Set up OAuth 2.0 Authorization Code for Bitbucket Cloud

  • Release version: Australia
  • Updated March 12, 2026
  • 2 minutes to read
  • Set up OAuth 2.0 Authorization Code credentials for Bitbucket in DevOps Change Velocity to use a more secure authentication method.

    Before you begin

    The OAuth consumer must be created in the Bitbucket tool with the required permissions before creating the OAuth credential record. You can navigate to Workspace settings > OAuth consumers > Add consumer in Bitbucket to add the OAuth consumer. The following permissions must be selected when you create the credentials for OAuth 2.0.
    • Account: Read
    • Projects: Read
    • Webhooks: Read and write
    • Pull requests: Read
    The This is a private consumer option must be deselected. You must enter your ServiceNow instance URL in the Callback URL field in the following format.
    https://<instanceurl>/oauth_redirect.do
    Permissions for Bitbucket OAuth 2.0 - Authorization Code
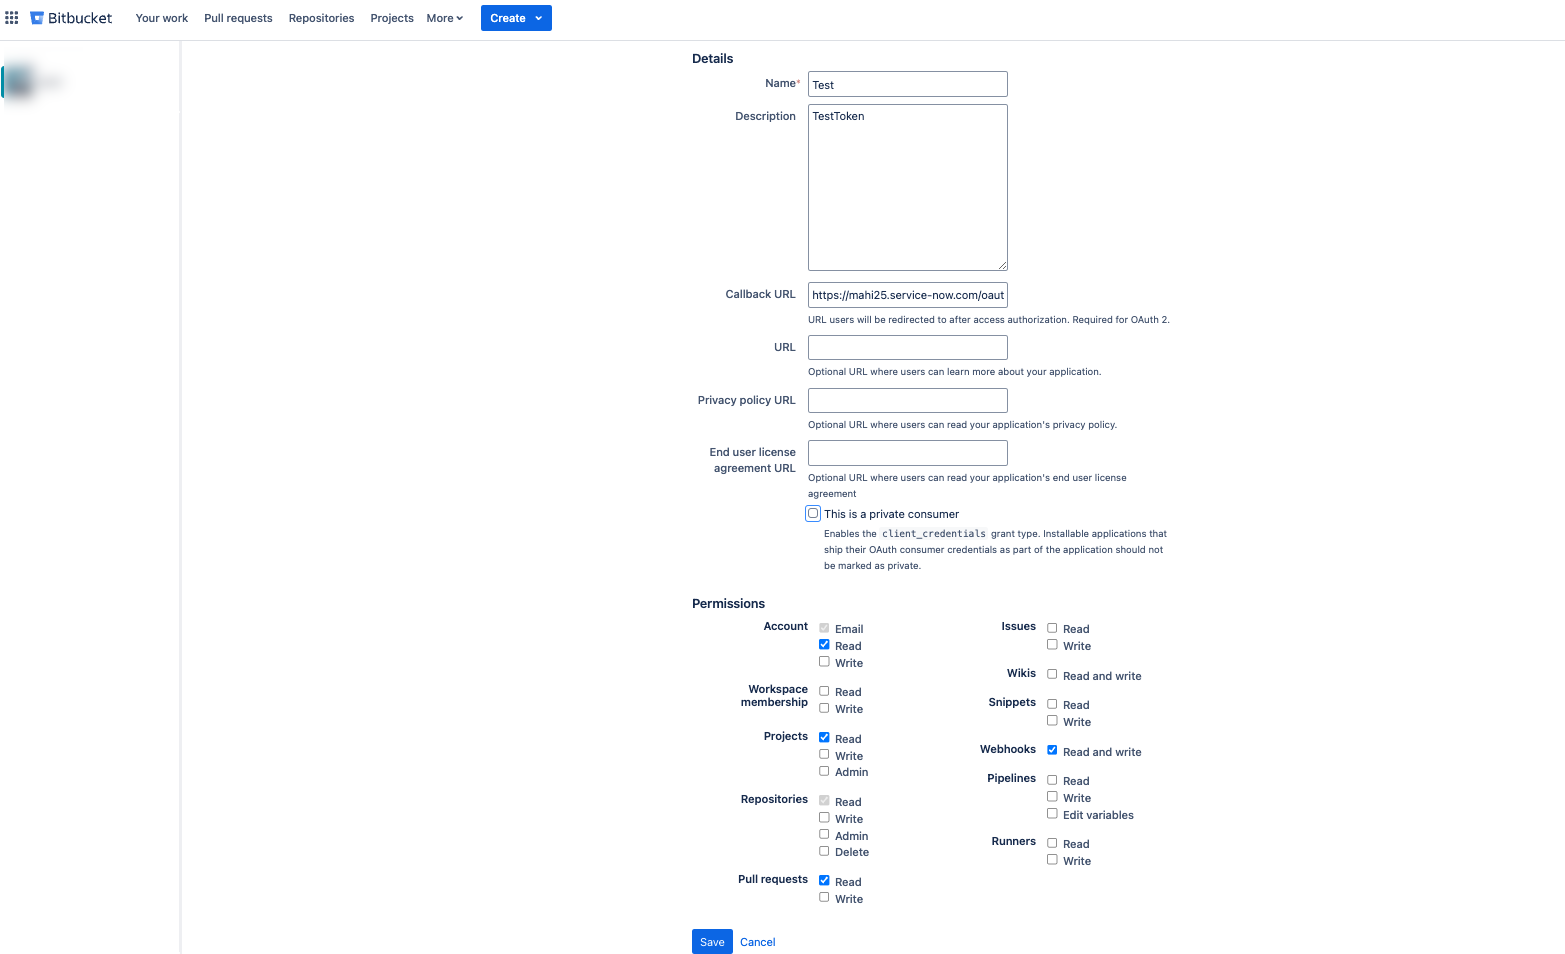
    You need the Client Id and Client secret values of your Bitbucket workspace. Client ID of your Bitbucket tool is available in the OAuth consumers section of your workspace settings (Workspace settings > OAuth consumers > Add consumer) in the Key field. Client secret of your Bitbucket tool is available in the OAuth consumers section of your workspace settings (Workspace settings > OAuth consumers > Add consumer) in the Secret field.OAuth consumer page

    Role required: admin

    About this task

    When you select the credential type as OAuth 2.0 - Authorization Code for Bitbucket Cloud, the repositories for all the workspaces are discovered. This is a limitation from Bitbucket side.

    Procedure

    1. Navigate to All > System OAuth > Application Registry.
    2. Select New.
      The system displays the message What kind of OAuth application?
    3. Select Connect to a third party OAuth Provider.
      The system displays an empty Application Registries form.
    4. Fill the following fields in the form.
      Field Value required
      Name Enter any name to uniquely identify the record.
      Client ID Client ID of your Bitbucket tool, which is available in the OAuth consumers section of your workspace settings in the Key field of Bitbucket cloud.
      Client Secret Client secret of your Bitbucket tool, which is available in the OAuth consumers section of your workspace settings in the Secret field of Bitbucket cloud.
      Default Grant type Select Authorization Code.
      Authorization URL

      Enter https://bitbucket.org/site/oauth2/authorize

      Token URL

      Enter https://bitbucket.org/site/oauth2/access_token

    5. Leave the rest of the form fields as default.
      Application Registry form for Bitbucket OAuth credential
    6. Select and hold (or right-click) the form header, and select Save.
      • The system validates the OAuth credentials and populates the Redirect URL (Hint: It should match the User authorization callback URL previously provided in your Bitbucket Cloud configuration).
      • The system populates OAuth Entity Profile with Grant Type as Authorization Code. For example, OAuth Entity Profile is created with default Name, My Bitbucket App Provider default_profile
    7. Navigate to All > Connections & Credentials > Credentials.
    8. Select New.
      The system displays the message What type of Credentials would you like to create?.
    9. Select OAuth 2.0 Credentials.
      The pop-up window displays an empty OAuth 2.0 Credentials form.
    10. Fill in these values.
      Field Value required
      Name Enter any name to uniquely identify the record.
      Active Enable
      OAuth Entity Profile Select the default OAuth Entity profile that you created in step 6.
      Applies to Select the MID Servers that can use this credential. For example, select All MID Servers.
      Note:
      You must connect to your Bitbucket tool instance using MID Server to use this credential.
      Order Select the order to apply this credential. For example, enter 100.
    11. Save the record.
    12. Select the Get OAuth Token related link to generate the OAuth token.