- Post History
- Subscribe to RSS Feed
- Mark as New
- Mark as Read
- Bookmark
- Subscribe
- Printer Friendly Page
- Report Inappropriate Content
on 06-05-2017 09:28 PM
Background
Workflow timers can be triggered in a workflow context, such as a Catalogue Request or Change Request.
When the copy of the workflow for that specific request gets to the point in a workflow where a timed event occurs it creates a scheduled item to perform the next stage of the workflow.
We can alter this schedule to manipulate the effect of the workflow timer. This is especially useful when you want to test workflows and don't want to wait the days/hours prescribed in the design.
The tricky part is finding which one of thousands of scheduled items is the one you need to change.
Steps
You will need full admin privileges to undertake the steps shown.
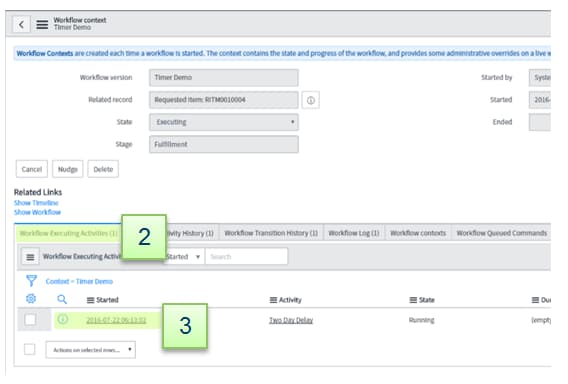
| 1. Open the requested item (or source of the workflow timer) and, choose the related link Workflow Context, to open up the context record. | |
2. Go to the Workflow Executing Activities, a tab at the bottom of the record. 3. Make a note of the Started time and date stamp on this activity |  |
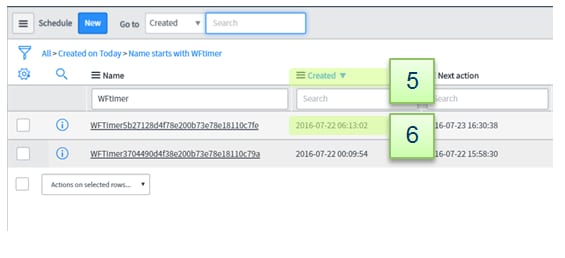
4. Navigate to System Scheduler > Scheduled Jobs. Open the filter and build a condition: Created on <date> and Name starts with WFTimer Where <date> is the date of the workflow context Started field |  |
5. Sort the result by Created (you may need to add it to your view)
6. Find the record with the exact created time as the workflow executing activity started time. |  |
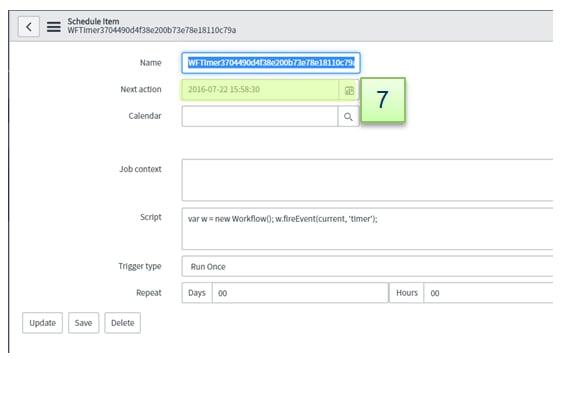
7. Open the schedule item Set the next action time, to whatever you want and click Update Typically I set it for 1 minute in the future. Do not make it a time in the past as while ServiceNow is powerful it hasn't And you are done.
But wait … what about if you have thousands of timer events every day? Or what if it's just your luck that the only two requests made today happened at exactly the same time? That's where method 2 comes in. |  |
| METHOD 2 | |
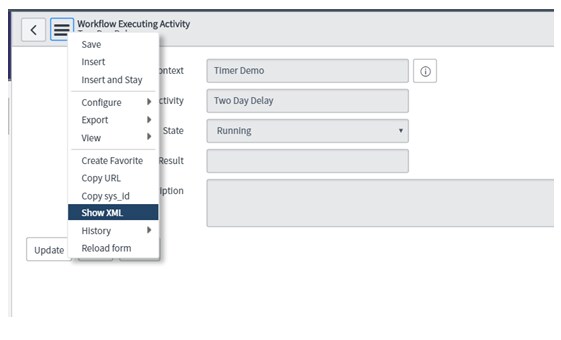
Back at the workflow context (step 2 above). : 1. Open the Workflow Executing Activity. 2. Right click or use the "hamburger" to Show the XML |  |
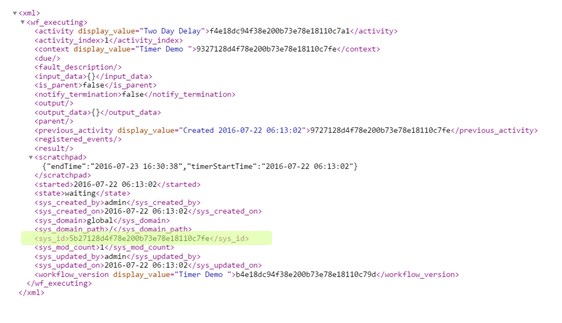
3. Towards the bottom you will find the <sys_id> tag. This is the sys_id of the Executing Activity. 4. Copy the hex-string that is the sys_id to the clipboard. |  |
5. Navigate to System Scheduler > Scheduled Jobs.
6. Build a list filter that has "Name" "is" and then type WFtimer and then paste in the sys_id. For Example : WFTimer3789237e878492e3be6ee734d This will return only one schedule record. 7. Open it and become awesome. |  |

- 6,023 Views
- Mark as Read
- Mark as New
- Bookmark
- Permalink
- Report Inappropriate Content
Excellent! This worked great! I used method 2 but I just got the sys_id from the URL since I opened the record in a new tab. Another option is to right click the record either in the related list or the actual record header, and click on copy sys_id in the menu.
- Mark as Read
- Mark as New
- Bookmark
- Permalink
- Report Inappropriate Content
Great post. However I just recently, after an upgrade to London, had to realize that my business rule for changing the WF-Timers did not work anymore. I think something has been changed in regards to how the timer are created (see code snipped from WFTimer code below):
   _getLabel: function() {
	   return "Workflow"+activity.context;
   },

   _getLegacyLabel: function() {
	   return "WFTimer"+activity.sys_id;
   },
So I guess the timers are now named "Workflow<workflow-context-sys_id>" instead of "WFTimer<activtiy-sys_id>". I will now try to adjust my business rule accordingly and test if it works.
- Mark as Read
- Mark as New
- Bookmark
- Permalink
- Report Inappropriate Content
Worked like a charm! I used method 1 in combination with the information about London posted by Philemon Antony. Awesome!