- Post History
- Subscribe to RSS Feed
- Mark as New
- Mark as Read
- Bookmark
- Subscribe
- Printer Friendly Page
- Report Inappropriate Content
on 08-23-2020 01:33 PM
Show all Attachments for the Account on a Case
Related List
In this Article I will take you through adding Attachments as a Related list to task and filter the Attachments. I will take a Case as an example we want to add a related list to. Lets say for an Account we want to see all Attachments, not just the ones attached to this specific case.
We can do that by doing the following.
To create a new related list, we must define the relationship:
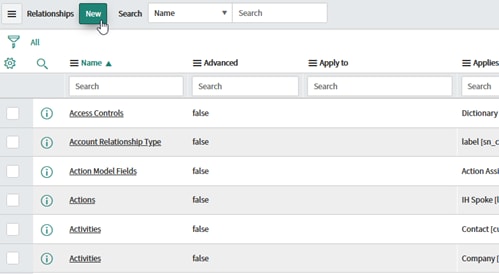
Go to System Definition --> Relationships

Click New:

We want to add the related list to a Case so we set Applies to table to Case [sn_customerservice_case]:

We want the related list to show Attachments so as Queries from table we set Attachment [sys_attachment]:

To determine the filter, we have a look at the Fields available for filtering on the Attachment table. For example, by looking at the Personalize list Columns:


We have a Table name and Table sys ID that looks interesting. If we look in the table we can see the table name for Case is sn_customerservice_case. The Table sys ID is the sys_id of the specific Case.
So if we know the Cases for an Account, we can look through the Attachement table for any Attachment where the sys_id is matching the sys_id of the case. To do so we first need to query all cases for the Account of the Case. Parent gives us access to the Case:
var casesArr = [];
var grCase = new GlideRecord('sn_customerservice_case');
grCase.addQuery('account', parent.account);
grCase.query();
while (grCase.next()) {
casesArr.push(grCase.getUniqueValue());
}
We now have an Array of all Cases. Only thing left to do is add this to the query on Attachments and we are left with the correct Attachments:
current.addQuery('table_sys_id', 'IN', casesArr);With the Relationship set up. The last step is adding it to the Case form. Note: the view can be selected. Below I chose the View name 'Workspace' so it will show up as a related list in Workspace for the Case:


And the result:
And since we are talking about Case we added it to the Workspace view and it also shows on the Agent Workspace:


This principle can be applied to any related information you want to show.
Hope you find this helpful. Please leave a comment or feedback and share your thoughts.
Kind regards,
Willem
- 3,186 Views
- Mark as Read
- Mark as New
- Bookmark
- Permalink
- Report Inappropriate Content
Hello Willem,
Thanks for this article. I am able to get a new attachment related list. But can you please confirm that I can add attachment from the agent workspace by clicking on new button.
It works as expected in standard ui related list while in agent workspace it doesn't work. It shows me this form:

- Mark as Read
- Mark as New
- Bookmark
- Permalink
- Report Inappropriate Content
Hi Geetika,
You are welcome. Feel free to mark the Article helpful if it helped you! 🙂
As for the Agent workspace, that handles it differently indeed. You should still be able to see the Attachments list, but adding attachments should be done via the Attachment functionality in Workspace, not from the related list.
Hope this helps!