- Post History
- Subscribe to RSS Feed
- Mark as New
- Mark as Read
- Bookmark
- Subscribe
- Printer Friendly Page
- Report Inappropriate Content
on 08-08-2022 05:59 AM
HR Security setup: (HR) Admin
For HR security is an important topic. Personal and sensitive information is handled by the HR Application and its users, so setting up good security is a must.
This article describes the setup for HR Admin and how to distinguish between the HR Admin and System Admin. In your role assignment, think about keeping the number of HR Admin’s on production to a minimum, while still making sure there is always an HR Admin available (in case of the lottery, promotion, or an accident).
Quick Checklist
This is the quick checklist to help track progress and give you an overview.
☐ 1. Setup – System Admin and HR Admin role
☐ 2. Safeguard minimum number of HR Admins (default = 2)
☐ 3. Remove HR Admin role from the System Admin
☐ 4. Add Delegated Developer to the HR Admin
☐ 5. Configure HR Admin impersonation options:
☐ A. Tracking impersonations
☐ B. Enable security (ACLs) to check if the user is being impersonated
Details
These are the detailed steps from the checklist, including references to sources and additional details.
1. Setup – System Admin and HR Admin

To configure your system, you must log in as a System Administrator [admin]. The HR Administrator [sn_hr_core.admin] role is contained in the System Administrator [admin] role. The combination of these two roles allows a user to perform all tasks associated with configuring your system.
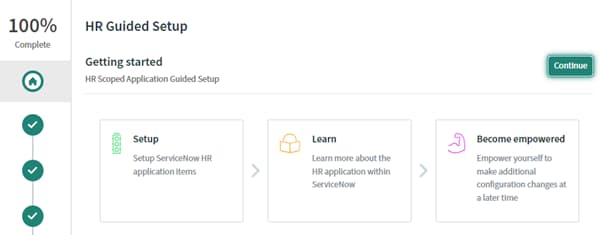
For any HR implementation it is always good to start with the guided setup. To use guided setup to help configure HR Service Delivery on your instance, navigate to HR Administration > Guided Setup. For further information on how to use the guided setup interface, see Using guided setup.

2. Safeguard minimum number of HR Admins
System properties determine the minimum number (default is two) of scoped admins that must be active for an application. Make sure to set these to the appropriate minimum number of admins. This can be done per type of Scoped Admin:
|
Property Name |
Scoped Admin |
|
sn_hr_core.min_admin_count |
HR admin [sn_hr_core.admin] |
|
sn_hr_ef.min_admin_count |
Employee Document Management admin [sn_hr_ef.admin] |
|
sn_hr_integrations.min_admin_count |
HR Integration Admin [sn_hr_integrations.admin] |
|
sn_hr_le.min_admin_count |
HR Lifecycle Event Admin [sn_hr_le.admin] |
|
sn_hr_le_pa.admin_count |
HR Lifecycle Event Performance Analytics Admin [sn_hr_le_pa.admin] |
|
sn_hr_pa.min_admin_count |
HR Performance Analytics Admin [sn_hr_pa.admin] |
|
sn_hr_pj.min_admin_count |
HR Parental Journey Admin [sn_hr_le_pj.admin] |
|
sn_hr_sp.min_admin_count |
HR Service Portal Admin [sn_hr_sp.admin] |
|
sn_hr_va.min_admin_count |
HR Virtual Agent Admin [sn_hr_va.admin] |
|
sn_templated_snip.min_admin_count |
Response Template Admin [sn_templated_snip.admin] |
|
sn_hr_ws.min_admin_count |
HR Agent Workspace Admin [sn_hr_ws.admin] |
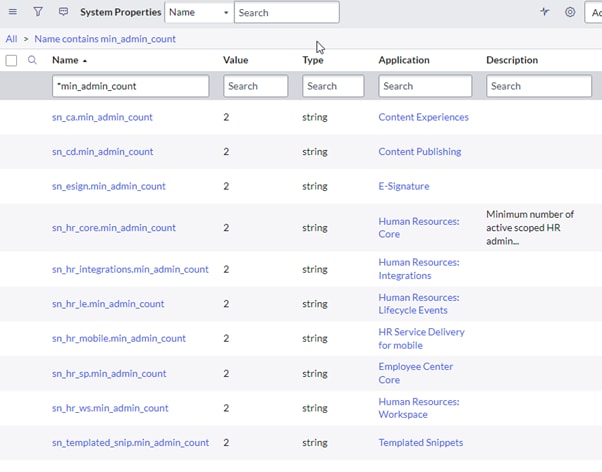
Go to: < your instance >.service-now.com/sys_properties_list.do?sysparm_query=nameLIKEmin_admin_count to review all minimal admin settings.

3. Separate the HR Admin from the System Admin role
After system configuration, ensure that only the HR Administrator [sn_hr_core.admin] role has access to sensitive information. Remove the HR Administrator role from System Administrator [admin] role to prevent the System Administrator from viewing sensitive HR information.
Ensure that you have completed setup before removing the HR Administrator role. The base system requires a user with the System Administrator role to run scheduled jobs. For details on HR scheduled jobs, see Components installed with Case and Knowledge Management.
- To ensure the scheduled jobs run, change the user in the Run as field for each scheduled job to a user that has the HR admin role.
Note: Changing the user allows the scheduled jobs to run, but only a user with the System Admin role can view and run a scheduled job on demand.
- Change the scope of the application to Human Resources: Core application. For information on changing the scope, see Contextual development edit messages.
- Reveal the Run as field. For information on revealing hidden fields on a form, see Configuring the form layout.
Steps to remove the HR Admin role:
- Log in as admin.
- From User Administration, go to Roles (left navigation menu).
- Click admin.
- From the Contains Roles tab, click Edit.
- From the Contains Roles List column, highlight and move sn_hr_core.admin to the Collection column.
- Click Save.
- Log out.

4. Add Delegated Developer to HR Administrator
For an HR Administrator [sn_hr_core.admin] to perform some platform duties, the delegated developer role must be added.
- Log in as [admin].
- From the Filter navigator, enter sys_store_app.list. The Store Application list appears.
- Click Human Resources: Core.
- Under Related Links, click Manage Developers.
- Ensure Developers is highlighted.
- Enter the name of HR Administrator.
- Click all items (green bar moves to the left) to grant permission.
- Click Save.
- Log out and log back in to ensure that the changes take effect.
5. Configure HR Admin impersonation options
⚠️Note: IT System Administrators (admin) and HR scoped users can still impersonate ServiceNow users. When impersonating a user with a scoped HR role, an admin or any HR scoped user cannot access features granted by that role. HR cases and profile information are not accessible. Only users with the scoped HR Administrator [sn_hr_core.admin] can see case details when impersonating other scoped HR users. Also, admin cannot change the password of any user with a scoped HR role. For more information on impersonating a user, see Impersonate a user.
A. Track
You can log impersonation by setting the following system property to true:
|
Property |
Description |
|
glide.sys.log_impersonation |
Enables (true) or disables (false) impersonation logging for interactive sessions. |
- Navigate to "sys_properties.list"
- Search for Name: glide.sys.log_impersonation
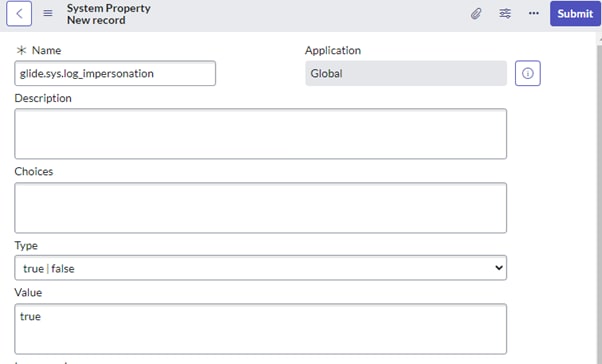
If this property is not available. Then you have to create a new one as follows:
- Navigate to "sys_properties.list"
- Click New
- Fill in the new property with the following values:
- Name: glide.sys.log_impersonation
- Type: true/false
- Value: true
- Save
- Go back to "sys_properties.list" and show List view
- Type "glide.sys.log_impersonation" in the Namecolumn and press Enter to confirm the property has been added.
- Perform a cache flush by typing "cache.do" in the navigator
- Log out then Log in again
After logging back in, you can see the history of impersonation in a system log by:
- Navigating to System log > All
- Type "*impersona" in the Messagecolumn and press Enter
- You will see the history of impersonations in the system log by looking for messages like:
- "Impersonation start:"
- "Impersonation end:"

B. ACL check
In addition to tracking, you can also enable security (ACLs) to check if the user is being impersonated. If you are impersonating and your impersonation check system property is set to true. You can find this in the HR Administration > Properties.
⚠️This should be set to true in a Production environment.
|
Property |
Description |
|
sn_hr_core.impersonateCheck |
If true, ACLs check if the user is being impersonated. |

Let me know if you have any additions, questions or concerns.
- 24,412 Views
- Mark as Read
- Mark as New
- Bookmark
- Permalink
- Report Inappropriate Content
Usefull, Thanks you!
- Mark as Read
- Mark as New
- Bookmark
- Permalink
- Report Inappropriate Content
Thanks for sharing the notes!
- Mark as Read
- Mark as New
- Bookmark
- Permalink
- Report Inappropriate Content
Amazing...
- Mark as Read
- Mark as New
- Bookmark
- Permalink
- Report Inappropriate Content
Thanks for sharing!
- Mark as Read
- Mark as New
- Bookmark
- Permalink
- Report Inappropriate Content
Thanks for sharing!