


shaunmillin

ServiceNow Employee
Options
- Subscribe to RSS Feed
- Mark as New
- Mark as Read
- Bookmark
- Subscribe
- Printer Friendly Page
- Report Inappropriate Content
06-01-2016
09:22 AM
In this blog post we are going to dive into how to integrate 3rd party webhooks into ServiceNow. First lets talk about what a webhook is. A webhook is a user defined http call back to an external system. Basically a webhook is a way to feed information from your application to an external system based on some event or action. Why is this important for your instance? Well if you are monitoring or discovering a custom application for CI creation or updates, this could be one use for this type of integration.
For this blog we will use github as an example, and simply echo the JSON message from github back to the system log in ServiceNow after a code commit happens.
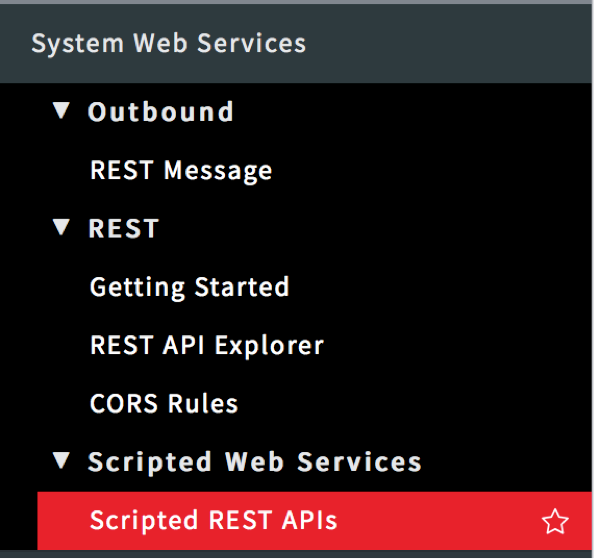
To start we need to create a Scripted REST API.
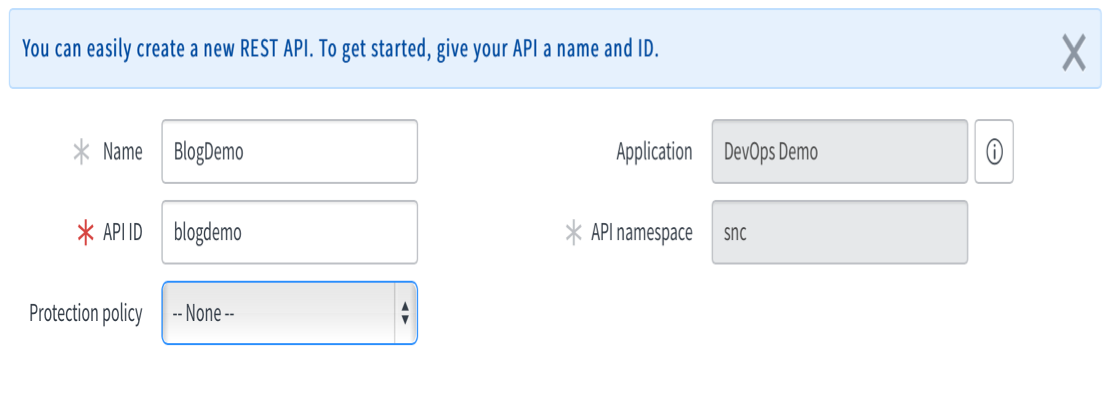
Click New.

Once the form opens fill in the Name and API ID.
Once the Form is filled out click submit.
Now go back to the Scripted REST API's and click the one we just created.
Scroll down to the related list area and select Resources.
Click New.
Once you click new this will create a new Scripted REST API Resource.
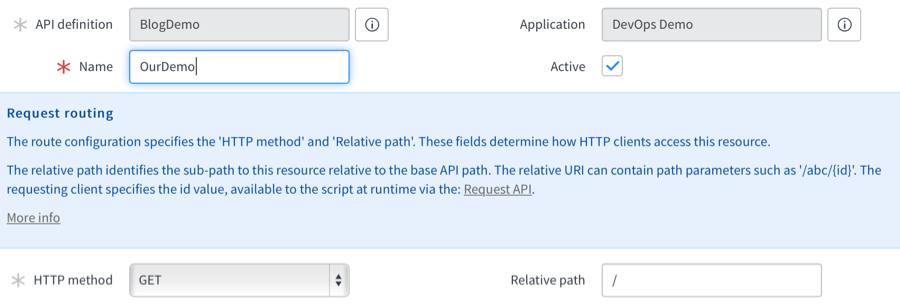
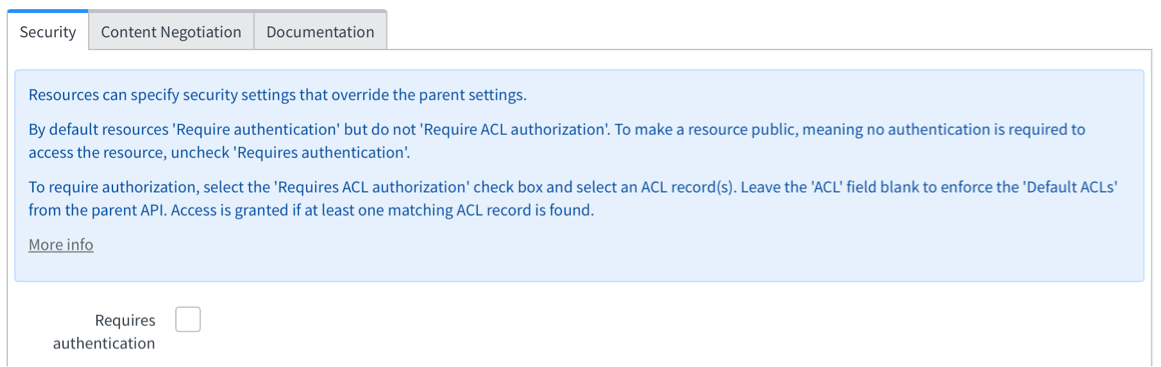
Fill in Name and then scroll down to Security.
Clear the check box for Requires Authentication.
- Note when you deselect Requires Authentication you are allowing unauthenticated access to this Method on your instance. Since this is a demo and an example we will not cover the security aspects of this.
Next lets change the HTTP method from GET to POST.
Click the drop down and select POST
Now we have to tell the resource what code to run. You will see there is some example code already provided for the resource.
Default Code:
(function process(/*RESTAPIRequest*/ request, /*RESTAPIResponse*/ response) {
// implement resource here
})(request, response);
Change default to:
(function process(/*RESTAPIRequest*/ request, /*RESTAPIResponse*/ response) {
gs.info(request.body.dataString);
})(request, response);
Basically we are replacing this line:
// implement resource here
With this line:
gs.info(request.body.dataString);
The default objects to work with in a Scripted REST API Resource are response and request.
For more details on request and response see here. http://geneva-docs.servicenow.com/?context=CSHelp:Scripted_REST_Request_API
http://geneva-docs.servicenow.com/?context=CSHelp:Scripted_REST_Response_API
The URL for our Scripted REST API is here.

So the url to this resource would be https://yourInstance.service-now.com/<resource_Path> or https://yourInstance.service-now.com/api/snc/blogdemo
Click Submit/Update on this resource.
Now that we have created our own custom restapi we can point our application webhook at it.
Here I am going to log into my GitHub account. And create a webhook on my repository.
For instructions on how to create webhooks on github see here: https://developer.github.com/webhooks/
Inside of your GitHub repository click settings.
On the left hand side of the screen click webhooks & services
Then click on Add webhook.
The Payload URL is the resource path we created earlier. https://yourInstance.service-now.com/api/snc/blogdemo
Once you have put in the Payload URL. Leave everything else as default and click Add webhook.
Once you have added your webhook you should see a green checkbox next to your url. This indicates that the test message was sent and github got back a successful message.

If you did not get the green checkmark delete this webhook and review the settings we created earlier and try again.
Now go back to your instance and browse to System log -> All.
In the logs you should see a message like this:
If you see this message congratulations you have configured ServiceNow to integrate into 3rd party webhooks.
Happy Automating!
Labels:
- 159,907 Views
26 Comments
- « Previous
-
- 1
- 2
- 3
- Next »
You must be a registered user to add a comment. If you've already registered, sign in. Otherwise, register and sign in.

