- Post History
- Subscribe to RSS Feed
- Mark as New
- Mark as Read
- Bookmark
- Subscribe
- Printer Friendly Page
- Report Inappropriate Content
on 10-12-2021 12:16 PM
A common question which comes up in CMDB/Discovery discussions is "how do I create my own class of CI and enable it to be discovered?". This article will walk through the steps involved with doing just that.
The basic premise is that you want to track a commonly-used application in your CMDB; let's see how that's accomplished.
Select a Process
The first step to creating a CI class is to establish its distinguishing characteristic(s). In this case it will be the command string from a process listing. For my example I will use a demonstration app I created which has an executable named "helloworld".

Discover the Server
Next I perform a horizontal discovery of the server in my ServiceNow instance, which will pull in the running process data to be used when defining my custom application CI.

After discovery completes, I bring up the CMDB record for the server and locate the entry for the "helloworld" process in the "Running Processes" tab, making a note of the "Name" and "Command" columns.

Create CI Class
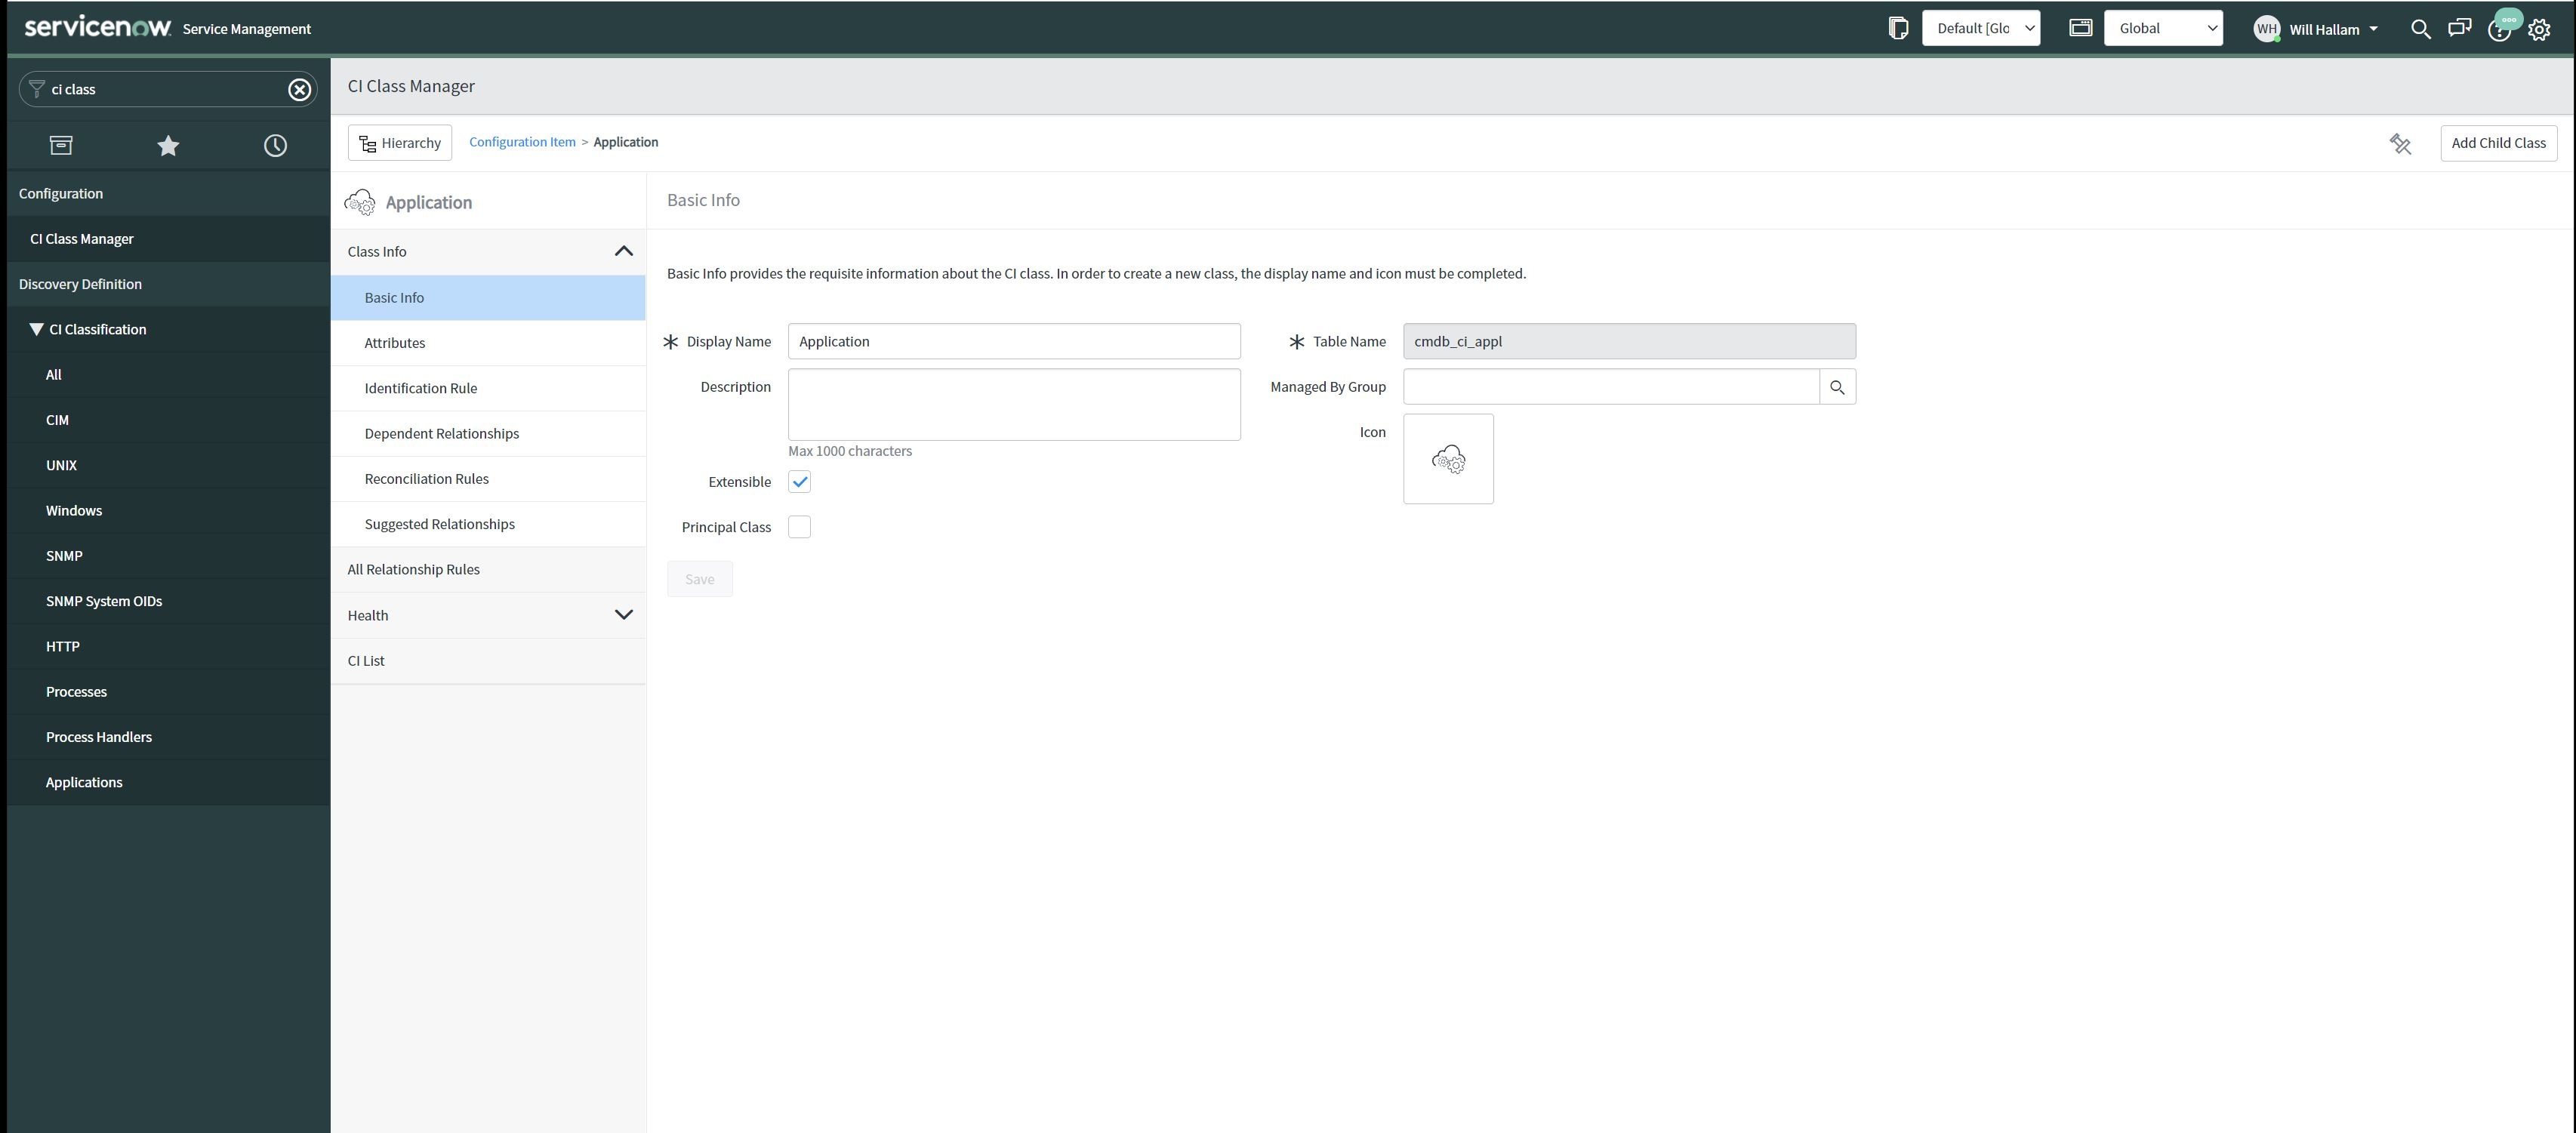
Armed with this information, I now go into the CI Class Manager (Configuration->CI Class Manager) in my instance, clicking "Open Hierarchy" on the welcome page. From there I select the "Application" class, then click "Add Child Class" in the upper right.

On the "Provide Basic Info" panel, I enter the Display Name for my example application. The new CI table name is automatically populated. Additional fields, such as Description and Managed By Group, can be populated at any time.

For this particular exercise, the basic info is all that's required; I'll stick with the defaults for everything else. Thus, I use the Next button to get through all the remaining panels until I see a "Done" button in it's place. Clicking "Done" completes the creation of my custom application class.

Create Discovery Pattern
Now that I have my CI class created, I need to create a Discovery Pattern which will populate the CMDB when it finds this process running on servers. To do that, I navigate to Pattern Designer->Discovery Patterns, then click "New". On the Basic tab, I select Pattern Type of "Application", specify an appropriate Name and limit the Operating System to "Linux Server".

In the Identification Section of the Basic tab, I click "New" to define how the application will be identified. I'll name this identification step "Discover" and select an Entry Point Type of "TCP Endpoint". The Find Process Strategy should be set to "None".

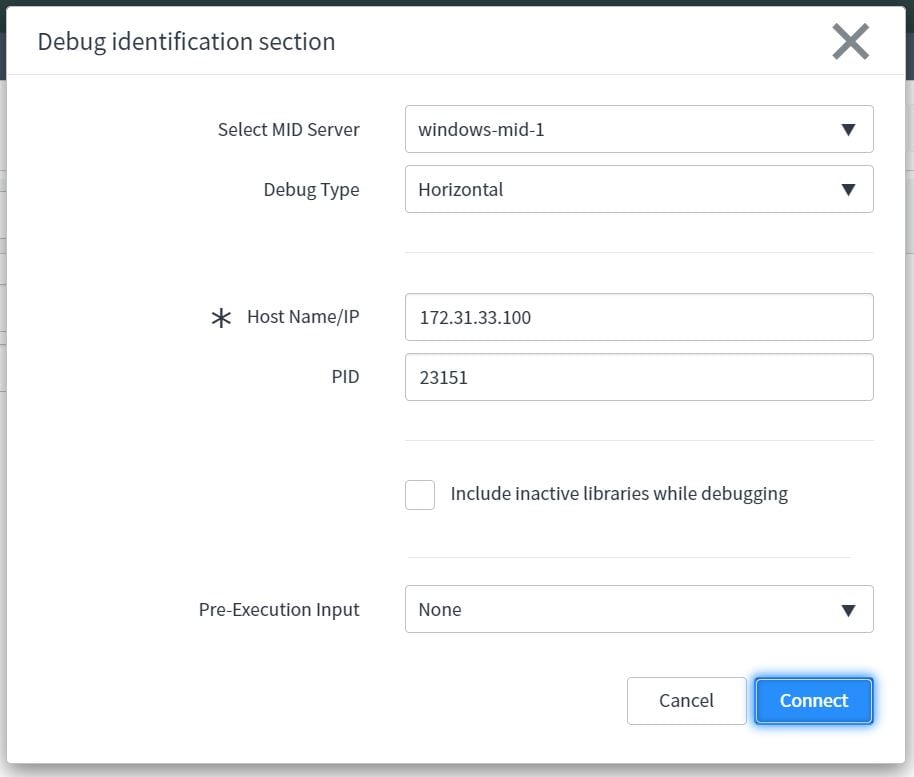
Clicking Done returns me to the main Pattern Designer screen, where I click "Done" and then "Publish". The next step is to flesh out what steps are executed to actually discover my "Hello World" application. Clicking on the name "Discover" under the Identification Section will bring me to the editing window. Upon entering the editing window, I first need to enter debug mode by clicking the "Debug Mode" button. In the subsequent dialog box I select an appropriate MID server, Debug Type of "Horizontal" and the IP address of the Linux server which is running "Hello World". The PID value will be the PID value reported from the horizontal discovery run I initiated at the beginning (in the case, "23151").

Clicking "Connect" will initiate the debug session. This connects to the server via the selected MID and interrogates the specified process ID, populating those attributes in the pattern designer session.

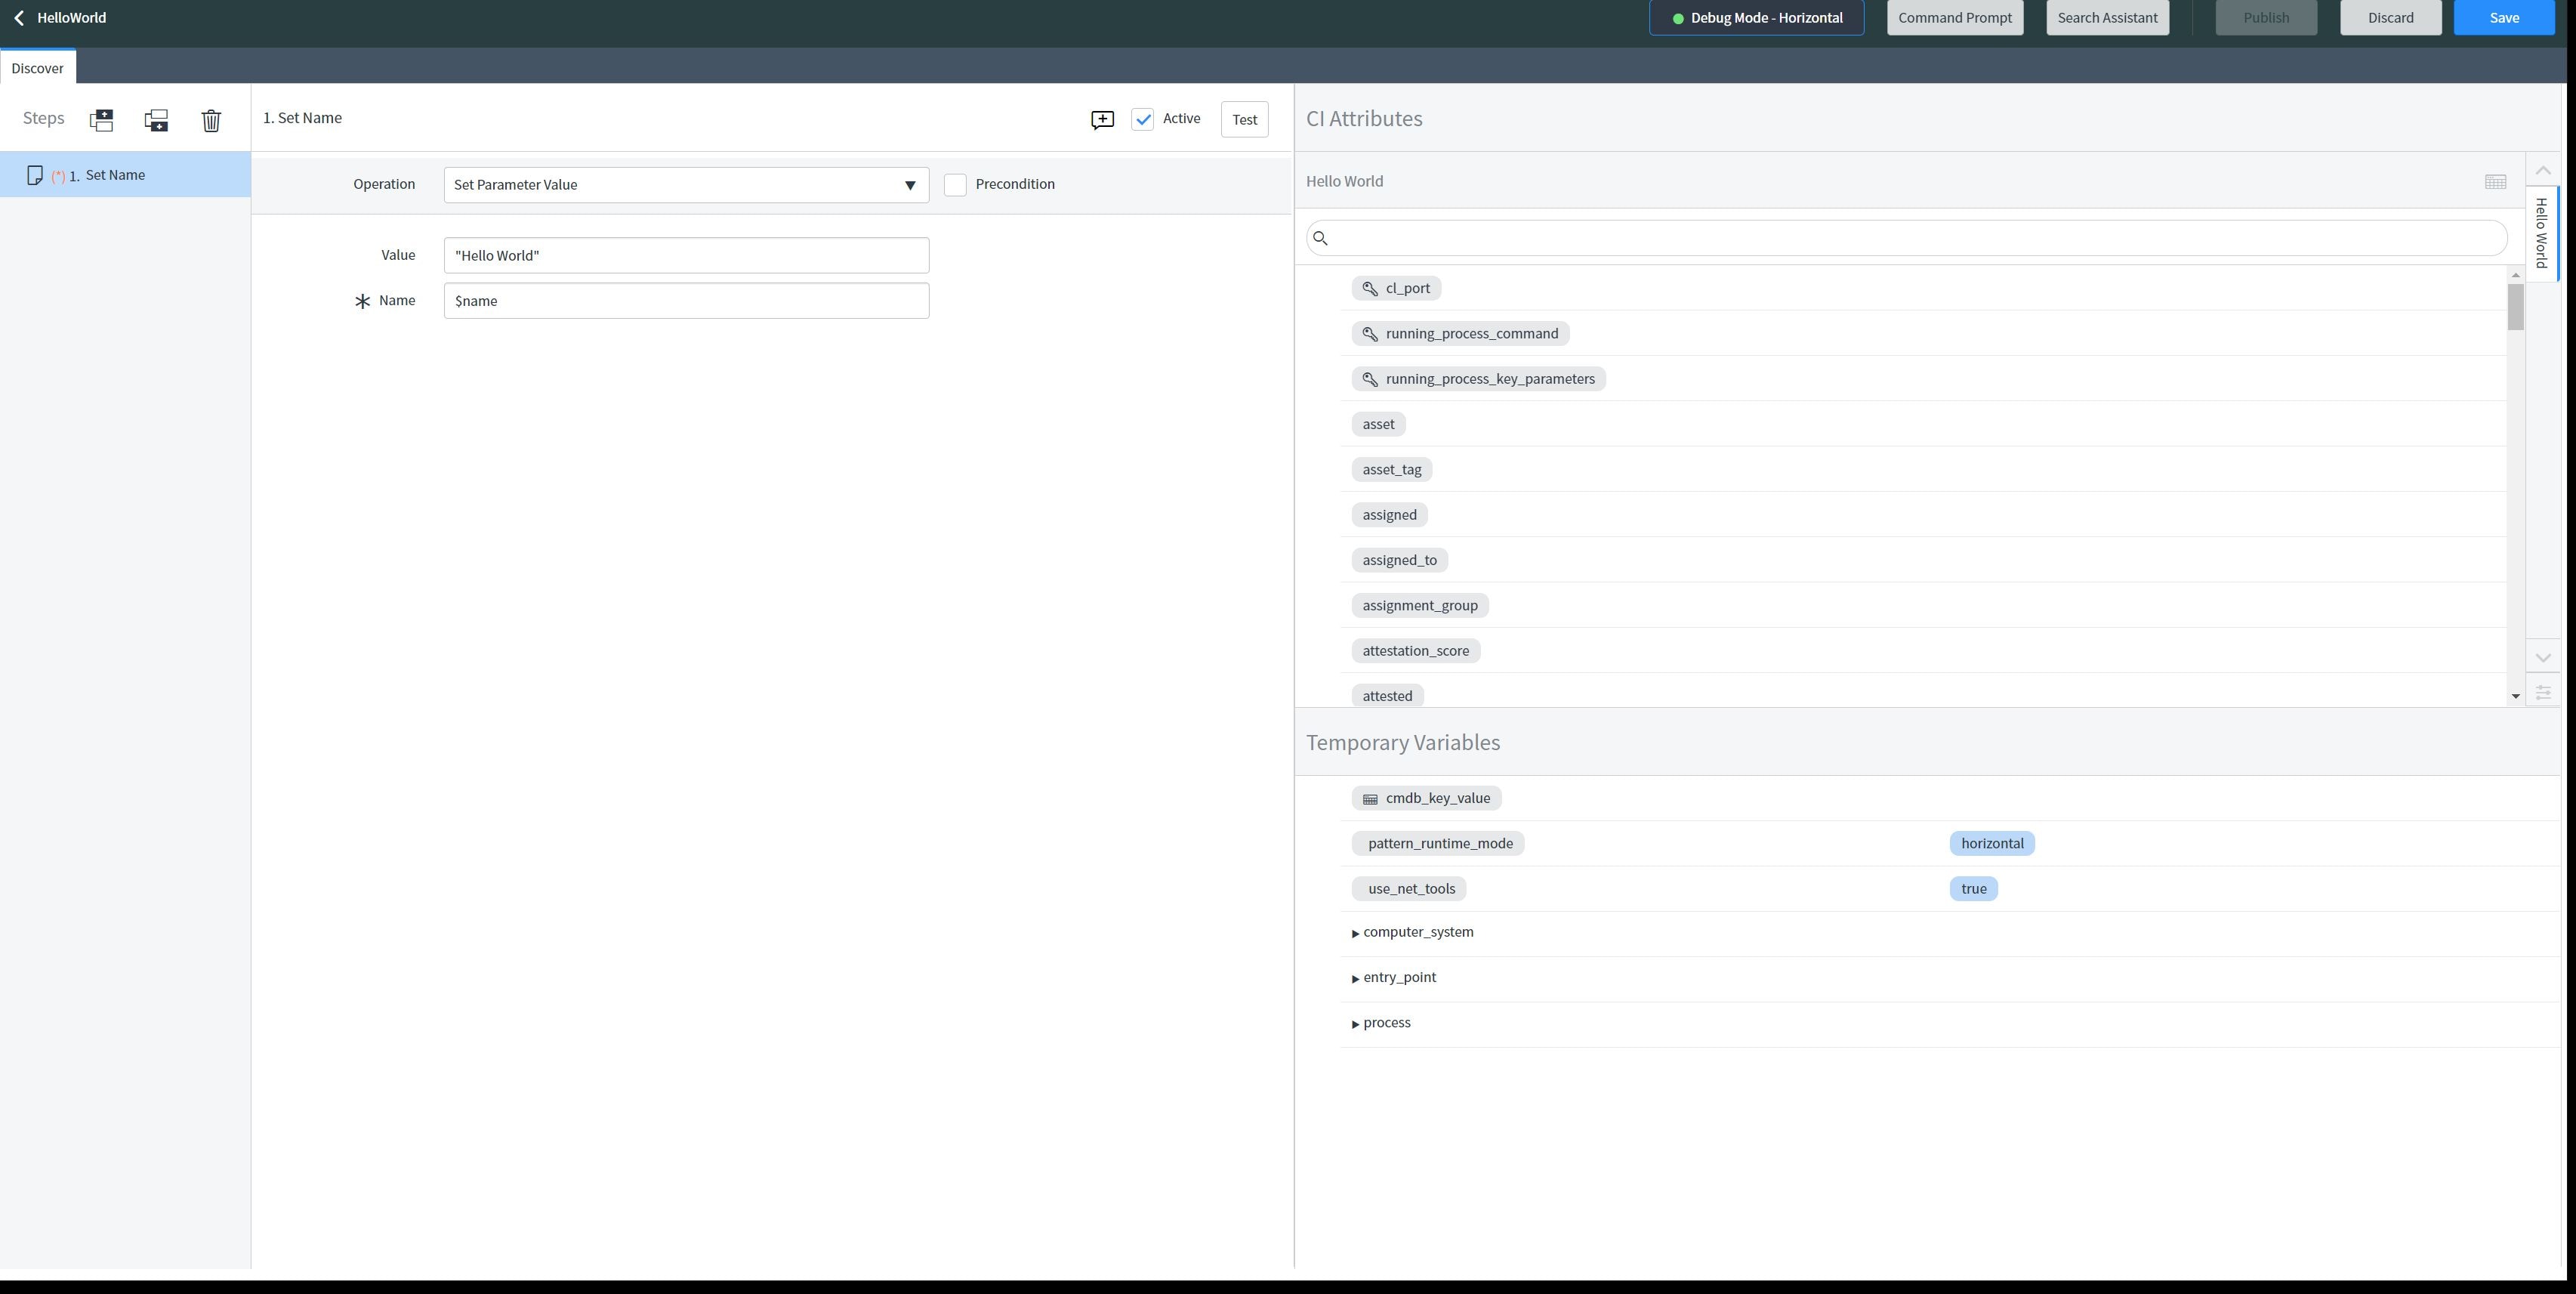
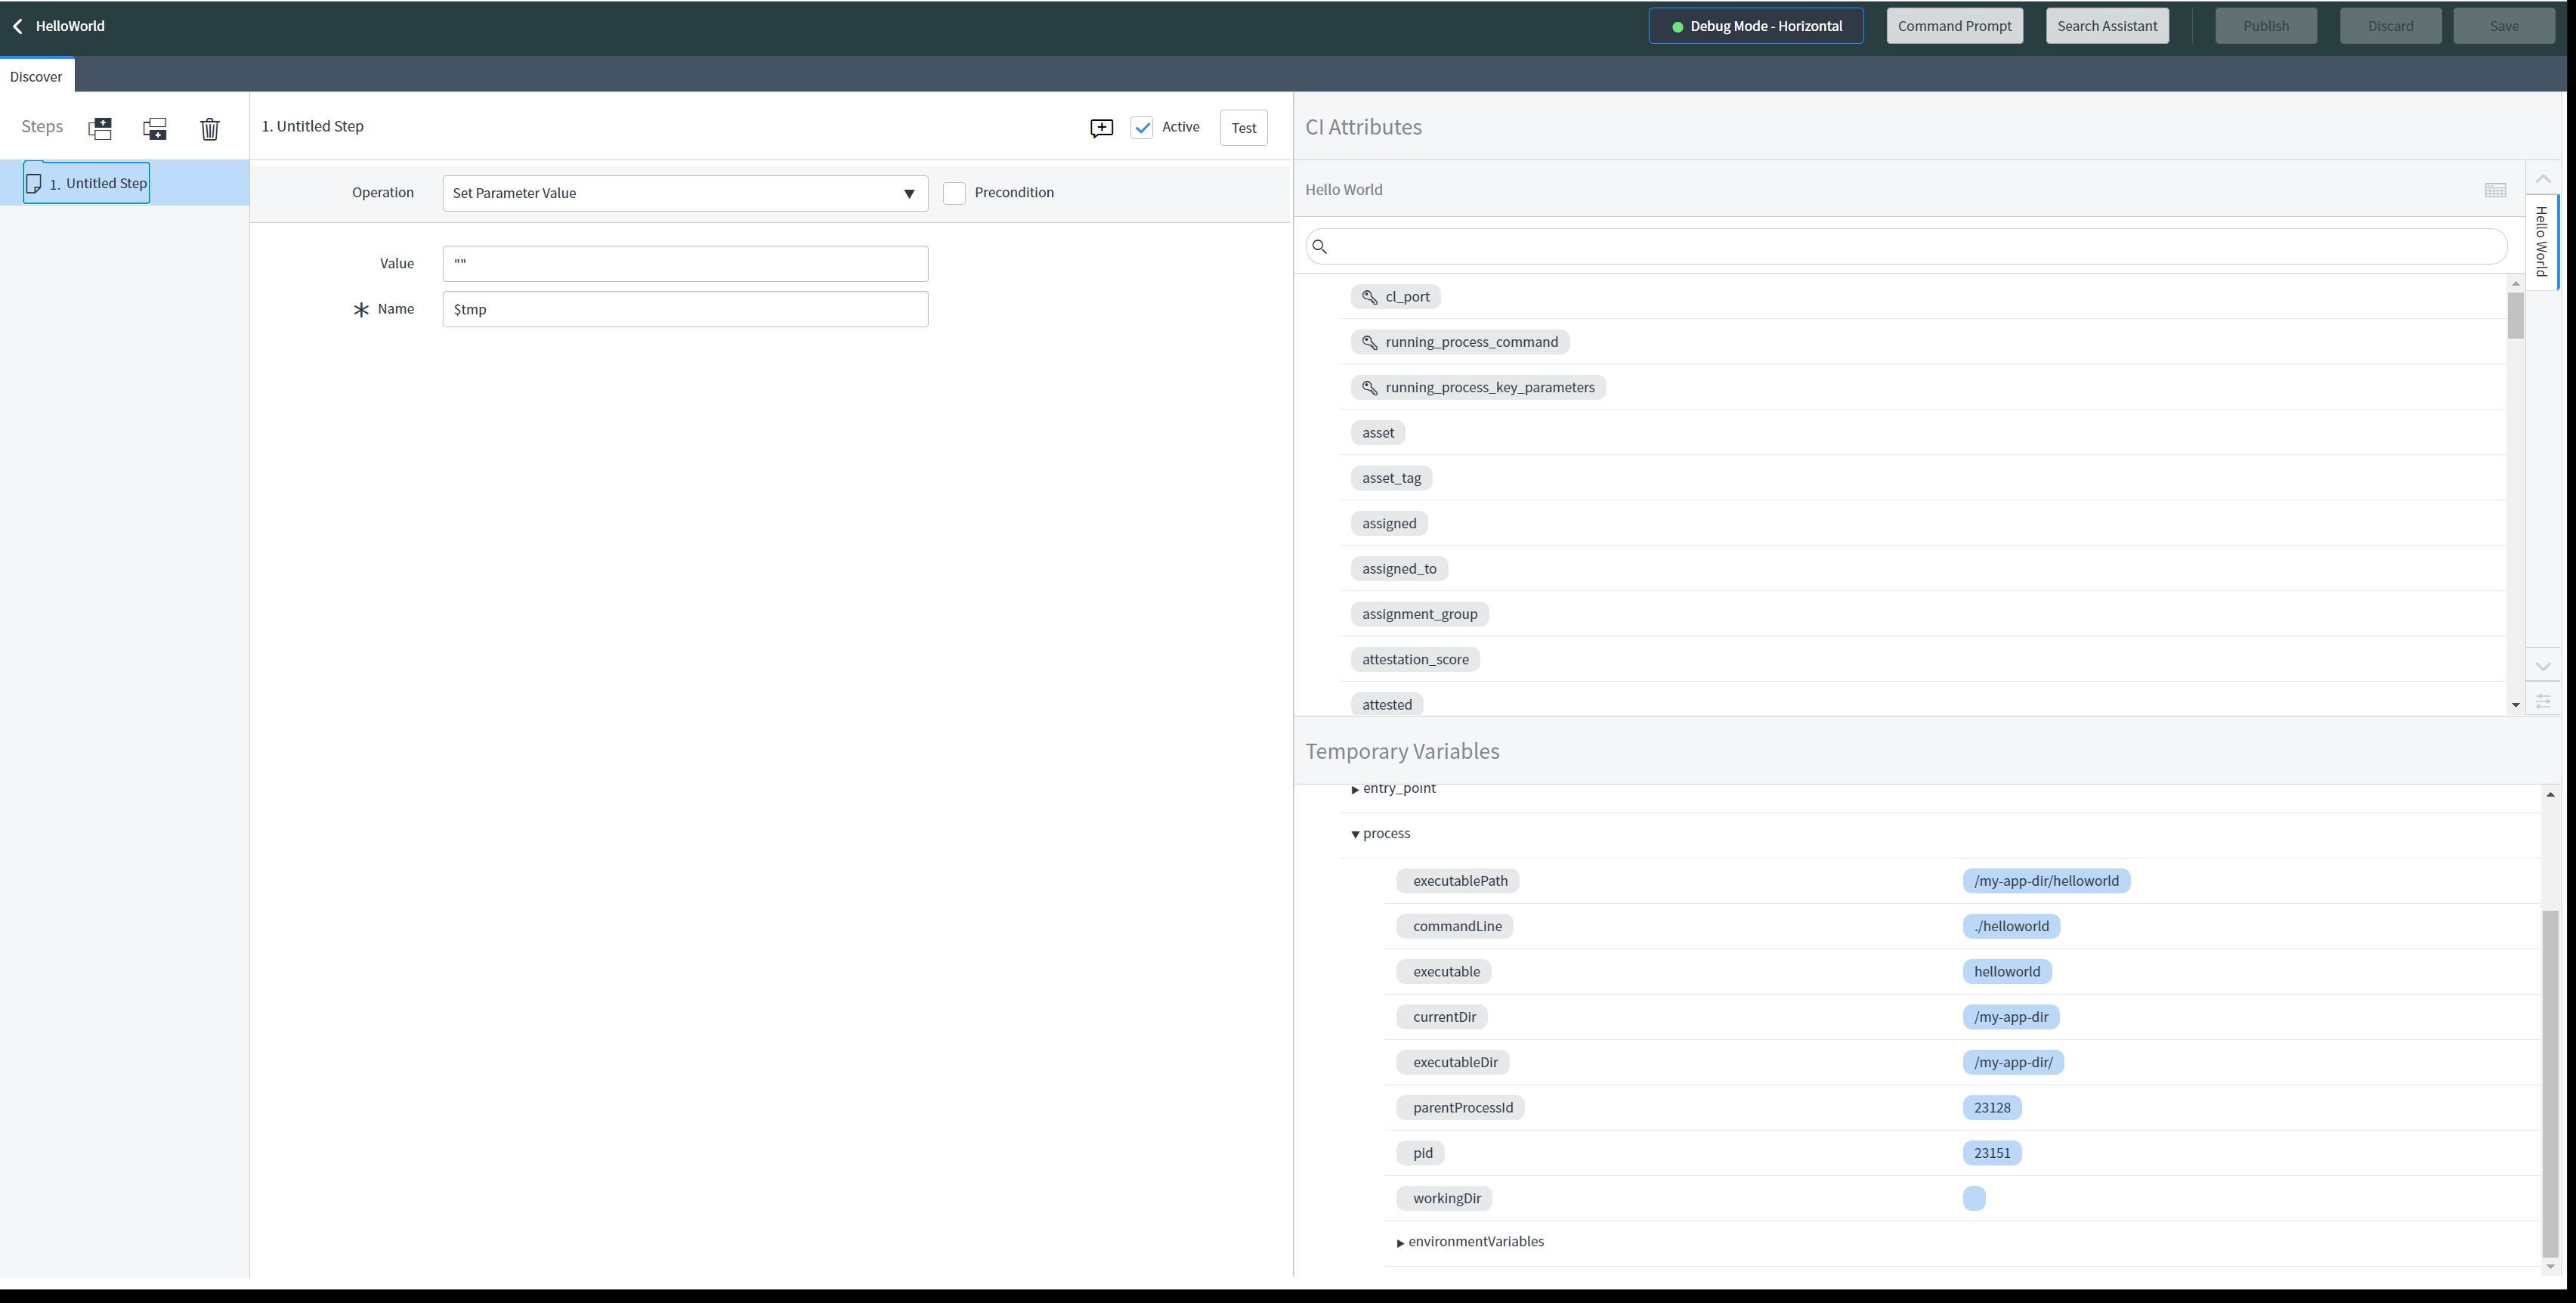
Now I'll rename "Untitled Step" on the left to be "Set Name" by double-clicking it and entering the new name. I'll maintain the Operation type of "Set Parameter Value", set Value to "Hello World" and set Name to "$name". Then I'll click the icon on the upper left to add a second step below the current one. A temporary debug session dialog box will appear while the MID executes the first step, populating the "name" variable as it is configured to.

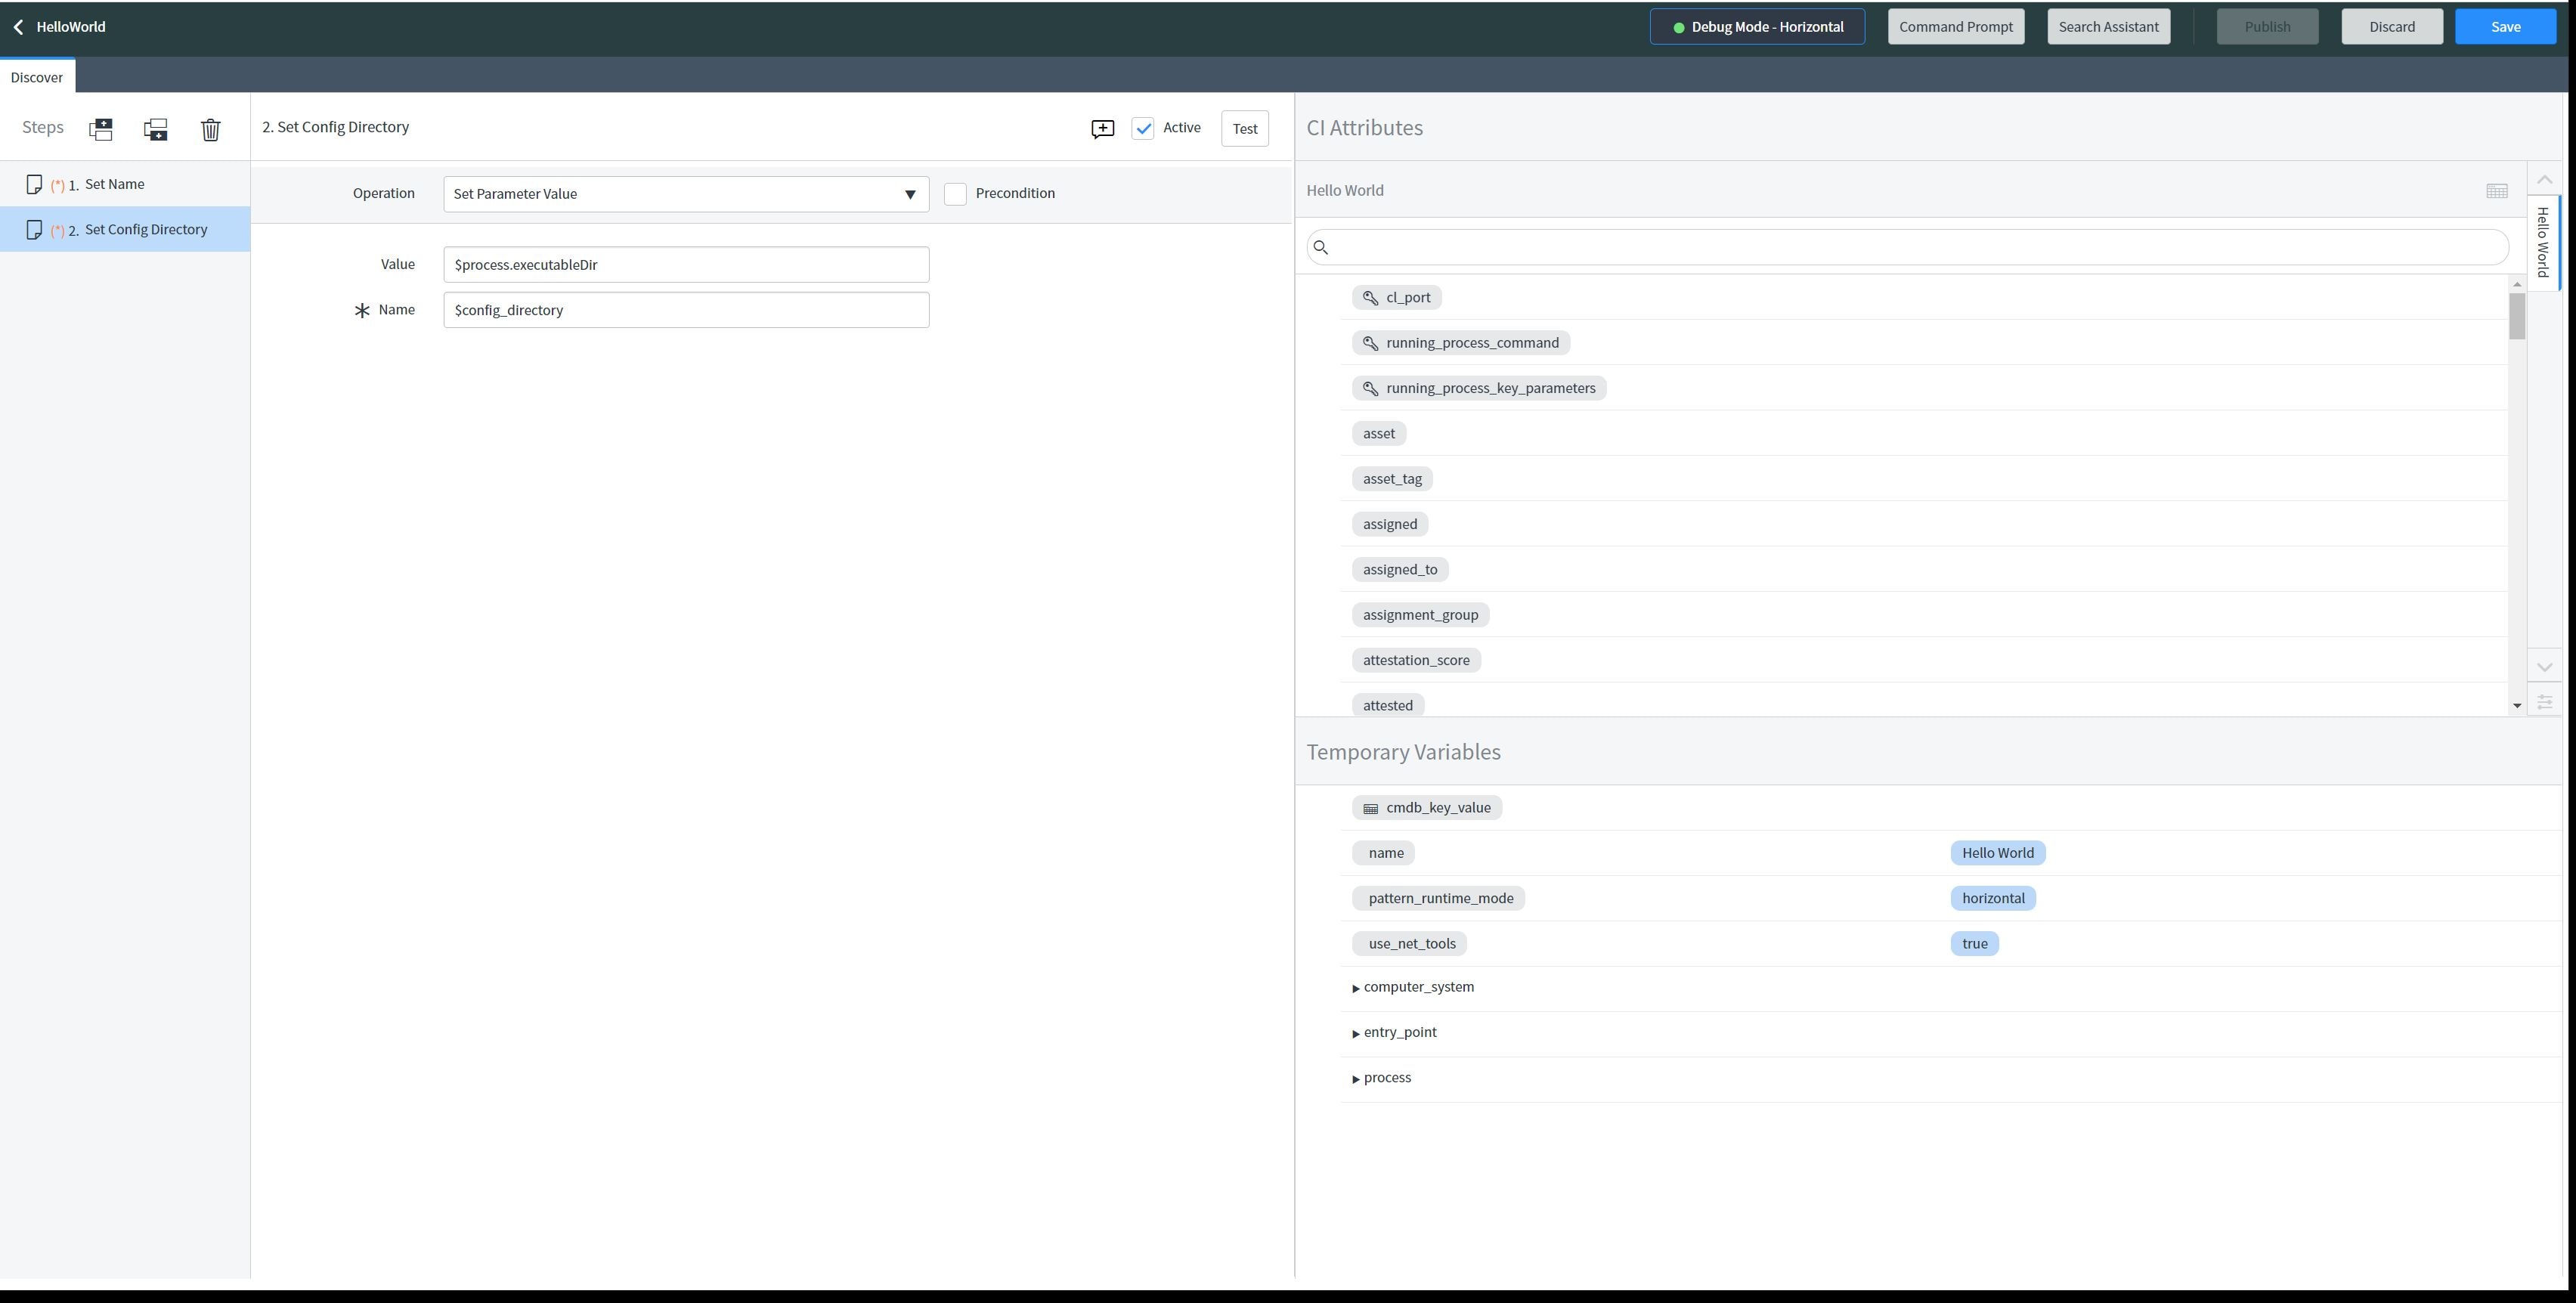
I'll name this second step "Set Config Directory". The Operation will be "Set Parameter Value". The Value will be "$process.executableDir" and the Name will be "$config_directory". This will take the executable directory which was discovered and populate the variable "config_directory" with it's value.

Clicking "Save" and then "Publish" will commit the new pattern. This same process can be followed for populating additional attributes for my application, such as "Version" and "Configuration file", which can be important for distinguishing between different variants of the same software product.
Create Process Classification
The next step creates the linkage between our discovered processes and the Hello World application class. I navigate to Discovery Definition->Processes, then click "New" to create a new Process Classification. I'll set Name to "Hello World" and Table to "Hello World". The Relation type will be "Runs on::Runs". To limit the discovery to just the "helloworld" process, I'll filter on "Name contains helloworld" and "Command contains helloworld". Once I save the record it allows me to attach a probe under the "Triggers probes" tab. That should be the Horizontal Pattern" probe. The Pattern value on that row is then set to "Hello World" to reference my newly-created pattern.

Re-Discover Server
To verify the operation of all these new bits, I'm going to launch another discovery on my Linux server. In the discovery status, I can see the new HelloWorld pattern being launched. I can view the details using the provided "Here" link.

When I view the server record in the CMDB, I now notice a new "Runs::Runs On" relationship with the discovered instance of "Hello World"!

- 7,233 Views
- Mark as Read
- Mark as New
- Bookmark
- Permalink
- Report Inappropriate Content
You can also do the same with Application Fingerptins. Just one single click will do all the above activities.