Ganesh Bhat

ServiceNow Employee
Options
- Post History
- Subscribe to RSS Feed
- Mark as New
- Mark as Read
- Bookmark
- Subscribe
- Printer Friendly Page
- Report Inappropriate Content
on 09-03-2019 09:51 AM
Problem statement
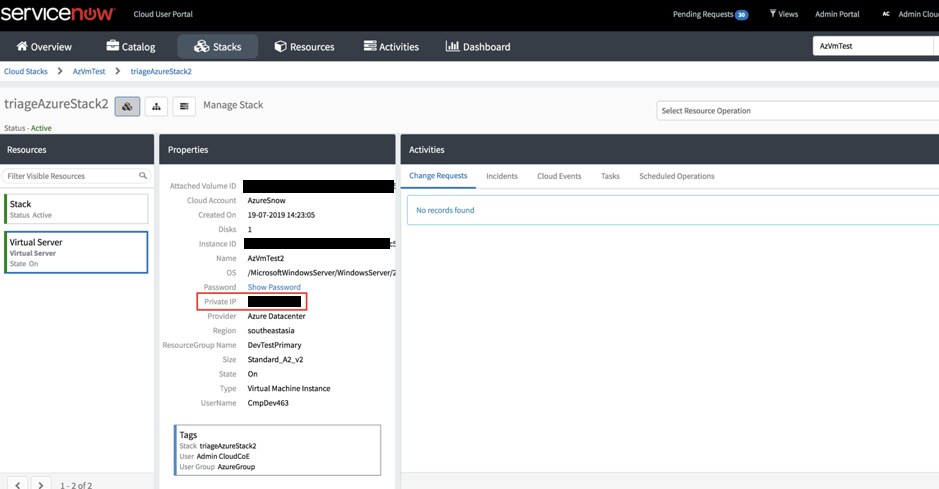
When user provisions any virtual machine in Azure using CMP Blueprint with default settings, user gets Private IP address by default. The screen capture below shows the provisioned stack on Azure datacenter with private IP address assigned to virtual machine.

This poses certain limitations and challenges when user would like to connect to the virtual machine using Remote Desktop, as Remote Desktop from client machines would need you to either have public IP address assigned or be part of the network.
This is a common problem faced by many customers and this article aims to address these difficulties and provide step-by-step guide to update blueprint to get the public IP address and connect to Azure virtual machine using Remote Desktop on its public IP address.
Step by step guide
Step 1.
a. Go to credentials in cloud management and create basic auth credentials for your windows VM.
Please make sure your password follows azure password conventions - https://docs.microsoft.com/en-us/azure/virtual-machines/windows/faq ( Refer: What are the password requirements when creating a VM? )
Step2.
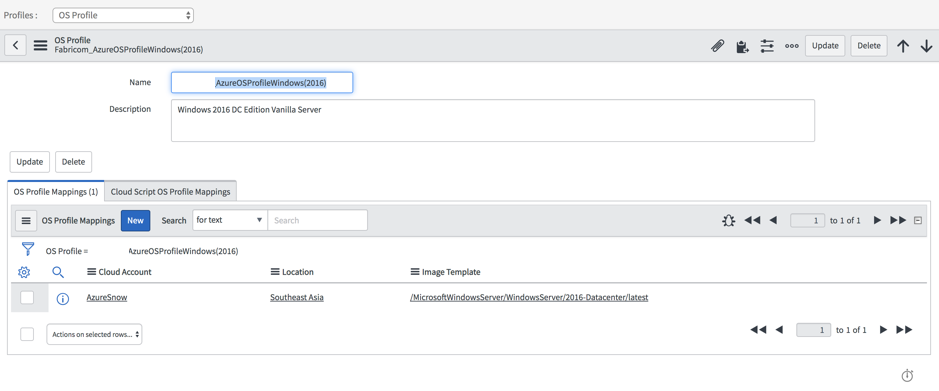
a. Create OS Profile by clicking New
b. Associate template to use with the OS profile, under OS Profile Mapping c. Open the image template by clicking on the link in the column "Image Template"
c. Open the image template by clicking on the link in the column "Image Template"d. Associate the Basic Auth credential created in Step1.

Step 3.
Creating blueprint
a. Click on new blueprint which opens blueprint designer
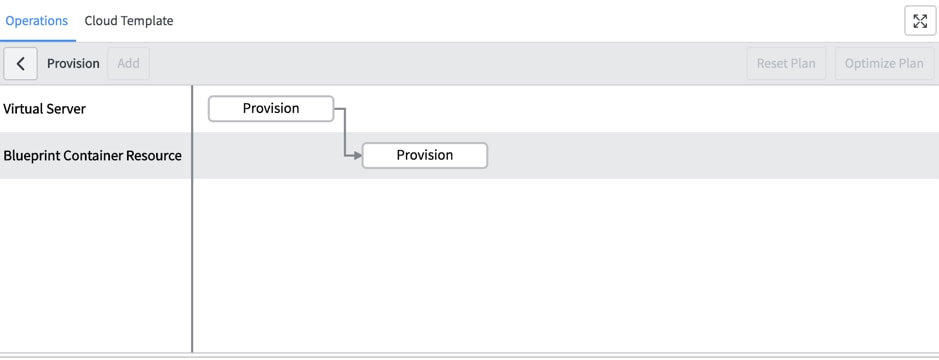
b. Add Virtual Server, Datacenter block and connect them as below.

c. Click on Virtual Server block in the diagram view
d. Click on Provision operation in Operations tab

e. Click on "Provision" operation bubble in Virtual Server swim-lane

f. Right hand side, you will see inputs pane with details about the operation selected
g. Scroll down and locate "DiscoverAndAttachIP", check the checkbox

This will allow the blueprint to get public IP address for the VM it provisions.
h. Click generate catalog and publish the same.
Step 4.
a. Go to user portal and launch the catalog
b. choose the OS Profile
c. Notice an additional variable in the catalog, Discover and attach IP, you can choose to default it or provide option to users in the catalog like below.
Choosing "True" for Discover And Attach IP will allocate Public IP in azure for the provisioned Virtual Machine.

Step 5.
a. Provision the catalog created in step 3 and view the stack.
b. Make note of Public IP address, UserName and Password. ( this will be the same one you set in Step 1 )

c. make use of this public IP address, username and password to connect to windows machine on Azure.

- 1,489 Views