- Post History
- Subscribe to RSS Feed
- Mark as New
- Mark as Read
- Bookmark
- Subscribe
- Printer Friendly Page
- Report Inappropriate Content
on 08-10-2022 01:10 AM
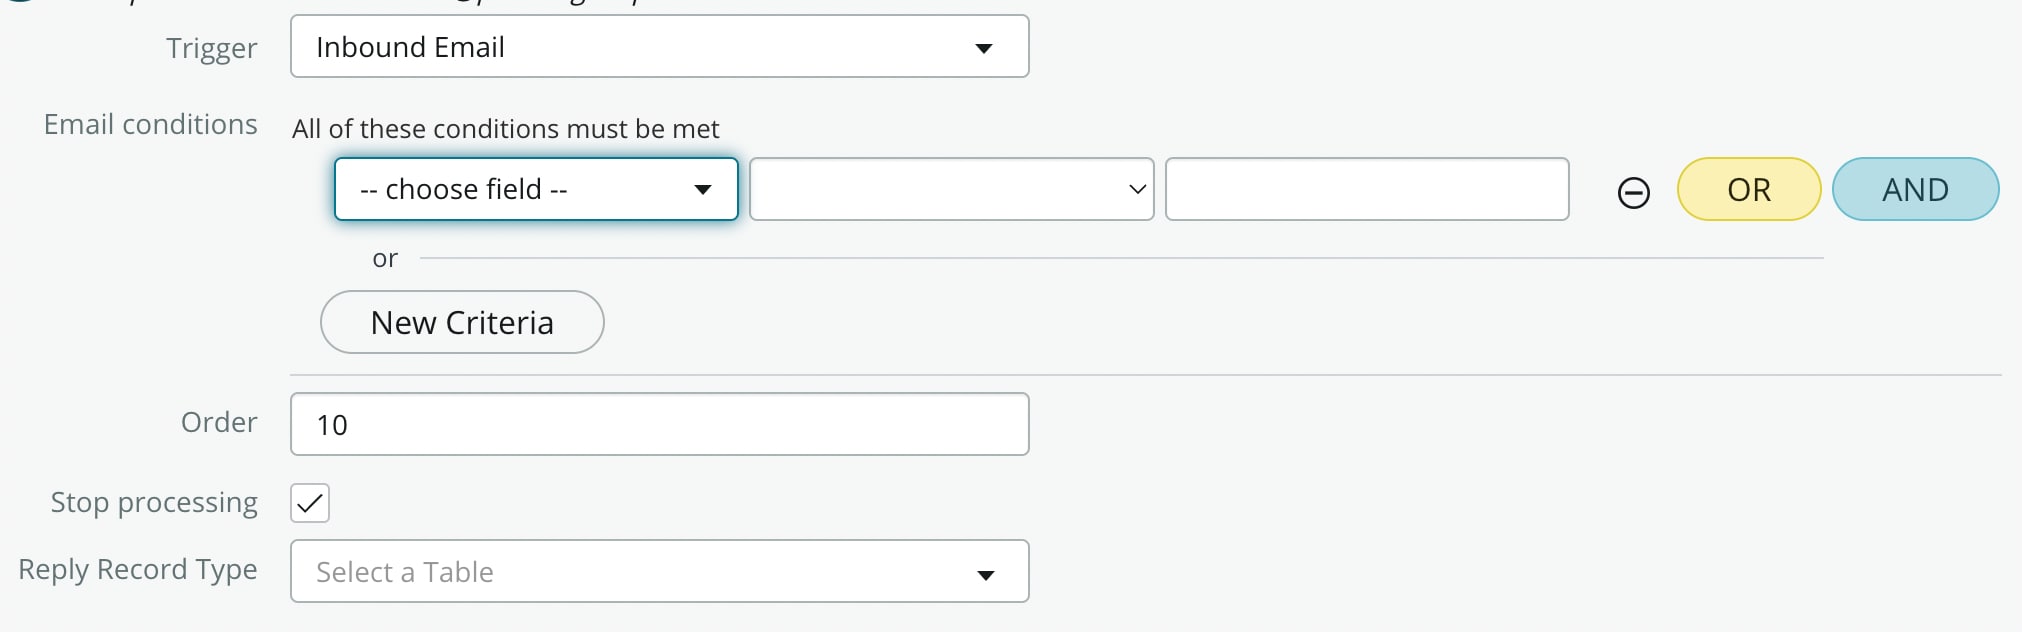
Scenario : You have created a flow where the trigger type is "Inbound Email" but you don't know how can you control the order of processing ? As in most of the scenarios , we need to provide order of execution for Inbound Actions. Then you are at the right place.
Problem : We all know that we are into flow era of ServiceNow where we try to accomplish most of our tasks by using flow designer. Then why not to leverage inbound email trigger of a flow instead of conventional inbound actions. Having said that, there is no OOB ordering & stop processing options available which we generally use to set the precedence of executing an inbound action & to stop processing other matching inbound actions (by saying matching inbound action , I mean to say that inbound actions with matching condition)when the desired one is executed.
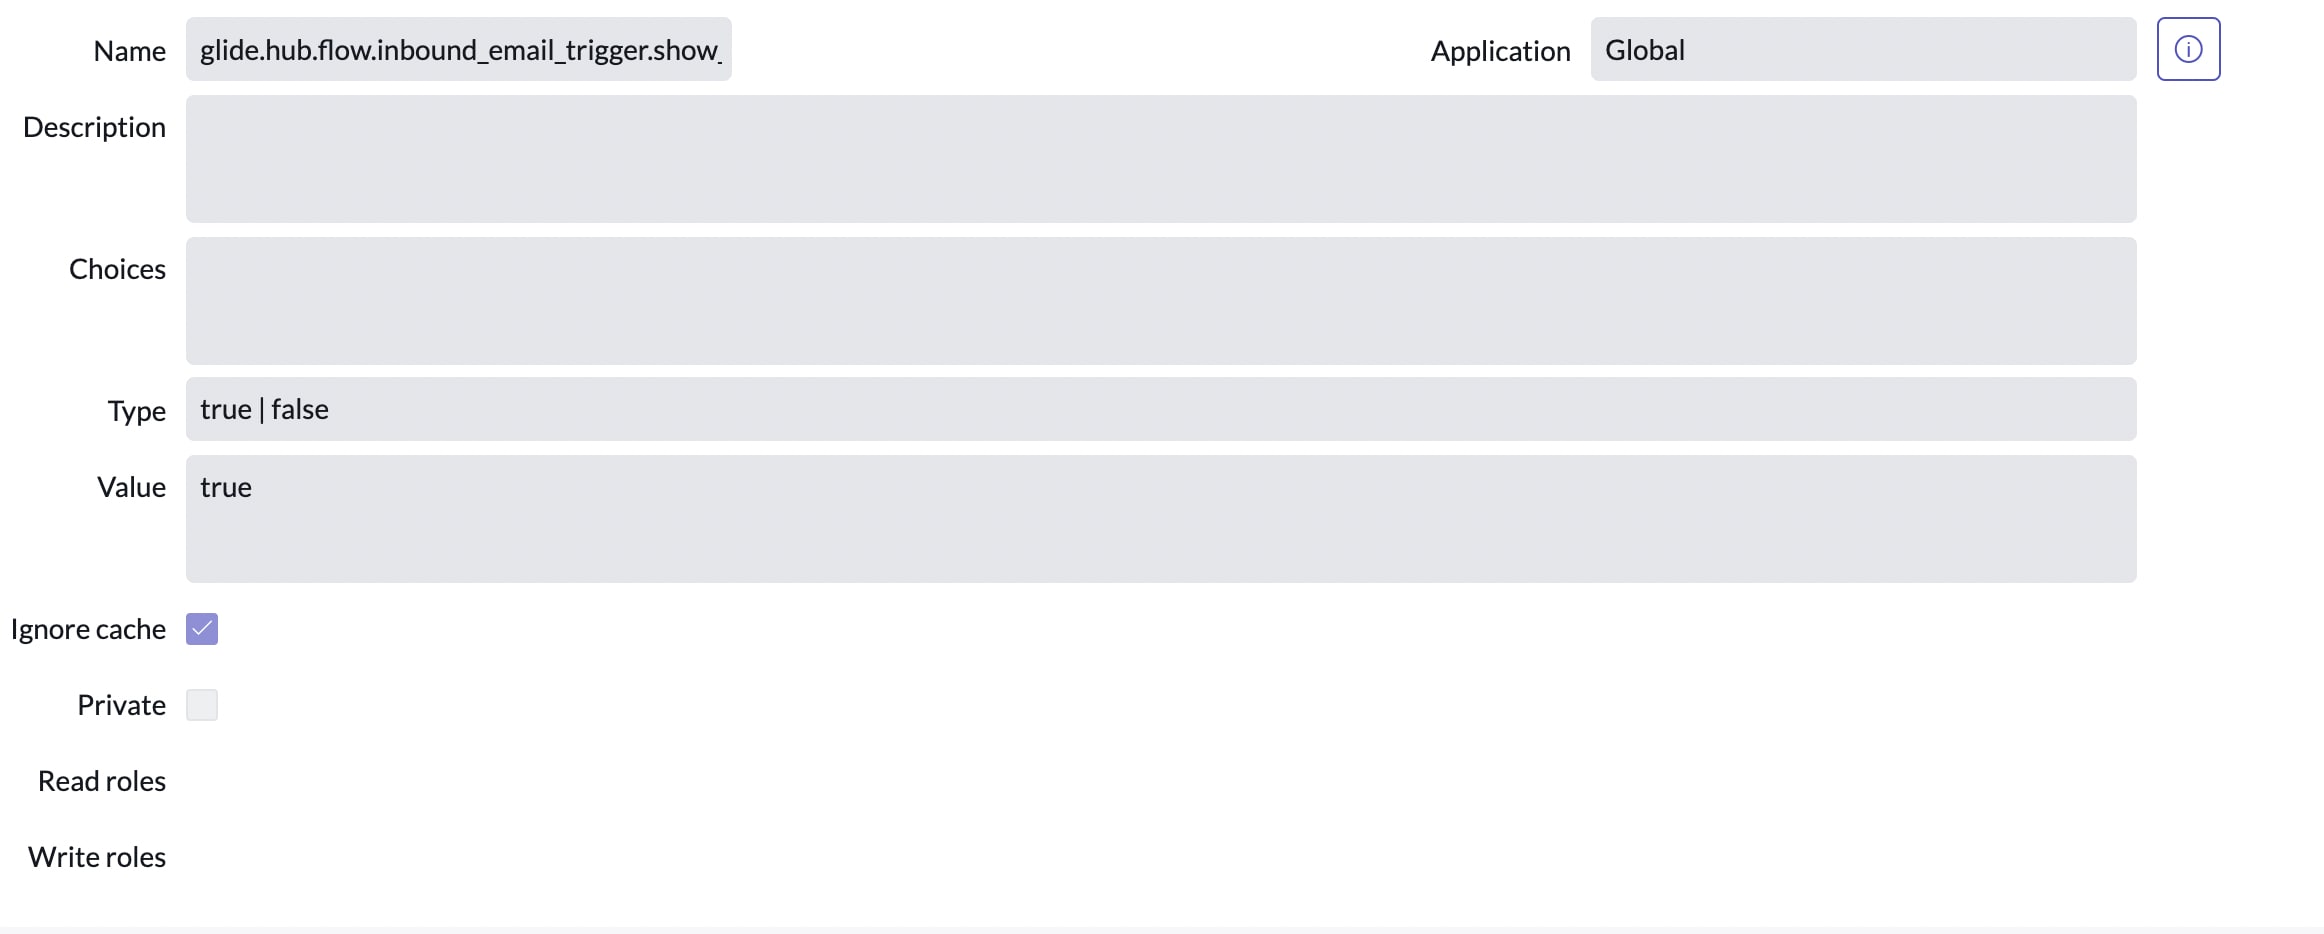
Solution : To achieve this , you can create a system property named "glide.hub.flow.inbound_email_trigger.show_advanced" as shown in the following image :

Once done, you could see the desired options available in your flow as shown in the below image :

Thanks & Regards,
Subham Kumar Shaw
Senior ServiceNow Consultant
- 9,096 Views
- Mark as Read
- Mark as New
- Bookmark
- Permalink
- Report Inappropriate Content
Wonderful post!
- Mark as Read
- Mark as New
- Bookmark
- Permalink
- Report Inappropriate Content
Nice find! Appreciate the effort.
- Mark as Read
- Mark as New
- Bookmark
- Permalink
- Report Inappropriate Content
Really helpful.
I'm wondering why this system property is not set OOTB...
- Mark as Read
- Mark as New
- Bookmark
- Permalink
- Report Inappropriate Content
Thank Subham, I have spent hours and hours to solve the problem. Thank you for the post.
- Mark as Read
- Mark as New
- Bookmark
- Permalink
- Report Inappropriate Content
Hi @SUBHAM_SHAW_SN ,
I have used this property and enabled in my enterprise instance, but its not working as expected.
My Requirement is - "The existing inbound actions ideally don't need modified. We need to create a flow which checks if a watermark exists in any inbound email. If the watermark does not exist, then the email processing should be halted in the flow. If the watermark does exist, then the flow should allow the email processing to continue to be processed by all flows/inbound actions."

So, I have tried this, but its not working. could you pls check.
Regards,
Avinash
- Mark as Read
- Mark as New
- Bookmark
- Permalink
- Report Inappropriate Content
In few cases even when the system property glide.hub.flow.inbound_email_trigger.show_advanced is activated, flows created before enabling this property fail to display the advanced inbound email trigger fields Order and Stop processing .
Problem Details
Administrators activated the system property glide.hub.flow.inbound_email_trigger.show_advanced to expose additional configuration options for inbound email triggers. Despite the property being set to true, flows that existed prior to this change do not show the Order and Stop processing fields in their inbound email trigger configuration.
Reproduction Steps
Navigate to Flow Designer
Open an existing flow with an Inbound Email trigger
Expand the Inbound Email trigger section
Verify that the Order and Stop processing fields are not displayed
Root Cause
The system property glide.hub.flow.inbound_email_trigger.show_advanced only takes effect when a trigger is initially created. Flows constructed before the property was enabled retain their original configuration schema and do not automatically inherit the advanced field visibility.
Solution
The inbound email trigger must be reelected to force Flow Designer to apply the current property settings and render the advanced fields.
Resolution Steps
Open the affected flow in Flow Designer
Expand the Inbound Email trigger configuration
Click the Trigger dropdown menu and reselect Inbound Email from the list
Verify that the Order and Stop processing fields now appear
Click Done to confirm the trigger configuration
Save and reactivate the flow
Reference Article: Advanced inbound email trigger fields not visible after enabling system property