- Post History
- Subscribe to RSS Feed
- Mark as New
- Mark as Read
- Bookmark
- Subscribe
- Printer Friendly Page
- Report Inappropriate Content
on 08-21-2022 07:31 AM
Building an application with App Engine is very easy. Don't trust me 😟?
I'll show you by building an application is just 15 minutes.⌚ You can build it too. Just follow my process below.⏬
With this application, Users will be able to raise requests based on different roles and groups.👩👩👦👦 Requests will be auto assigned to respective Assignment group and team based on the category.
This application is developed in App Engine Studio - a more user-friendly and citizen developer centric platform that was released in Quebec to develop applications.
I’ve provided a step-by-steps ⏭ method used to develop an Request application in App Engine Studio.
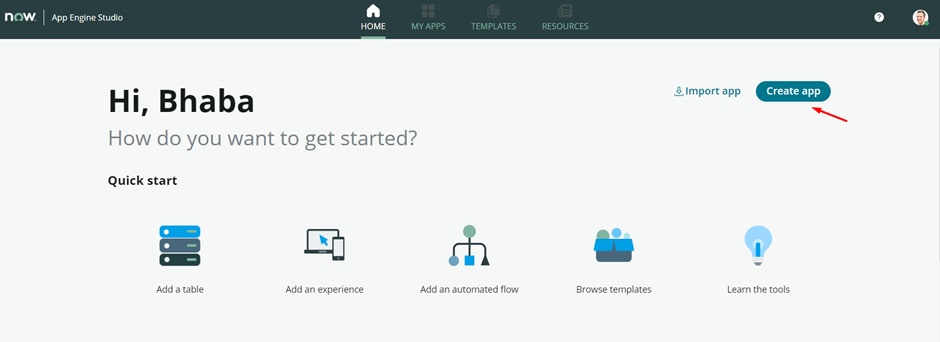
- Navigate to App Engine > App Engine Studio. Click on Create app.

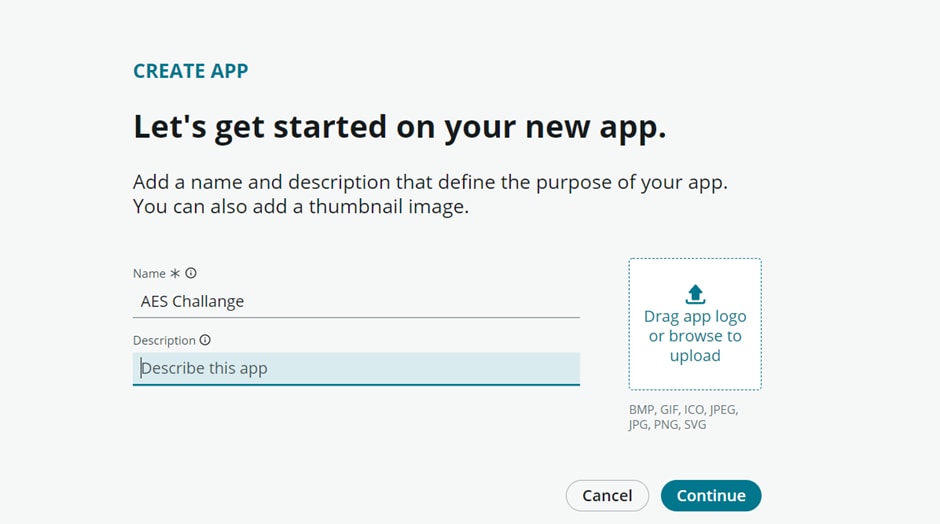
2. Enter any name and description. In our case I'll name it as AES Challange.

3. Click on continue and in the next screen click on Go to app home to continue.

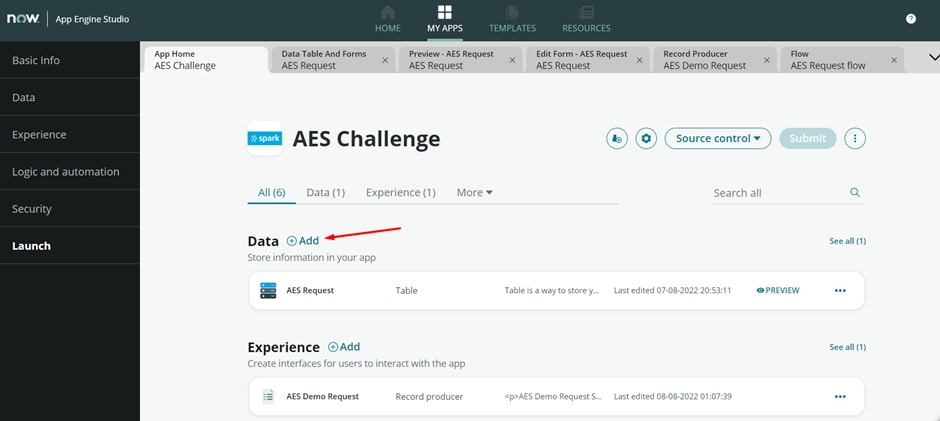
4. Click on Add, next to Data. This will create a table📈 inside the application.

5. We can create table by uploading a spreadsheet📃, creating a table from scratch or by extending an existing table. We’ll extend an existing table in this case.

6. We’re extending the task table as it contains key information which we need in our application. By extending the table, we don’t need to re-create those fields again.

7. Now we’ll add the columns that we need for the application.

8. Arrange the list view fields of the AES Request table by clicking the gear icon.


9. Arrange the field of the form by navigating to the form design.


Hurrah!!!😁 We’ve successfully completed creating a table in our new application.
⏩Simply by creating a table in App Engine, we can access to most of the out-of-the-box functions that allows users to access to multiple capabilities like:
👉Import/Export Data
👉Events & Email Notifications
👉Create Reports & Maintain Dashboards
👉API Integrations using REST.
👉Scheduled Jobs
👉Templates
👉Inbound Email Actions and many more.
10. Now, we will be adding our application to the Service Catalog.📇 Go back to the App Engine Studio, and click on 'Add' link beside the Experience as shown below.

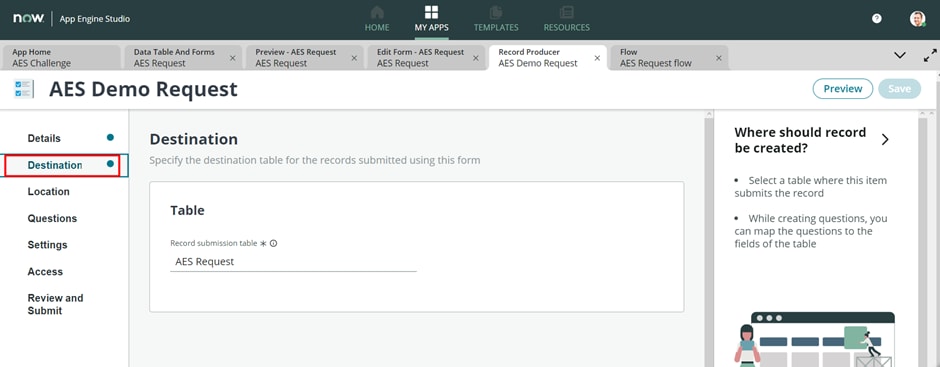
11. We’ll create a Record Producer as this will allow users to select any item from the catalog and will create records inside our AES Request table.


12. Let us edit the record producer and configure its behaviour with our service catalog. In order to continue, we need to fill all the basic details for the catalog item. Click on the tab one by one and fill the details as shown in below image.

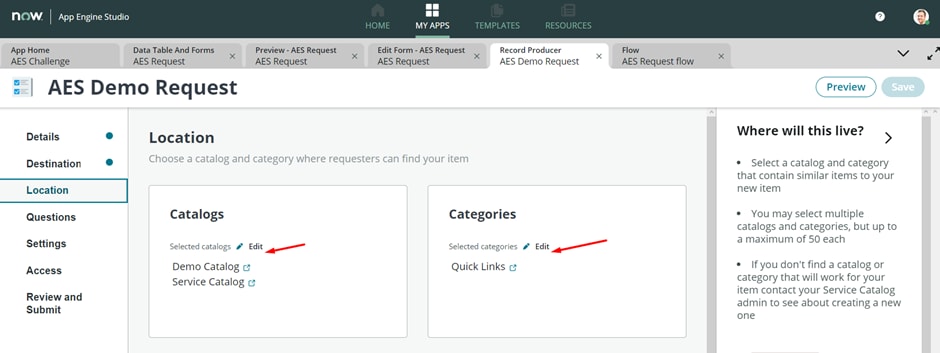
13. Mention the catalog name you want to add and categories that this catalog item will belong to

14. Click on the ‘Question’ tab and few questions so that it guides end users to provide all the required information before catalog item submission.

15. Review all the information provided and click 'Submit' once previewed.

16. Now, our application is tied with the service catalog. Verify it by navigating to the service portal and check logging in as end user. Our new item AES Demo Request should be visible under Catalog Item.

17. Test the catalog item. Fill the form and click submit. Navigate to the application and verify the record creation.


18. Now, let’s add some assignment logic to our application as we’ve created the table and also added our item to the service catalog.
Click on 'Add' icon beside the Logic and Automation as shown.

19. Click on Build from scratch as shown and add all the basic information as required to create the flow.

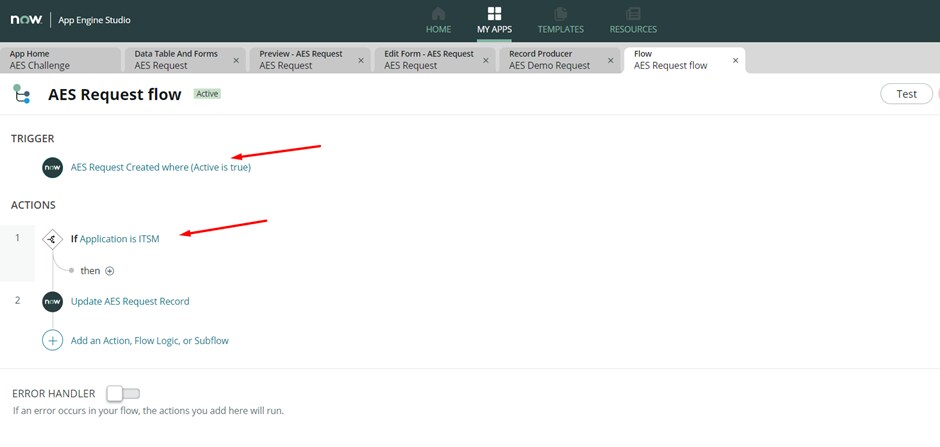
⏭Let's add a trigger now by clicking on 'Add a trigger'.
20. Select the trigger Record->Created. Specify the 'AES Request' table. We can also add any conditions if required.
21. Choose ‘If Condition’ under action and apply condition to check if the application is ‘ITSM’. We can also drag-and-drop from the data pill option available beside.
22. Next, click on 'Action' and select 'ServiceNow Core-> Update Record'. Drag-and-drop the AES Request Record data pill into the Record field. Follow the steps as shown in below images.


23. Once done, we can now save our flow. Don’t forget to click ‘Activate’ to activate our flow.

Finally, we’ve successfully created our first application using App Engine Studio.😃 It’s that simple. We’ve added our own tables, service catalog and flow logic to automate the process.
Hope you've followed me along with the steps and completed building your first application as well with App Engine Studio.
Please comment below for any query.
Thanks & Have a great time !😀
#AppEngineStudio #AppEngine #Servicenow #Automation.
- 10,143 Views
- Mark as Read
- Mark as New
- Bookmark
- Permalink
- Report Inappropriate Content
How, can I display different applications (form's) depending on the type of category field added in the first application?
Shoud I use a request flow, but I dont know how to trigger the differnt forms depending on the initial category field.
THanks.