플레이북 사용
플레이북을 사용하여 초기 개요 생성부터 최종 승인 및 완료에 이르기까지 수명주기의 각 단계에서 요구를 안내합니다. Playbook은 각 단계 내에서 단계별 활동을 제공하여 필요한 모든 정보를 캡처하고 거버넌스 프로세스를 따르도록 합니다.
시작하기 전에
- 필요한 역할: it_demand_user, it_demand_manager
- 관리자는 기본 또는 사용자 지정 플레이북이 활성화되어 있는지 확인합니다.
이 태스크 정보
플레이북은 요구의 표준 스테이지(예: 개시, 계획, 실행, 모니터링 및 종결)를 정의하고 각 스테이지에서 완료해야 하는 활동 또는 작업 항목을 포함합니다.
주:
플레이북은 가이드가 있는 스테이지 기반 워크플로우에서 수요 정보를 제공합니다. 요구 기록의 상세 페이지 에서도 동일한 필드와 목록을 사용할 수 있습니다. 어느 위치에서든 수요 정보를 업데이트할 수 있으며, 한 위치에서 변경한 내용이 다른 위치에 반영됩니다.
이 작업 주제는 요구 AI 플레이북을 따릅니다. 다음 7개의 스테이지로 구성된 표준 플레이북입니다.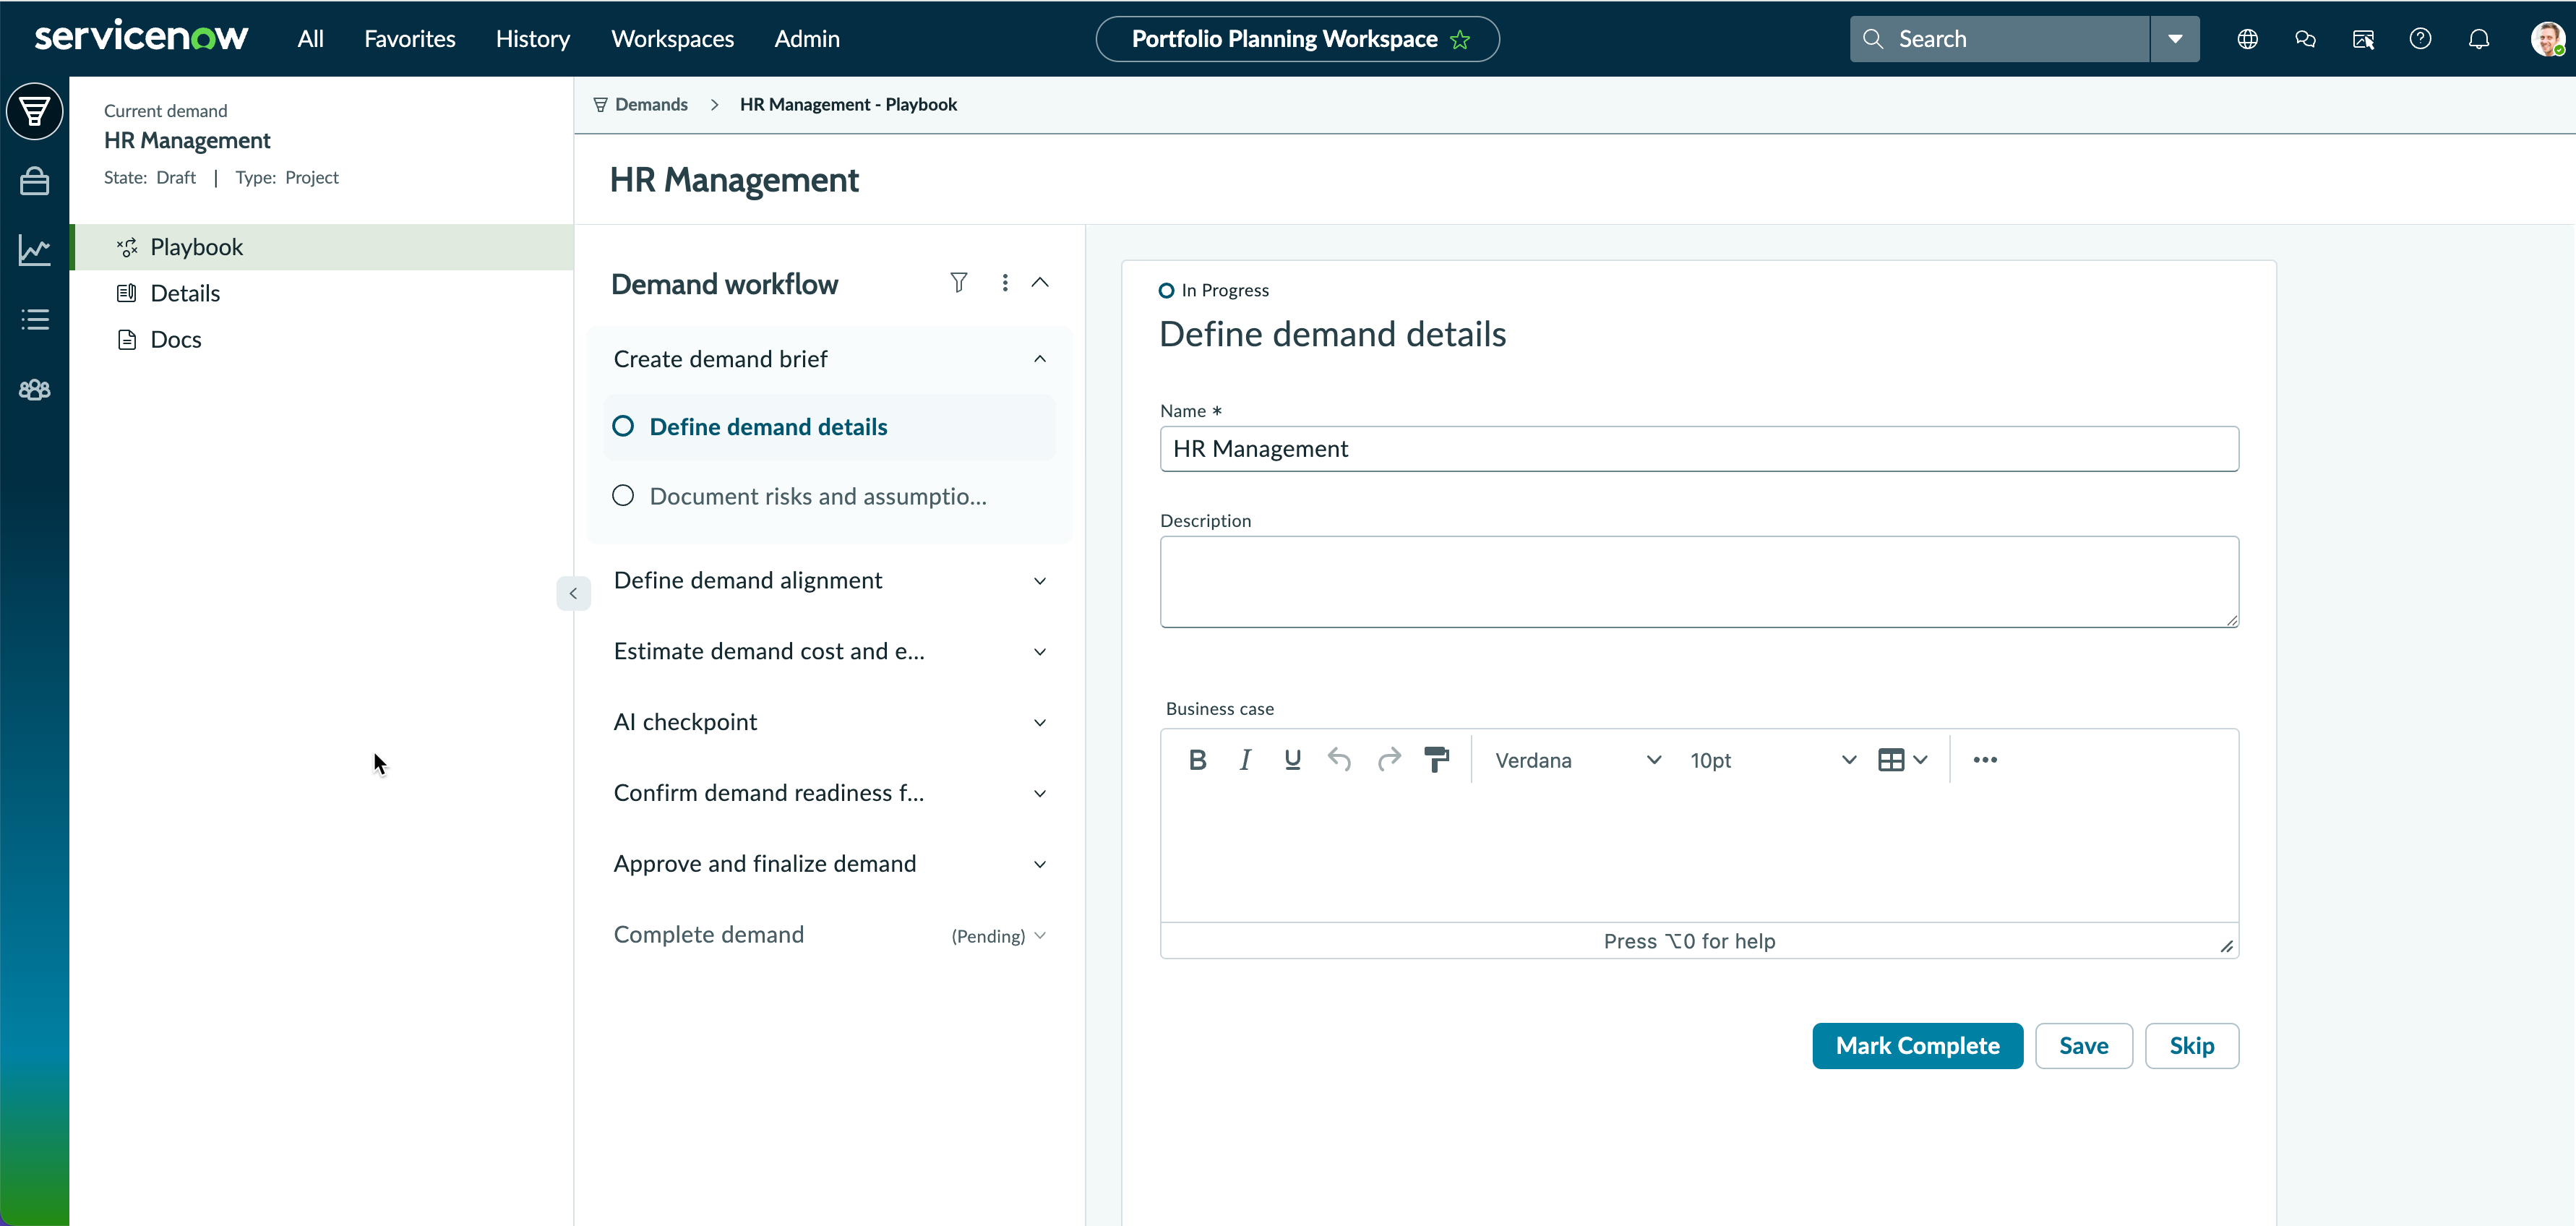
- 수요 보고서 작성
- 수요 정렬 정의
- 수요 비용 및 작업량 예측
- AI 검사점
- 검토를 위한 수요 준비 상태 확인
- 수요 승인 및 마무리
- 수요 완료
주:
각 단계는 요구 관리자가 요구를 성공적으로 완료하도록 안내하는 활동, 작업 항목 또는 단계로 구성됩니다. 요구가 해당 플레이북에 대해 정의된 트리거 조건과 일치하는 경우에만 플레이북 메뉴를 볼 수 있습니다.AI 컨트롤 타워 플러그인이 설치되어 있고 요구의 투자 유형이 인공 지능으로 설정된 경우 AI 검사점 단계를 사용할 수 있습니다.
주:
에서 생성된 수요 관리용 넥스트 경험 요구가 플레이북 페이지에서 열립니다.