- Post History
- Subscribe to RSS Feed
- Mark as New
- Mark as Read
- Bookmark
- Subscribe
- Printer Friendly Page
- Report Inappropriate Content
on 08-01-2022 11:32 AM
Today we are going to set up an integration with Microsoft Teams to send a push notification when an event occurs in our custom application.
The problem/scenario:
Managers don't want to access the platform every day to see if there are submissions to validate. It would be better to receive a smartphone notification when there were pending records.
The solution:
To send notifications to their smartphones we created a Flow using App Engine Studio.
When a manager receives a notification, we make sure that there is an employee record to validate in the platform.
What are the steps to accomplish this integration?
- In Microsoft Teams we are going to create a webhook, which is a web address to be used in the next step;
- Using the App Engine Studio we will create a Flow that will be triggered when the employee saves the record. When the record is saved, we will send a message to the Teams channel.
1) Creating the webhook
1.1) A team can have many channels. In your corporate Microsoft Teams, choose a channel to be used, and in the top right corner click on the three points (more options) icon;
1.2) Click on Connectors.

1.3) In the "Incoming Webhook" connector, click on [Add].

1.4) In the configuration screen, inform:
Any name for your webhook;
(Optional) You can click on [create] if you like to upload an image as an icon for your webhook. If you do that, every message will contain that image.

1.5) This step is done! Copy the Webhook address because we will use it in step 2.

2) Creating a Flow
Objective:
Every time an employee creates a record in your App table, you will send a Teams notification to his/her manager.
In the Automation of your Application, create a Flow.
2.1) The unique mandatory field is the Flow name. Click on [Submit]
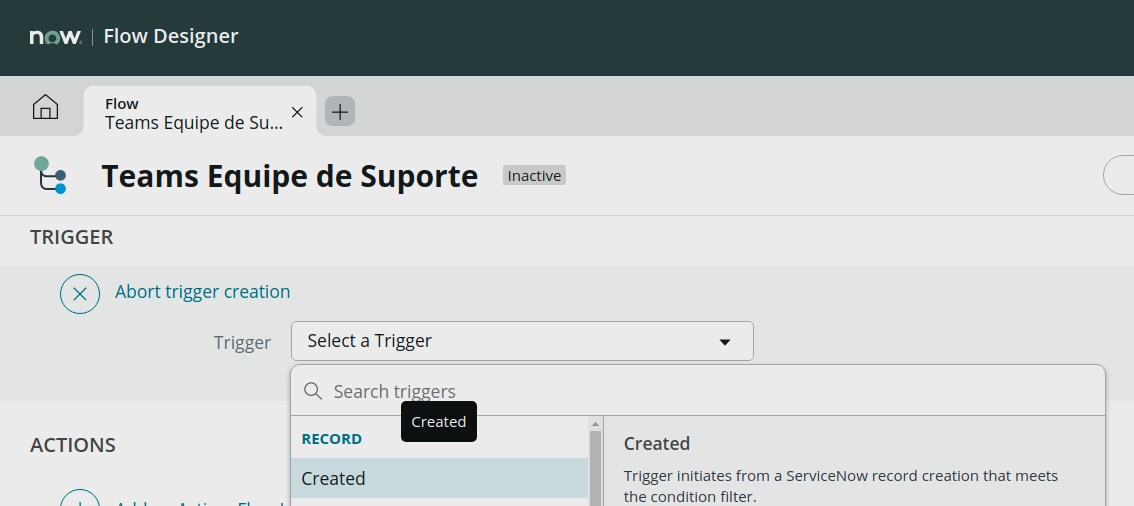
2.2) For the trigger, select Record > Created
2.3) Select your Table and click [Done]
Your Flow name;
A description about what the flow does;
Application: Select your app;
Protection: -- None --
Run As: User who initiates session
Click on [Submit]

2.4) For the Trigger, select Record > Created

2.5) Select your Table and click [Done]

2.6) In the ACTIONS section, choose [Post a Message]. The remaining parameters will be:
Webhook URL: Use that copied in step 1.
Title: Inform your notification title.
Message: Type the message to send. You can use fields from the record being created.
Click on [Test] to see what your notifications will look like.
When you are happy with the look and feel of your message, click on [Activate] to activate your Flow.
Thank you!
- 1,773 Views