- Post History
- Subscribe to RSS Feed
- Mark as New
- Mark as Read
- Bookmark
- Subscribe
- Printer Friendly Page
- Report Inappropriate Content
on 02-06-2019 09:42 AM
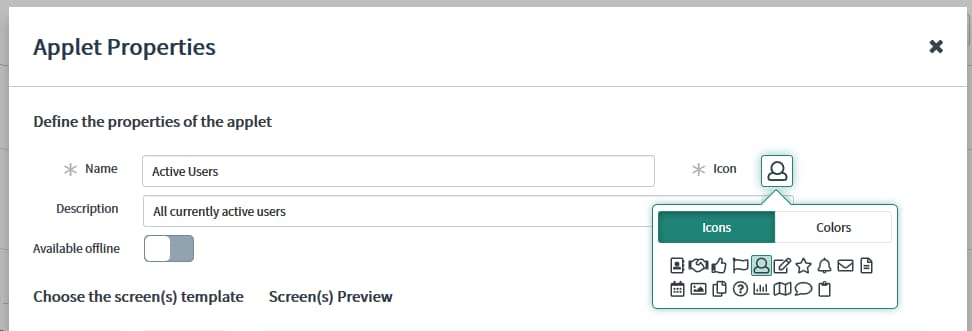
The ServiceNow Agent app was recently released on app stores, and documentation is already available, but it appears that some developer configuration options are undocumented and not available in the Studio IDE. One such feature is Icons. The ServiceNow Agent app uses the popular Font Awesome 5 Pro icon set, which means that over 5000 icons are technically available for use in the app, but the Studio IDE only allows developers to select from a very small subset of 18 icons, as seen below:

While it does not appear to be explained in the documentation, it is actually possible to use the full range of FontAwesome icons in your ServiceNow Agent implementation. Here is how:
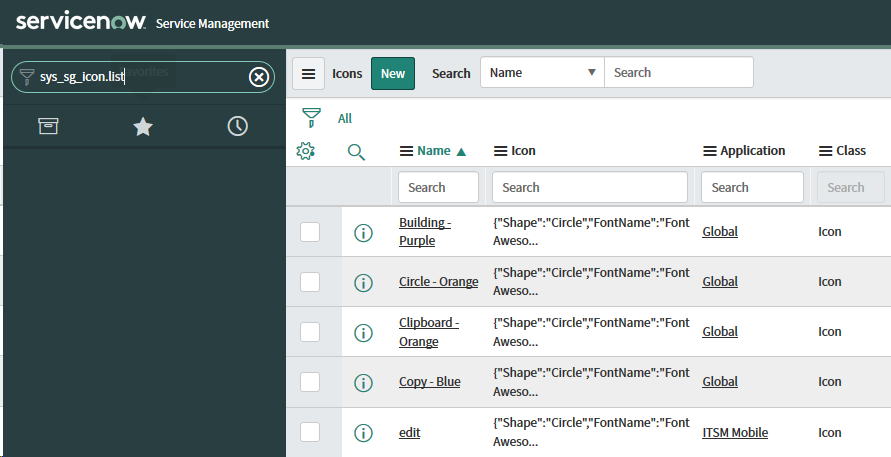
Step 1: Locate the Icon table
All of the ServiceNow Agent tables begin with the prefix "sys_sg". Icons are defined on the Icon table, "sys_sg_icon".

By looking at some of the existing entries, we can see how an icon is defined. Since in-depth documentation is not availabe, it isn't clear what other values are valid for each of the fields.
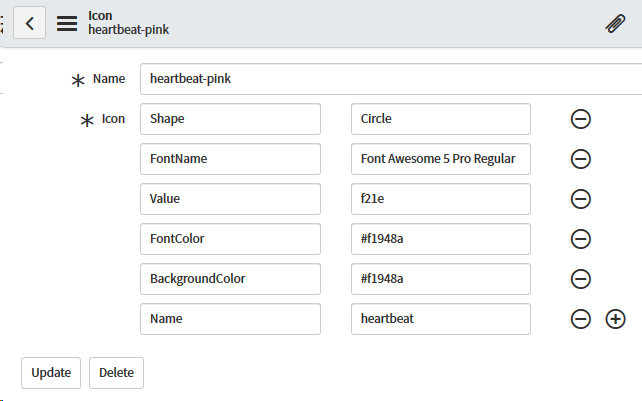
Step 2: Create a new Icon entry
For my testing, I decided to replace the user icon on my Active Users applet with the heartbeat icon. Whatever icon you choose, you will need to get the unicode character code for it from the Font Awesome site:

Create a new icon record and fill in your details:

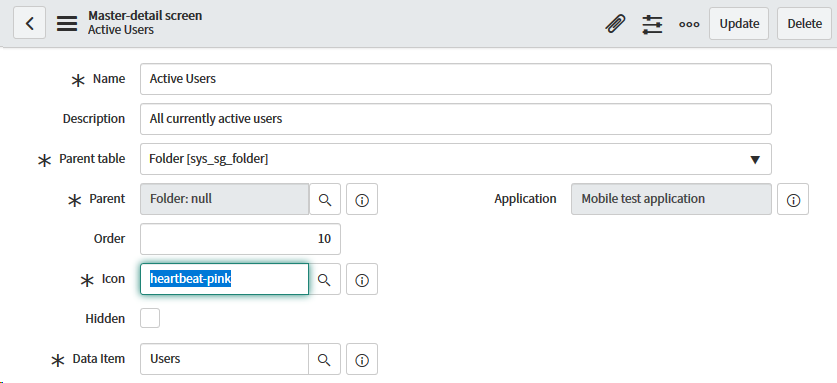
Step 3: Update the Icon field on the Applet record
You will not be able to select your new icon from the Stuido IDE, so you will need to edit the record directly in the platform. It may take a bit of digging around to find what table your record is stored on, but it will be in one of the "sys_sg" tables. My record was in the "sys_sg_master_detail_screen" table. Update the Icon reference field to point to your new icon:

Step 5: Verify in the app
If you already have ServiceNow Agent open and are logged in, you will need to refresh the app by pulling down on the main screen. Now navigate to your applet which uses the new icon and verify that your changes worked. Here is a screen capture of my custom icon in the app:

- 5,883 Views
- Mark as Read
- Mark as New
- Bookmark
- Permalink
- Report Inappropriate Content
Hi Tony,
This is great!
Can we create more icon like this?
- Mark as Read
- Mark as New
- Bookmark
- Permalink
- Report Inappropriate Content
Does anyone understand why some fontawesome unicode character icons work and others do not? It feels a bit of a lottery but is unusable to know what ones are available for Mobile...
- Mark as Read
- Mark as New
- Bookmark
- Permalink
- Report Inappropriate Content
Hi Tony, This help lot to me. I've created couple of custom icons. Thanks for your efforts.