- Post History
- Subscribe to RSS Feed
- Mark as New
- Mark as Read
- Bookmark
- Subscribe
- Printer Friendly Page
- Report Inappropriate Content
on 07-23-2018 06:55 PM
The link function
When creating new widgets, most of us are very familiar with the HTML Template, Client Script, Server Script, and SCSS fields. One of the lesser used fields is the link function field.
The link function is similar in a lot of ways to the client controller function in a widget. Both of these functions run client-side and have access to the $scope of the widget, which is also available in the HTML template. Both of these also have access to the data and options objects sent from the server.
Why use the link function?
The main use case for using the link function in a widget, is when you need to do some DOM manipulation or setting up watchers. Something which is really useful when doing this, is the element object (explained further below) available in the link function. With this, we can easily perform DOM manipulation which won't affect anything outside of our widget/directive.
As an example, say we want to change the width of an input with a class of "change-width" which is in our HTML template, using DOM manipulation.
angular.element('.change-width').css('width', '100px');The above code will work fine in our link function (or controller, for that matter) but what if there are elements outside of this widget/directive with the same class name? Well, using the element object, we don't need to worry about that:
function (scope, element) {
   // find only the elements which are descendents of our parent element
   // using jqLite method .find()
   var inputBox = element.find('.change-width');
   // on focus, expand the input box(es)
   inputBox.on('focus', function() {
      $(this).animate({width: "150px"});
   });
   // when leaving the box, reduce the width
   inputBox.on('blur', function() {
     $(this).animate({width: "100px"});
   });
}
If you know one thing about the link function, in my opinion, it should be this. Knowing that the link function of a widget/directive is the correct place for DOM manipulation (if it is required) and what parameters you have available (scope, element, attrs, etc.) will give you a good start to using the link function appropriately.
Run order
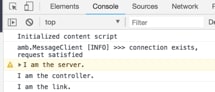
One of the first things to note about the link function, is that it runs after the client controller. If you add a console.log() message to the server, controller, and link script fields, you will see the log appear in the browser's console in the following order:
- Server
- Client controller
- Link function

Controller vs. link function
When we setup our controller, we can inject angular services/factories and other objects that we need. This can be done in any order, so long as the correct name is used. For example:
function ($scope, spUtil, $http) {
   var c = this;
   //client controller controller code here
}
will work exactly the same as:
function (spUtil, $scope, $http) {
   var c = this;
   //client controller controller code here
}
The link function on the other hand, does not have the same ability to inject these objects. The link function has defined parameters, which must be specified in the correct order, and can be given any name.
function (scope, element, attrs) {
   // link function code here
}
These three parameters can be given any name (e.g. $scope will work just as well as scope) so long as they are in the correct order.
- scope is the same as our AngularJS $scope object in the client controller
- element is the jqLite-wrapped parent element of the widget (directive)
- attrs gives us access to the attributes of the element
NB: there are more link function parameters than the three listed above. View the AngularJS documentation here for more information.
Another important note in the differences between these two functions, is the lack of the tight two-way data binding that exists between the HTML template and the controller $scope. You may notice if you change a $scope value in the link function, it doesn't reflect this in the HTML template (or at least, not straight away). A way around this, is to call the $apply method from the link function:
function (scope) {
   //.....some code up here
   function myFunction() {
      scope.my_var = "new string";
      scope.$apply();
   }
}
Note that you should never have to call .$apply() when modifying scope attributes from the controller (due to the two-way binding) and most of the time, this is where this manipulation should occur in any case.
Dependency injection in link functions
As noted above, we cannot inject dependencies (like $window for example) in a link function the same way as we can in the client controller. However, this doesn't mean we can't do it.
If we are using a link function in a widget, it is possible to inject dependencies using the already available $injector service.
function (scope, element, attrs) {
   var $window = $injector.get("$window");
   //we can now use the AngularJS $window service
   $window.on('click', function(event) {
      //run some code here on click
   });
}
If we have created a new directive (by creating a new AngularJS provider) we can use dependencies like this:
function($window) { //we can inject dependencies here, and use in the link function
   return: {
      restrict: "E",
      link: function() {
         $window.on('click', function(event) {
            //run some code on click here
         }
      }
   }
}
Accessing controller methods and attributes from the link function
Say we want to check the current value of c.my_variable or fire c.myMethod() from the link function. Easy! There are a few ways to do this, but the way I usually use, is the following:
function (scope, element) {
   var c = scope.c;
   element.on('click', function() {
      c.myMethod();
   });
}
That's it. Assuming we are using the "controller as" notation in our client controller, (i.e. var c = this) then we can access c on the link function. The above example will fire c.myMethod() on the controller whenever we click anywhere in our widget/directive.
A word of warning
It can be tempting to do a lot of unnecessary jQuery (jqLite) work in an angular widget, particularly for someone coming from a background of developing web applications using libraries like jQuery. AngularJS is a Model-View-Controller (MVC) framework with a magnitude of benefits, and sometimes it can take some time to get used to thinking in the "angular way". When you are writing some code which requires DOM manipulation, ask yourself if this isn't better served using an angular directive like ng-click, ng-class, ng-model etc.
Putting all of this to use
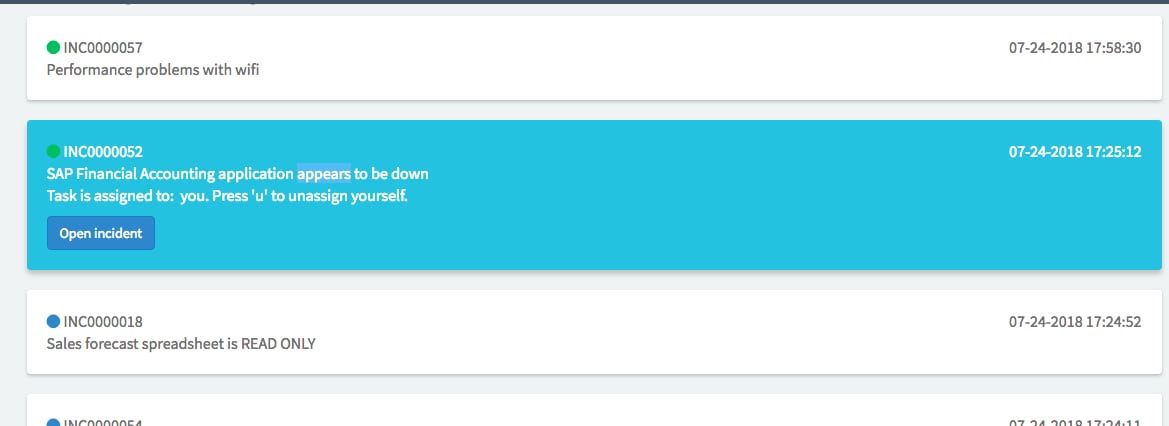
As a working example, I created a simple widget which shows a (configurable) list of tasks, which can be navigated using the arrow keys, and the assigned_to field can be updated using the 'a' key (to assign to you) or the 'u' key (to unassign yourself).

Use the attached XML file to import the widget and have a look if you like. Note that this widget is not meant to be production ready. It is an example of some of the concepts explained here. I know the widget would need some work to be useful 🙂
The link function from the widget is below.
function(scope, element) {
  // we can't inject services into the link function, but we can get them another way...
  var $window = $injector.get('$window');
  // we have access to the scope object, which has our client controller on it
  var controller = scope.c;
  registerWindowEvents();

  function registerWindowEvents() {
    // register our window listener
    angular.element($window).on('keyup', function(event) {
      if (event.keyCode == 65) { // 'a' key
        controller.assignToMe(controller.data.user); //pressing u will assign me
        return;
      }
      if (event.keyCode == 85) { // 'u' key
        controller.assignToMe(""); //pressing u will unassign me
        return;
      }
      if (event.keyCode == 13) { // 'enter' key
        if (controller.selected) //pressing enter will open the task modal
          controller.openTask(controller.selected);
        return;
      }
      //if button pressed is up or down, we will record it, otherwise, exit
      var direction = event.keyCode == 40 ? 'down' : (event.keyCode == 38 ? 'up' : false);
      if (!direction) //if up or down wasn't pressed, get out of here
        return;

      // using element.find ensures we are only searching within our widget
      var selected = element.find('.selected');
      // find the element below the selected one, and click it
      var next;
      if (!selected.length) //if there are none, we use the first card element and select that
        next = element.find('.card');
      else //if direction pressed is up, then grab the previous element. otherwise, grab next
        next = direction == 'up' ? selected.prev() : selected.next();
      if (!next.length)
        return; //if we are at end/beginning ignore
      // if we got here we have a "next" element
      controller.selected = next[0].id;
      //next[0].scrollIntoView(); //optional code to scroll the next card into view
      scope.$digest(); //process updates to scope
    });
  }
}
Hope this helps!
- 34,098 Views
- Mark as Read
- Mark as New
- Bookmark
- Permalink
- Report Inappropriate Content
Thank you Dan for this excellent write up. Just the right length too.
- Mark as Read
- Mark as New
- Bookmark
- Permalink
- Report Inappropriate Content
Hey Dan that was extremely useful.
As you know, getting your head around not only AngularJS and the cycles etc but how it is baked into ServiceNow can be a headache. I ended up here trying to work out how to communicate between the Client Script and the Link Function but I know know that my main problem was timings. But this lead onto other articles I read and I now know this concept so much more now.
Thanks again for taking the time to create and post this.
- Mark as Read
- Mark as New
- Bookmark
- Permalink
- Report Inappropriate Content
- Mark as Read
- Mark as New
- Bookmark
- Permalink
- Report Inappropriate Content
@Dan Conroy This is a great write up and thanks again!
- Mark as Read
- Mark as New
- Bookmark
- Permalink
- Report Inappropriate Content
Very impressive. I have struggled a lot to understand this before. This content had the best explanation with good examples. Thank you Dan.
- Mark as Read
- Mark as New
- Bookmark
- Permalink
- Report Inappropriate Content
Hi @Dan Conroy , Can you help me on this post? https://www.servicenow.com/community/employee-center-forum/extended-operators-in-sn-desktop-filter-w...