


iris_geist

ServiceNow Employee
Options
- Subscribe to RSS Feed
- Mark as New
- Mark as Read
- Bookmark
- Subscribe
- Printer Friendly Page
- Report Inappropriate Content
06-01-2017
06:54 AM
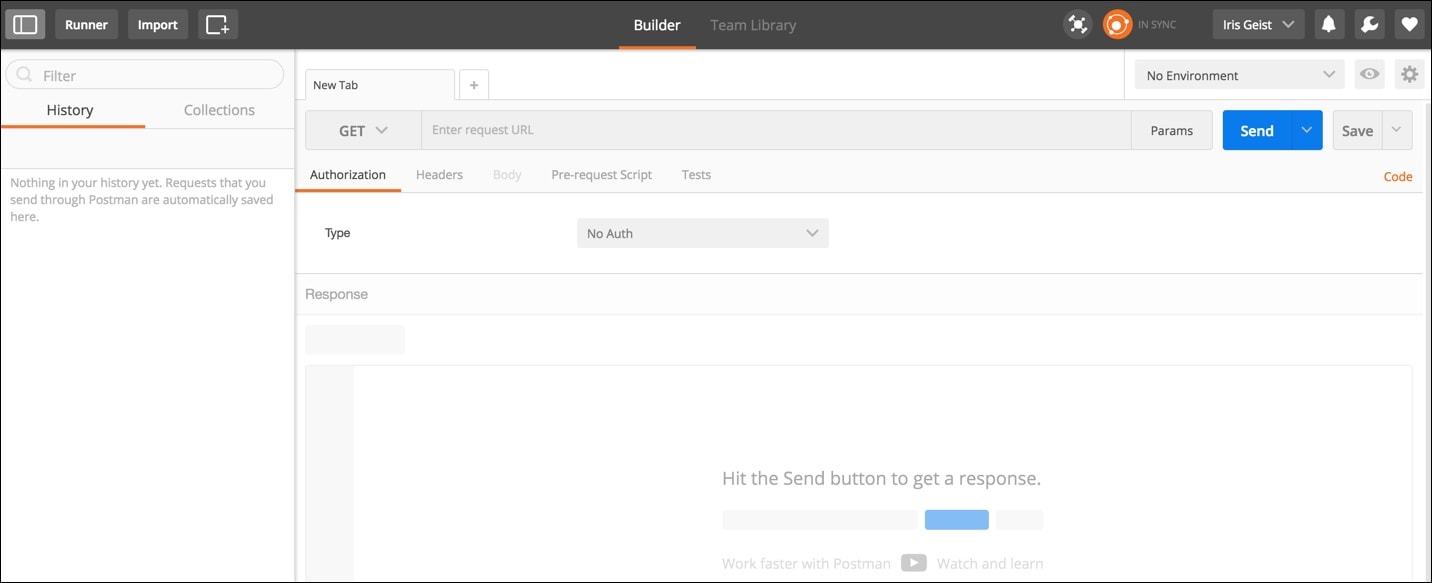
POSTMAN is an extension app that can be downloaded and installed from the Chrome Web Store. It is used to test REST APIs, check the input and the output for REST methods, and view the Code used to run the request. This post is the extension of Testing REST web services through Firefox RESTClient or POSTMAN. I will describe how to use POSTMAN, and as requested will add information on how to post an attachment.
The look and feel is very similar to the Firefox RESTClient:
Learn more about POSTMAN for sending requests
How to retrieve data from a ServiceNow instance
One common test we run, is using GET to retrieve data from ServiceNow. You will run GET methods to retrieve data programmatically from ServiceNow into another tool, where it can be used for processing or reporting. The URL for the GET method can most easily be retrieved from the REST api explorer in the instance:
https://<instance.service-now.com/api/now/table/incident?sysparm_query=active%3Dtrue&sysparm_display_value=true&sysparm_limit=1
Each request will have a Header, where, for example authorization and content formatting information can be found, and a body, where the individual attributes will be filled.
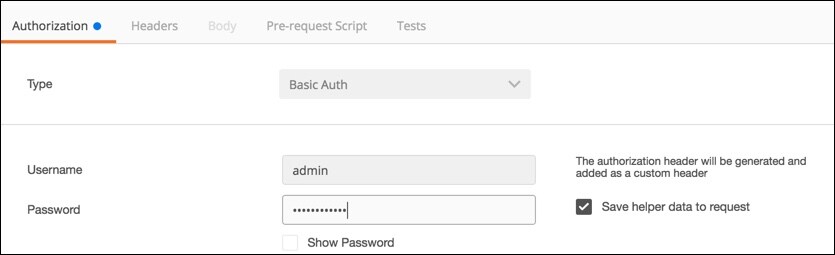
Once the URL is entered, the authorization headers have to be filled:
Typically, we use Basic Auth, which is using userID and password, but the OAuth authentication method is also supported by ServiceNow. I save the request, once I have the basics set up, to make it easier to tweak and retest.
When clicking the Send button, we can view the request
With all the additional header information:
|
Cache-control →no-cache,no-store,must-revalidate,max-age=-1 Content-Encoding →gzip Content-Type →application/json;charset=UTF-8 Date →Sun, 28 May 2017 17:10:18 GMT Expires →0 Link →<https://<instance>.service-now.com/api/now/table/incident?sysparm_query=active%3Dtrue&sysparm_display_value=true&sysparm_limit=1&sysparm_offset=0>;rel="first",<https://instance.service-now.com/api/now/table/incident?sysparm_query=active%3Dtrue&sysparm_display_...>;rel="prev",<https://instance.service-now.com/api/now/table/incident?sysparm_query=active%3Dtrue&sysparm_display_...>;rel="next",<https://instance.service-now.com/api/now/table/incident?sysparm_query=active%3Dtrue&sysparm_display_...>;rel="last" Pragma →no-store,no-cache Server →ServiceNow Strict-Transport-Security →max-age=63072000; includeSubDomains Transfer-Encoding →chunked X-Is-Logged-In →true X-Total-Count →50 |
POSTMAN header response result
Other basic POSTMAN features
- When clicking on Code on the upper right of the application, you get a sample code string:
GET /api/now/table/incident?sysparm_query=active%3Dtrue&sysparm_display_value=true&sysparm_limit=1 HTTP/1.1
Host: instance.service-now.com
Authorization: Basic YWRtaW46QWtsYXJhMjAxMi8v
Cache-Control: no-cache
Postman-Token: 0d9471c9-26f8-715a-2b81-c01c113087f0
That shows you detail on how POSTMAN executed the GET command.
- When clicking on Params to the right of the URL, you can enter the URL parameters as key value pairs in a table, or check the parameters currently set:
- POSTMAN also makes troubleshooting easier with the copy to clipboard
and search
functions, with which you can quickly find a key value pair that you want to analyze deeper.
Create a new Incident with POSTMAN
Now that we have the basics covered, let's use postman to create a new incident in your ServiceNow instance. To create an incident, we will use the POST method.
- First, you will change the method to POST, and enter the URL similar to this:
https://instance.service-now.com/api/now/table/incident?sysparm_display_value=true
- Then, you will have to set up the Authorization again, same as you did for the GET method.
- Next, set the correct content-type:
- Finally, the fields to fill in for your new ticket are entered in the Body tab using Key - Value pair notation in raw format:
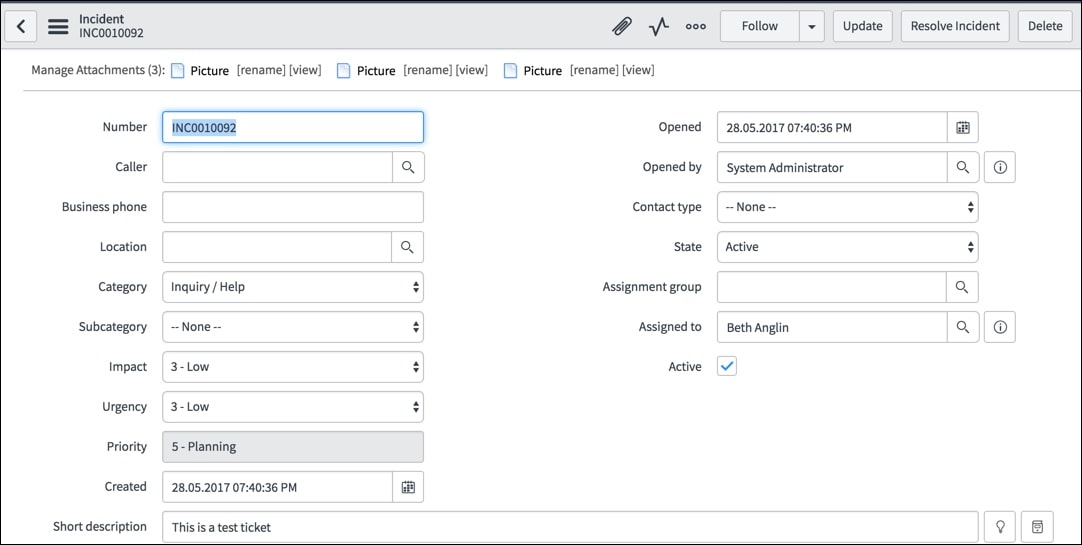
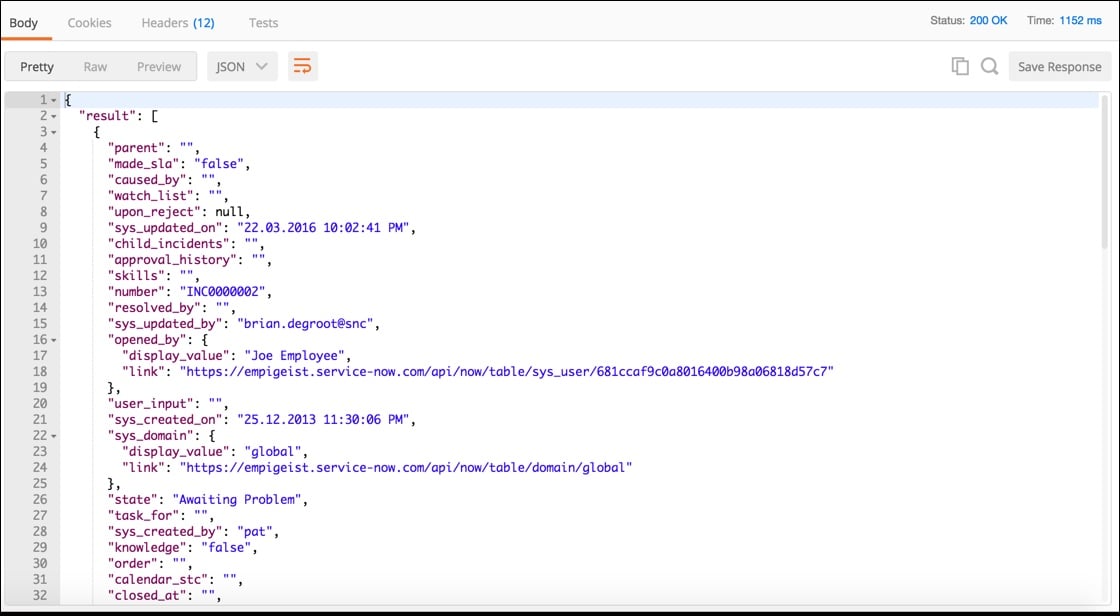
- Once you have all fields filled in that you want to fill with values other than default values, you can (first save and then) send the request:
{
"result": {
"parent": "",
"made_sla": "true",
"caused_by": "",
"watch_list": "",
"upon_reject": "Cancel all future Tasks",
"sys_updated_on": "28.05.2017 07:37:53 PM",
"child_incidents": "0",
"approval_history": "",
"skills": "",
"number": "INC0010091",
"resolved_by": "",
"sys_updated_by": "admin",
"opened_by": {
"display_value": "System Administrator",
"link": "https://instance.service-now.com/api/now/table/sys_user/6816f79cc0a8016401c5a33be04be441"
},
"user_input": "",
"sys_created_on": "28.05.2017 07:37:53 PM",
"sys_domain": {
"display_value": "TOP/MSP/Default",
"link": "https://instance.service-now.com/api/now/table/domain/09ff3d105f231000b12e3572f2b4775d"
},
"state": "Active",
"task_for": "",
"sys_created_by": "admin",
"knowledge": "false",
"order": "",
"calendar_stc": "",
"closed_at": "",
"delivery_plan": "",
"impact": "3 - Low",
"active": "true",
"work_notes_list": "",
"business_service": "",
"priority": "5 - Planning",
"sys_domain_path": "!!!/!!#/!!!/",
"rfc": "",
"time_worked": "",
"expected_start": "",
"opened_at": "28.05.2017 07:37:53 PM",
"business_duration": "",
"group_list": "",
"work_end": "",
"caller_id": "",
"resolved_at": "",
"approval_set": "",
"subcategory": null,
"work_notes": "",
"short_description": "This is a test ticket",
"close_code": null,
"correlation_display": "",
"delivery_task": "",
"work_start": "",
"assignment_group": "",
"additional_assignee_list": "",
"business_stc": "",
"description": "",
"calendar_duration": "",
"close_notes": "",
"notify": "Do Not Notify",
"sys_class_name": "Incident",
"closed_by": "",
"follow_up": "",
"parent_incident": "",
"sys_id": "29c05d89134fb200ec5450f32244b0b4",
"contact_type": null,
"incident_state": "New",
"urgency": "3 - Low",
"problem_id": "",
"company": "",
"reassignment_count": "0",
"activity_due": "UNKNOWN",
"u_some_ne_wfield": "",
"assigned_to": {
"display_value": "Beth Anglin",
"link": "https://instance.service-now.com/api/now/table/sys_user/46d44a23a9fe19810012d100cca80666"
},
"severity": "3 - Low",
"comments": "",
"approval": "Not Yet Requested",
"sla_due": "UNKNOWN",
"comments_and_work_notes": "",
"due_date": "",
"sys_mod_count": "1",
"reopen_count": "0",
"sys_tags": "",
"escalation": "Normal",
"upon_approval": "Proceed to Next Task",
"correlation_id": "",
"location": "",
"category": "Inquiry / Help"
}
}
Create an new Incident with attachment using POSTMAN
Now that we have all the simple steps figured out, let's send a new ticket with an attachment. Often times an attachment helps the viewer of the incident with screen shots or specific examples, enabling a faster resolution of the issue.
I first checked, how an attachment is sent with REST API explorer: Attachment API
Then I translated that information into how to do it with POSTMAN:
- The URL to use:
https://instance.service-now.com/api/now/attachment/file?table_name=<ServiceNow dictionary name>&table_sys_id=<SysID of the record that should hold the attachment>&file_name=<name to give the file once loaded>
- Example Headers:
Files need to be of content-type multipart/form-data
- Example Body:
As you can see, POSTMAN allows for two types of form-data: Text for any clear text you want to pass, and File for attachments. Once you choose File, you can upload any file through the Choose Files button.
- Example Headers:
- Save and Send the request and the attachment will be created.
Several images for each attachment I tried for this blog post is attached to this post below - one for each "Send" I performed.
Attachment handling is not done through the incident (or other table) API, but in a separate step. If you are writing code to create an incident that should contain an attachment, you will first create the incident, then return the sys_id of this incident to call the attachment API with that information.
I hope this information helps - please let me know if you are interested in more detail, and we can expand as needed.
Labels:
- 62,579 Views
7 Comments
You must be a registered user to add a comment. If you've already registered, sign in. Otherwise, register and sign in.


