- Post History
- Subscribe to RSS Feed
- Mark as New
- Mark as Read
- Bookmark
- Subscribe
- Printer Friendly Page
- Report Inappropriate Content
on 07-14-2020 07:24 AM
Introduction
This article explains how you can take advantage of the new mobile features about reporting.
If you are a newbie, you feel uncomfortable with new ServiceNow mobile technology, or even you are not familiar with Studio, I strongly recommend you to read the next resources prior to start:
- Mobile Configuration and Navigation on documentation
- Mobile Development Fundamentals (Orlando) on NowLearning
- Mobile Applications on Developer site
- How Studio Works
I assume that you have the right foundations about ServiceNow technology, and specifically the Mobile approach.
If you are familiar with graphs, but want to discover more about navigation, maybe would be interesting for you jump directly to the second part of the article.
Expected Working time: 30 minutes
Now Classic vs Now Mobile / Agent Mobile
ServiceNow mobile approach changes starting on Madrid version, till this moment, the only mobile application of ServiceNow is Now Classic, which from the technology point of view, is a hybrid app, so developers can’t easily use the resources of the mobile.
New applications Agent Mobile and Now Mobile are absolutely native, so you can easily take a picture and attach to an incident, create your own actions when you swipe to the left, or use a Siri shortcut. Besides of that, they are able to render Knowledge Articles and Catalog Items with same boundaries as Classic.
Now Mobile is focused on general public, and Agent Mobile on fulfillers. Both of them work similarly, they are focused on a Low Code / No Code approach, and actually they can load the same functionality indistinctly, being more a navigation topic than a programmatic issue where you are going to locate your projects.
For this article, we are going to use Agent Mobile, but all explanations can be applied exactly the same for Now Mobile.
First Things First
You need to download Agent Mobile app to your device on the Apple Store or Google Play, depending on your phone.
Also it is highly recommended to activate ITSM Mobile Agent plugin as starting point, so you’re going to enjoy some OOTB functionality for your fulfillers.
Not needed from a technical point of view, but I activated also Major Incident Management and Performance Analytics – Content Pack for Major Incident Management to give it a little bit of flavour.
Let’s Start!
Once you have installed ITSM Mobile Agent, you have access to a lot of OOTB functionality, basically all the information about the assigned task that the agent has, and on-call schedule.
But imagine you want that your people can see in a glance where we are. You can create specifics Applet List, but probably a good option would be to create a couple of reports (At this moment, the allowed type of graphics is Single Score, Timeline, and Performance Analytics Latest Score), something like:
- Incident opened
- Incident overdue
- Incident per category
- Active Major Incidents
So, this is the plan:
- Create the reports if needed
- Add them to an Applet Launcher
- Add a navigation from My Work
- Have fun!
Create the Reports
Fortunately, we have some of them created OOTB:
- Open Incidents (Single Score)
- Overdue Incident (Single Score)
- Active Major Incidents (Latest Score)
I only had to create one Time Series that I named “Open Incidents per Category”, so I filter incidents on state New, In progress or On Hold, grouped by category and trended by created.

Add to an Applet Launcher
To see anything that you create on Agent Mobile, you must have an Applet Launcher where you place your development.
So yes, first you need to go to the chart preview list:

And create one per each report or PA that you want to show:

I’m going to leave, by now, Jump to Screen empty. I have to repeat the process for each report that I want to show.
Now we can focus on the applet launcher. For this example, I’m going to create a new one called Incident Dashboard on the ITSM Mobile Agent Project:

You can do this on Mobile Studio or in classic view, but I prefer Mobile Studio.


Once you introduce the name, you have to choose for our case Generic, and we are going to create two sections:
- Incidents, with all the Single Score reports
- Section Type: Single Score
- Orientation: Vertical
- Selected Applets: Open Incidents, Overdue Incidents, Active Major Incidents
- Incidents per Category, with the Timeline
- Section Type: Report
- Orientation: Vertical
- Selected Applets: Open Incident per Category


Now we have the applets, and we have the applet launcher, but what is next? We need to be able to see our Applet Launcher on the Agent Mobile application, commonly we add a new tab or a navigation, which I think makes sense in this case.

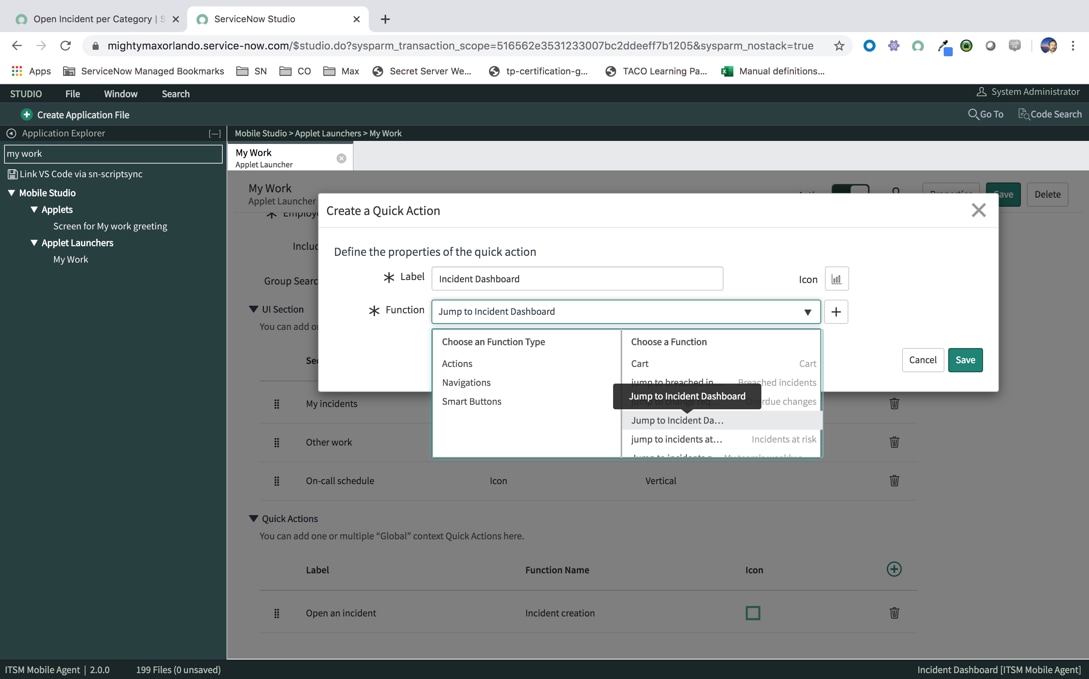
Let’s create a new one called Jump to Incident Dashboard:
- Type: Applet Launcher
- Context: Global
- Destination: Incident Dashboard

And add as a quick action to My Work applet launcher:


Have fun!
When you log to ITSM Mobile Agent, after refreshing the screen, you have now three dots close to your name, this is because you have now more than one quick action. Tab over the three points and select Incident Dashboard:

All done! So now you have a perfect dashboard on you mobile…
Umm… well, not so perfect, you need to add the action to the applet in order to see the data, but it will be on the second part of the article.
- 18,902 Views