- Post History
- Subscribe to RSS Feed
- Mark as New
- Mark as Read
- Bookmark
- Subscribe
- Printer Friendly Page
- Report Inappropriate Content
on 07-24-2022 02:41 AM
In last article we saw how we can create our own transform type data source to execute server side logics and how we can access the output.
This article is very similar but in this we'll trigger a REST API call to get the data from external system and use it in UI builder page.
The public API that we are using here is the Excuser API. Check out the endpoints it is using to get familiar. We are going to fetch some of the great excuses using this API and present them on our custom UI builder page.
Transform data source to trigger REST calls to external system and return response.
If any of the below steps are unclear, please check out the previous article here.
For this example, I've created a sample page on UI builder using "heading" , "rich text" , "text area" and "button" components.

1. Create a new outbound REST message and method. I am using "https://excuser.herokuapp.com/v1/excuse/office" endpoint for our test page. It is an open API and doesn't require any authentication.

2. Create a new transform type data source.

Yes, just that simple. You can even call in your script include and do further processing there and pass on the results to your data broker.
3. Add the transform data source to your page.
Click on data sources icon > Add+ > Find your data source > Add. You can test it out with static values. Here I am using client state parameter to pass the category dynamically.

4. Now, let's change the category value from the button click. The button click event can be used to update the client state parameter value.


Repeat same for other buttons.
5. Now, we'll create a client script to use the output of our data source and store it in another client state parameter.
function handler({api, event, helpers, imports}) {
    let excuseResponse = JSON.parse(api.data.example_rest_transform_source_1.output);

    api.setState('newExcuse', excuseResponse[0].excuse);  //"newExcuse" is client state parameter name here.
}
6. Bind "newExcuse" to the value of "text area" component.

That's it. You can use the output in whatever way you like.
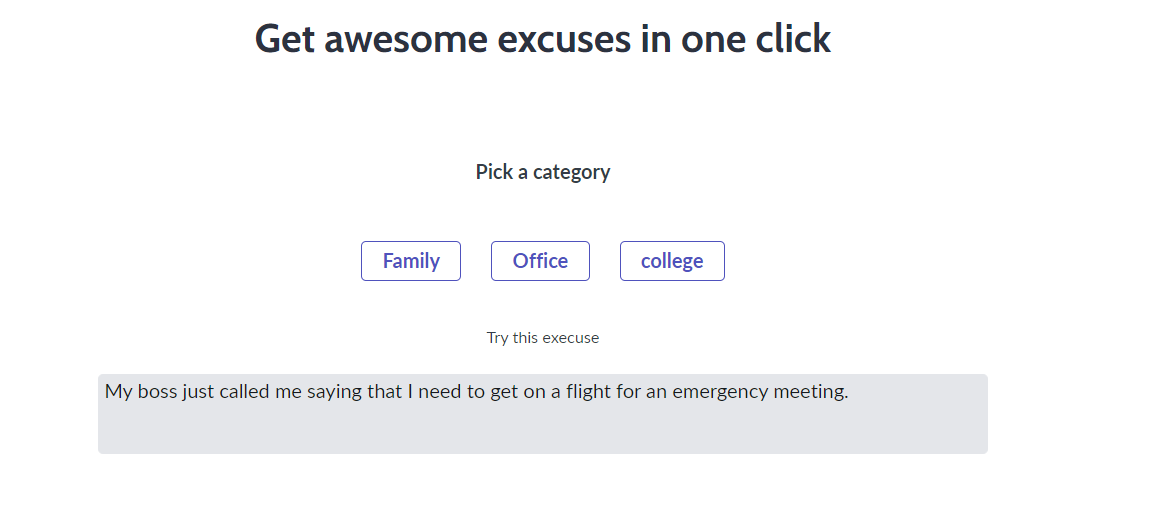
Here are the results. I've attached the XML in case you want to load on your instance and try it out.

- 4,087 Views