- Post History
- Subscribe to RSS Feed
- Mark as New
- Mark as Read
- Bookmark
- Subscribe
- Printer Friendly Page
- Report Inappropriate Content
on 06-18-2022 10:01 AM
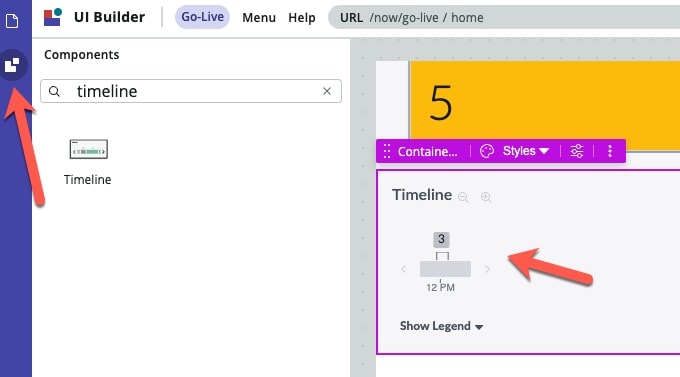
In the UI builder, one has now access to various components that can easily be put in the workspace. One of them is the "timeline" component. Its a great way to display data in timeline with hover over information.

It comes with static demo data but if you wish to display data from a table, follow these steps.
First of all thanks to
1. Open your UI Builder and add timeline component on one of your containers

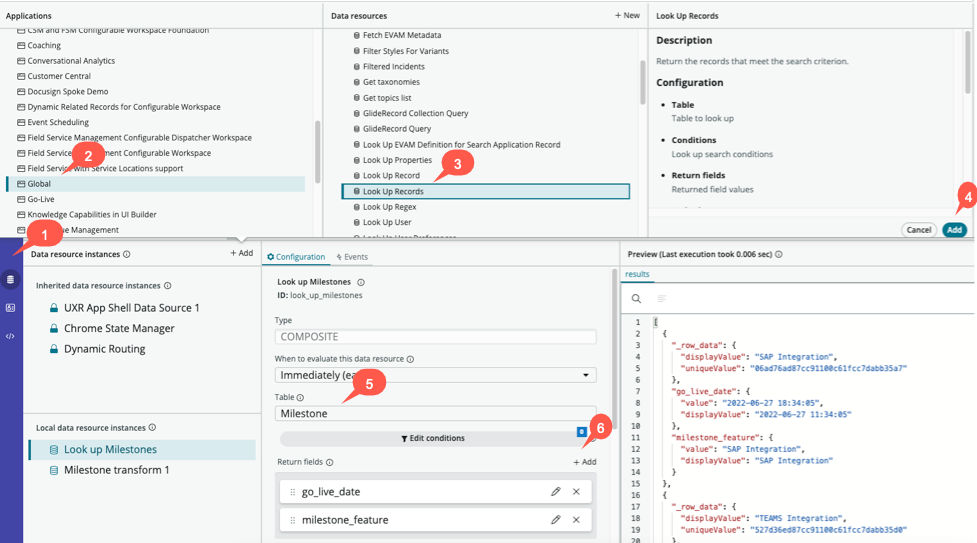
2. Click on Components -> Data resource instances (add) -> Global -> Look up records -> Add. Then pick your table and columns. You should see the results on the results pane

3. Now create the Transform to convert the results to the format that Timeline component requires. Click on Components -> Data resource instances (add) -> New data resource -> Transform. It will open a new tab or window

4. Give it a name. For the "Properties" :
[
{
  "name": "data",
  "label": "data",
  "description": "Planned Task GraphQL Data Result",
  "readOnly": false,
  "fieldType": "json",
  "valueType": "object",
  "mandatory": true
}
]
and the following for "Script"
function transform(input){
	var returnArray = [];
	var records = input.data;

	for (var i in records){
		var myObj = {};

		myObj.name = "Milestones";
		myObj.icon = "starFill";
		myObj.label = records[i].milestone_feature.displayValue;

		var events = [];
		var eventsArray = {};

		eventsArray.description = records[i].milestone_feature.displayValue;

		var startUTC = new GlideDateTime(records[i].go_live_date.value);
		eventsArray.timestamp = startUTC.getNumericValue();

		events.push(eventsArray);
		myObj.events = events;

		returnArray.push(myObj);
	}

	return returnArray;
}
5. Save and go back to your UI builder. Click on New -> (your application) -> pick the transform you just created. For example:

If you see an ACL error. Follow these steps as instructed in the video to fix the ACL error
Replace the "data" to pick from the look up step created above. (see "5" in the image above)
Finally change the "Event data" in the Timeline component as shown below

Fix the Start date and end date ranges as you choose to. Save and preview your workspace to see the data
- 3,915 Views
- Mark as Read
- Mark as New
- Bookmark
- Permalink
- Report Inappropriate Content
this is great, is there a way to have the event titles and dates display without a hover over? to always display the event name and date?