


Jake Gillespie
Giga Guru
Options
- Subscribe to RSS Feed
- Mark as New
- Mark as Read
- Bookmark
- Subscribe
- Printer Friendly Page
- Report Inappropriate Content
04-12-2017
07:53 PM
GlideAjax is one of the most versatile scripting tools available to ServiceNow Administrators and Developers. It provides a way for the Client to silently communicate with the Server, and in doing so either update or retrieve information from the Server, that would otherwise require the form to be saved or reloaded. In my last post, Client-Server Communication, we discussed a basic example of how to use GlideAjax to retrieve a single String value rather than retrieving the entire GlideRecord object. In this post we'll build on that example by retrieving multiple data elements and returning them to the Client as a JavaScript Object.
First of all, there are several ways to retrieve multiple data elements via GlideAjax. The ServiceNow Wiki provides an example using the "set" and "get" method. That is, we "set" the attributes (name-value pairs) to be returned from the Server in our Script Include, and then "get" these attribute values one-by-one in our Client Script. For example:
As you can see from the above scripts, the Script Include (first image) uses the setAttribute() method to add the values to the Server response, while the Client Script uses the getAttribute() method to retrieve the values from the Server response and use them as local JavaScript variables. This method can be messy and difficult to maintain, particularly when many attributes are added. Another limitation is that the values being transferred are all forced to data type of String. This is because the values are actually transferred via an XML structure as String (or text) values. That means that after retrieving the values in the Client Script, any non-String values would then need to be converted back to their original data types (e.g to Numbers or Booleans). This also presents an issue for transferring JavaScript Objects, which can contain multi-level relationships between their own data elements. Fortunately there is a better way, and that way is known as JSON (JavaScript Object Notation). Before we dive into JSON and how it is used, let's define a new example:
Display a message on the Incident form indicating if the selected Configuration Item is currently referenced in an Active Change Request.
As with the example in my previous post, we'll need an onChange Client Script to trigger the GlideAjax communication with the Server whenever the Configuration Item field value changes, and then process the Server response once it is received. But first, let's review the GlideAjax Script Include, and how the source data is first retrieved from a GlideRecord, and then processed into a custom JavaScript Object before being returned to the Client.
Lets step through the above function getActiveChangeRecord(). First of all, we need the sys_id of the selected Configuration Item record, so this is retrieved from the Client on line 5. A query is then executed using the GlideRecord Class (line 9-12). This is known as an encoded query, and the filter conditions set on line 10 are:
- Active = true
- Configuration Item IS NOT Empty
- Configuration Item IS [the CI selected on the Incident form]
From here, we check if a matching Change Request record was found (line 13). If a record was found, we add several elements to our custom JavaScript Object called resultObject. These elements (or members) are named: number, short_description and url. The first two elements (lines 15-16) refer directly to the table fields of the same name from the Change Request, while the third element (line 17) url refers to the URL of the record in question. Why do we want the URL I hear you ask? Well all will be revealed when we review the Client Script. Let's look at the final step, converting our JavaScript Object to the JSON format (line 20). JSON is essentially a structured text format, which can store a JavaScript Object as a (plain text) String value. This is important because the result that our Script Include is sending back to the Client Script can only be a String value. Once converted to JSON, our JavaScript Object resultObject would be stored as the following text value:
Now let's review the onChange Client Script, and in particular how the JSON value is converted back to a JavaScript Object for client side processing.
The first local function defined in our onChange Client Script is called getActiveChangeRecord() and it essentially calls the Server and passes the following two attributes:
- getActiveChangeRecord — this is the name of the Script Include function we're calling
- [ciSysId] — this is the sys_id value of the Configuration Item record we have selected on our Incident form
The second function is a CallBack, which is triggered when the Client receives the Server response. After checking that a response was received correctly (line 16), the code then converts the JSON format back to a JavaScript Object called taskRec (line17). The converted value is then checked to ensure it isn't a null value (line 18), before proceeding to retrieve the 3 data elements: number, short_description and url, and use these values to build a HTML hyperlink (line 21). In this case our data elements were all String data types, but it should be noted that using the JSON method will retain the original data types from the Server object (e.g. a true/false Boolean value would not be converted to a String as it would be using the setAttribute() / getAttribute() method described earlier). This HTML tag is then displayed on the Incident form using the g_form API method called addInfoMessage(). Let's take a look at the final result:
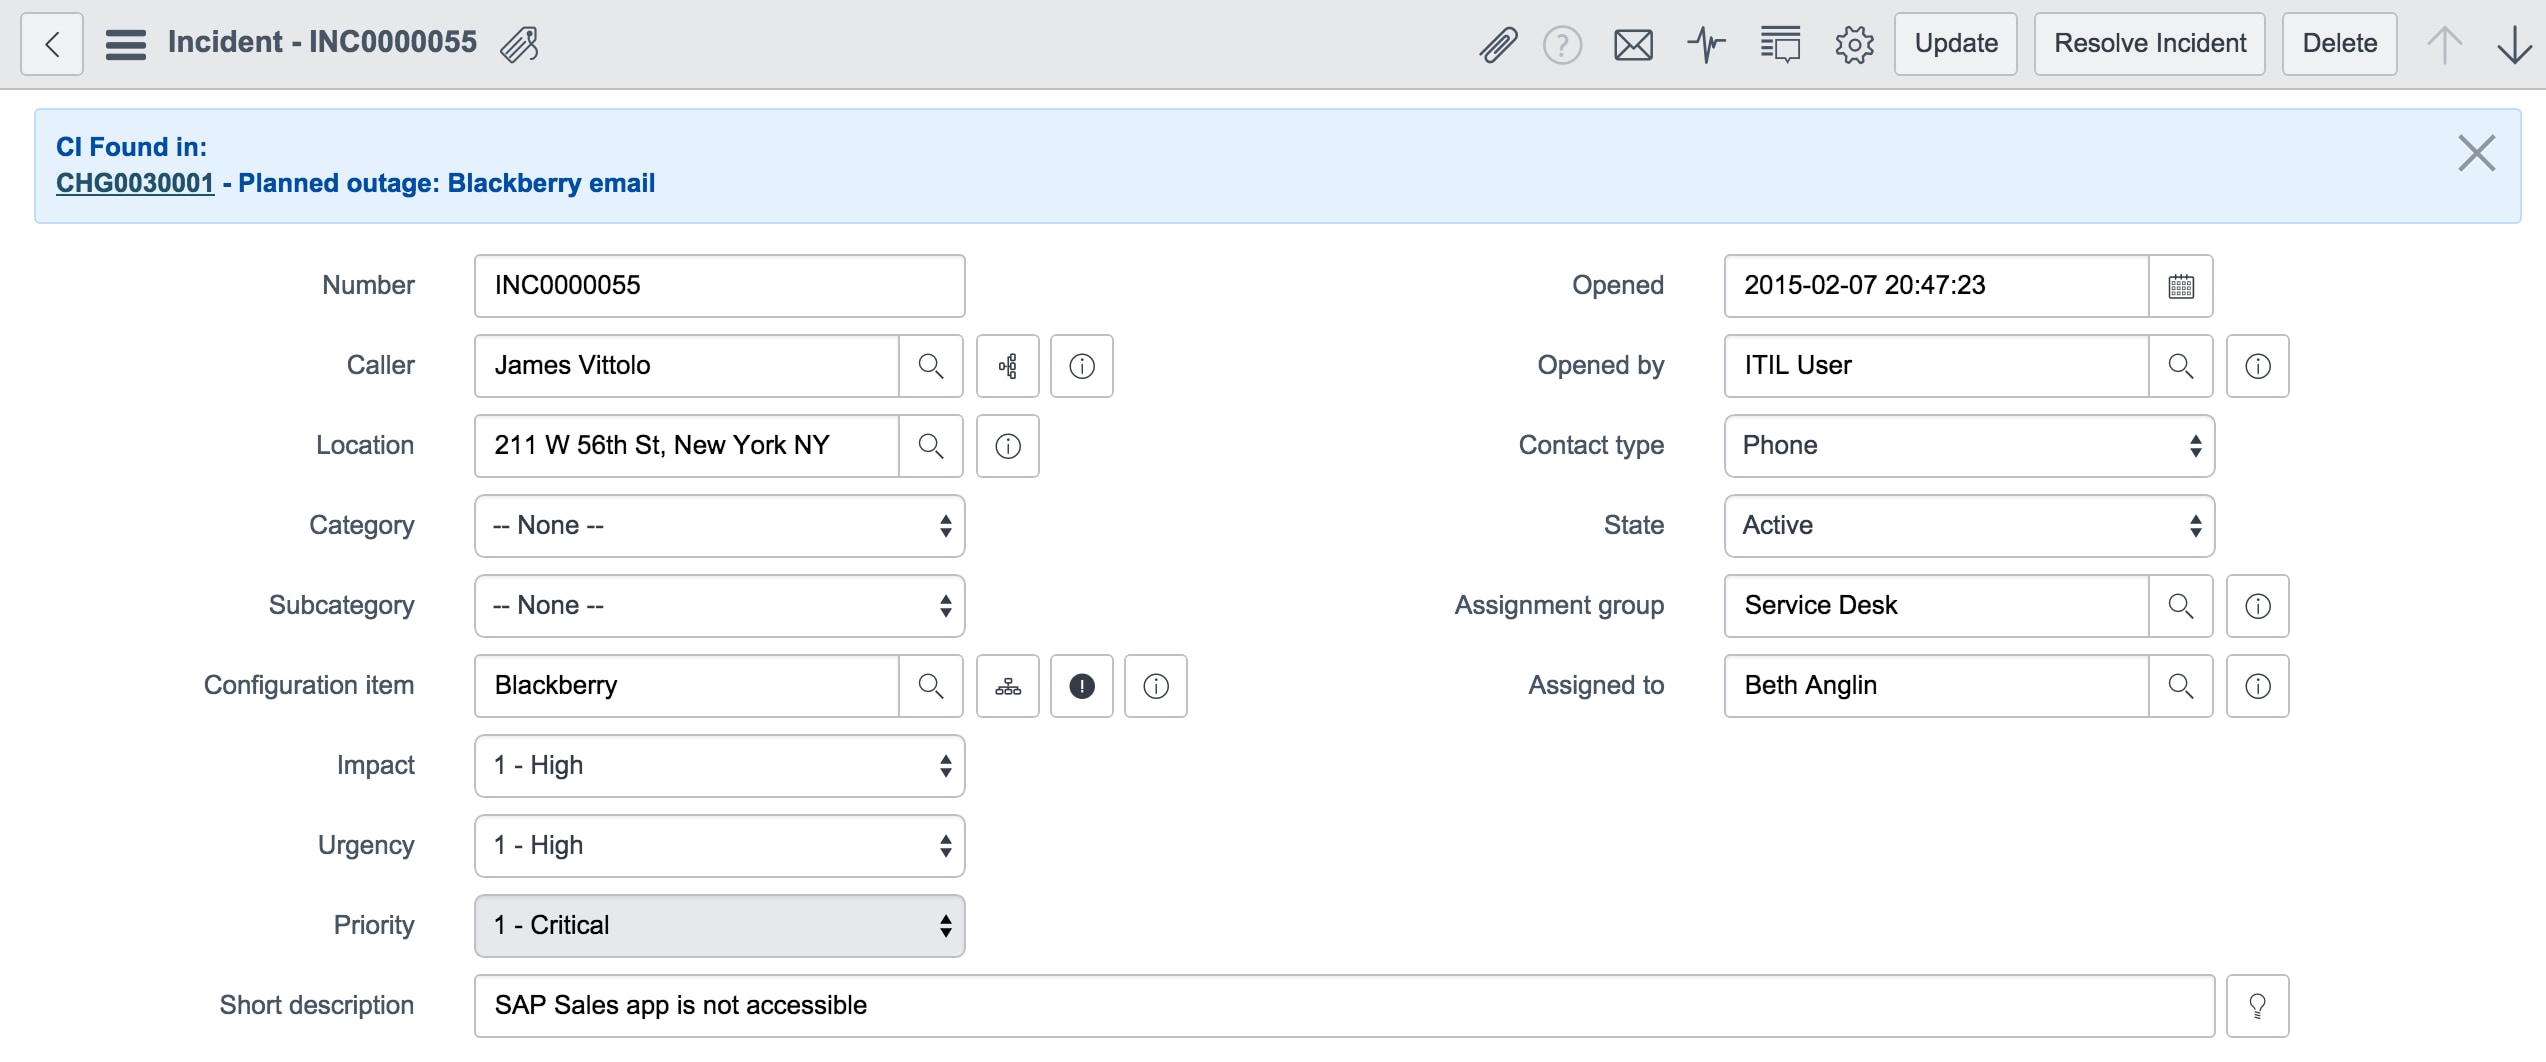
As you can see in our example above, the Configuration Item for Blackberry is currently referenced in an active Change Request with Short Description "Planned Outage Blackberry email". This would likely indicate to the Service Desk Agent that the issue is related to a planned outage. Because we retrieved the Change Request's URL, the user can open the record simply by clicking the Change Request number displayed in the Information message.
Well as you can see, the combination of GlideAjax and JSON makes transferring JavaScript Objects between the Server and Client very easy, not to mention incredibly useful. In our example we transferred a custom JavaScript Object with only 3 elements, however it's possible to convert an Array of Objects to JSON as well, meaning that the process defined above could cater for multiple JavaScript Objects being transferred via GlideAjax. To do this we would simply need to pass an Array variable to the JSON.encode() function instead of a JavaScript Object. Then, when the JSON value is converted back to it's native data type on the Client using the JSON.parse() function, the returned value will be a native JavaScript Array.
For further information on the topics covered in this article, please see the following pages:
- GlideAjax
- GlideRecord
- GlideForm
- Client Script Best Practices
- W3Schools: JavaScript Objects
- W3Schools: JSON Tutorial
NOTE: MY POSTINGS REFLECT MY OWN VIEWS AND DO NOT NECESSARILY REPRESENT THE VIEWS OF MY EMPLOYER.
- 6,933 Views
You must be a registered user to add a comment. If you've already registered, sign in. Otherwise, register and sign in.
