


Miguel Donayre

ServiceNow Employee
Options
- Subscribe to RSS Feed
- Mark as New
- Mark as Read
- Bookmark
- Subscribe
- Printer Friendly Page
- Report Inappropriate Content
04-05-2021
07:55 PM
With the push of digital transformation to automate more business processes and manually tasking, it's time we automate applying a Project template to a Newly created Project. Time and time again, I see Project Managers unfamiliar with ServiceNow make mistakes when applying a template to a project, which should be a simple task. I hear it's a "training" issue, or the PM didn't know what they were doing. In the end, they spend more time trying to fix the mistakes than focusing on the Project at hand. The reality is, applying a template should be automated. LET'S FIX THAT.
This proof of concept will show you the art of the possible using Flow Designer to apply a Project template to a Newly created Project.
The first thing we need to do is identify what Project template will be applied. For this walkthrough, I added a reference field to the Project table and called it a Project template. I added that new field to the "New" view. This is the view used when creating a new Project.
You can use whatever method you want to capture the Project template to use as long as you can pass the Project template sys_id.
Once that is done, open the Flow Designer.
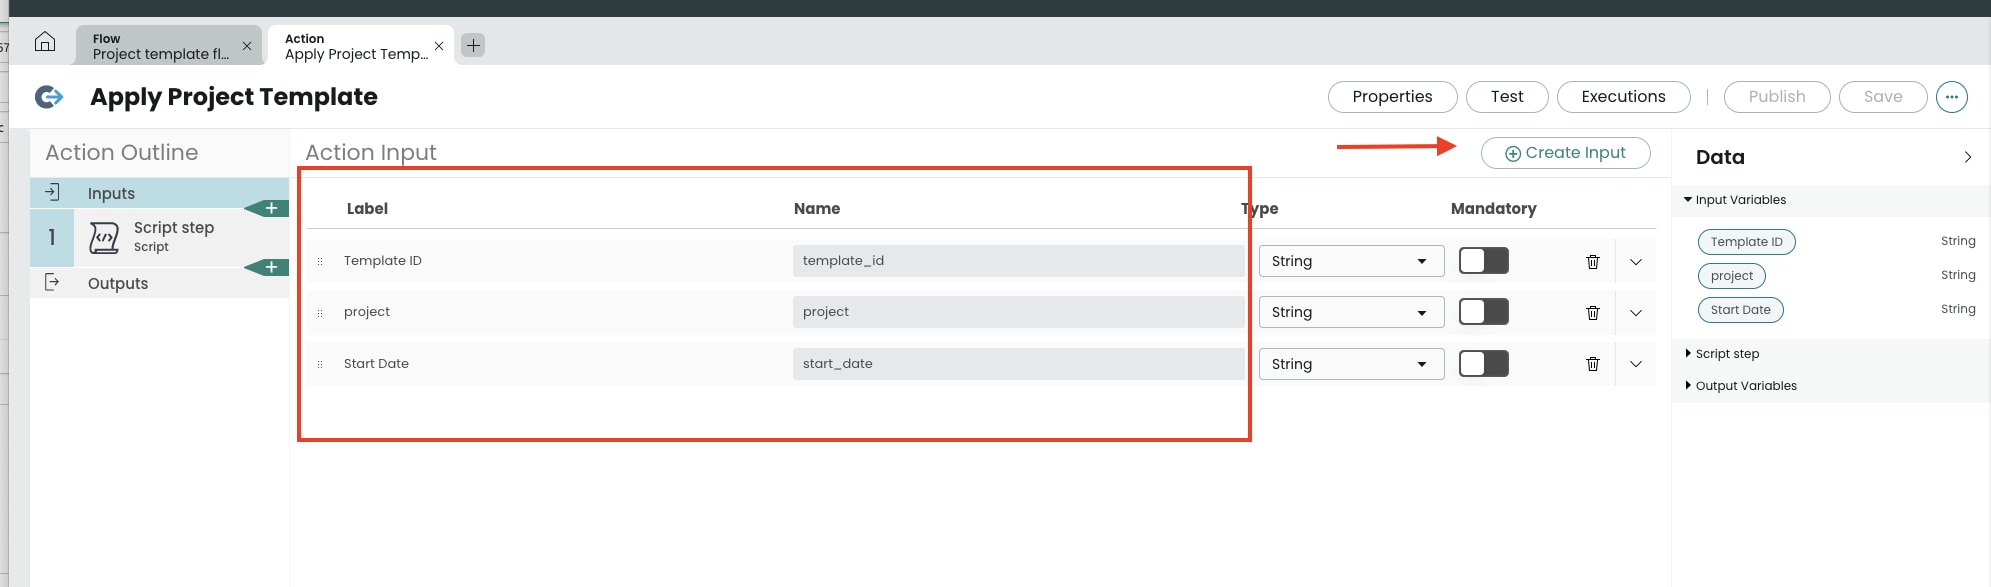
We have to create a new Action. This Action will be applying the Project template for us. The class we will be using is called "GlideProjectTemplate," with the "apply" function. It needs 3 variables/values to work - template_id, project_id, and start_date (in that order).
In the "Input" section, you will have to create 3 new inputs
Template ID, Project, and Project State Date.
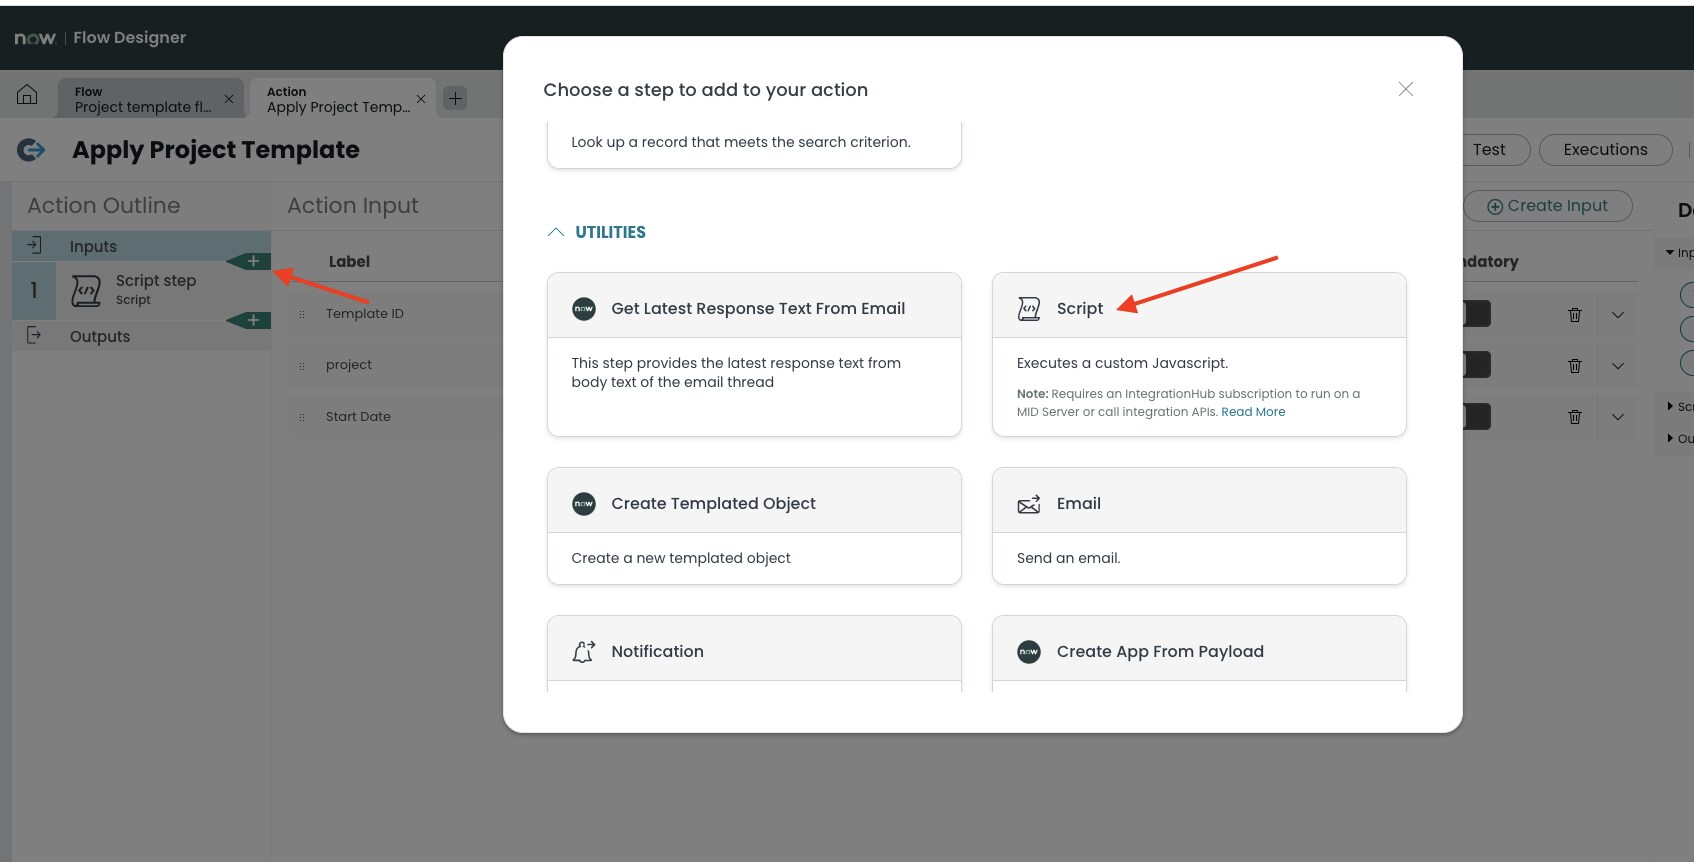
Once the inputs are entered, you will add a "Script step" Click on the green plus icon under inputs, and it will open a popup. In the Utilities section, select "Script."
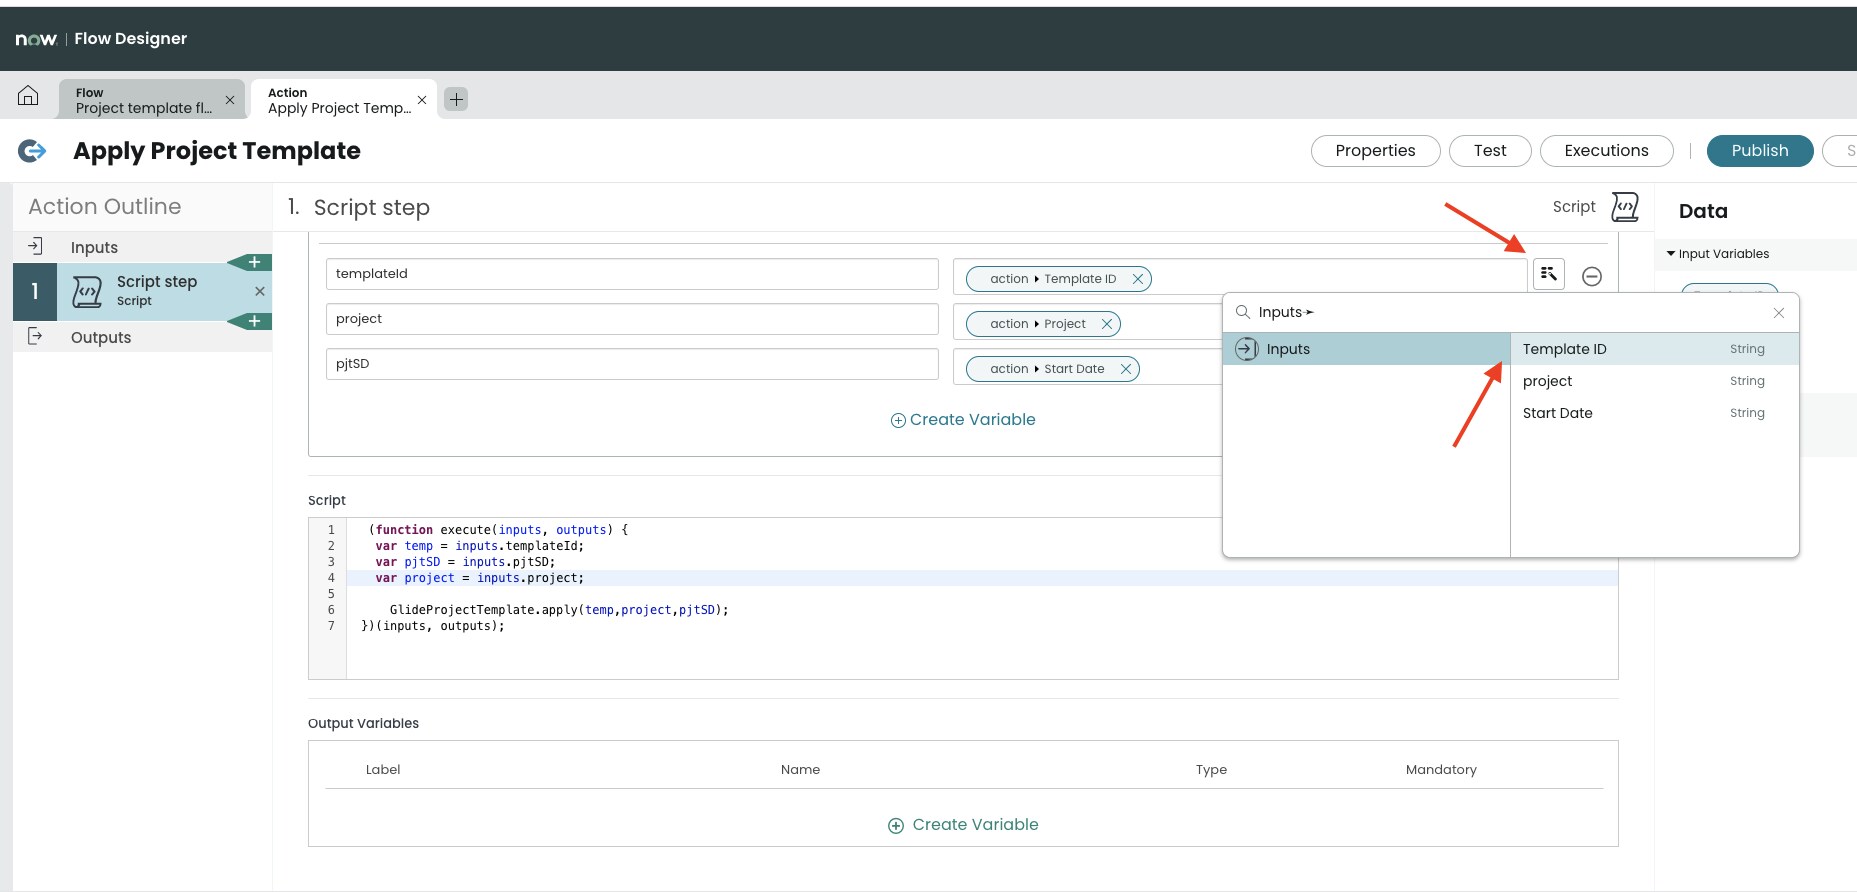
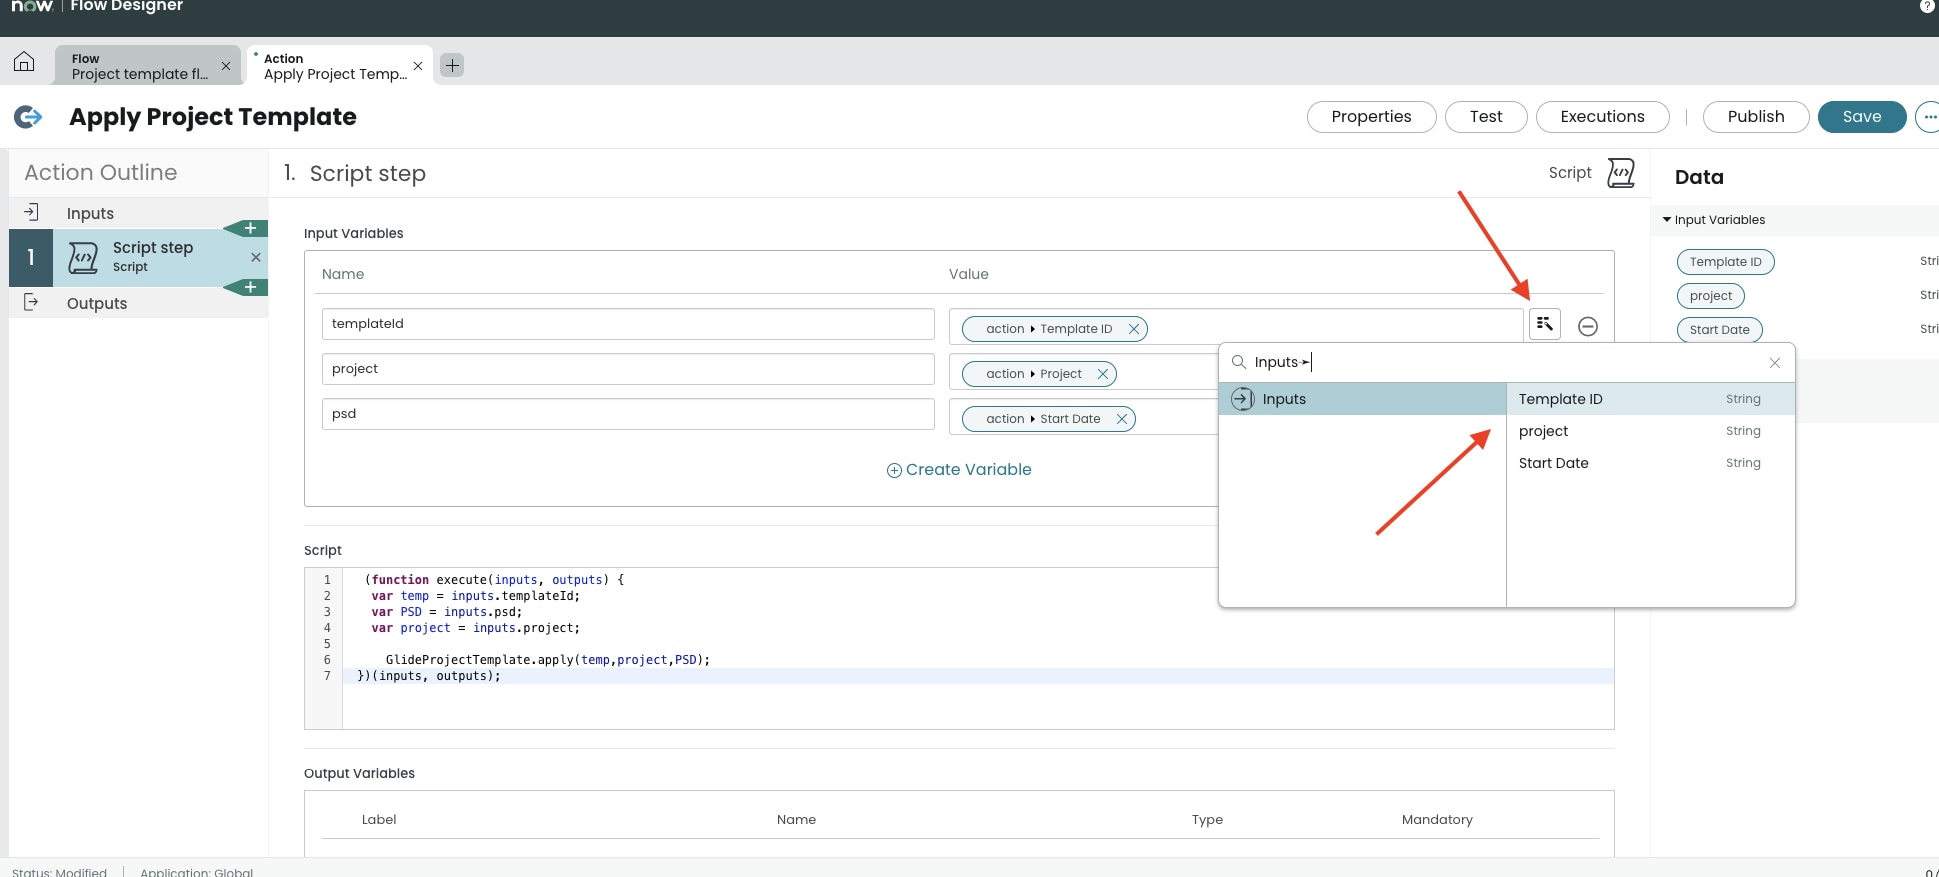
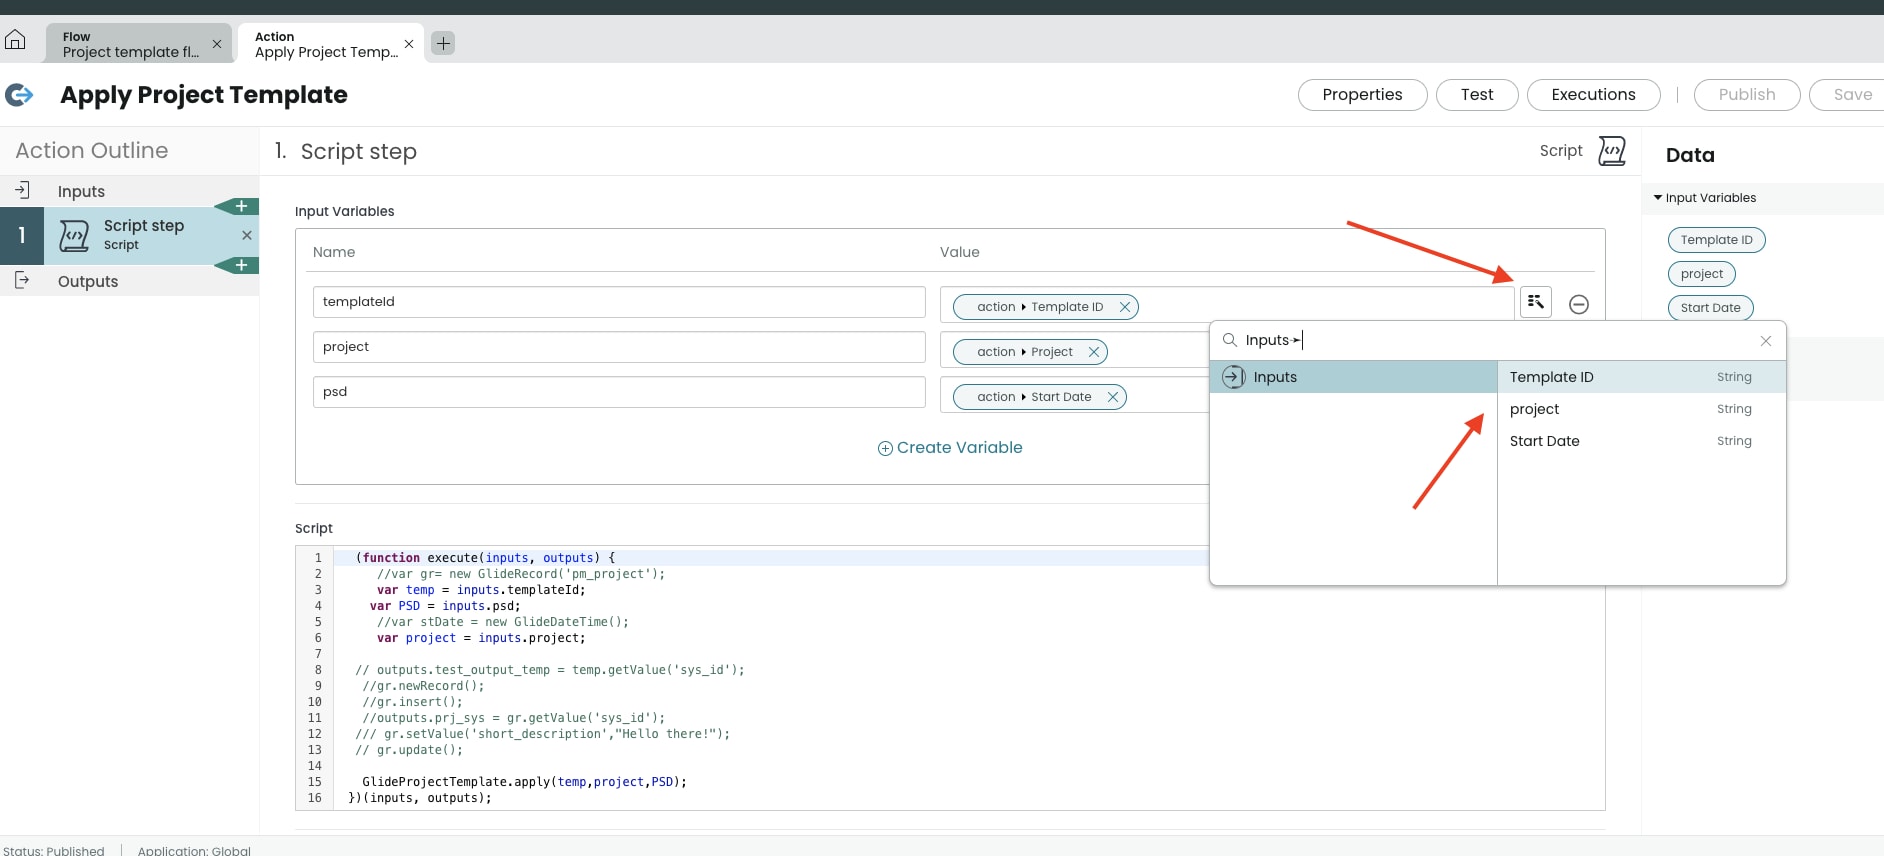
Once that is done, it will open the Script Step form to configure. The first thing that you will need to do is add input variables again. Click on the "magic wand" icon to map the value you declared in the Input steps above. These are the variables you will reference in the Script section.
In the script section, copy and paste this code. The script declares the values you need to pass to the "GlideProjectTemplate.apply" function: the template sys_id, project sys_id, and the project start date, and apply it to the Project. The variables are coming from the input field that will get feed from the Flow Designer.
 (function execute(inputs, outputs) {
  var temp = inputs.templateId;
  var pjtSD = inputs.pjtSD;
  var project = inputs.project;

	GlideProjectTemplate.apply(temp,project,pjtSD);
})(inputs, outputs);
Test for errors, save and publish.
Next, we will create a new Flow.
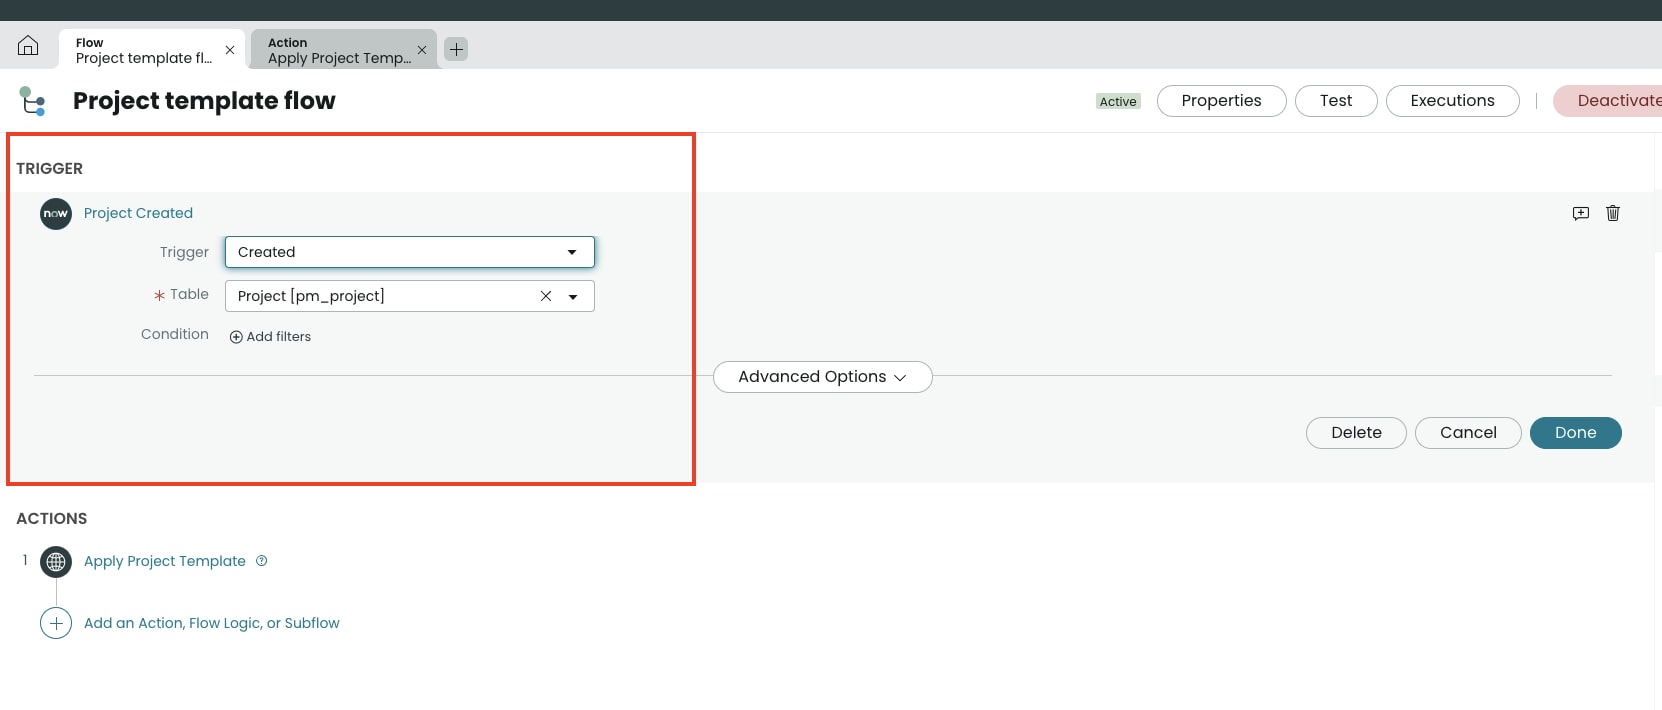
For the trigger, I used Created on the Project table (pm_project). I kept it simple. This will create the data pills you will need for the action.
You can use any trigger as long as you can pass these values to the action - template sys_id, project sys_id, and the project start date.
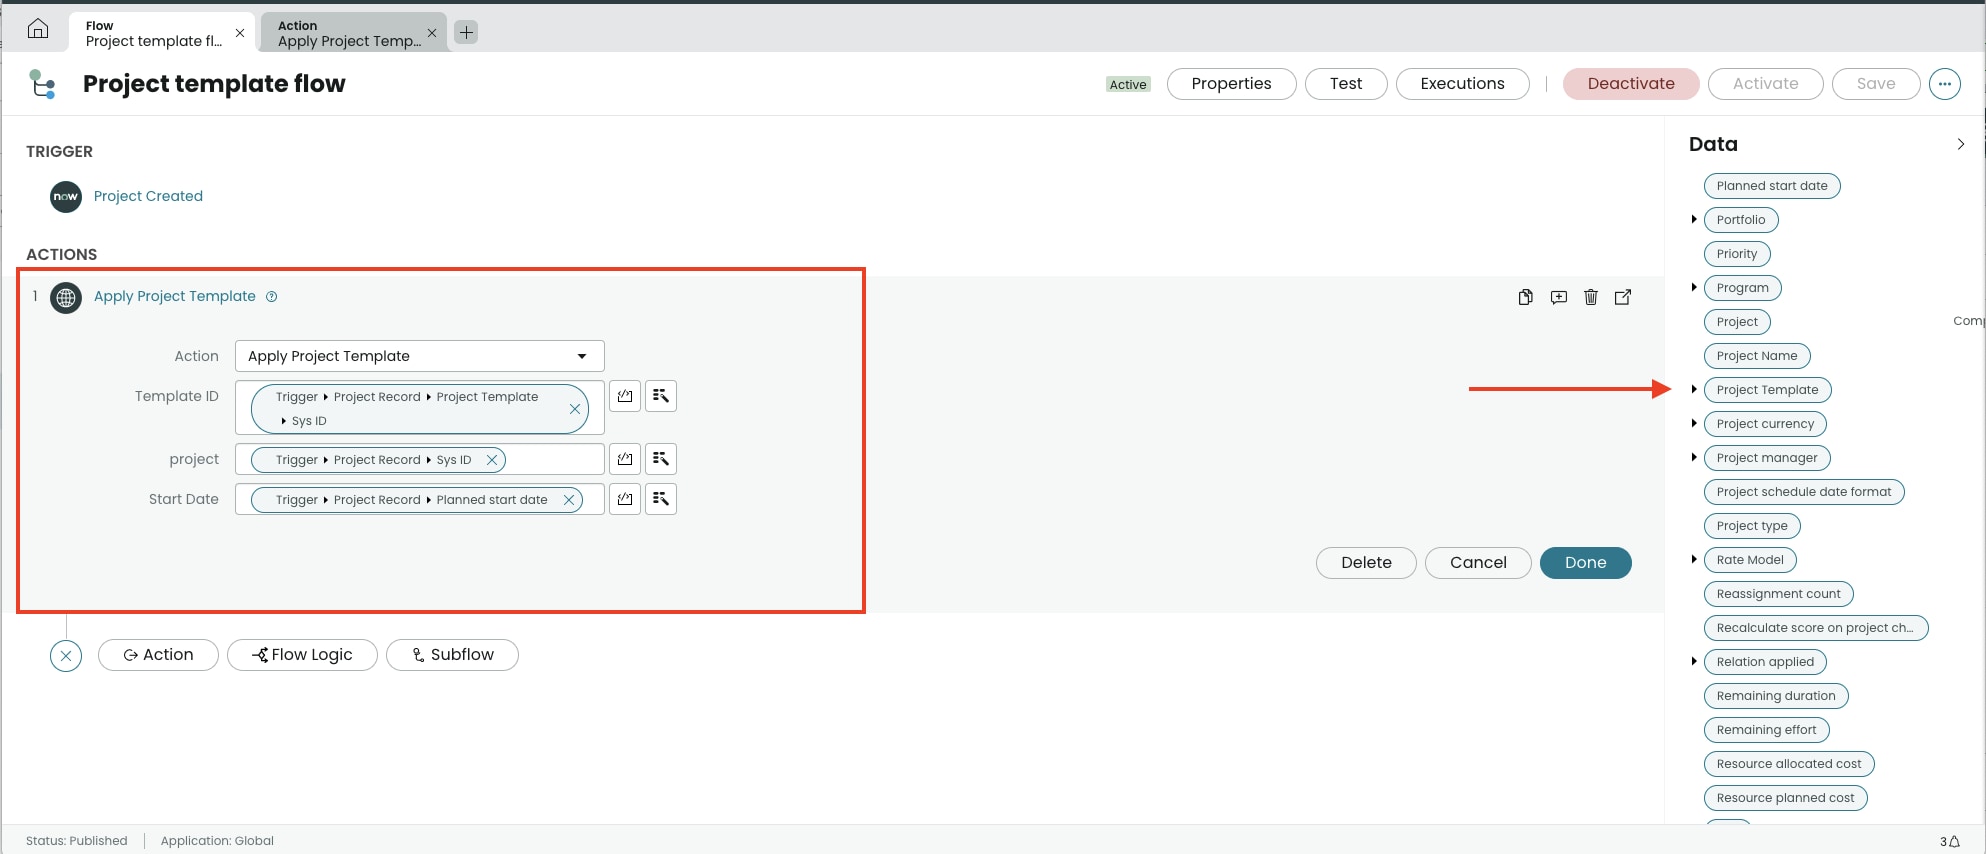
Once that is done, you should now see data pills on the right side of the window. Click on the "Add an Action, Flow Logic, or Subflow link," new buttons should now appear. Click on the Action button. Search for the action you just created. Click on it.
You should now see the variables we build in the previous steps above, Template ID, Project, and Start date. You will need to add the correct data pills to the fields.
For Project add the Trigger-Record Created -->Project Record--> sys_id data pill
For Template ID, add the Trigger-Record Created -->Project Record--> Project Template-->sys_id (this is from the field I added in the beginning, this is not OOTB)
for the Start date, add the Trigger-Record Created -->Project Record--> Planned Start Date
Make sure the correct values are mapped. You might have to click on the arrow icon next to the reference field to see additional fields. Save and test.
It should now auto-apply a Project template to a Project as long as Project has a Project Template value on the Project record. Once it is working, Active/Publish it.
Congratulations, you have now created an automated process/workflow to apply a Project Template to a New Project!!
This is just the tip of the iceberg. You can apply this for creating a Project from a Catalog item or a Change request with a template applied using Flow Designer. The possibilities are endless!
Making work, work better for people!
Couple of things I want to mention. The "GlideProjectTemplate" is a hidden class, and there is no documentation out there.
I have NOT tested this out on a scoped application, and it may not work. Once I test this out, I will update let you know if it works.
Labels:
- 15,793 Views
9 Comments
You must be a registered user to add a comment. If you've already registered, sign in. Otherwise, register and sign in.