- Post History
- Subscribe to RSS Feed
- Mark as New
- Mark as Read
- Bookmark
- Subscribe
- Printer Friendly Page
- Report Inappropriate Content
on 08-11-2021 04:07 PM
Summary
This article details how to make a page public upon creation and how to make an already existing page public. The bottom section of the page, adding the ACL, is required to make the page public. Make sure not to skip those steps.
| Creating a page and making it public | |
|  |
|
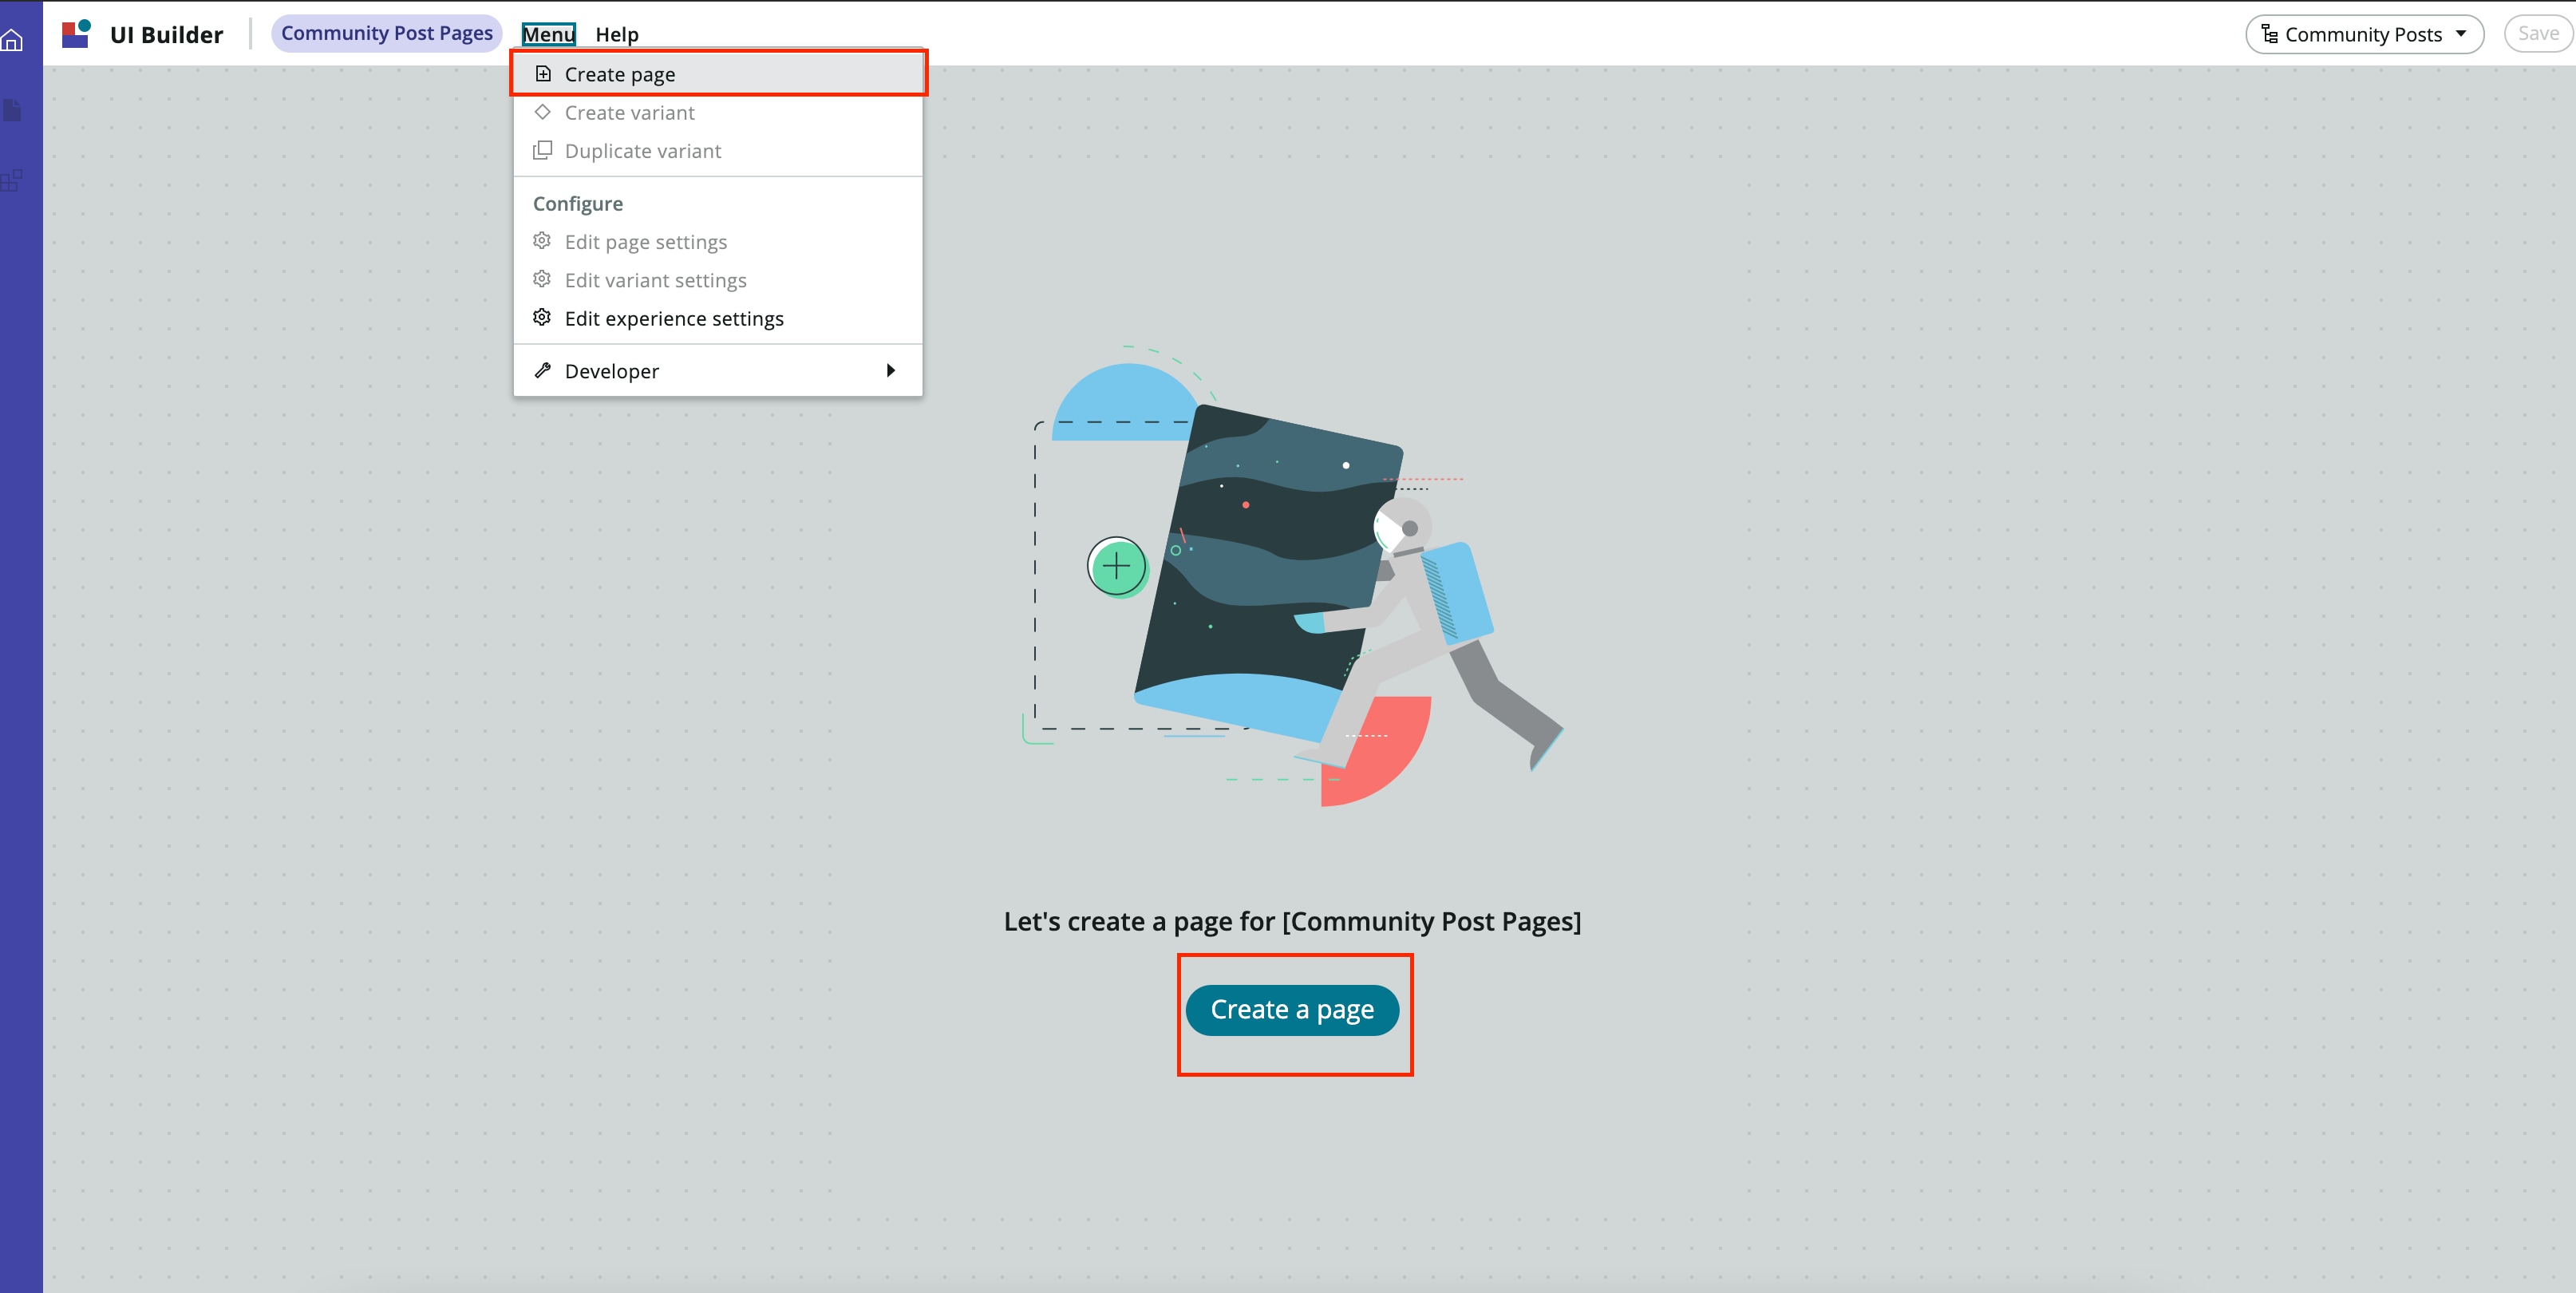
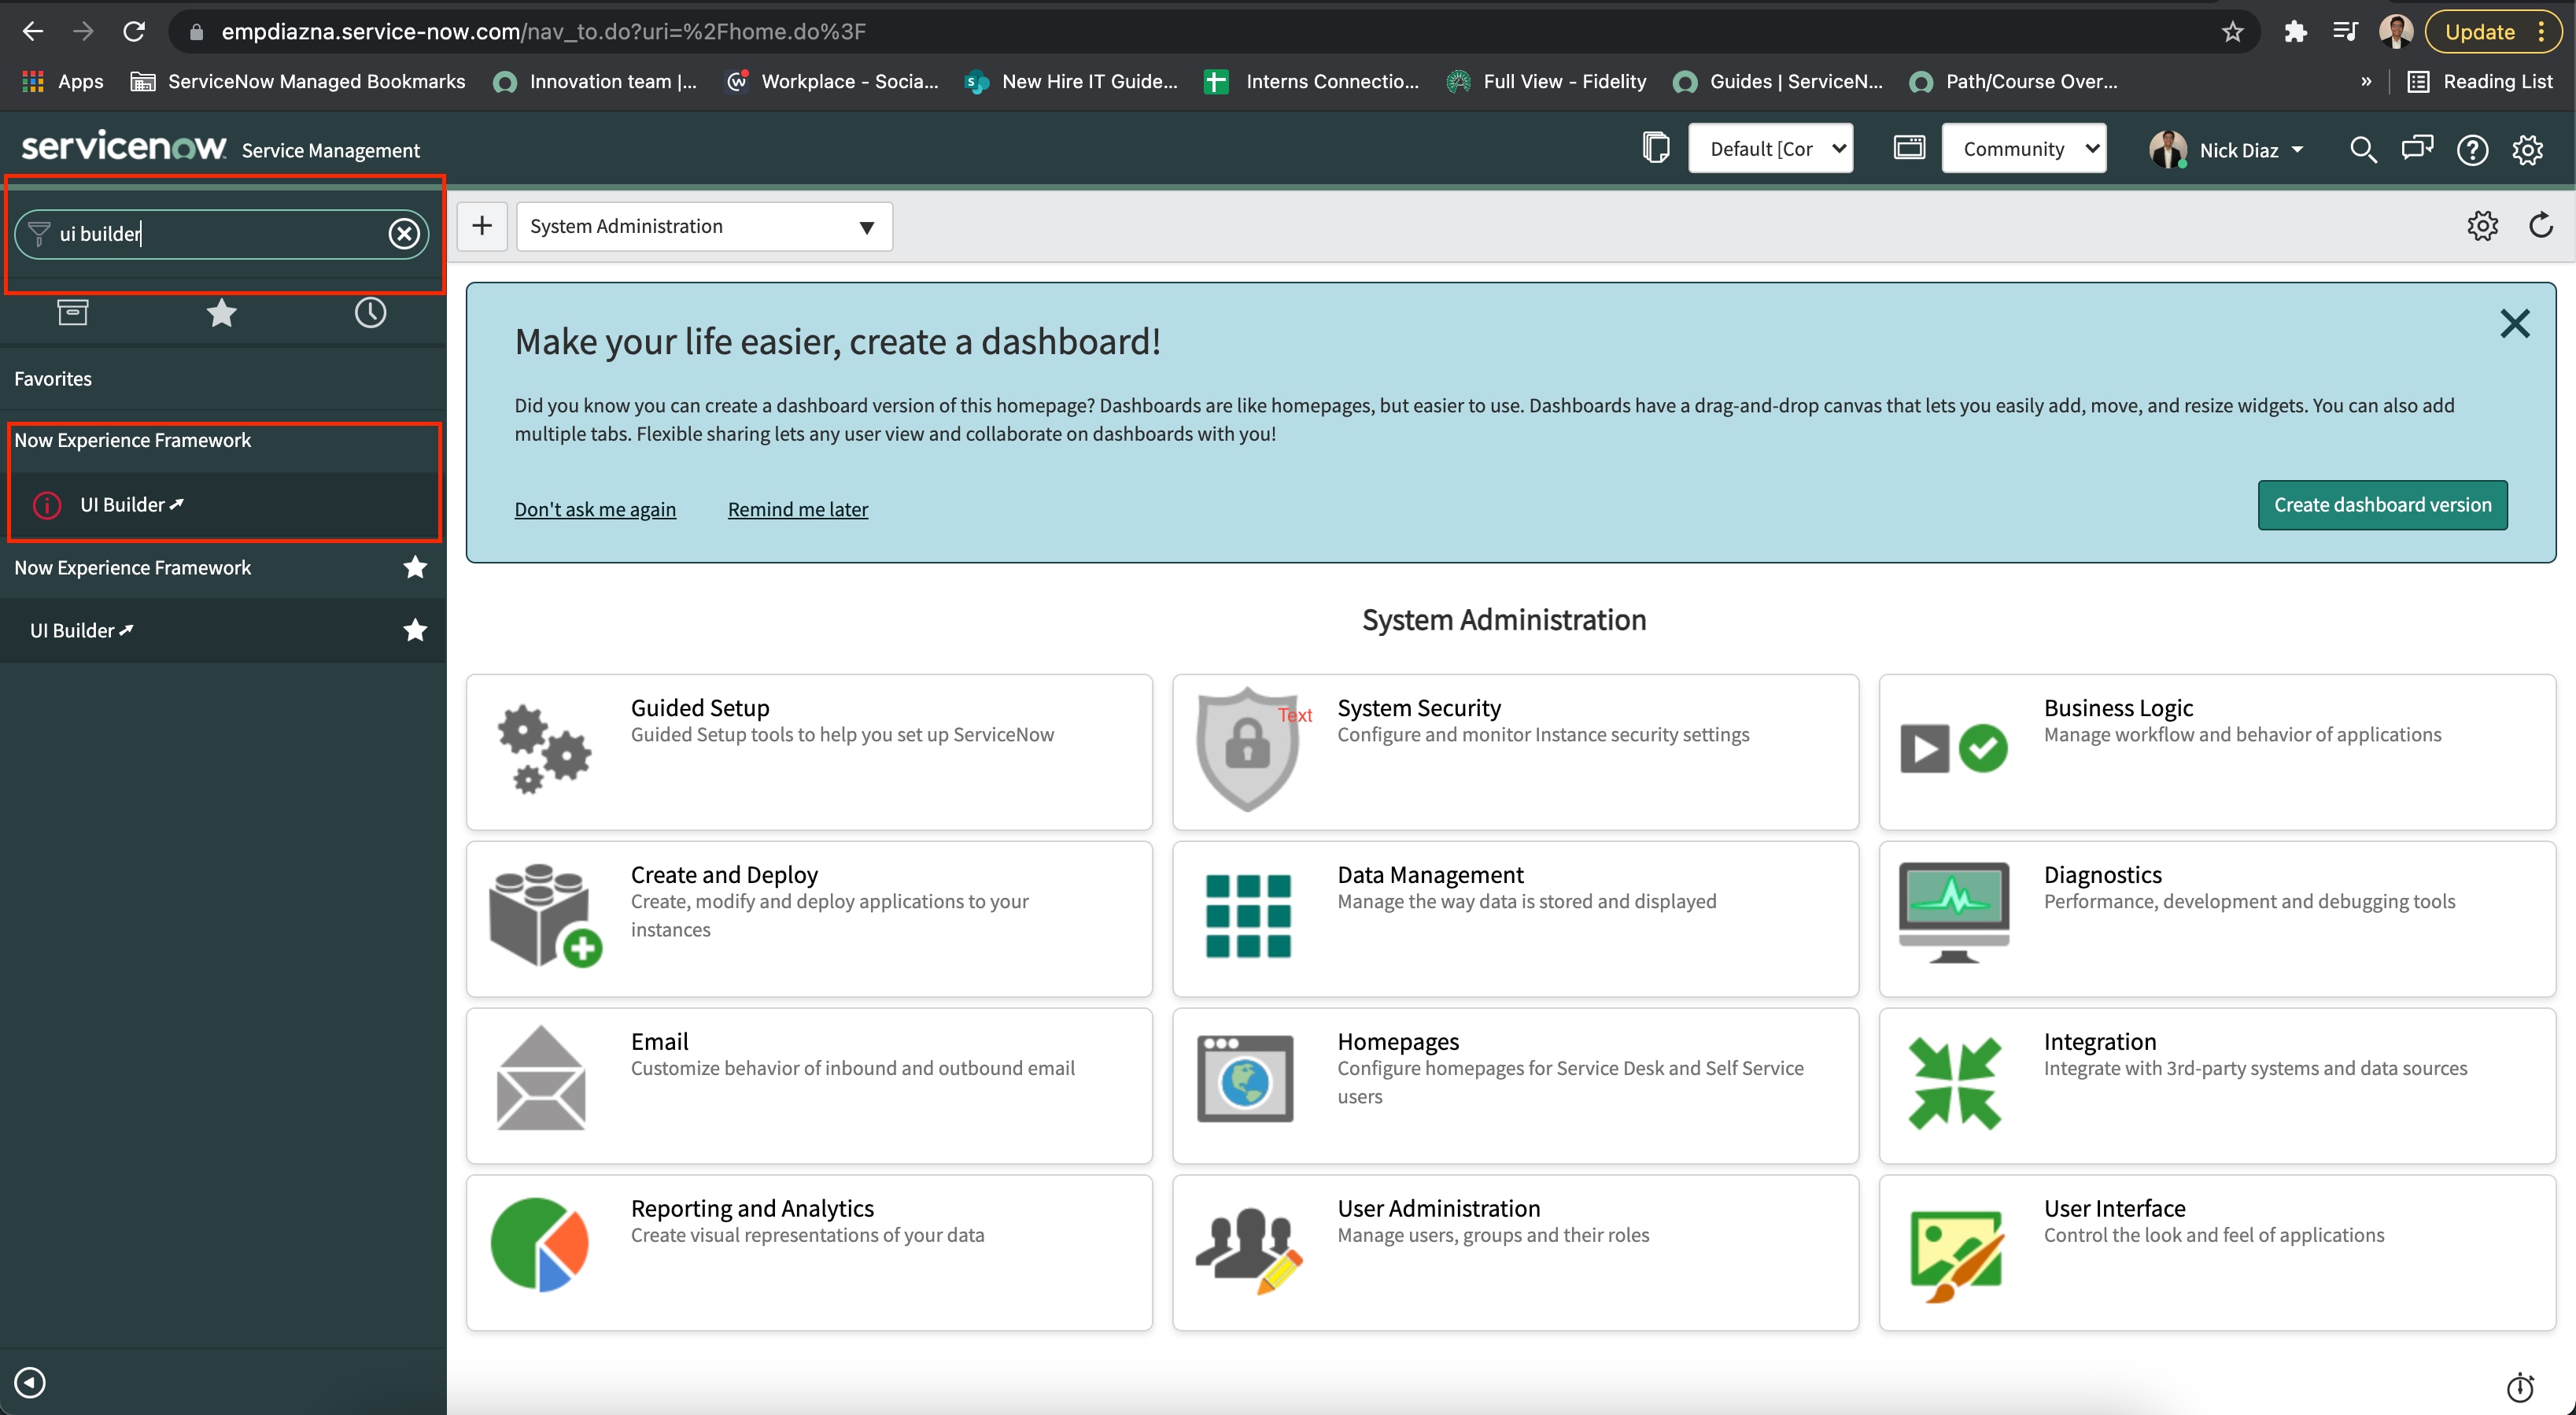
3. Select an experience you wish to create a page in 4. Go to “Menu” and click “Create Page” or click “Create a page” in the center screen |  |
|
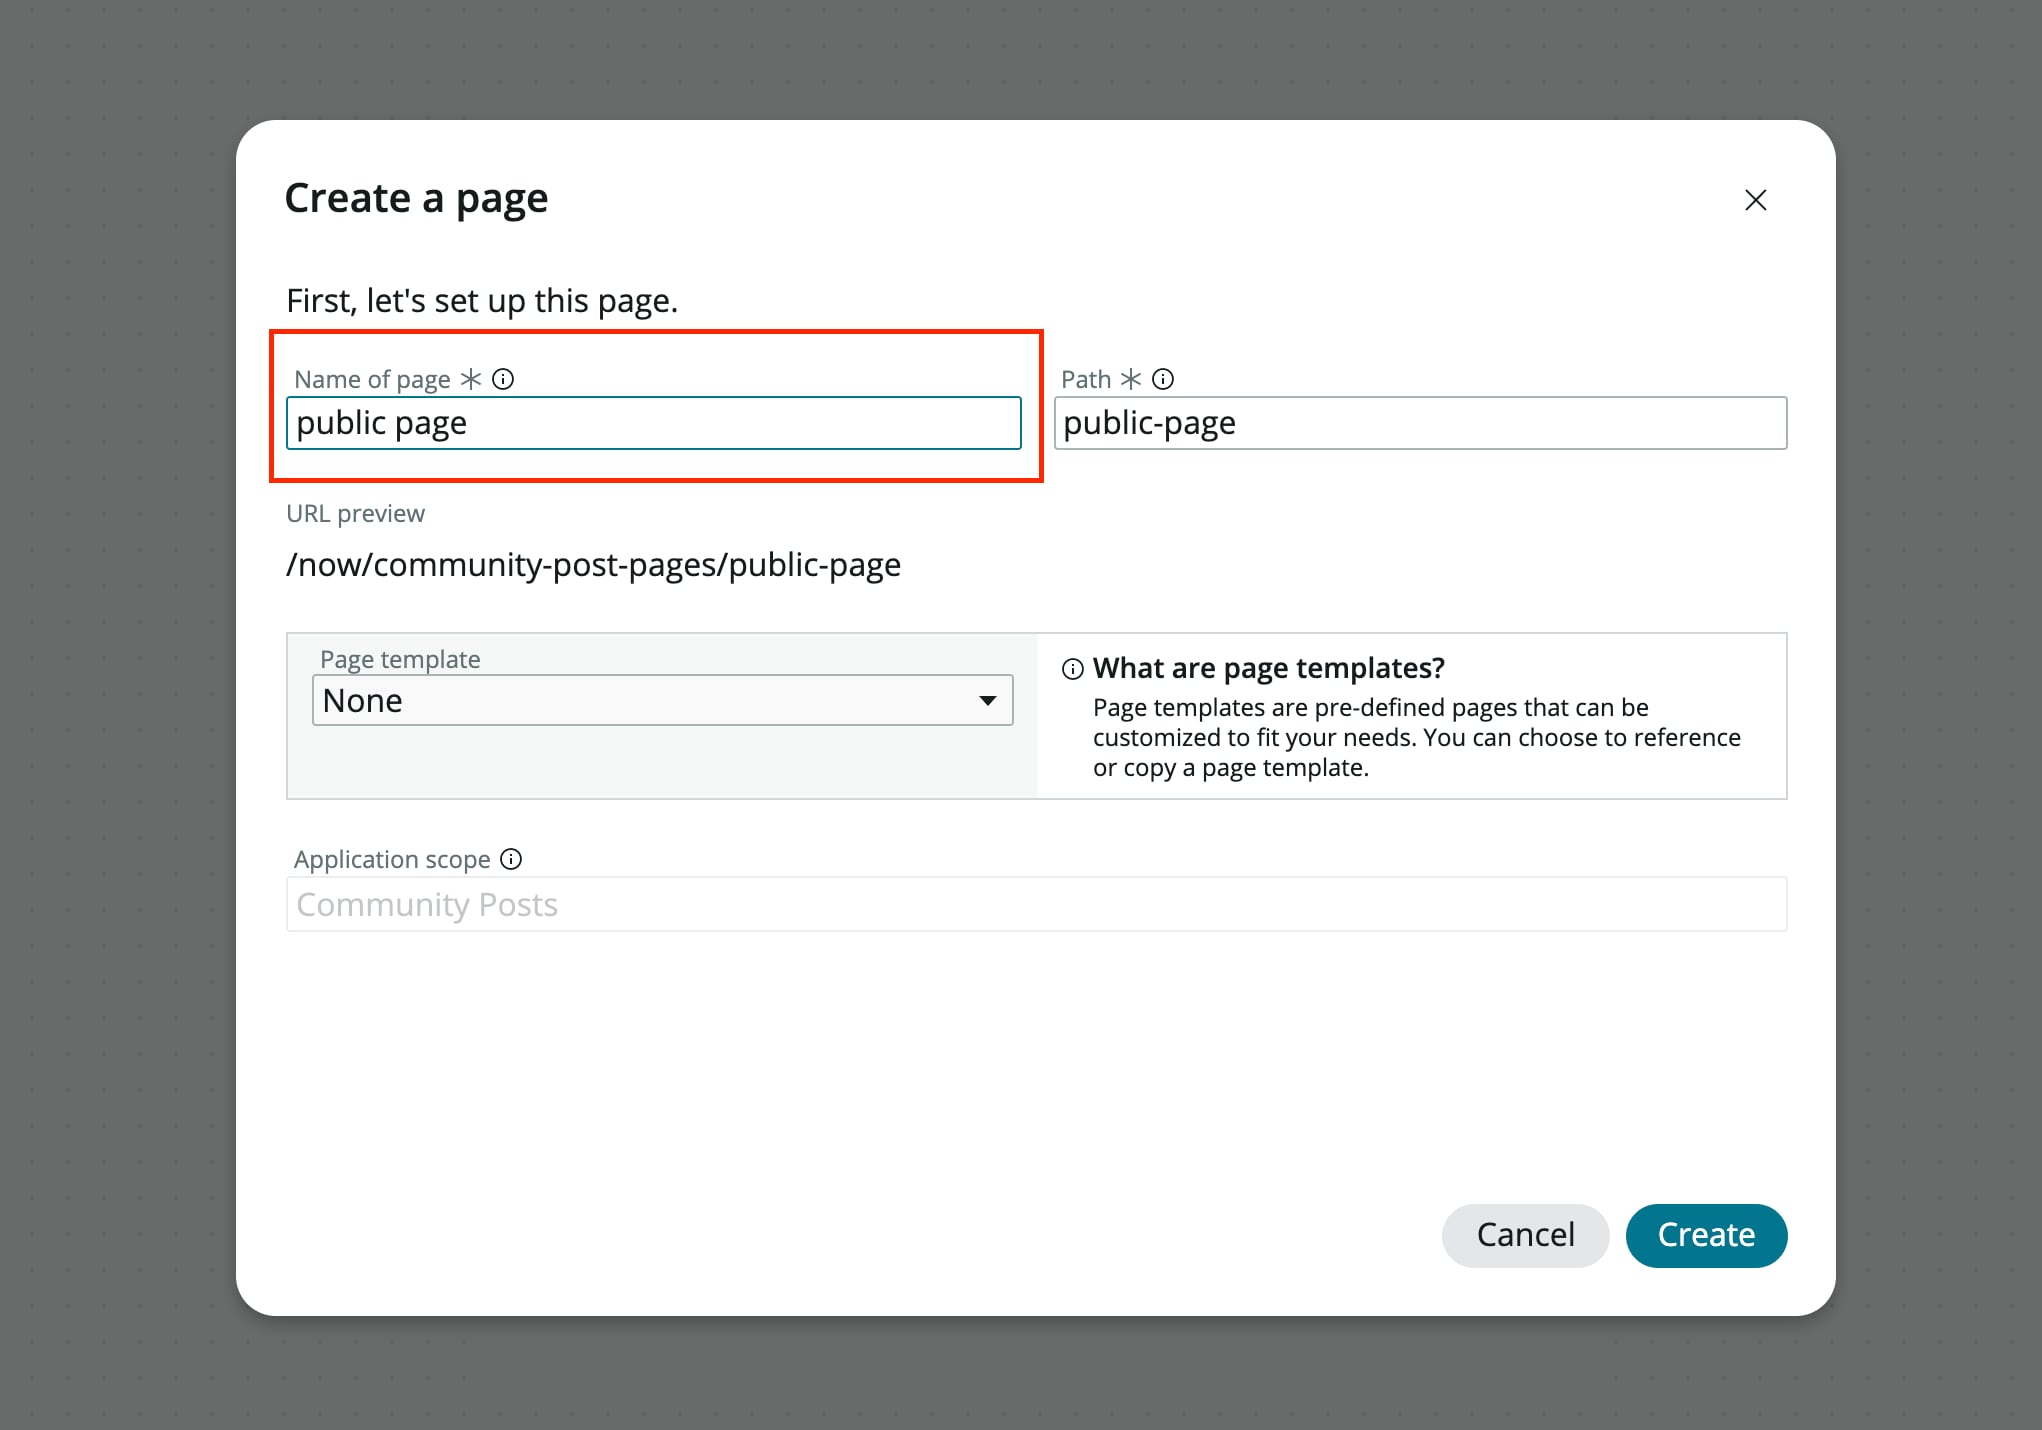
5. Enter a name for the page and click Create
|  |
|
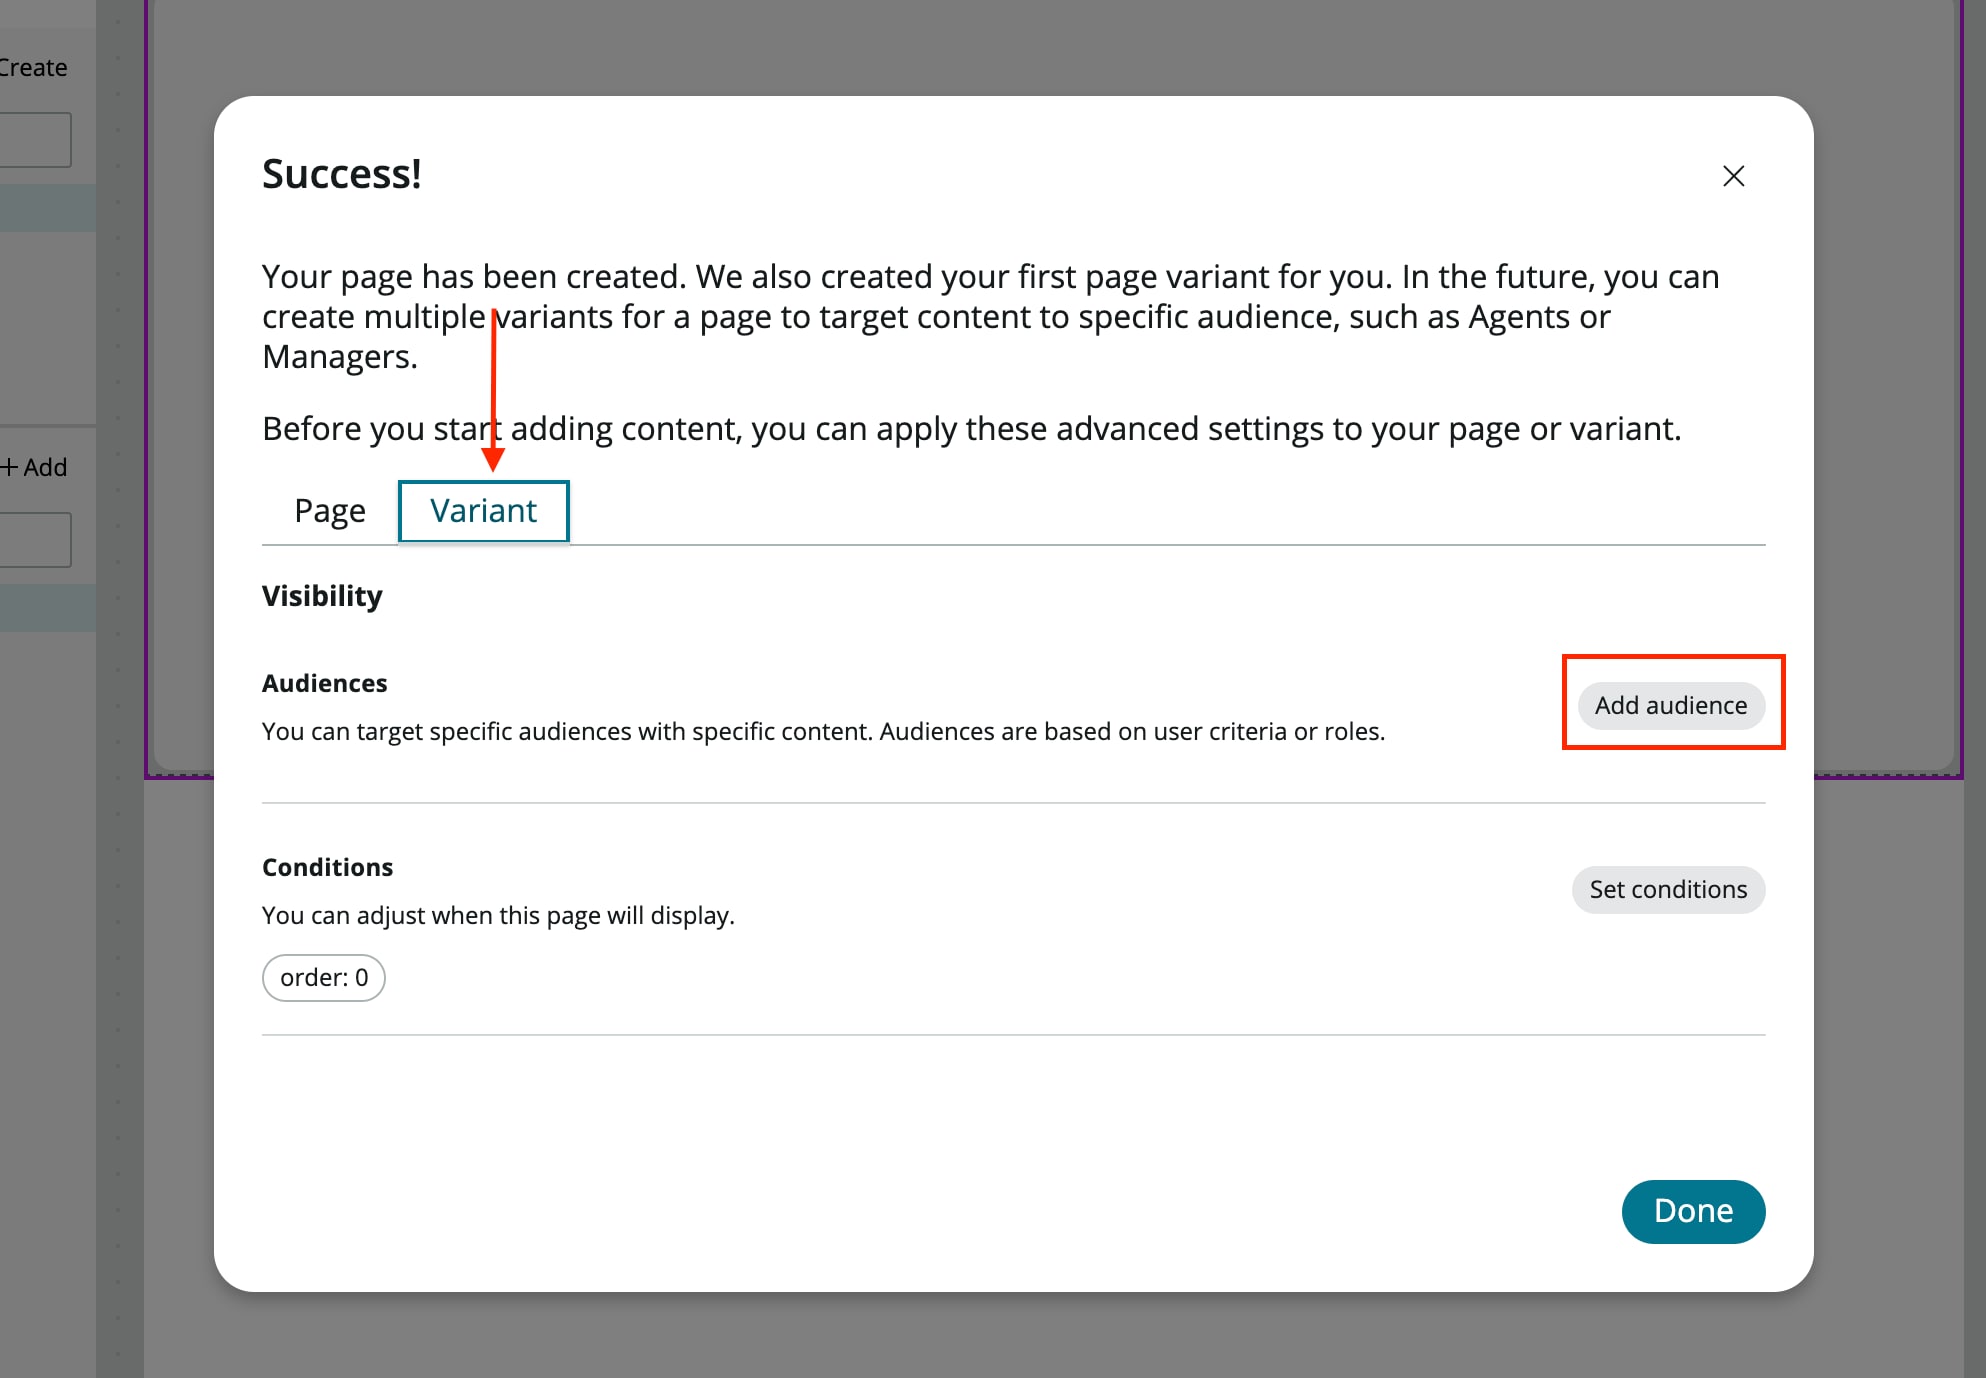
6. There will be another pop up with two tabs - Page and Variant
7. Select the Variant tab and click Add audience under Audiences |  |
|
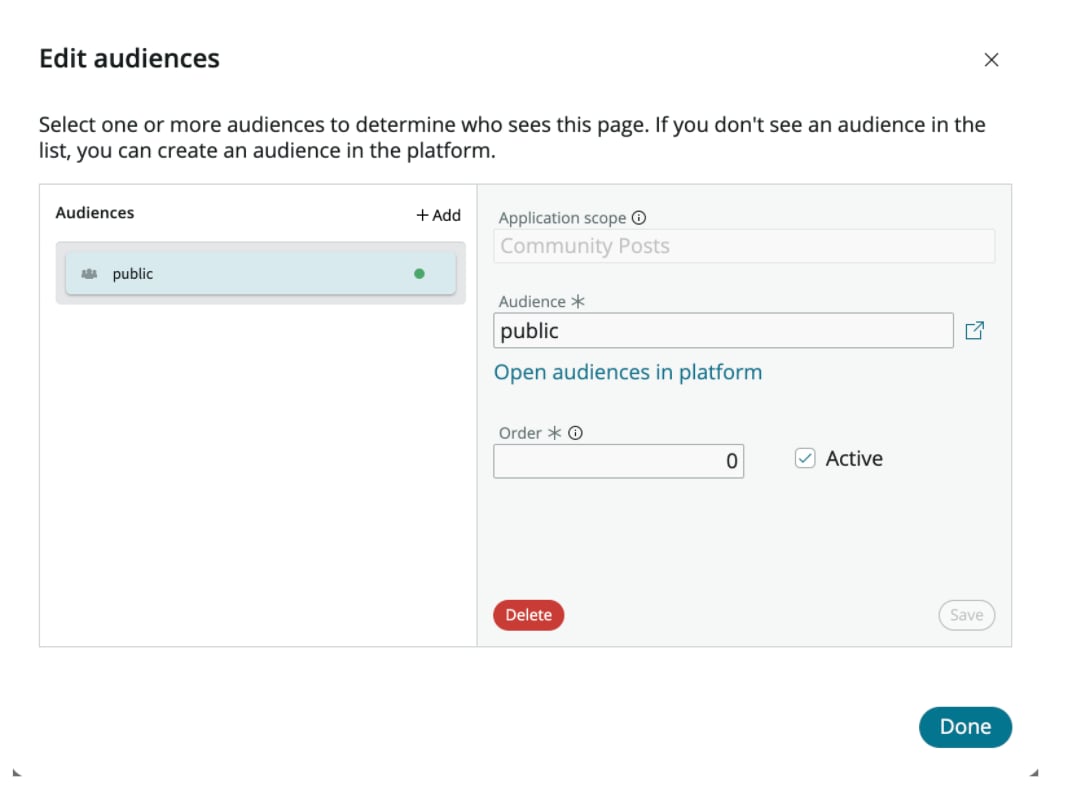
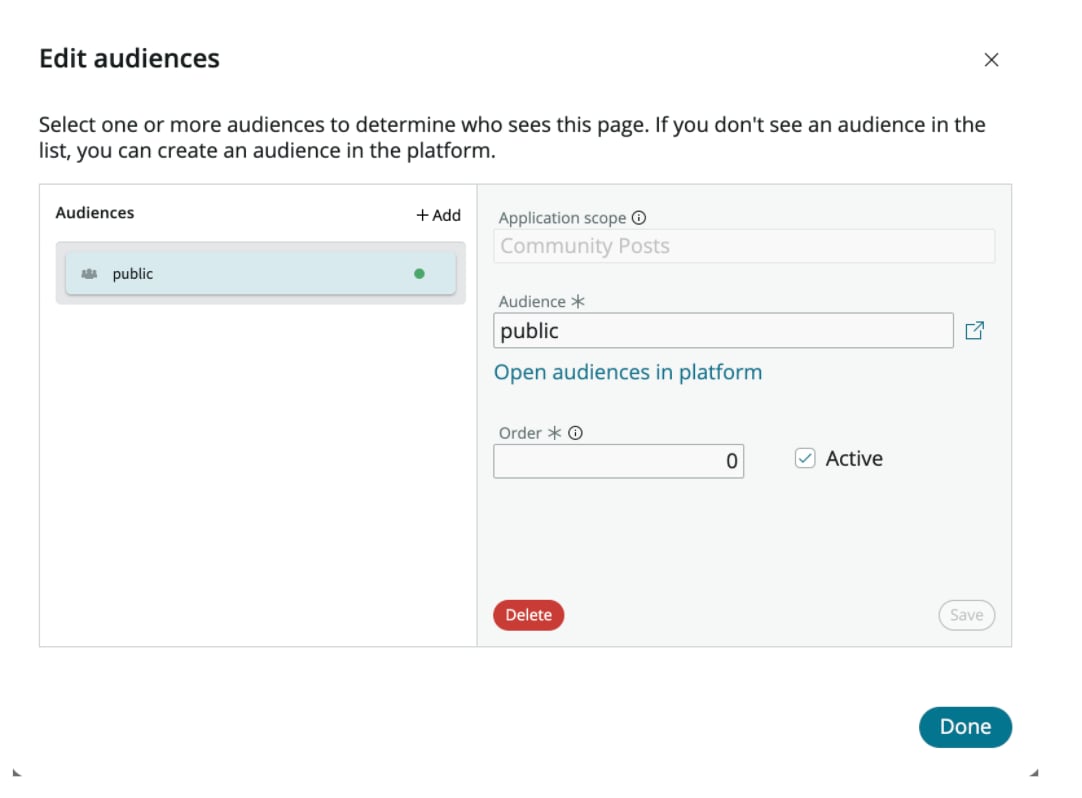
8.Click +Add and type “public” into the audience field and select the public role
9. To create a public audience role, click “Open audiences in platform”
|  |
|
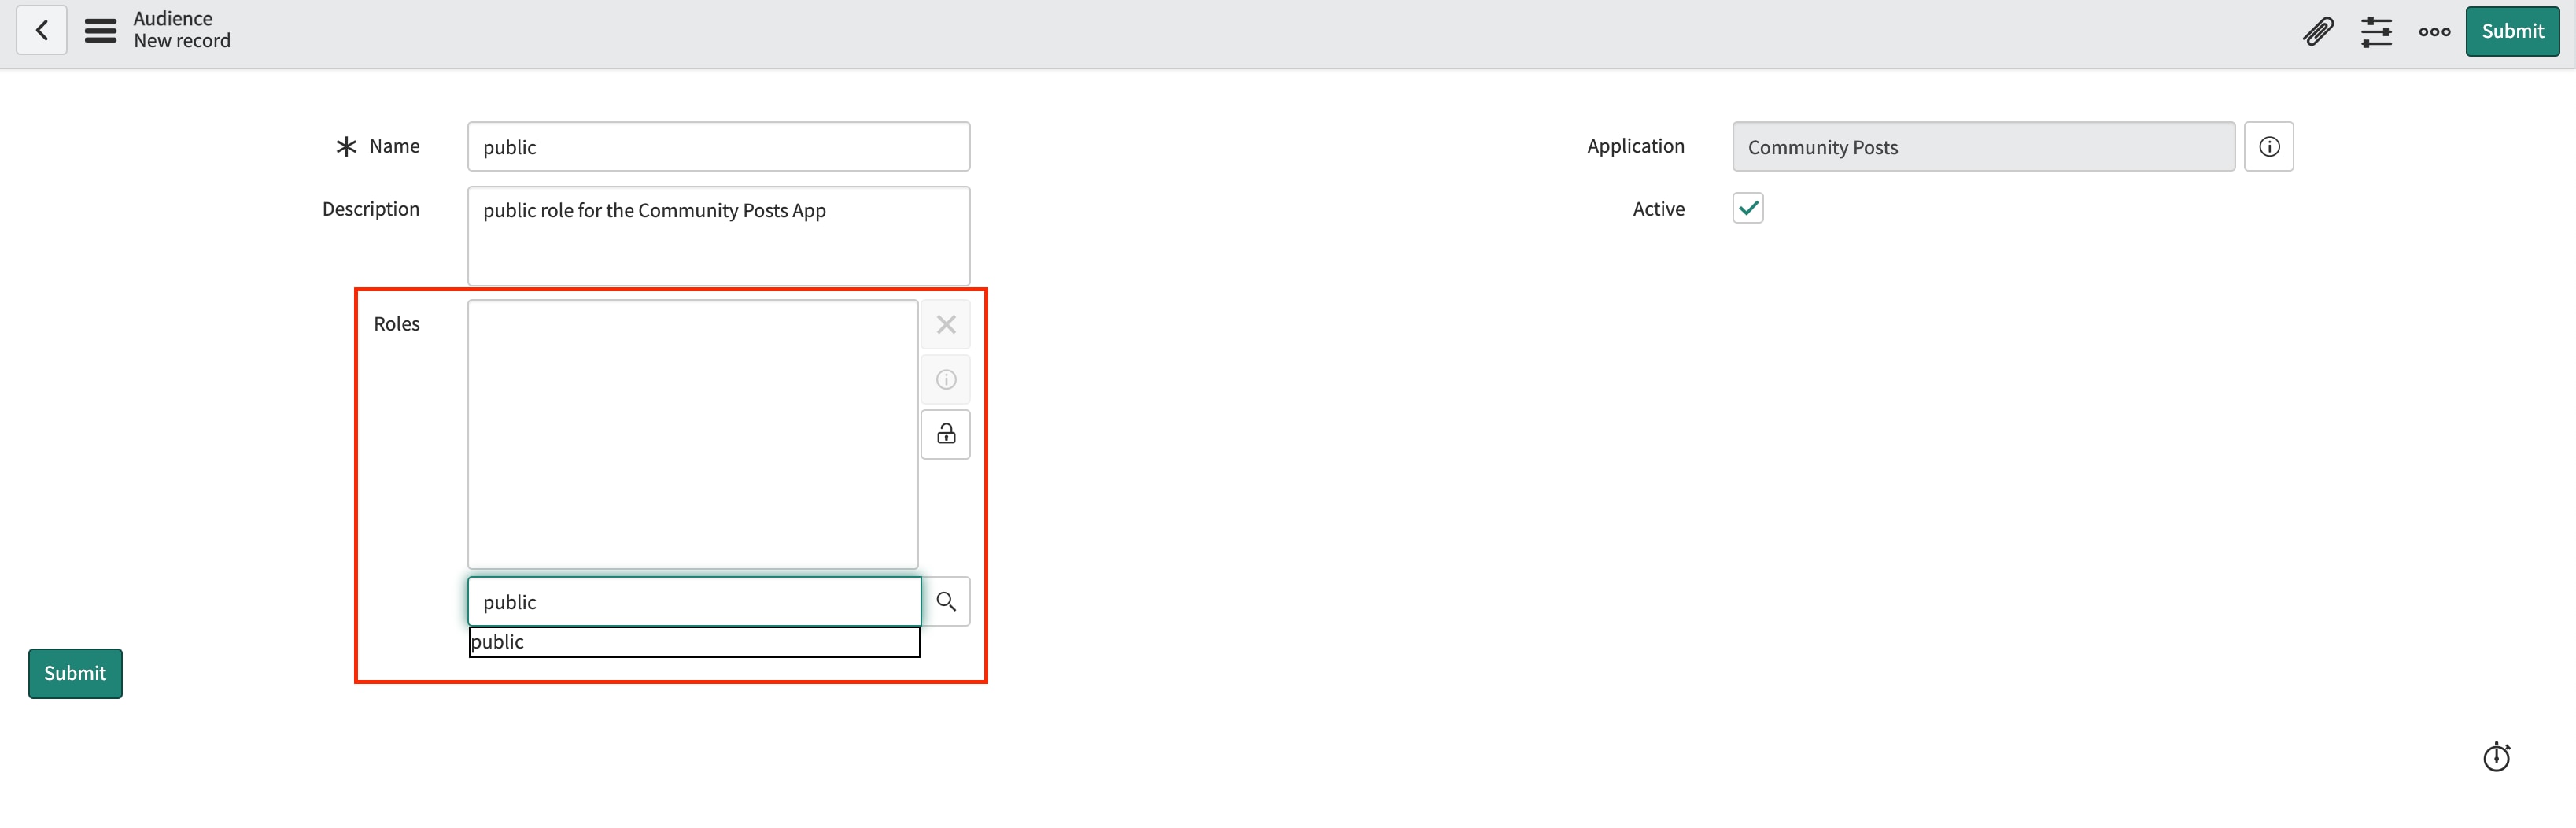
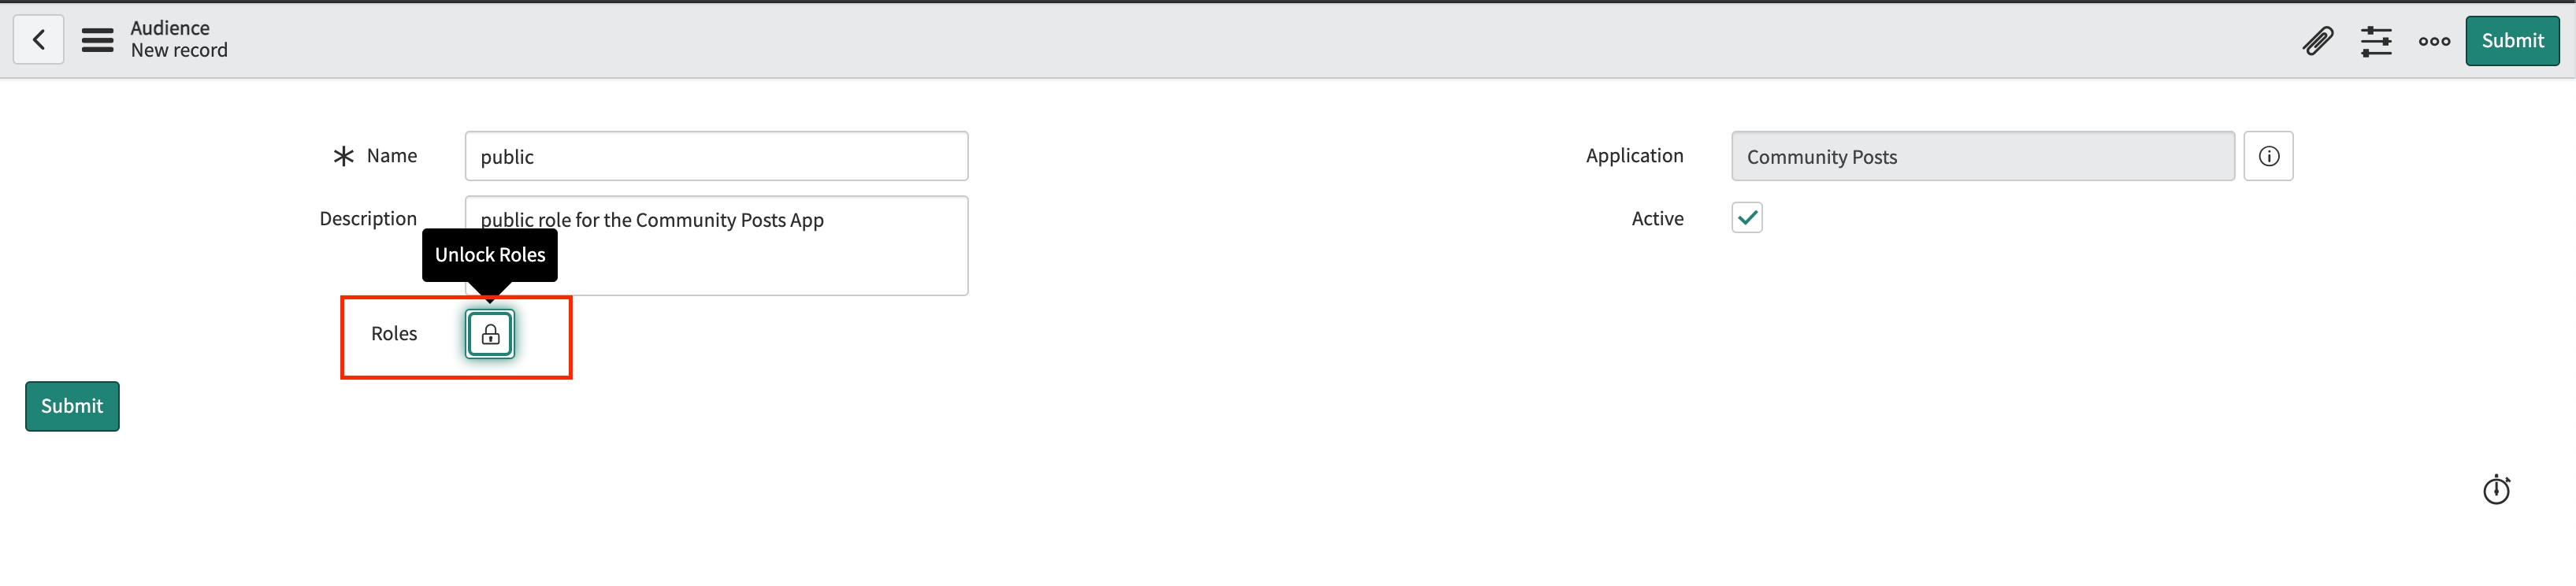
10. Click “New” in the top left of the page 11. Enter a name (preferably “public) and a description if desired 12. Click the lock icon (“unlock roles”) next to the roles label |  |
|
13. Type “public” into the textarea and select “public” from the dropdown 14. Click the lock icon again to close this section 15. Click Submit |  |
|
16. Return to the UIB page, click +Add,type “public” into the “Audience” field
17. Click Save 18. Returning to the Variant tab, click done |  |
Insert here
| Assigning the public role to a page that has already been created | |
|  |
|
5. Click +Add and type “public” into the audience field and select the public role
6. To create a public audience role, click “Open audiences in platform”
|  |
|
7. Click “New” in the top left of the page 8. Enter a name (preferably “public) and a description if desired 9. Click the lock icon (“unlock roles”) next to the roles label |  |
|
10. Type “public” into the textarea and select “public” from the dropdown 11. Click the lock icon again to close this section 12. Click Submit |  |
|
13. Return to the UIB page, click +Add,type “public” into the “Audience” field
14. Click Save 15. Click Done |  |
|
Add Route ACL
| |