- Post History
- Subscribe to RSS Feed
- Mark as New
- Mark as Read
- Bookmark
- Subscribe
- Printer Friendly Page
- Report Inappropriate Content
on 09-21-2020 11:38 PM
Greetings!
I created my first UI component to learn the Now Experience UI Framework and would like to share the steps that I went through to achieve it.
I upgraded my personal instance to Paris as the now-cli(command line interface) is now supported to this version.
I installed node on my windows machine from here . Node would help us install and run now-cli commands and to package and deploy the component to the ServiceNow instance.
Once the node installation was completed, I opened up the command prompt(win +R -> cmd) and executed the command npm install @servicenow/cli -g. The command will help us install the now-cli on our machine.
C:\Users\mypc\servicenow>npm install @servicenow/cli -g
the -g in the command ensure that the now-cli is installed globally so that you can run it within any directory on your machine.
You can verify the version of now-cli by typing the command now-cli --version
C:\Users\mypc\servicenow>now-cli --version
Now CLI @18.0.0
I need to connect to my instance first before I can create any components. You would need your instance URL, username and password (this user should have admin role or you can use your default admin user as well). Using the below command I was able to successfully connect my machine to my ServiceNow instance.
C:\Users\mypc\servicenow>now-cli login --host https://devxxxxx.service-now.com --method basic --username admin --password ******
You should receive the below message if your connection is successful
√ Connection to 'https://devxxxxx.service-now.com' successful. Credentials saved.
Instance version: Paris
I created a new Folder to get started with my project. Make sure that the folder is empty to create and scaffold a new project.
I then created a new project in this folder that would hold all the necessary files(scaffold) to start developing the component by running the command now-cli project. The parameters required for creating a project.
- name : The project name. This should be a valid and unique name and its a mandatory parameter
- description: a brief description about your project. This will then be available in the npm registry and the Plugins list
- scope: ServiceNow scope name to be assigned to this project and its components. If scope is not provided, the Now CLI will default the scope name to x_<vendor_prefix>_<package_name>
offline: if used this will not connect to the current host during the scaffolding process, skipping validation of the given scope name. scope is mandatory for offline option.
C:\Users\mypc\servicenow\mynewfolder>now-cli project --name myfirst-project --scope x_myorg_helloworld --offline
If you are not using the offline option and the scope doesn't exist in ServiceNow system creates a new one like below.
Created scope "x_68723_myfirst_project"
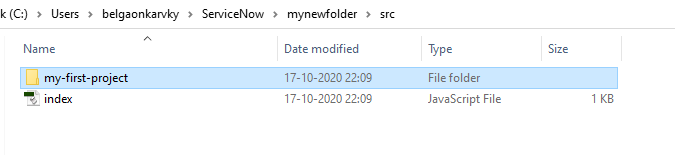
The folder structure will look something like below once the project is created

Below are the list of files that are created within the project due to the scaffolding process.

Once the folder is created we need to install some npm dependencies so that we can run our component locally
C:\Users\mypc\servicenow\mynewfolder>npm i
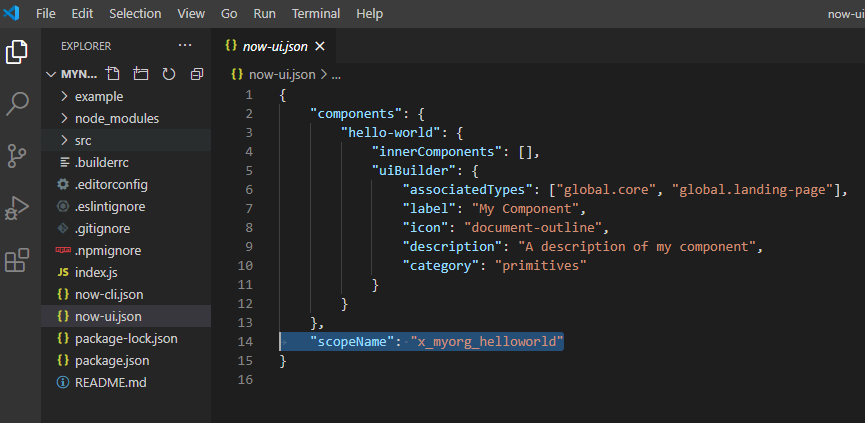
Since this step take some time to complete I meanwhile opened up the index.js file that is there within your component folder in an code editor or notepad(you may notice there are multiple index.js file, you would have to open the one that is there just within your component folder in my case it is myfirst-project) . I am using Visual studio Code to make changes to my component. Now lets add our hello world text within this file. Please refer to the screenshot below at line 7. This is the component view. You can add your html here which would then be rendered, also verify that at line 11 you have the createCustomElement with the name of your project.

Once you have saved the file you can now run this new component within your local host(assuming the npm dependencies are installed completely or else you have to wait). Now just keep in mind there are two different commands the one is develop which runs the development server locally, where web components can be quickly evaluated and iterated on browser, we are going to use this one. There is another command called deploy which deploys the whole project to you ServiceNow instance.
C:\Users\belgaonkarvky\ServiceNow\mynewfolder>now-cli develop --open
Running component locally...
The --open parameter opens up your default browser and looks for the localhost.
Voila!! i have completed building my first UI component, the hello world.

I will cover the deployment and using the component on UI pages in next article.
Thank You for taking your time in reading this article. Please let me know if you have any suggestions or question.
Regards
Vinayak
- 4,245 Views
- Mark as Read
- Mark as New
- Bookmark
- Permalink
- Report Inappropriate Content
It is really great to see your post about building your first UI Component. Congratulations!
For anyone interested in learning more about building components for the Now Experience UI Framework, you can find custom component training on the ServiceNow Developer Site.
- Mark as Read
- Mark as New
- Bookmark
- Permalink
- Report Inappropriate Content
Thank You.