


Brad Tilton

ServiceNow Employee
Options
- Subscribe to RSS Feed
- Mark as New
- Mark as Read
- Bookmark
- Subscribe
- Printer Friendly Page
- Report Inappropriate Content
08-16-2018
01:43 PM
There are a lot of great features in ServiceNow's London release, but my favorite, by far, is the Multi-row variable set. As someone who has implemented Service Catalog through the native UI, CMS, and Service Portal over the years this is something that I've always wanted to be in the platform. There have been some really good alternate solutions found on share, but those are unsupported and can make upgrades a bit riskier. I'm happy to report that the multi-row variable set functionality in the London release is very well done and we'll explore that here.
In this post we'll create a multi-row variable set, henceforth to be known as a MRVS, add variables, then show it in action. In a subsequent post we'll access its values from a background script (which could represent a business rule, scheduled job, workflow script, or flow designer script action). We're going to take a fairly common use case that I've seen in the past where someone is requesting access to different applications, and the level of access may be different for each application. I've seen this done via order guides, adding separate items to the cart manually, or some sort of custom variable solution, but it seems like a great use case here.
Creating the MRVS
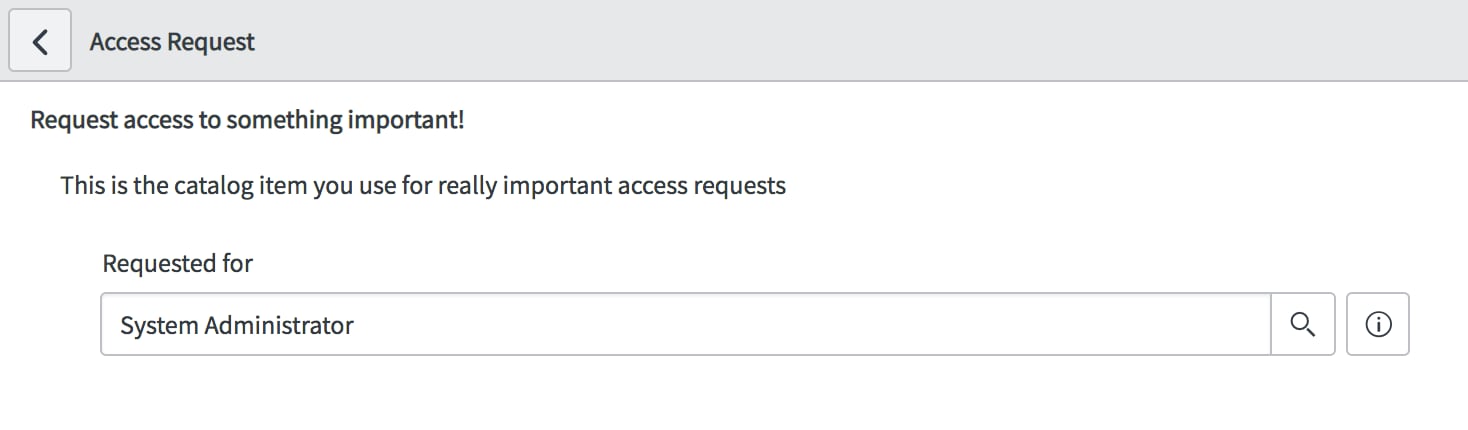
We'll start with a new catalog item I've created with one variable with requester information so far:
We're now going to add the new MRVS by going into the Catalog Item record and clicking New in the variable set related list. Notice the new interceptor that's been added:
Clicking on the MRVS we get a new variable set record to fill out:
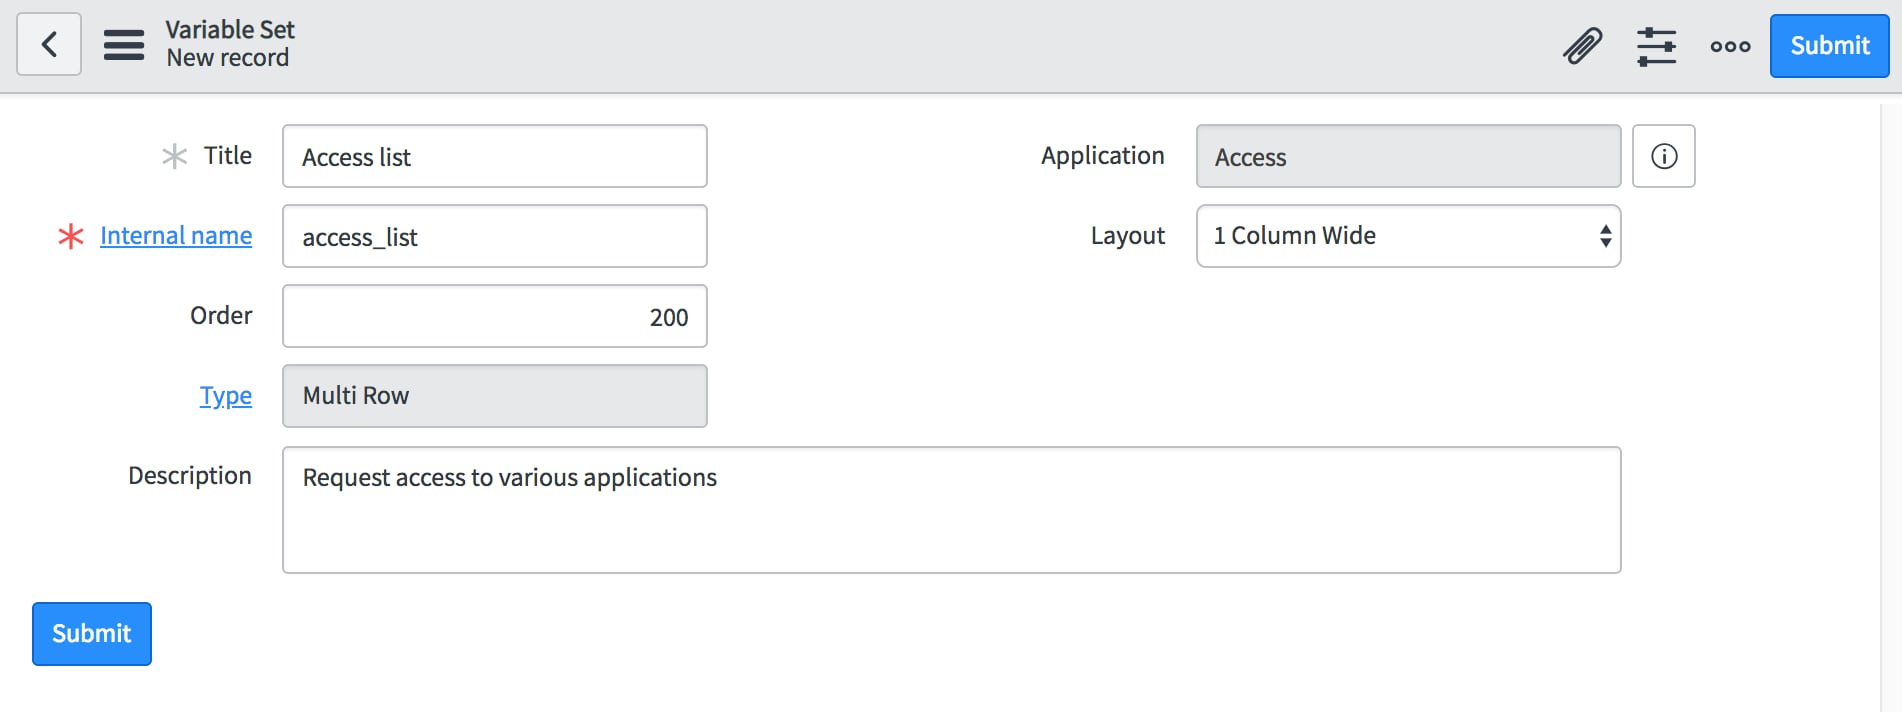
I'm now going to create three variables in my update set:
The users will be able to select applications along with an access level for each application. Also, we're going to want to require a business justification if they ask for "Full access" to an application, so we'll add a ui policy to make that field mandatory. Note: Because the variable is located in the MRVS and will show up as a table you cannot toggle the visibility with a ui policy.
Testing the MRVS
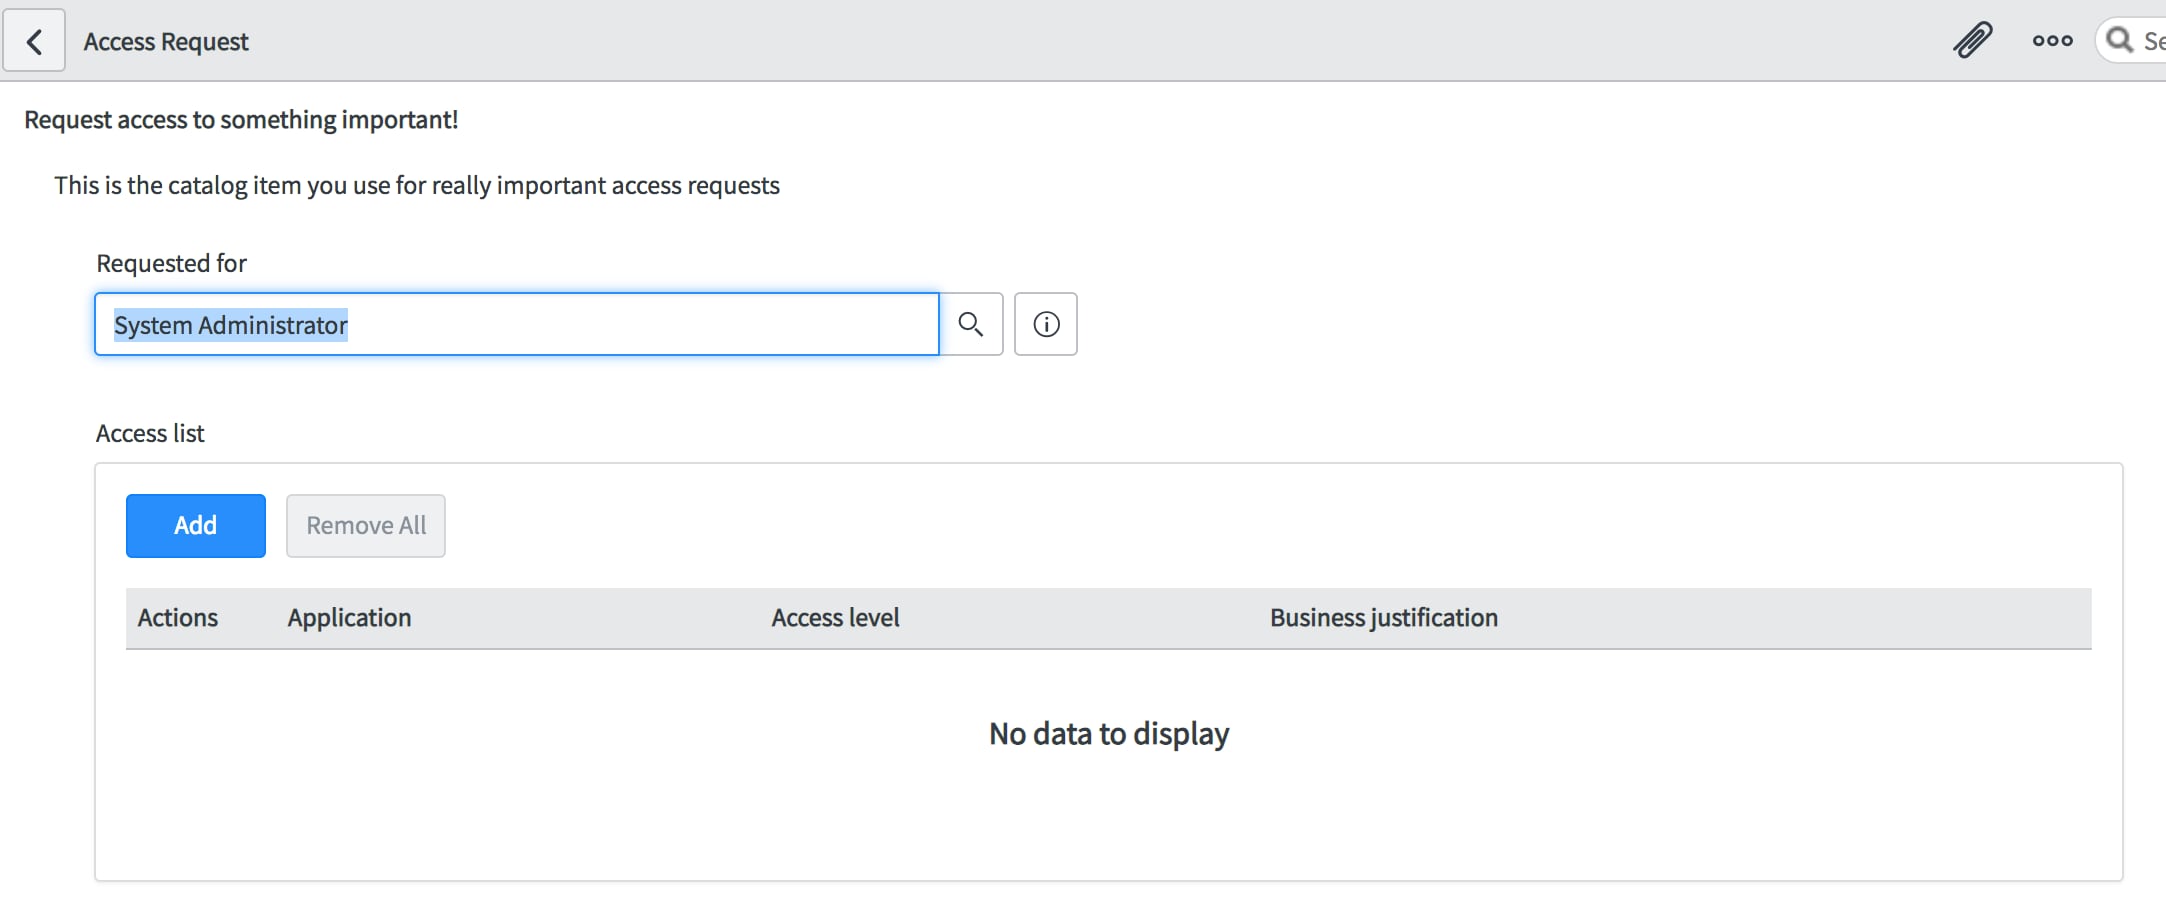
Now it's time to test it out! Clicking on the Try it button on the catalog item will bring up the item front end with the rendered variables. You can see that our Access list variable set has a table with no current entries in it.
Hitting the add button will bring up a modal with the three variables we defined inside the variable set, so we'll fill those out and click add.
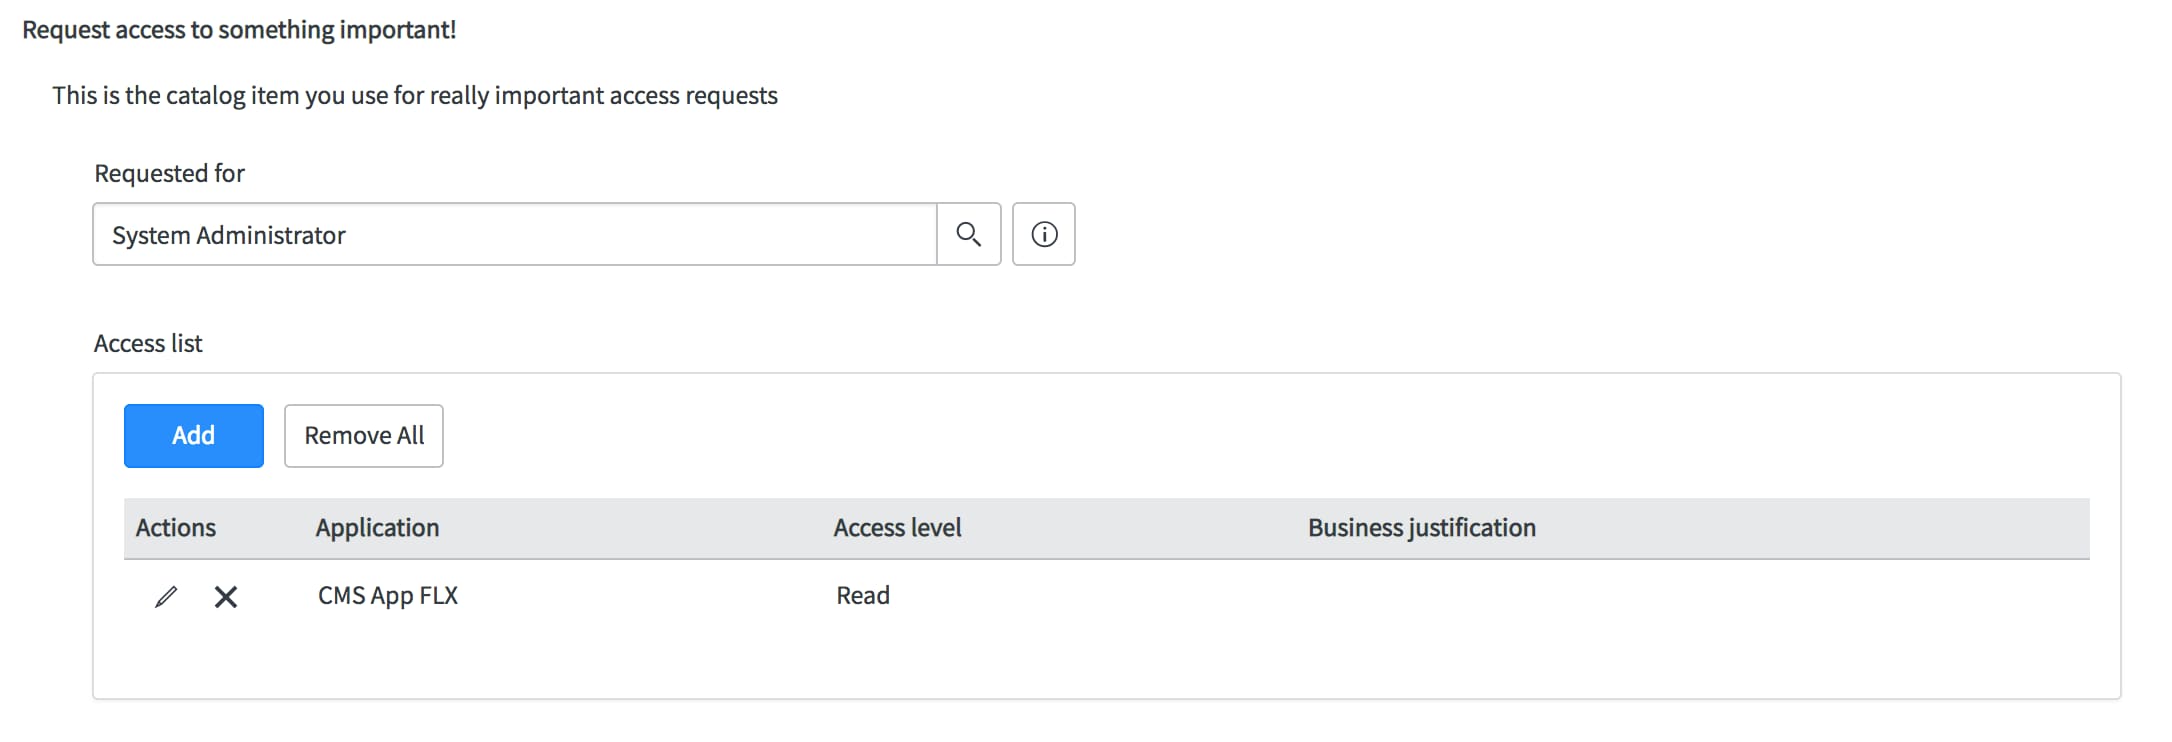
Now you can see that we've got a row for that entry.
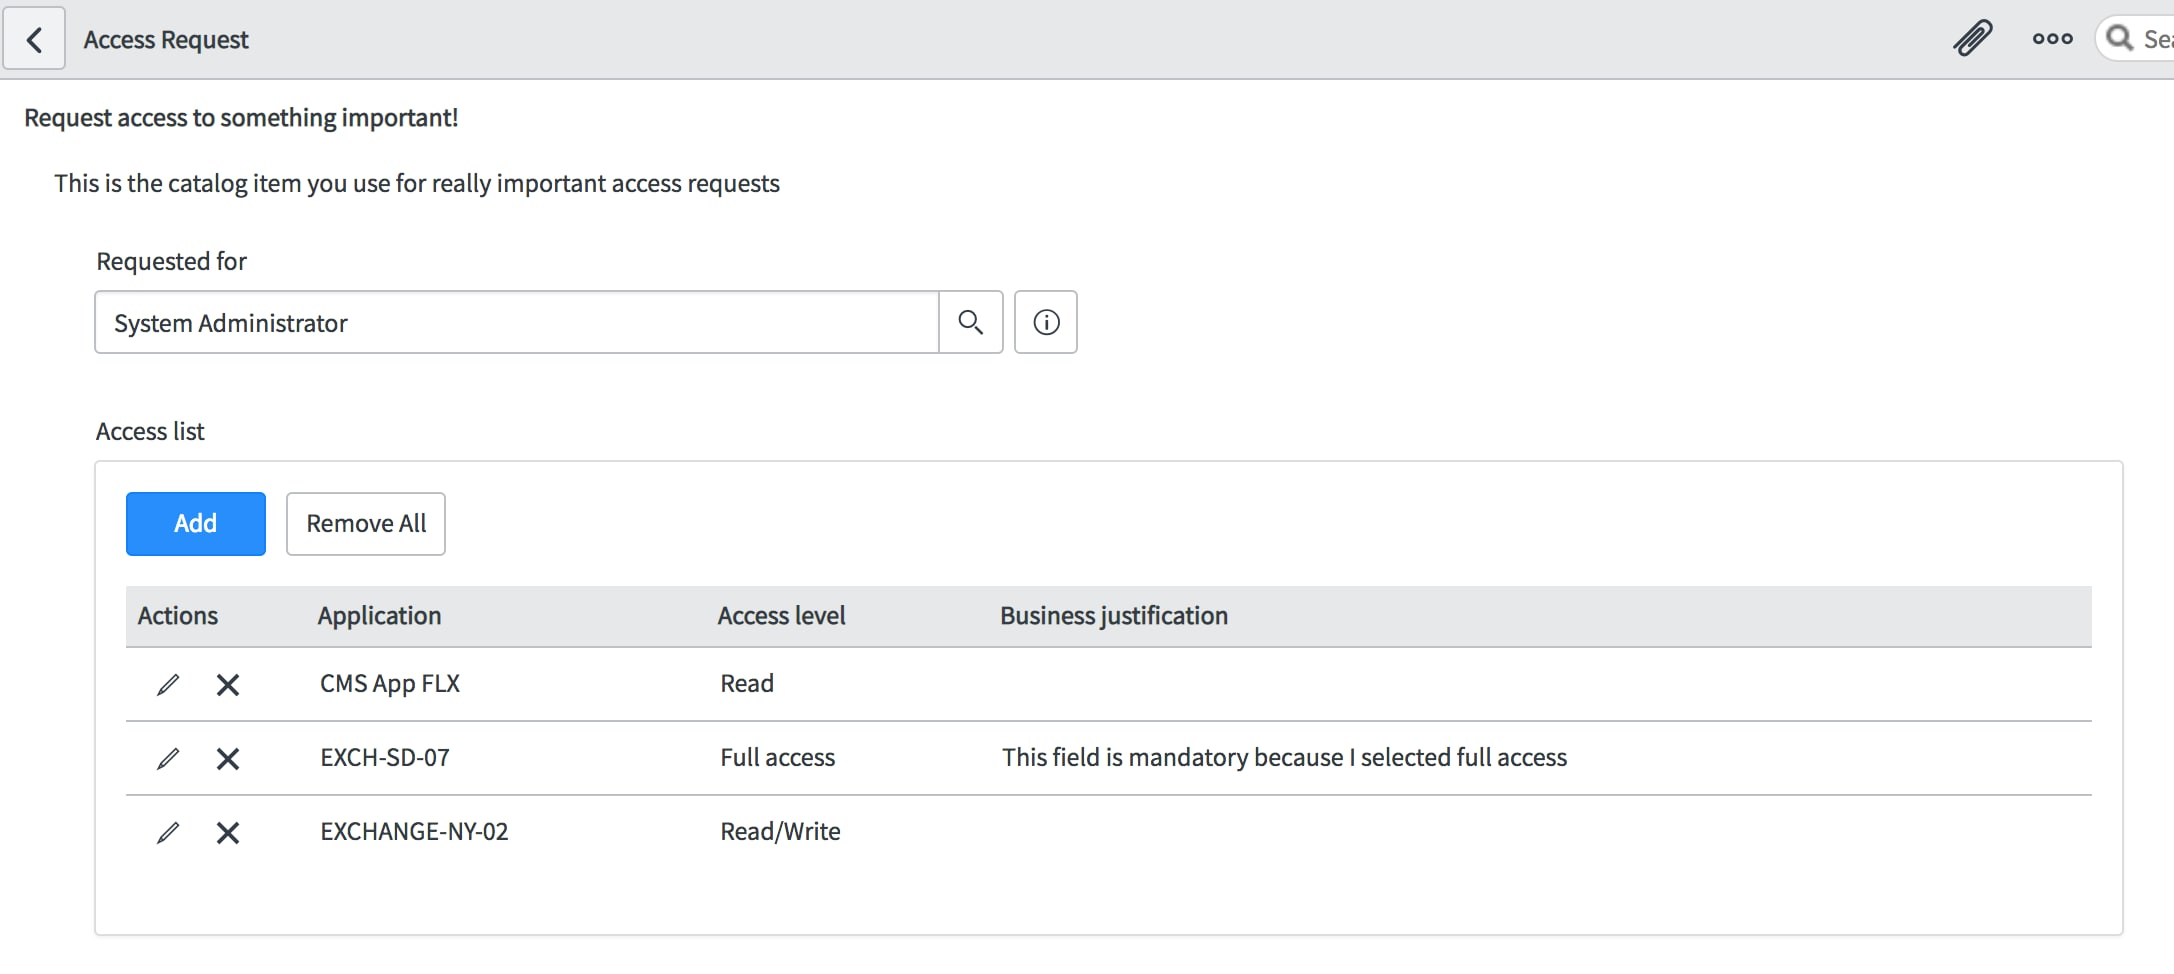
Now we'll add another row, but this time change the access level to full access, which will trigger our ui policy to make the Business justification field mandatory.
And then we'll add another entry and end up with 3 different rows in our multi-row variable set.
We can also edit or remove rows by clicking the pencil and x icons under the actions header in the table.
From here we can order the catalog item and let the workflow take over. In the workflow, we may want to do things like send approvals to various people based on the different applications selected, automate the provisioning of this access, or create tasks dynamically for each of these applications and access.
See my next post: Scripting the Multi-row Variable Set
- 154,692 Views
66 Comments
- « Previous
-
- 1
- 2
- 3
- …
- 7
- Next »
You must be a registered user to add a comment. If you've already registered, sign in. Otherwise, register and sign in.

