


Administrator
Options
- Subscribe to RSS Feed
- Mark as New
- Mark as Read
- Bookmark
- Subscribe
- Printer Friendly Page
- Report Inappropriate Content
06-03-2022
01:04 PM
I'm a ServiceNow fangirl.. that comes to no surprise to anyone who knows me well. Because I am such a fangirl, I do my best to incorporate ServiceNow into as many of my own hobbies as possible. One of those hobbies happens to be 3D printing. If you attended any of the recent Knowledge events and visited the Hackzone, you probably noticed the very large rack of CNCs and 3D prints right smack in the middle of the action. We got lots of questions about the exhibit so I thought I'd put together a little blog post series to get into the details a bit more than maybe we were able to at K22. This first week we'll focus on the basics.
What is it?
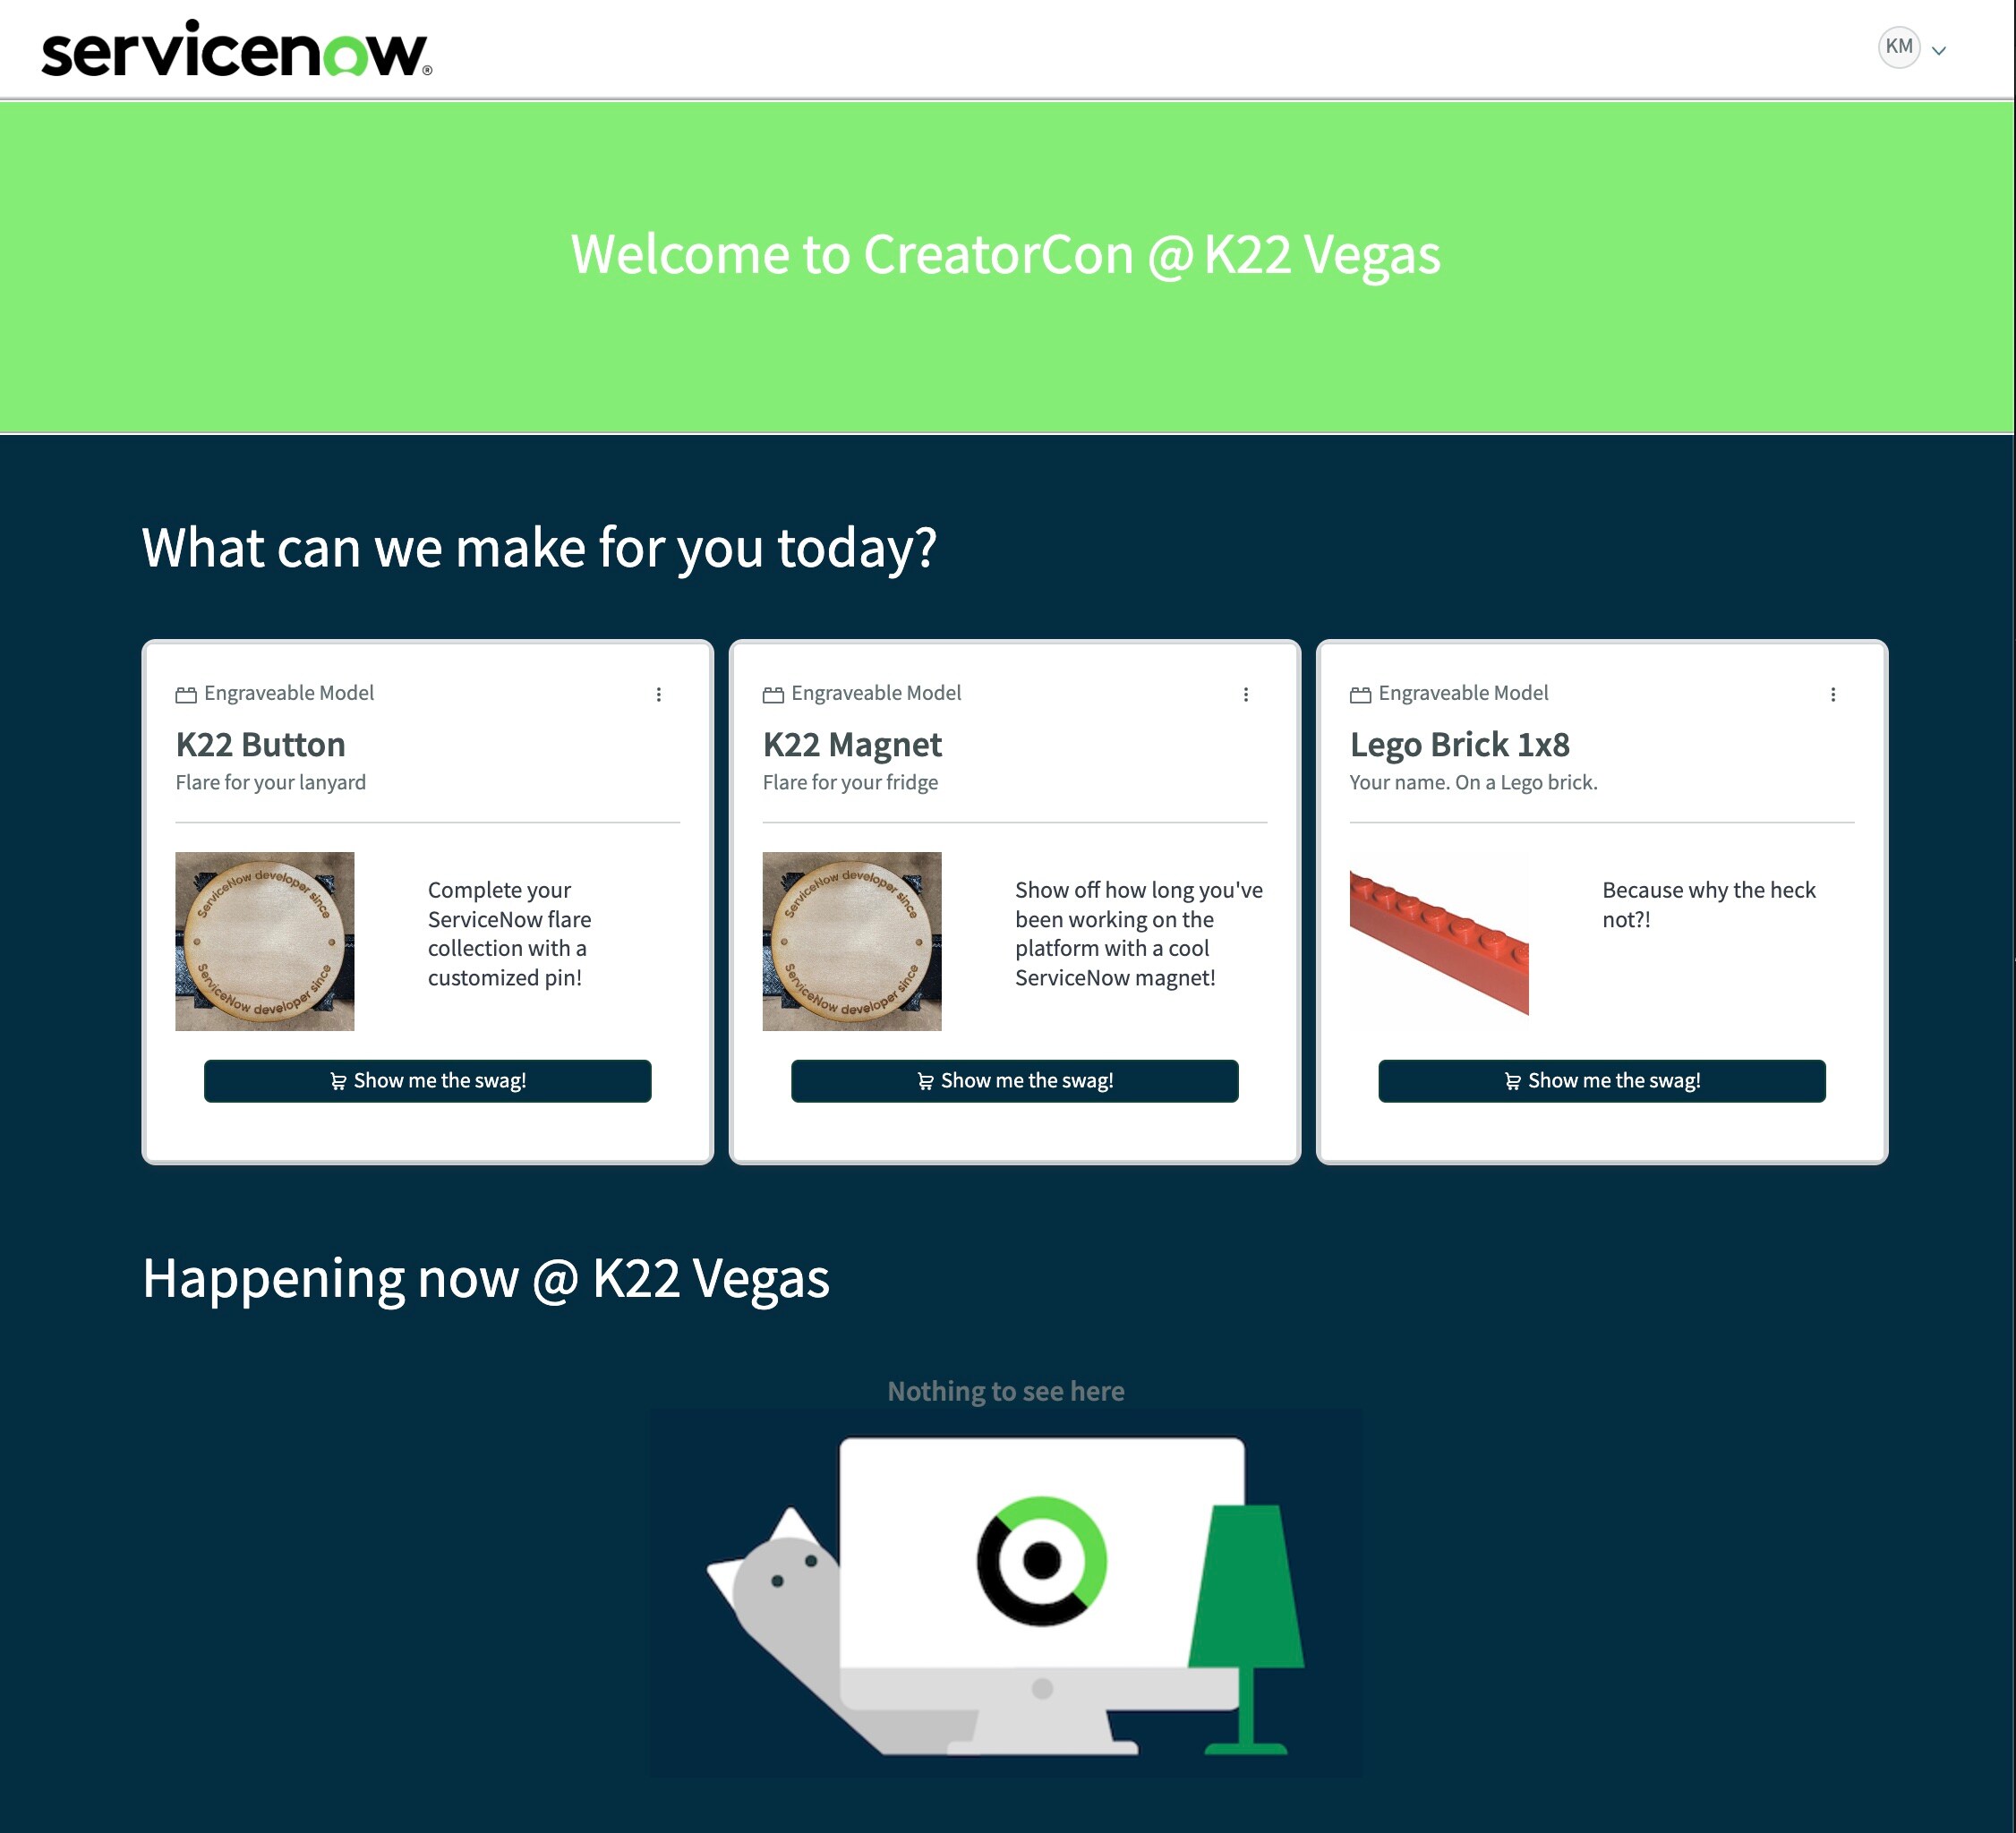
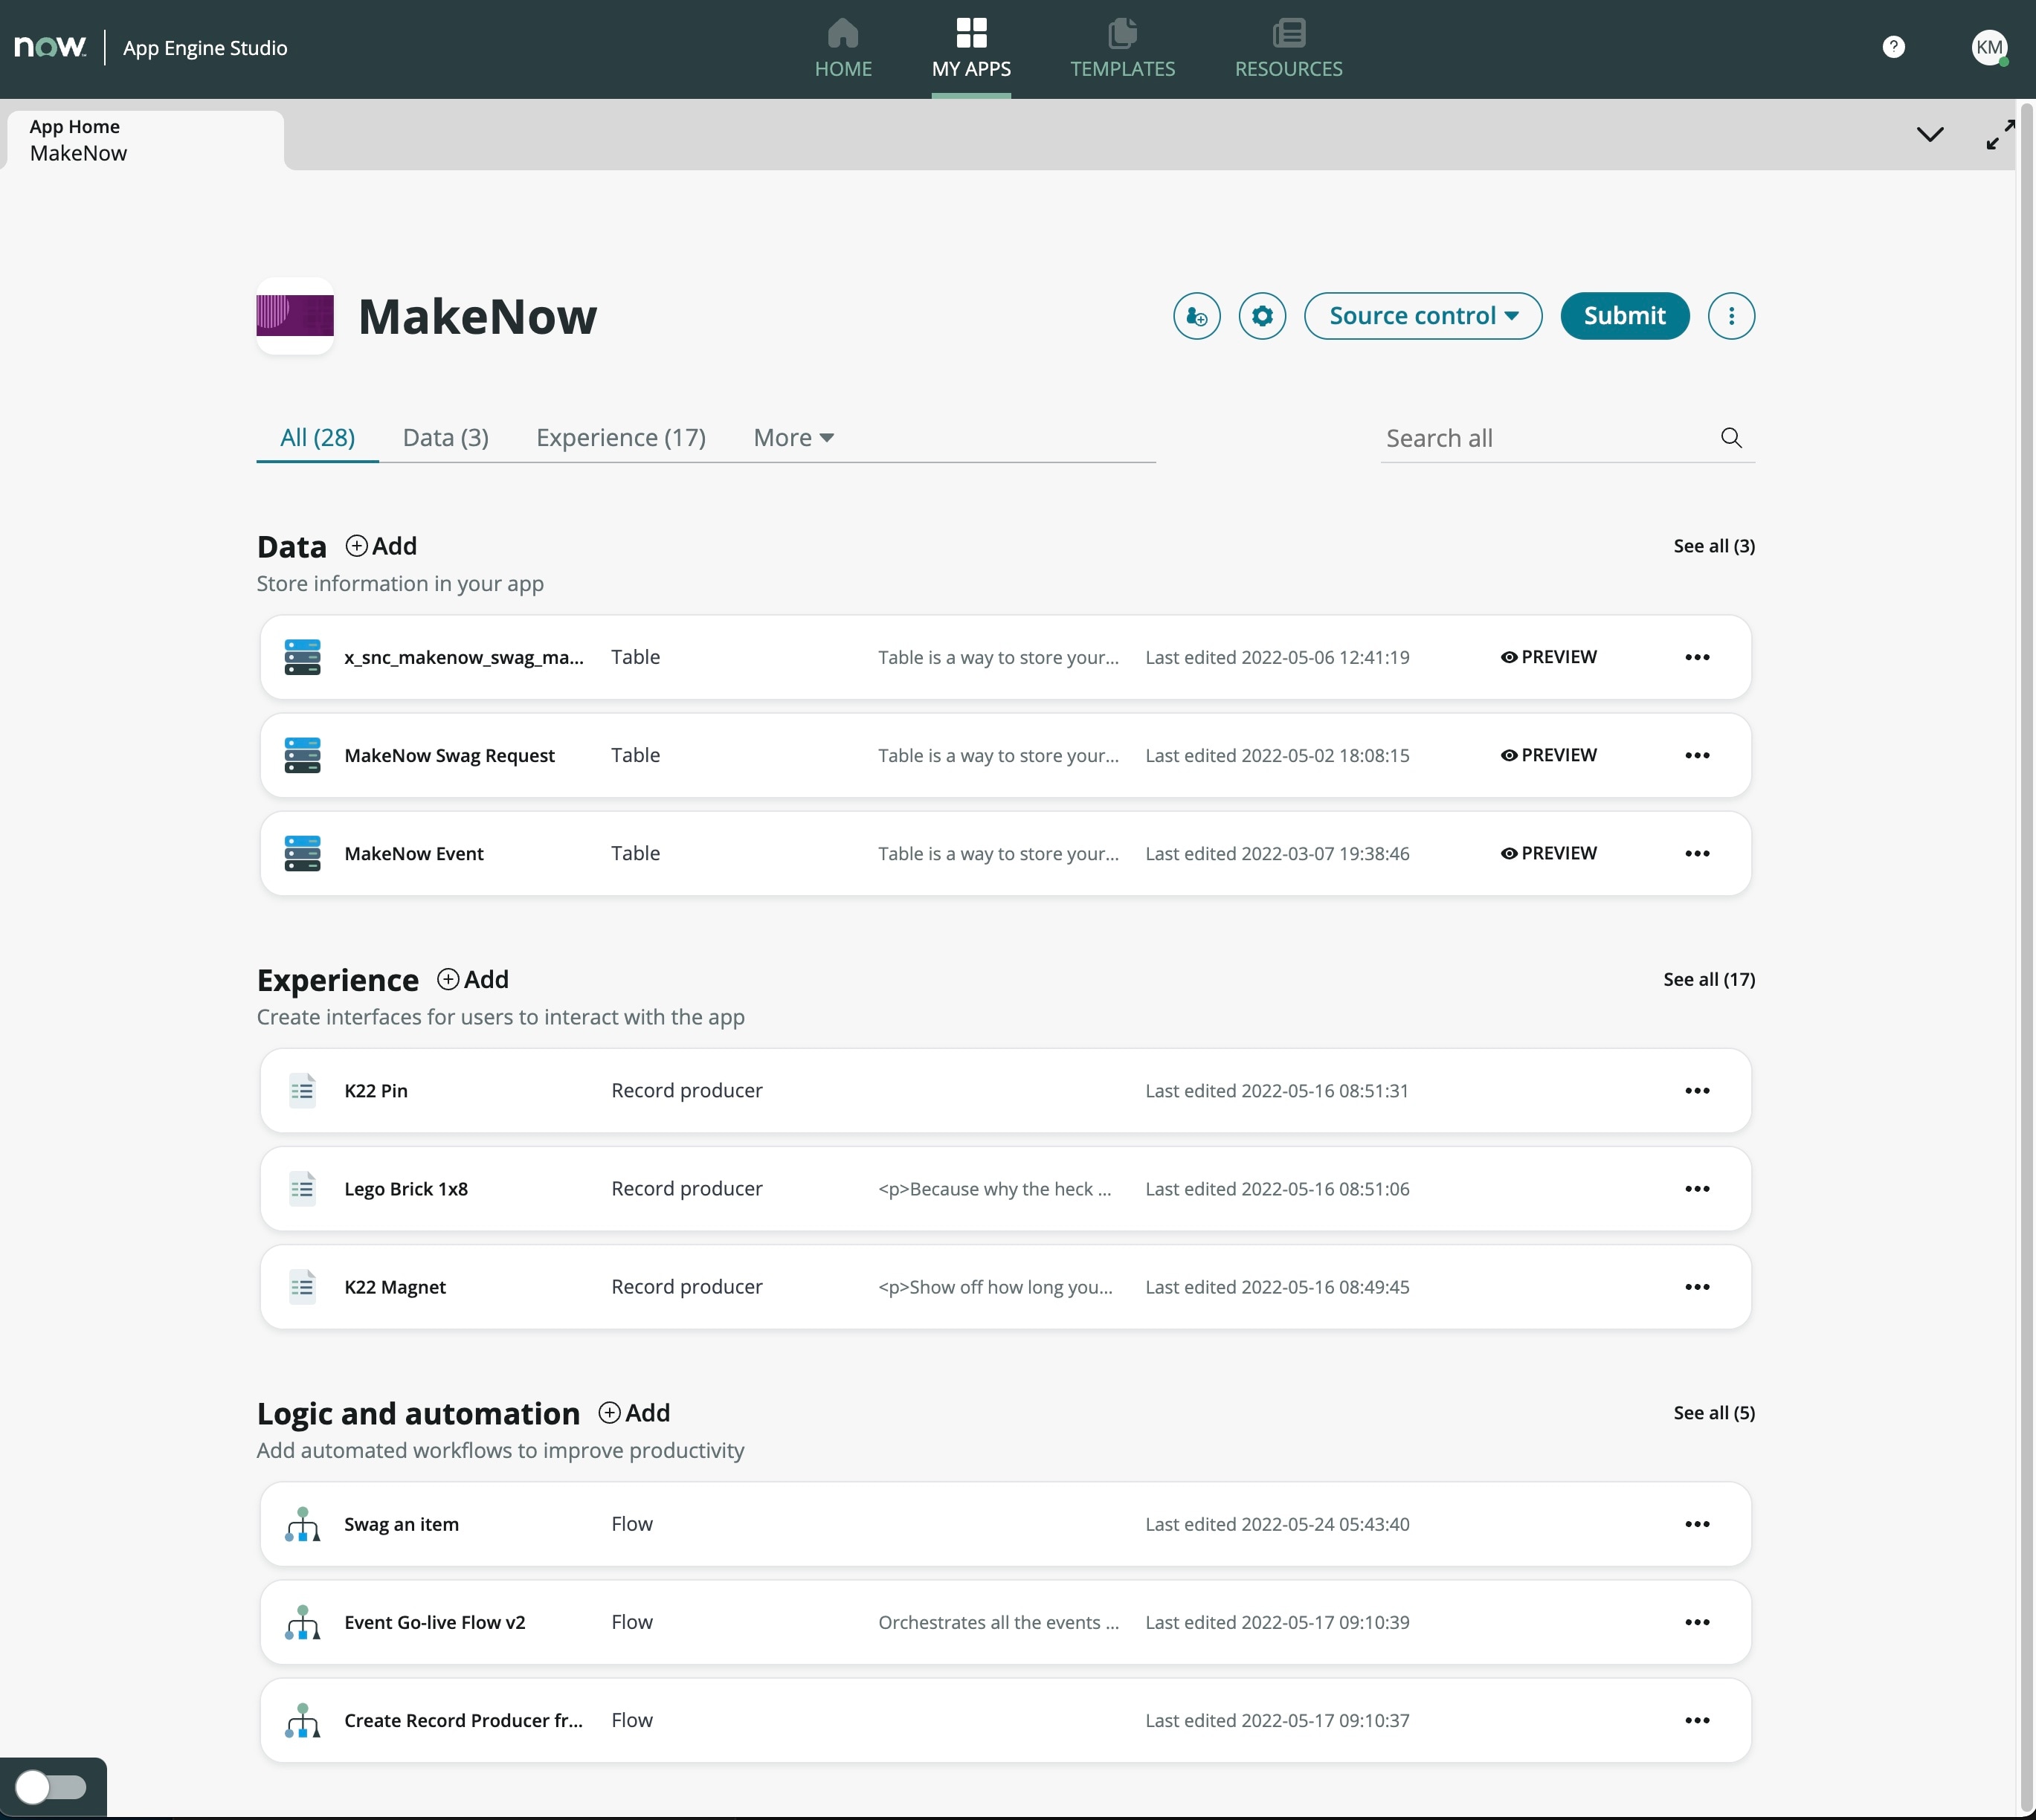
The MakeFarm is an app that was created to allow any attendee at a ServiceNow event to create customized swag (i.e. pins, magnets, keychains) all via the use of some cool integrations and gadgetry.
How does it work?
At the core of the MakeFarm is App Engine and Automation Engine or Creator Workflows as well call it here at ServiceNow. App Engine was used to build the UI, business logic, workflows, etc. Automation Engine (formerly known as IntegrationHub) was used to create custom spokes/integrations for OctoPrint. OctoPrint os the software that provided the API we needed in order to interact with out various Swag Machines - CNCs and 3D Printers in this case.
That's a cool story Kristy, but how do I build it myself?
Let's start this series with the hardware and software requirements. We'll get into more of the nitty gritty app build and integrations in an upcoming post.
- Hardware requirements
- A Raspberry Pi 3b or 4
- 3D Printer, CNC, or both if you're feeling adventurous
- USB Cable to connect device to RPI (may vary based on your brand of device)
- Software requirements
- A ServiceNow Instance, Quebec or later
- Install IntegrationHub Starter/Standard at the very least. This gives us access to build the custom spokes we'll need later
- Update the CMDB CI Class Model plugin for the device tables we'll use for the 3D Printers and CNCs
- OctoPrint
- MID Server for Raspberry Pi
- A ServiceNow Instance, Quebec or later
NOTE: If you are a 3D Printer/CNC owner, you may already have a Raspberry Pi running OctoPrint. If that's the case, you can skip to the installing a MID server section below
First thing you'll want to do is get your Raspberry Pi and MID server configured. I suggest using a 64-bit install of Raspberry Pi OS rather than using the OctoPi image (more on OctoPi/Print later).
Installing a MID Server
Once you have your RPI OS installed you can move on the to install of the MID Server. It can be a little tricky to get the MID running now that we do require a 64-bit MID, but it is doable.
First step through this Mid server on raspberry pi article by
Also check out the comment I added about removing the garbage file that is created on MID start up. This will save you some headache when trying to figure out why your MID is failing to start.
After you've installed, you can use this script to quickly configure your MID:
sudo /opt/agent/installer.sh -silent -INSTANCE_URL https://<instancename>.service-now.com/ -MUTUAL_AUTH N -MID_USERNAME MID_USERNAME_HERE -MID_PASSWORD MID_PASSWORD_HERE -USE_PROXY N -NON_ROOT_USER pi -APP_NAME YOUR_APP_NAME_HERE -MID_NAME $HOSTNAME -APP_LONG_NAME $HOSTNAME
The above script is assuming you've installed your MID in /opt/agent, so adjust according to your install.
Install OctoPrint
Next up, we'll install and configure OctoPrint. For this project, I took the manual route and installed everything manually following these instructions:
https://octoprint.org/download/#installing-manually
Then using the specific instructions for Setting up OctoPrint on a Raspberry Pi running Raspberry Pi OS (Debian)
I followed
The rest of the steps are entirely up to you.
So that's it for MakeFarm Hackzone exhibit Part 1! Let me know if you try it out and/or have any issues or questions. In part 2 we'll cover OctoPrint plugins and Integrations.
Until then, be well and be kind!
Labels:
- 2,730 Views
5 Comments
You must be a registered user to add a comment. If you've already registered, sign in. Otherwise, register and sign in.
