


sabell2012

Mega Sage
Options
- Subscribe to RSS Feed
- Mark as New
- Mark as Read
- Bookmark
- Subscribe
- Printer Friendly Page
- Report Inappropriate Content
02-13-2016
03:04 PM
The next workflow pattern I will give an example of is the Workflow Control via Property Input pattern. As a side-note; for this article the title of Mini-Lab is a misnomer. This is a full-lab! Fair warning.
To see more about workflow patterns read my article:
Pragmatic Patterns: Workflows - Using Data to Adjust the Flow
Similar to my previous mini-lab article (Mini-Lab: Workflow Control Via Variable Input ) we will be going through the steps to build a very simple Service Catalog driven workflow. This one, however, will be configured by properties in the System Properties table. We will be looking at how changing the properties activates/deactivates parts of the workflow. The idea is to give greater control to the owner of an application without having to make code changes.
Prerequisites:
- Some familiarity with the workflow editor. I will be using the Geneva version of ServiceNow for my examples.
- Also, if you have not done so, you might want to run through my other lab on how to do advanced work with the If Activity; as we will be using this in those techniques in this and the next mini-lab article:
Mini-Lab: Workflows - Playing With the If Activity
Requirements
- Create a Service Catalog Item / Workflow combination where properties changed by an application owner will affect what occurs in the workflow.
- Place this Service catalog Item under the Can We Help You? Service Catalog Category.
- The name of the Service Catalog Item will be: Workflow Control via Property Input
- The Service Catalog item will contain a single variable: State.
- State can have four choices: New, Active, Open, and Closed. The underlying values of these will be 0,1,2,3 respectively.
- Only the Order Now button will appear on the Service Catalog Item.
- There will be a new application named: Workflow Patterns
- There will be a section under Workflow Patterns labeled: Administration.
- In the Administration section there will be a module that will contain a properties page named: Properties.
- There will be two properties:
- Property 1 will be labeled: React on Active?, and will be a checkbox. Default will be checked.
- Property 2 will be labeled: React on Open?, and will be a checkbox. Default will be checked.
- The workflow will print a message in the log that indicates a particular state was chosen and the appropriate property is active.
- The workflow will check to see if the React on Active is checked. If it is it will place a log statement saying so in the System Log.
- The workflow will check to see if the React on Open is checked. If it is it will place a log statement saying so in the System Log.
- If either is not checked, but is chosen in the Service Catalog Item then an unknown message will be printed in the log.
Design
1. Create a Service Catalog Item (Req #1)
- Name: Workflow Control via Property Input (Req #1,3)
- Category: How Can We Help You? (Req #2)
- Deactivate every shopping cart feature except Order Now. (Req #6)
2. Catalog Item Variables: (Req #4,5)
- Name: State
- Choice List
- Choices: New, Active, Open, Closed
- Values will be the strings: 0, 1, 2, 3
- Choices will be entered into the Choices table
3. Create a new Application (Req #7,8)
- Name: Workflow Patterns
- Create a section in the new application labeled: Administration.
4. Create two System Properties (Req #10)
- Name: workflow.react_on_active
- Description: React on Active?
- Type: true/false
- Associated to Workflow Patterns -> Properties page
- Name: workflow.react_on_active
- Description: React on Active?
- Type: true/false
- Associated to Workflow Patterns -> Properties page
5. Create a new System Property Category
- Name: Workflow Patterns
- Title: Workflow Patterns
- Associate this to the two system properties in Design#4.
6. Create a new Module under Workflow Patterns (Req #9)
- Name: Properties
- Type: Properties page.
- Link: Workflow Patterns System Property Category.
7. Workflow design will be as follows: (Req #1, 11,12,13,14)
Development
Our requirements and design are now completed. Let us see about implementation!
We will do our construction bottom up. We will start with the properties, then move to the workflow, then create the Application/Module/Properties page, and finally create our Service Catalog Item to kick the whole thing off.
Lab 1.1: Setting up the Properties Page
1. In the navigation filter type sys_properties.list and press enter. This will open up the System Properties list view.
2. Click on the New button to open the New properties form.
3. Fill in the form with the following (Req #10):
- Name: workflow.react_on_active
- Description (this will act as the question in the properties page): React on Active?
- Type: true | false
- Value: true
- Right-Click on the form header to display the form context menu, and choose Save to save your work.
4. Scroll to the bottom of the form and note the System Property Category related list. Click on the New button. The new System Property Category list view will be displayed. (Design #5)
- Fill in the form with the following:
- Name: Workflow Patterns
- Title: Workflow Patterns
- Copy the link that is displayed. This will be used when creating the Workflow Patterns property module later.
- Click the Submit button to save your work. This will display the workflow.react_on_active properties form.
f. Note that the workflow.react_on_active property now has a related list link to the new Workflow Patterns System Property Category.
g. Right-Click on the form header to display the form context menu, and choose Save just to make sure you save everything.
5. In the Navigation filter type in the following: sys_properties_category_m2m.list. This will display the System Properties Category list.
NOTE: Not sure why sys_properties and sys_properties_category_m2m are not links in the System Admin application. Mystery.
6. Filter for "Workflow Patterns".
7. Change property display order so that Active is 100, and Open is 200.
NOTE: This affects the order that the properties appear in the displayed properties page.
8. Now change the property name to: workflow.react_on_open
Note: (Req #10)
- Right-Click on the form header to display the form context menu, and choose Insert and Stay. This will create a new property named workflow.react_on_open.
- Scroll to the bottom of the form to view the System Property Category list view. Note that it is now empty.
- Click on the Edit button. This will display a Select List of System Property Categories. Filter for Workflow Patterns, and select this category.
- Click on Save to save your work. This will display the workflow.react_on_open property form. Scroll to the bottom to verify that the property is now associated to the Workflow Patterns System Property Category.
- Click on the Update button to make sure to save your work.
9. Navigate to System Definition -> Application Menus. The Application Menus list view will be displayed.
10. Click on the New button. The New Application Menu form will be displayed.
11. Fill out the form with the following (Req #7,8,9):
- Name: Workflow Patterns
- Active: Checked
- Category: Custom Applications
- Right-Click on the form header to display the form context menu and select Save to save your work.
12. Scroll to the bottom of the Application Menu form. You will see the Modules related list. It will be empty.
13. Click the New button. The New Module form will be displayed.
14. Fill out the form with the following:
- Title: Administration
- Order: 9000
- Click the Link Type tab.
- Link Type: Separator
- Click the Submit button. You will be returned to the Application Menu form.
15. Click the New button again. The New Module form will be displayed.
16. Fill out the form with the following (Req #10):
- Title: Properties
- Order: 9100
- Click the Link Type tab.
- Link Type: URL (from Arguments: )
- Arguments: system_properties_ui.do?sysparm_title=Workflow%20Patterns&sysparm_category=Workflow%20Patterns
NOTE: This is the link you copied in step 4b. I shortened it a bit as everything to the sys_properties_ui.do is implied and automatically filled in for you during runtime.
f. Click the Submit button. You will be returned to the Application Menu form.
g. The Modules list on the Application Menu form should look like this:
17. Click the Update button to make sure you save all of your work
Lab 1.2: Building the Workflow
1. Navigate to Workflow -> Workflow Editor. A new tab will open in your browser and the Workflow Editor will be displayed.
2. Click the plus "+" symbol in the upper right of the editor to create a new workflow. The New Workflow form will be displayed.
3. Fill out the form with the following:
- Name: Workflow Control Via Property Input
- Table: Global
- Description: Workflow control via property input
- Click the Submit button to save your work.
4. From the Core tab on the editor navigate to Utilities and drag a Scripting Activity onto the form. The Activity Properties form will appear.
5. Fill out the form with the following:
- Name: Initialize
- Script:
// it is a good practice to assign your properties to scratchpad variables
workflow.scratchpad.active = gs.getProperty('workflow.react_on_active');
workflow.scratchpad.open = gs.getProperty('workflow.react_on_open');
Note: This will pull in our properties and feed them into the workflow stream. BTW, this is my best practice, others feel just using the gs.getProperty where needed is sufficient. I feel that if you call the getProperty for the same property more than once it becomes an efficiency issue. Keep the number of record retrievals to a minimum in your workflow for maximum performance.
6. From the Core tab on the editor navigate to Conditions and drag an If Activity onto the form. The Activity Properties form will appear.
7. Fill out the form with the following:
- Name: Check Properties
- Advanced: Checked
- Script:
// in a modified if we can store our results in a scratchpad object variable for
// examination
workflow.scratchpad.result = ifScript();
function ifScript() {
// build a result object that will contain all possible results
var result = {active:false, open:false, unknown:false};
result.active = workflow.scratchpad.active == "true";
result.open = workflow.variables.open == "true";
// make sure you have a catch all
result.unknown = !(result.active || result.open);
return result;
}
d. Click the Submit button to save your work.
8. Right-Click and Delete the two conditions of the Check Properties If Activity.
9. Right-Click on the Check Properties If Activity header to display the Activity Context menu, and choose Add Condition (be patient, for whatever reason this can take several seconds to display!). The new Condition Properties form will appear.
10. Fill out the form with the following (Req #12):
- Name: isActive
- Condition Type: standard
- Skip during generate: checked
- Condition: workflow.scratchpad.result.active == true
- Click on the Submit button to save your work.
11. Repeat the procedure. Fill out the form with the following (Req #13):
- Name: isOpen
- Condition Type: standard
- Skip during generate: checked
- Condition: workflow.scratchpad.result.open == true
- Click on the Submit button to save your work.
12. Repeat the procedure one last time. Fill out the form with the following (Req #14):
- Name: isUnknown
- Condition Type: standard
- Skip during generate: checked
- Condition: workflow.scratchpad.result.unknown == true
- Click on the Submit button to save your work.
13. Your If Activity should look like this:
14. From the Core tab on the editor navigate to Utilities and drag a Run Script Activity onto the form. The Activity Properties form will appear.
15. Fill out the form with the following (Req #11):
a. Name: Log New
b. Script:
var identifier = context.name + '.' + activity.name;
gs.info('---> [{0}] New triggered!', identifier);
c. Click the Submit button to save your work.
NOTE: The context.name will automatically fill in the workflow name, and the activity.name will automatically fill in the, uh, activity name. BTW, this is really useful for labeling your log entries! Remember that a best practice is: NO MYSTERY LOG ENTRIES in the System Log! This has been a real problem at a lot of my clients that use Workflows.
16. From the Core tab on the editor navigate to Utilities and drag a Run Script Activity onto the form. The Activity Properties form will appear.
17. Fill out the form with the following (Req #11):
a. Name: Log Active
b. Script:
var identifier = context.name + '.' + activity.name;
gs.info('---> [{0}] Active triggered!', identifier);
c. Click the Submit button to save your work.
18. From the Core tab on the editor navigate to Utilities and drag a Run Script Activity onto the form. The Activity Properties form will appear.
19. Fill out the form with the following (Req #11):
a. Name: Log Failure
b. Script:
var identifier = context.name + '.' + activity.name;
gs.info('---> [{0}] Nothing triggered!', identifier);
c. Click the Submit button to save your work.
20. Wire up your workflow to look like the following diagram:
At this point you may want to Publish your workflow to save it down. However, that is not really necessary as you will be the only one testing it.
Lab 1.3: Building Service Catalog Item
Now we are ready to create the user interface (UI).
1. Navigate to Service Catalog -> Catalog Definitions -> Maintain Items. The Catalog Items list view will be displayed.
2. Click the New button. The New Catalog Item form will be displayed.
3. Fill out the form with the following (Req #1,2,3,6):
- Name: Workflow Control Via Property Input
- Active: checked
- Availability: Desktop Only
- Catalogs: Service Catalog
- Category: Can We Help You?
- Workflow: Workflow Control Via Property Input
- Short Description: Workflow Control Via Property Input
- Use Cart Layout: not checked
- Omit price in cart: checked
- No quantity: checked
- No proceed checkout: checked
- No cart: checked
- Right-click on the form header to bring up the context menu.
- Choose Save to save your work and remain on the form.
NOTE: Some of these values may not be visible on the form and you may need to modify the form to include them.
4. Scroll to the bottom of the Item form. You will see the tabs for the related lists.
5. Choose Variables, and click the New button. The New Variable Form will be displayed.
6. Fill out the form with the following (Req #4,5):
- Type: Select Box
- Click on the Question tab.
- Question: State
- Name: state
- Click on the Type Specifications tab.
- Include None: checked
- Right-click at the top of the Variable form to display the context menu.
- Choose Save to save your work and remain on the form.
NOTE: The Name field is where we make sure our variable name is consistent with what we programmed into our workflow.
7. Scroll to the bottom of the Variable form. You will see the Question Choices related list displayed.
8. Click on the New button. The New Question Choice form will be displayed.
9. Fill in the form with the following:
- Text: New
- Value: 0
10. Right-click on the Question Choice form header to bring up the context menu.
11. Click on Save to save your work and remain on the form.
12. Change the form to the following:
- Name: Active
- Value: 1
13. Right-Click on the Question Choices form header and choose Insert and Stay. This will write down a new record with the new values, and keep you in the form.
14. Change the form to the following:
- Name: Open
- Value: 2
15. Right-Click on the Question Choices form header and choose Insert and Stay. This will write down a new record with the new values, and keep you in the form.
16. Change the form to the following:
- Name: Closed
- Value: 3
17. Right-Click on the Question Choices form header and choose Insert. This will write down a third choice record, and will then return you to the Item form.
18. The Question Choices list view should now look something like this:
Unit Test
Now we are ready to do our testing. First we will test with all of the defaults. Our first test will involve choosing State equals Active, and verify that the properties don't interfere with the normal working of the workflow. Next we will turn off the Active property, and retest to see that Active is now an Unknown choice in the workflow. This will demonstrate control of the workflow via the properties.
1. First let's verify that our Properties page displays, and that the two options are present, and defaulted checked.
2. Navigate to Workflow Patterns -> Administration -> Properties. The Workflow Properties page will be displayed.
3. Validate that the two properties are present, and that they are both checked. Cool huh?!
4. Navigate to Self-Service -> Service Catalog. The Service Catalog home page will be displayed.
5. Click on the Can We Help You? Service Catalog item. The list of Help Service Catalog items will be displayed.
6. Scroll down until you find the Service Catalog Item labeled: Workflow Control Via Property Input, and click that link.
7. The Workflow Control Via Property Input Catalog Item will be displayed and should look something like this:
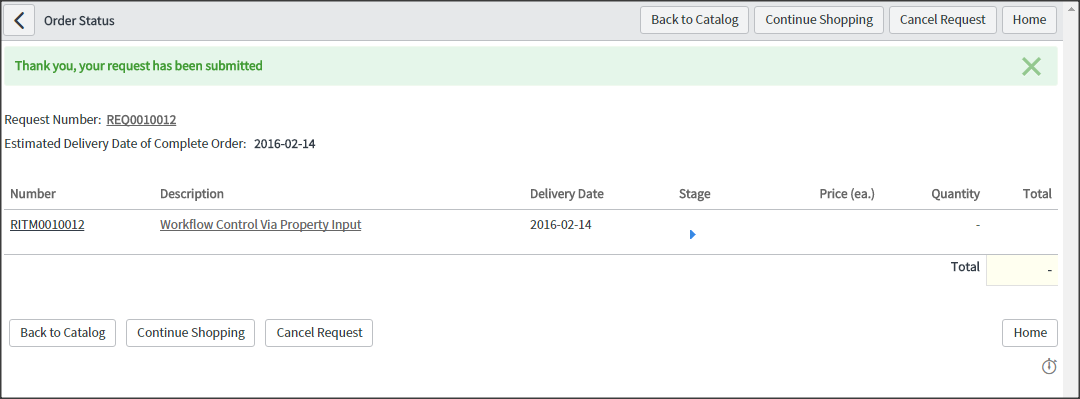
8. Choose the State value of Active, and click the Order Now button. The Order Status form will be displayed.
9. Click on the RITM number. The Requested Item form will be displayed.
10. From the Requested Item Form scroll down to related links.
11. Click on the Show Workflow link. This will display the current workflow.
12. The workflow should show that the Active path was executed.
13. Close the workflow browser tab.
14. Navigate back to Workflow Patterns -> Administration -> Properties. The Properties page will be displayed.
15. Uncheck React on Active? And click the Save button to save your work.
16. Navigate to Self-Service -> Service Catalog. The Service Catalog home page will be displayed.
17. Click on the Can We Help You? Service Catalog item. The list of Help Service Catalog items will be displayed.
18. Scroll back down until you find the Service Catalog Item labeled: Workflow Control Via Property Input, and click that link. The Workflow Control Via Property Input page will be displayed.
19. Choose the State value of Active, and click the Order Now button. The Order Status form will be displayed.
20. Click on the RITM number. The Requested Item form will be displayed.
21. From the Requested Item Form scroll down to related links.
22. Click on the Show Workflow link. This will display the current workflow.
23. The workflow should show that the Active path was not executed, but instead you should see that the Unknown path was executed. This validates that the Active property controlled the flow.
24. Close the workflow browser tab.
25. Navigate to System Logs -> System Log -> All. The System Log list view will be displayed.
26. Filter for Message starts with "---> [". This will display the list of messages written by the workflow.
27. Note that the first entry should be for the Active branch of the workflow firing. The second should be for the Unknown branch of the workflow firing.
28. You should go ahead and now test the other two possibilities:
- Open property unchecked, Active property checked, and Open chosen on the Service Catalog item.
- Open property unchecked, Active property unchecked, and anything chosen on the Service Catalog item.
And there you have it! A method of controlling a workflow via properties; complete with interface! This makes it possible to give the user control over what is executed in the workflow.
This concludes the second pattern example. In my next article I will show how you can use variables and System Properties in concert to control your workflow (pattern 3).
Steven Bell
Please Share, Like, Comment this blog if you've found it helpful or insightful.
for Click for More Expert Blogs and also Find Expert Events!
You must be a registered user to add a comment. If you've already registered, sign in. Otherwise, register and sign in.

