- Mark as New
- Bookmark
- Subscribe
- Mute
- Subscribe to RSS Feed
- Permalink
- Report Inappropriate Content
12-09-2025 01:56 AM
Overview
This article demonstrates how to integrate external weather information into ServiceNow by consuming the WeatherAPI.com REST service.
We will walk through:
Calling a Weather API using sn_ws.RESTMessageV2
Building a configurable Weather Widget by using Instance options
This solution is ideal for learning API integrations and widget UI development in ServiceNow.
1. Calling Weather API in ServiceNow
Weather-based widgets make dashboards more engaging, and ServiceNow makes it simple to consume external REST APIs.
In this article, we use RESTMessageV2 to fetch:
Current weather
3-day forecast
Basic location details
The data is then returned to the widget for rendering.
2. Server Script
The following script calls the Weather API, retrieves the forecast, normalizes custom dates, and prepares the response for the widget.
(function () {

    try {
        var city = (options.city || "Hyderabad").replace(/ /g, "%20");
        var startDate = normalizeDate(options.start_date);

        var apiKey = gs.getProperty('weather.api.key');
        var url = "https://api.weatherapi.com/v1/forecast.json?key=" + apiKey +
                  "&q=" + city + "&days=3&aqi=no&alerts=no";

        var r = new sn_ws.RESTMessageV2();
        r.setEndpoint(url);
        r.setHttpMethod("GET");

        var result = JSON.parse(r.execute().getBody());

        var apiToday = result.forecast.forecastday[0].date;

        var displayToday = startDate || apiToday;
        var disp1 = computeNextDate(displayToday, 1);
        var disp2 = computeNextDate(displayToday, 2);

        data.weather = {
            city: result.location.name + ", " + result.location.country,
            temp: result.current.temp_c,
            icon_url: "https:" + result.current.condition.icon,
            date: formatPrettyDate(displayToday)
        };

        data.forecast = [
            {
                date: formatPrettyDate(disp1),
                avg_temp: result.forecast.forecastday[1].day.avgtemp_c,
                icon_url: "https:" + result.forecast.forecastday[1].day.condition.icon
            },
            {
                date: formatPrettyDate(disp2),
                avg_temp: result.forecast.forecastday[2].day.avgtemp_c,
                icon_url: "https:" + result.forecast.forecastday[2].day.condition.icon
            }
        ];

    } catch (ex) {
        data.error = ex.message;
    }

    function normalizeDate(inputDate) {
        if (!inputDate) return "";
        var gdt = new GlideDateTime();
        gdt.setDisplayValue(inputDate);
        return gdt.getLocalDate().toString();
    }

    function computeNextDate(dateStr, addDays) {
        var gdt = new GlideDateTime(dateStr + " 00:00:00");
        gdt.addDaysLocalTime(addDays);
        return gdt.getLocalDate().toString();
    }

    function formatPrettyDate(dateStr) {
        var p = dateStr.split("-");
        var monthIndex = parseInt(p[1], 10) - 1;
        var day = parseInt(p[2], 10);
        var months = ["Jan", "Feb", "Mar", "Apr", "May", "Jun",
                      "Jul", "Aug", "Sep", "Oct", "Nov", "Dec"];
        return months[monthIndex] + " " + day;
    }

})();
3. Client Controller
The client script sends parameters (city and date) to the server and receives weather data.
api.controller = function($scope) {
    var c = this;
};
4. Instance Options Schema
Administrators can configure a default city and start date through instance options.
[
  {
    "name": "city",
    "section": "other",
    "label": "Default City",
    "type": "string"
  },
  {
    "hint": "DD-MM-YYYY",
    "name": "start_date",
    "section": "other",
    "label": "Start Date",
    "type": "string"
  }
]
5. Widget HTML
The widget displays the current weather along with a 3-day forecast.
<div class="weather-widget">
  <h3>{{data.weather.city}}</h3>

  <div class="forecast-card">
    <img ng-src="{{data.weather.icon_url}}">
    <div>{{data.weather.temp}}°C</div>
    <div>{{data.weather.date}}</div>
  </div>

  <div class="all-weather">
    <div class="forecast-card" ng-repeat="day in data.forecast">
      <img ng-src="{{day.icon_url}}">
      <div>{{day.avg_temp}}°C</div>
      <div>{{day.date}}</div>
    </div>
  </div>
</div>
6. Download Widget XML
The complete widget XML is available for download below.
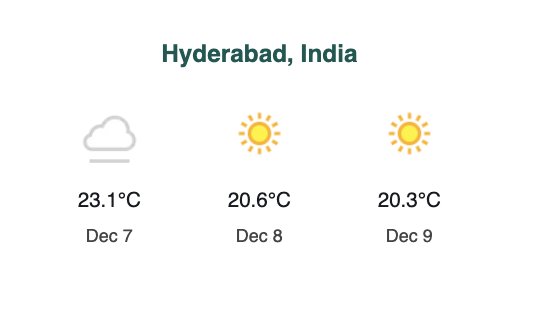
7. Final Output
Below is the final appearance of the Weather Widget in Service Portal:
Solved! Go to Solution.
- 2,909 Views
- Mark as New
- Bookmark
- Subscribe
- Mute
- Subscribe to RSS Feed
- Permalink
- Report Inappropriate Content
12-09-2025 02:37 AM
Yes, it is a business requirement — in fact, it was suggested by the ServiceNow team themselves. The idea was to display real-time weather information in the portal based on the selected event record, which contains the city name.
- Mark as New
- Bookmark
- Subscribe
- Mute
- Subscribe to RSS Feed
- Permalink
- Report Inappropriate Content
12-09-2025 02:29 AM
thanks for sharing but was this a business requirement which you worked recently?
I have worked with multiple customers but never came across such requirement to show weather of cities within ServiceNow.
Ankur
✨ Certified Technical Architect || ✨ 10x ServiceNow MVP || ✨ ServiceNow Community Leader
- Mark as New
- Bookmark
- Subscribe
- Mute
- Subscribe to RSS Feed
- Permalink
- Report Inappropriate Content
12-09-2025 02:37 AM
Yes, it is a business requirement — in fact, it was suggested by the ServiceNow team themselves. The idea was to display real-time weather information in the portal based on the selected event record, which contains the city name.
- Mark as New
- Bookmark
- Subscribe
- Mute
- Subscribe to RSS Feed
- Permalink
- Report Inappropriate Content
01-07-2026 11:22 PM
I tried this thanks for posting this. I learned new things when working on it.