


valarmathi_kann

ServiceNow Employee
Options
- Subscribe to RSS Feed
- Mark as New
- Mark as Read
- Bookmark
- Subscribe
- Printer Friendly Page
- Report Inappropriate Content
04-20-2022
02:04 AM
This blog article covers the steps to add post-provisioning steps after a server is provisioned using a cloud template (e.g cloud formation). The steps to handle credentials for logging into the server, the steps required to run a cloud script are also provided. You will find this useful for building your server deployment workflows.
What is covered?
1. Working CFT Template [PFA, AWSCFTForServiceNowCPG]
2. Configure Post Provisioning scripts [Block Until Ready & Execute Script]
Block Until Ready - Waits for the VM to be available and IPAddress is reachable over the internet.
Execute Script - Operation to execute a script on the provisioned instance.
3. Configure NodeAddress & NodeCredentials. [Needed for any script execution]
Resolves IPAddress, UserName and PrivateKey which is the base for any script execution.
4. Configure Cloud Scripts and execute the same in post provision
Nginx script that can be executed on any Linux machine.
5. Troubleshoot issues related to wrong Input Parameters passed to cloud.
Steps to configure a Post Provision on CPG [Applicable for CFT, ARM, GDM]
1. Get a CFT Template [InstanceName is mandatory Input for Post Provision]
PFA, AWSCFTForServiceNowCPG template for reference.
2. Create a catalog item.
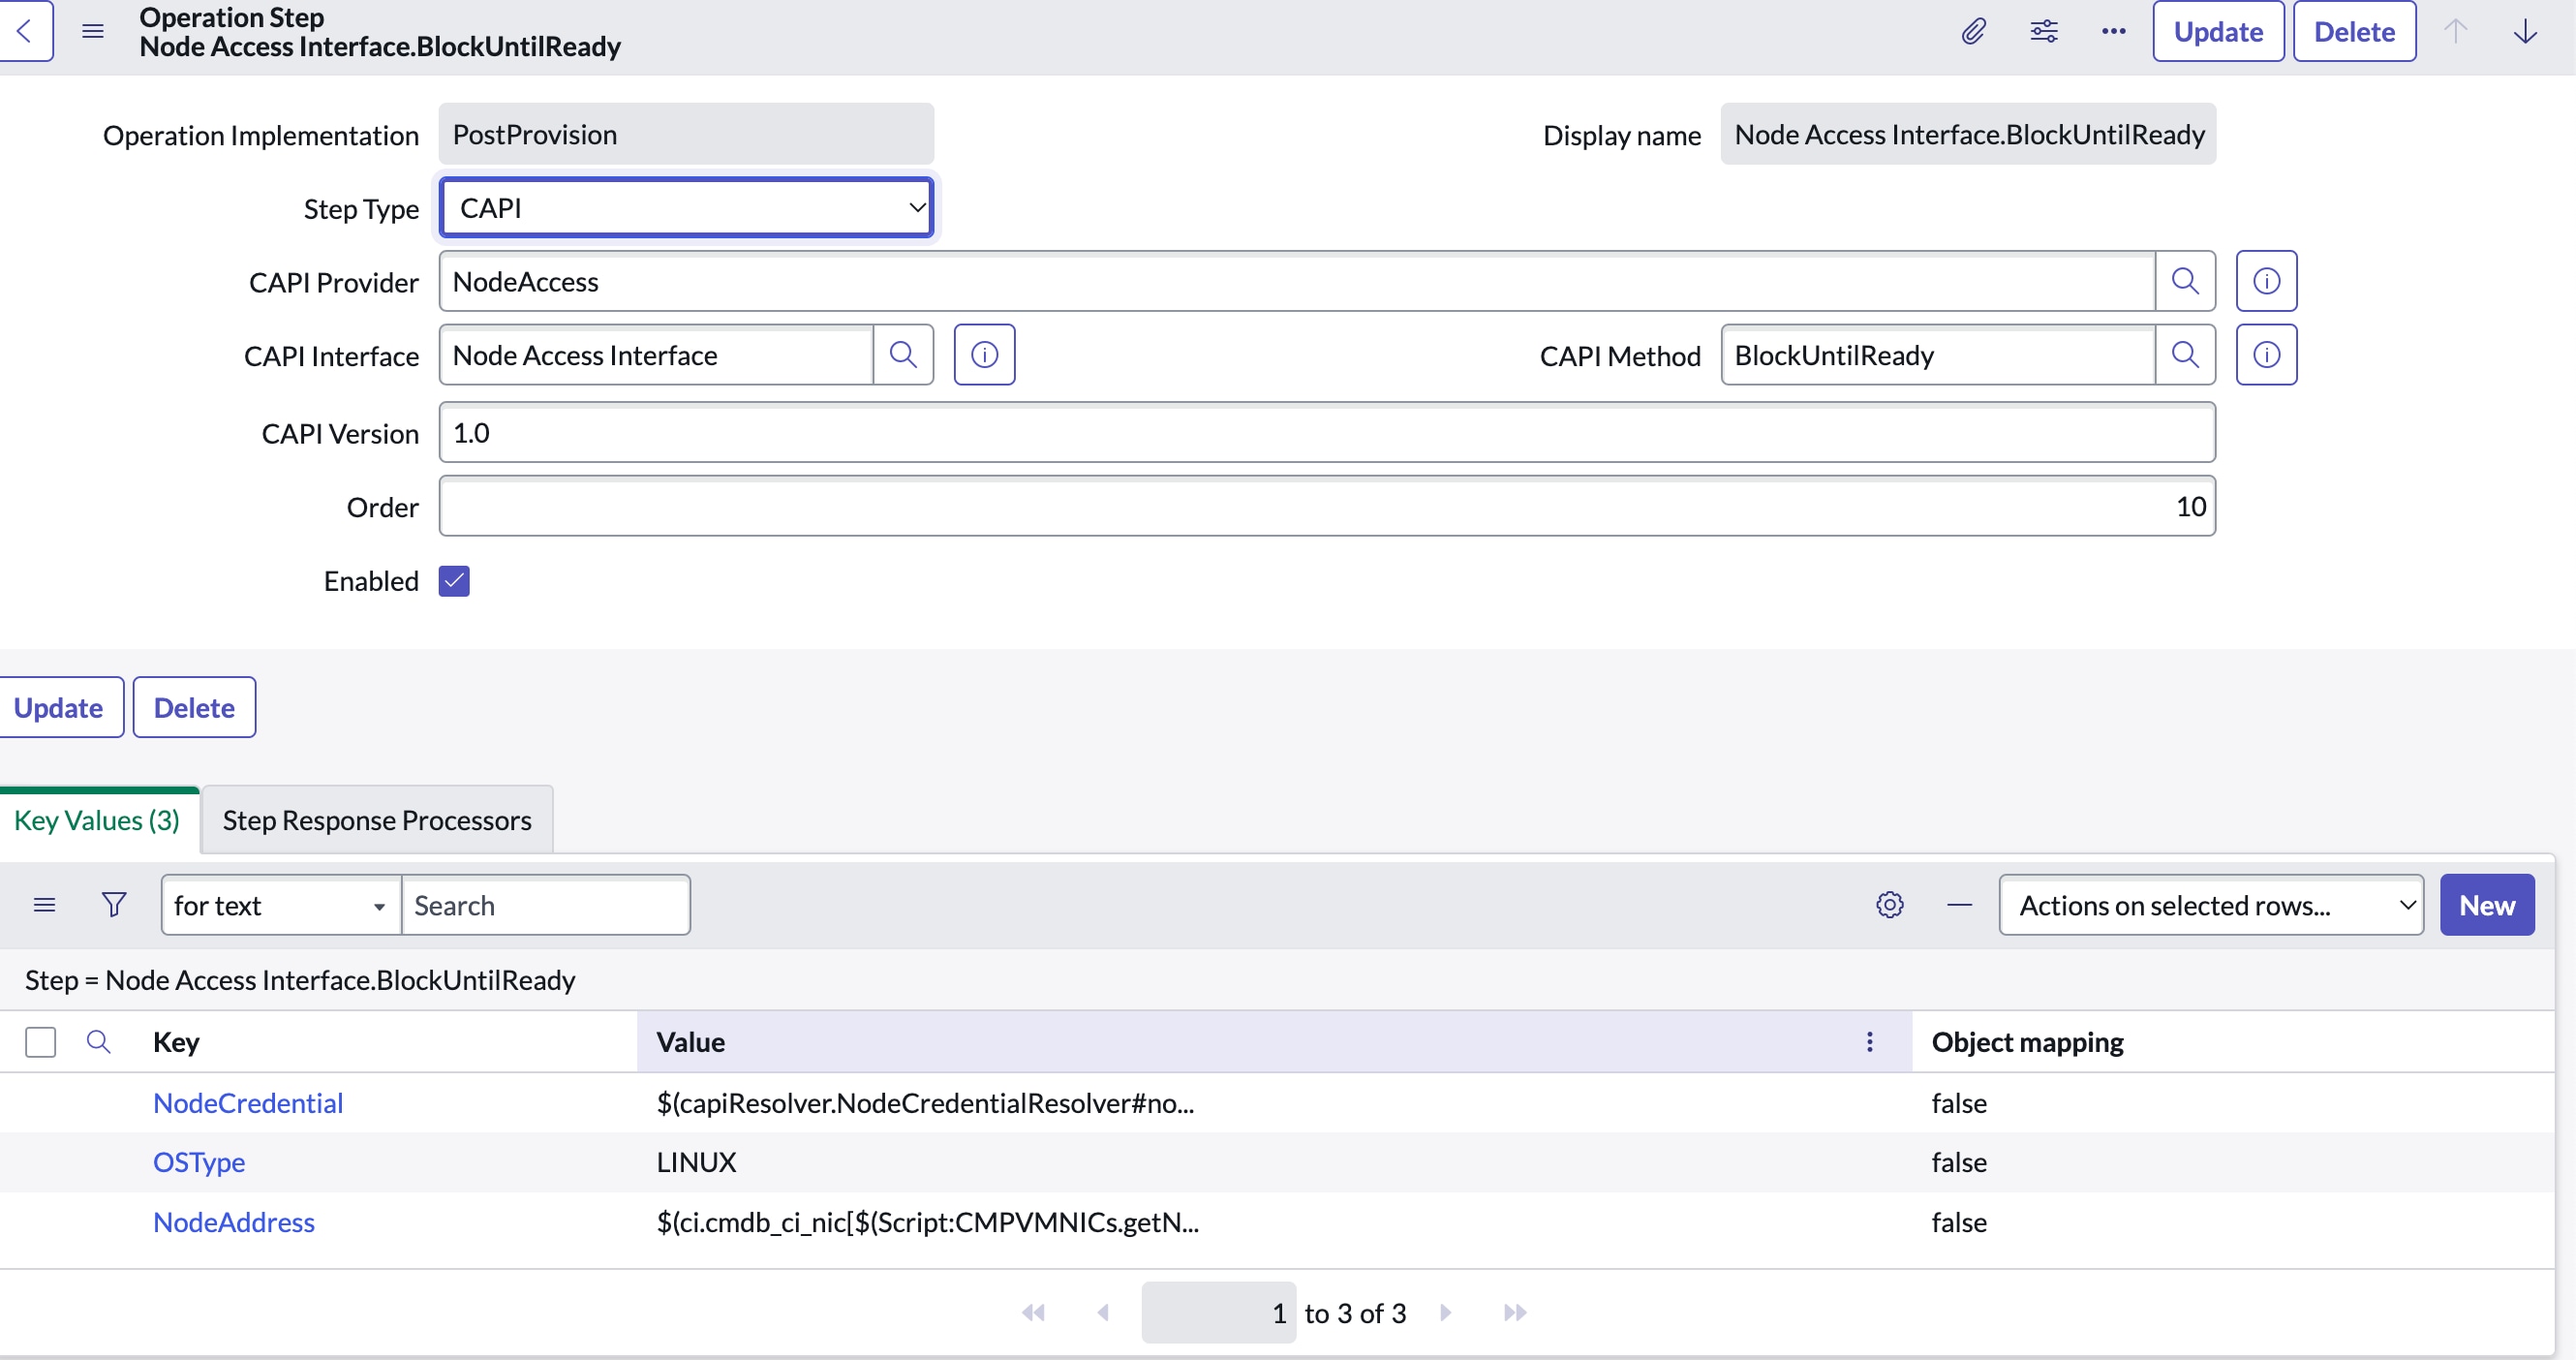
3. Add a Post Provision Operation for Block Until Ready. This operation waits until the VM is available to do the Execute Script operation on the provisioned VM.
If Step 3 is not done, we might face Connection Refused issue which is inconsistent.
4. Add a Post Provision Operation for Execute Script. This operation runs an execute script on the provisioned instance.

5. Add the below Mappings in both the operations to resolve NodeAddress, NodeCredentials
NodeCredential
$(capiResolver.NodeCredentialResolver#nodeCredentialId=#sys_id of the ssh credentials#)
$(capiResolver.NodeCredentialResolver#nodeCredentialId=520f3ad087c3455053d40f65dabb357e)
Create a new credential from Credentials module with username/private_key and replace the sys_id in the above expression.
THIS IS THE SAME CREDENTIAL THAT WE USED TO PROVISION THE VM.
NodeAddress
[Use 1st expression if public_ip is reachable over the internet / Use 2nd expression if private_ip is reachable over the internet]
$(ci.cmdb_ci_nic[$(Script:CMPVMNICs.getNICs[arg=$(Stack.items[${parameter.vmName}].attributes[sys_id])])].public_ip)
$(ci.cmdb_ci_nic[$(Script:CMPVMNICs.getNICs[arg=$(Stack.items[${parameter.vmName}].attributes[sys_id])])].private_ip)
${parameter.vmName} - This has to be resolved in this expression which is not OOB.
a. Create an attribute vmName in Resource Block which is created out of catalog item. The Resource Block name will be the name of the catalog item.
b. vmName will be an input from the user. Map the InstanceName [newly provisioned node name] to this vmName
Go to Cloud Catalog Item > Manage Attributes. Get the expression of InstanceName from Provision and replace the expression of vmName.
Get this expression
Replace the expression here
Script
${CloudScript.scripts.InstallNginx} --> change the script name accordingly.
Configure Script in Cloud Scripts Module
Cloud Script template
Cloud Script [Script Name should be given in expression]
${CloudScript.scripts.InstallNginx}
Now, you are ready to launch a stack.
Look at Cloud API Trail for troubleshooting
Happy Provisioning 🙂
- 1,533 Views
You must be a registered user to add a comment. If you've already registered, sign in. Otherwise, register and sign in.


.png)
.png)
.png)
.png)