- Post History
- Subscribe to RSS Feed
- Mark as New
- Mark as Read
- Bookmark
- Subscribe
- Printer Friendly Page
- Report Inappropriate Content
on 11-15-2017 01:48 PM
You've ensured that the out-of-the-box Performance Analytics content is properly pointing at the correct data structures in your ServiceNow instance. Now it's time to collect the data for the indicators and breakdowns so you can start visualizing data.
Each plugin you activated, also created Data Collector Jobs to help you collect analytics information for the indicators and breakdowns that were installed. Once the jobs run, you will be able to see the data in the widgets and dashboards that were provided. It's straight-forward, but the Data Collector is a pretty special entity inside of Performance Analytics. Put simply, the Data Collector is what runs on a periodic basis (usually daily) to read your operational tables, measures the data for that day against the definitions specified in the different Indicators and Breakdowns, and stores the data in the Performance Analytics tables inside your instance. The Data Collector is in effect what drives the snapshot nature of the data for Performance Analytics.
In general, each plugin you activated for out-of-the-box content installed two (2) Data Collector Jobs:
- Historic Data Collection: The historic collection is usually run when you install/configure Performance Analytics for the first time. By default, the historic Data Collector Job collects the last 60 days of data for the indicators specified in the job. You can configure the job to collect more historic data if you want to go back further in time. After you have run the historic Data Collector Job for the out-of-the-box content, the only job that should then run for those same indicators is the corresponding daily job.
- Daily Data Collection: The daily collection is configured to run every day and needs to be scheduled to do so. It is the daily Data Collector Job that will continue to populate data into the Performance Analytics tables going forward into the future after you have configured Performance Analytics. Failure to enable the daily Data Collector Jobs will prevent any new data from being visualized in your dashboards.
Now we can go through the steps to collect the historic data and also configure the daily collection to be scheduled.
Step 1: Run The Historic Data Collector Job(s)
What you have done will collect Performance Analytics data from this day forward. However, you should also collect historic data. After all, you likely have plenty of records in your ServiceNow instance for your processes where you can gain immediate insight. This is the purpose of the historic Data Collector Jobs. You should run these historic jobs provided with the out-of-the-box content when you first configure Performance Analytics.
To run the historic Data Collector Job, perform the following steps:
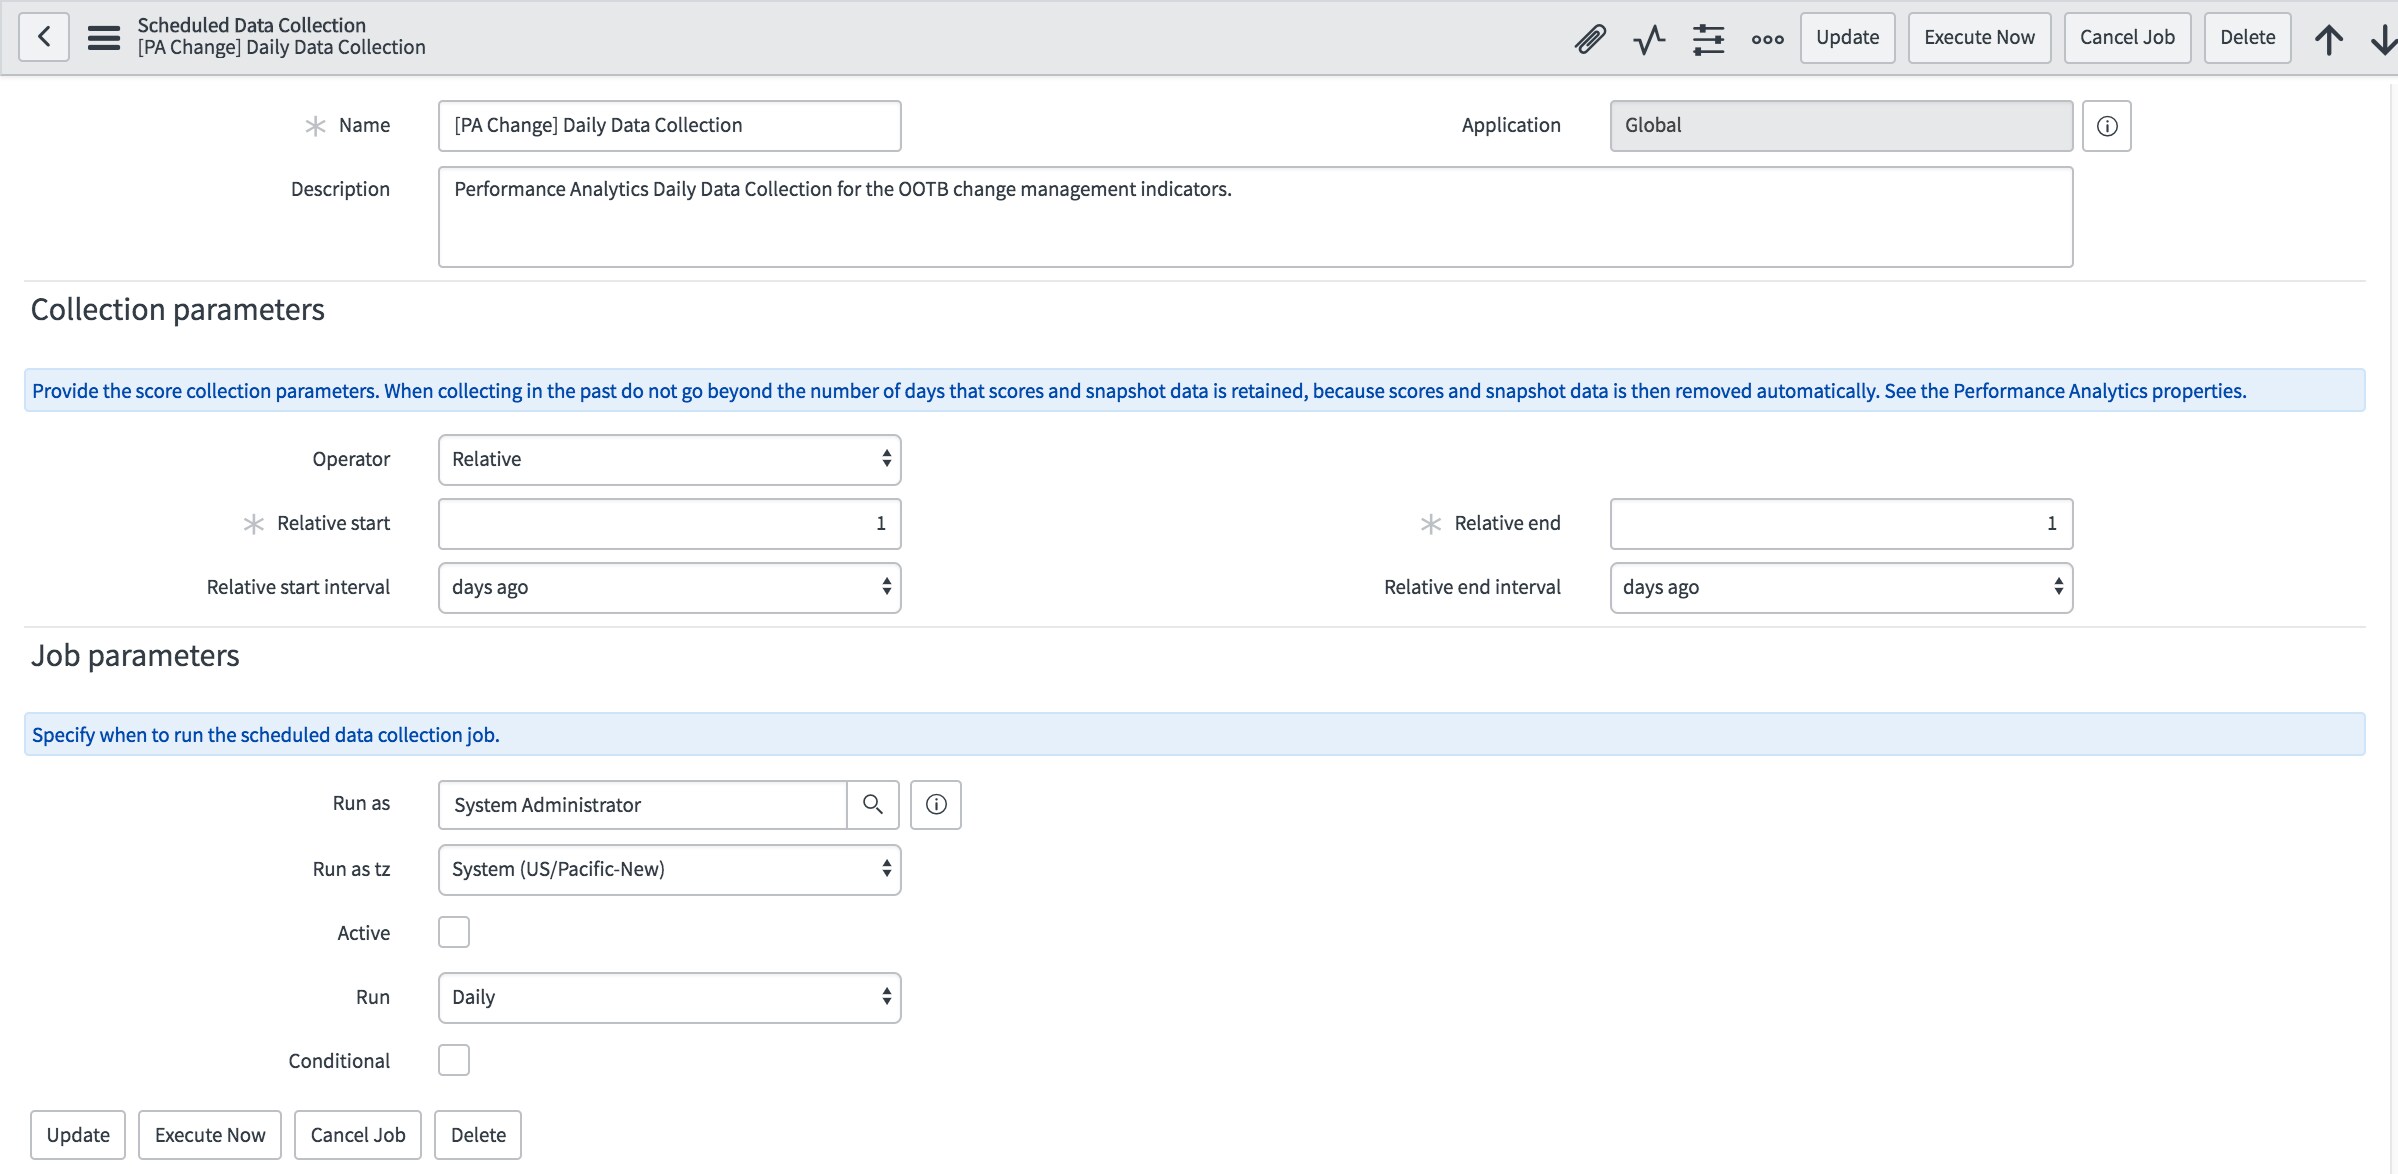
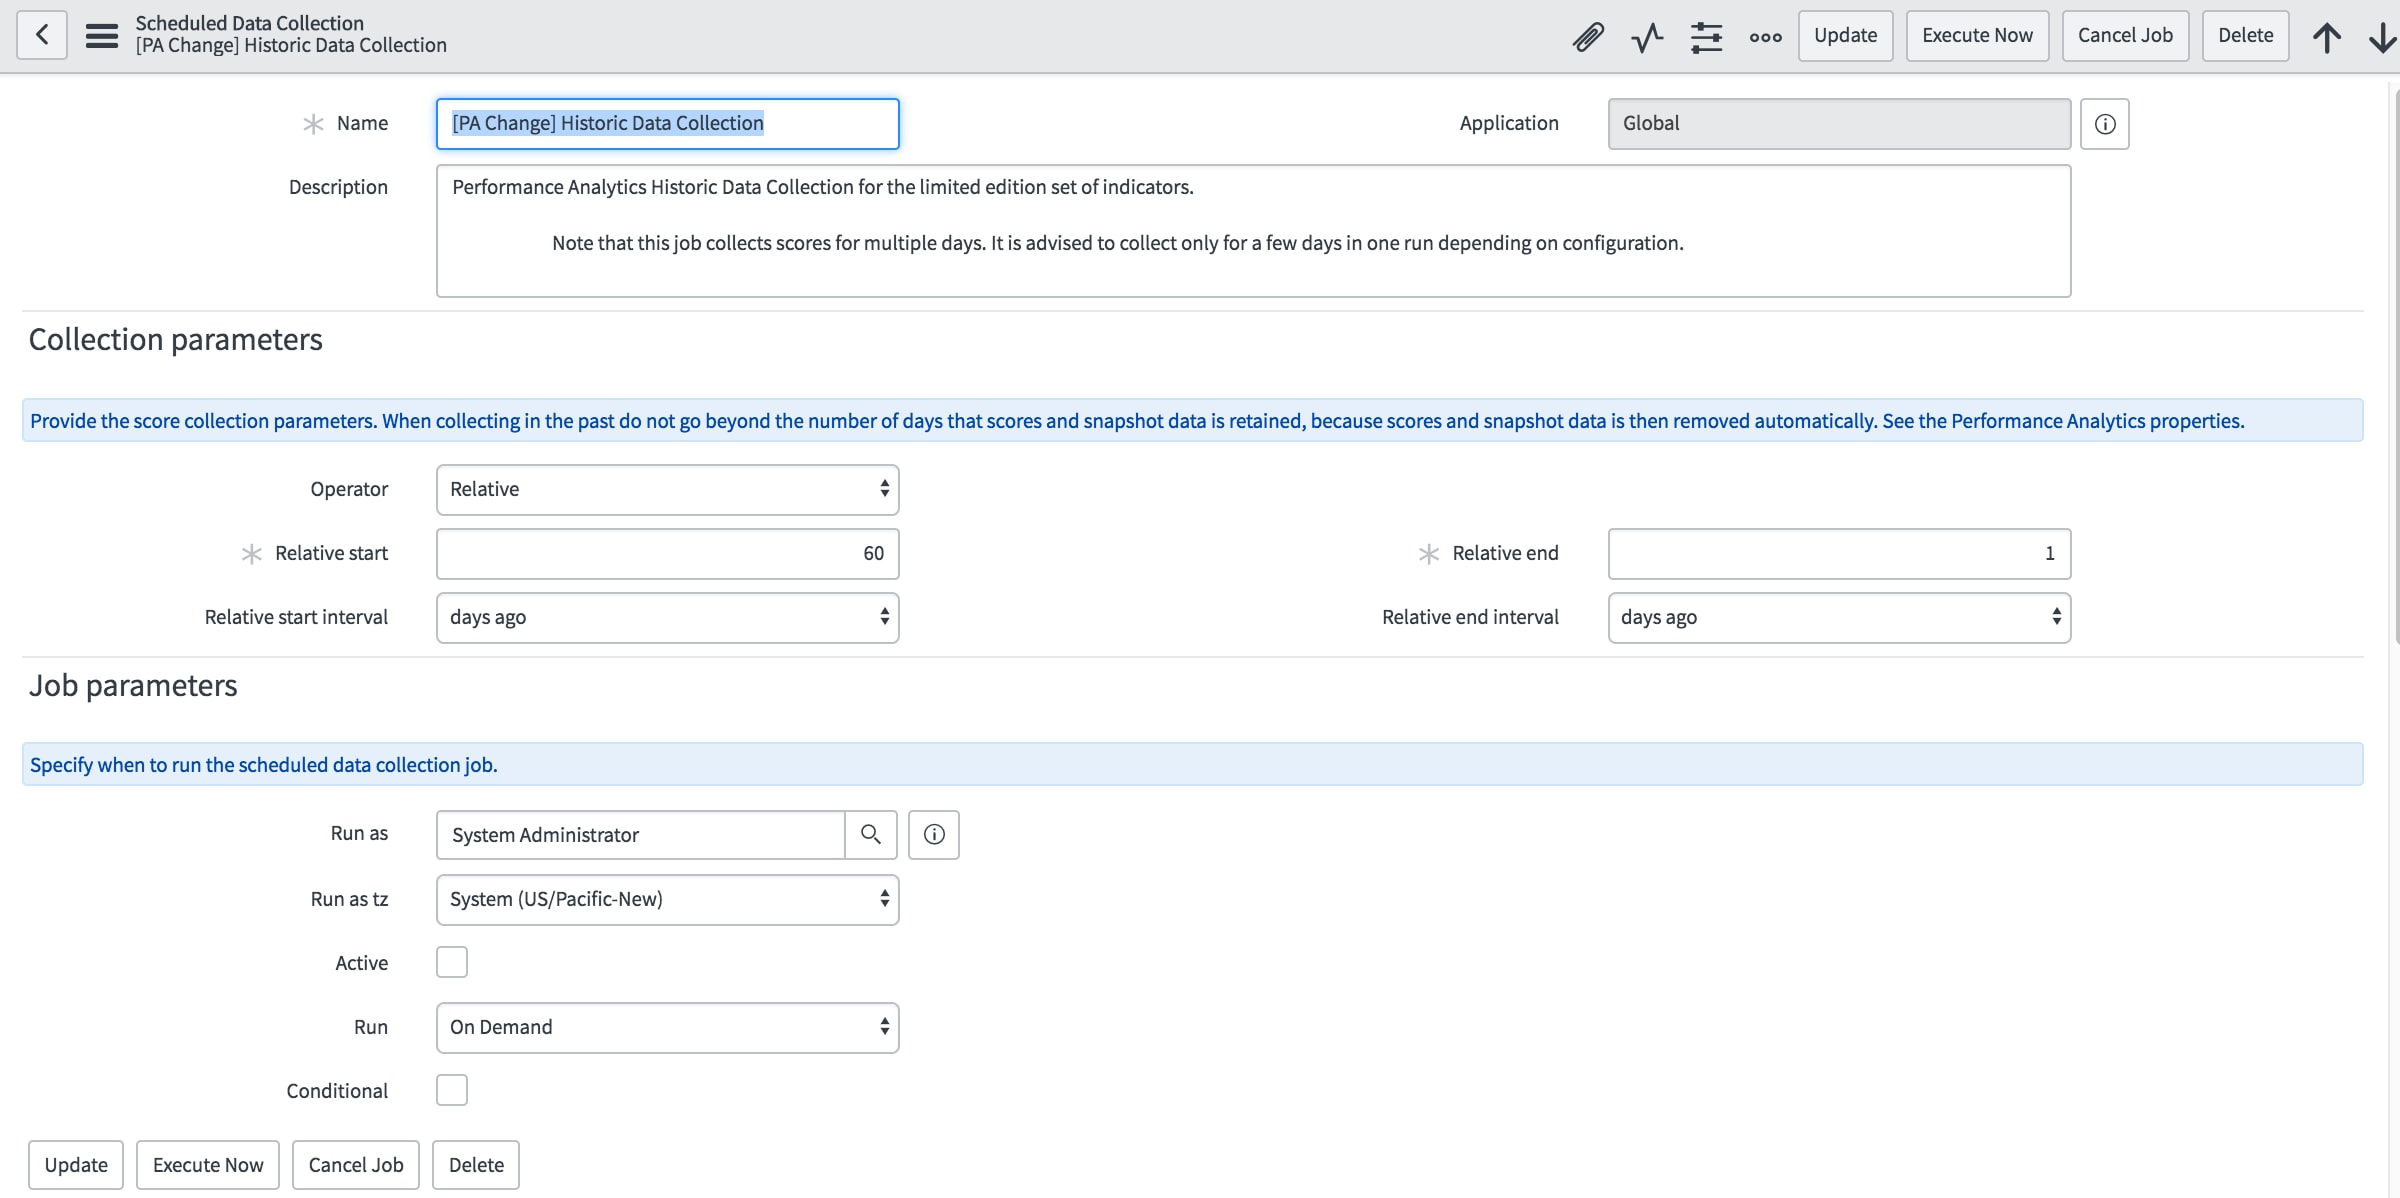
- In the left-hand navigation page, click Performance Analytics > Data Collector > Jobs. The list of available jobs are displayed in the main content pane. The out-of-the-box historic Data Collector Jobs contain the word "Historic".
- For each historic Data Collector Job you want to run, click the job from the list in the main content pane. The details of the job appear in the main content pane.
- Input the number of historic days you want to collect in the Relative Start box under Collection Parameters. By default, the historic Data Collector Job will collect data for the prior 60 days.
Important Note! When the historic Data Collection Job runs, the Data Collector will actually run a number of times equal to the number of days specified in the form. For example, the default configuration causes the Data Collector to run 60 times in succession. The Data Collector will start at T-60 days and examine all records as if the date were 60 days ago. After processing all of those records, the Data Collector will run again at T-59 days and repeat the process. It then progresses to T-58 days and so on until it gets to the current date.
Each day's collection may take a minute or two to complete depending on the size of your tables. But realize that a historic data collection over multiple months may take some time to complete.
- Under Job Parameters, make sure the account specified in the Run As box has rights to read the data in the tables specified by the indicators.
- Click the Execute Now button to start the job. You are returned to the list of Data Collector Jobs.


Once you click the Execute Now button, the Data Collector will run and collect data over the specified number of days.
Step 2: Verify Data Collection
The next step is to verify that the data have been collected by the Data Collector. Perform the following steps to check the completion of the historic Data Collector Job you just ran:
- In the left-hand navigation pane, click Performance Analytics > Data Collector > Job Logs.
- Check the State of the historic data collection you started. It will report as Collected when the job has finished.

If the job is still running, you will see that the State is Collecting. Just be patient and check back periodically. Once complete, you should see a number of Inserts to tell you the statistical data have been collected.
Step 3: Schedule The Daily Data Collector Job(s)
The first thing to do is make sure the daily Data Collector Jobs for your desired content are enabled. This will ensure Performance Analytics is collecting the data and snapshotting your KPIs on a daily basis. To enable the jobs, perform the following steps:
- In the left-hand navigation page, click Performance Analytics > Data Collector > Jobs. The list of available jobs are displayed in the main content pane. The out-of-the-box daily Data Collector Jobs are marked as "Daily" in the Run column.
- For each daily Data Collector Job you want to enable, click the job from the list in the main content pane. The details of the job appear in the main content pane.
- Check the Active box under Job Parameters to enable the job. A form appears for you to schedule the time of day the job will run.
- Select the time (based on a 24-hour clock) when the job will run in the Time box. It is recommended the job run shortly after midnight in the timezone of the instance to collect a full day's worth of data from the prior day. In the example below, the job is scheduled to run at 12:10AM in the US Pacific timezone, which is the system timezone for the instance.
- Review the Run As box to ensure the Data Collector Job runs as a user with enough rights to read the indicator tables.
- Click Update to save your changes. You are returned to the list of Data Collector Jobs.
- Review the list of Data Collector Jobs to ensure the Active field is set to true.


The Data Collector Job you just enabled will now run daily at the time you scheduled.
Step 4: Review Your Results
Once you see the Data Collector Job has finished, seeing your new data is simple:
- In the left-hand navigation pane, click Performance Analytics > Dashboards. The last selected dashboard appears in the main content pane.
- From the dropdown list at the top of the main content pane, select a dashboard corresponding to the historic Data Collector Job you just ran. In the example used in this article, it would be a dashboard related to Change Management such as the Change Premium dashboard.


Once you have completed these 4 steps, you are ready to start analyzing your data! Go back to the Performance Analytics Landing Page and click on the Analyze step.
- 7,417 Views
- Mark as Read
- Mark as New
- Bookmark
- Permalink
- Report Inappropriate Content
Thank you, Heath, for taking the time to write this information up. It is extremely helpful, as SN documentation leaves a lot to be desired (like true, step-by-step instructions)
- Mark as Read
- Mark as New
- Bookmark
- Permalink
- Report Inappropriate Content
Can anyone help clarify the following:
"Under Job Parameters, make sure the account specified in the Run As box has rights to read the data in the tables specified by the indicators."
However I found something conflicting at the docs site:
"The data collection job does not use the permissions of this user. Any user can run the job."