


Siham TAHA

ServiceNow Employee
Options
- Subscribe to RSS Feed
- Mark as New
- Mark as Read
- Bookmark
- Subscribe
- Printer Friendly Page
- Report Inappropriate Content
07-11-2022
06:42 AM
The migration of Campus maps is now available in the product with version 1.3.2 of Indoor Mapping with our Snapshots feature
As a WSD and Indoor mapping customer, you might want to create your map on a certain instance and then migrate it over to another instance (e.g., create your map on a development instance and then migrate it to a production instance).
Promoting an indoor map across instances has two components to it:
- Configuration updates: Migrated through update sets in the ‘Indoor Mapping’ scope
- Campuses and Map related updates: Exported through XML, using the attached UI Actions. These UI actions export XML related to an indoor map campus and WSD campus, which can then be imported in a target instance.
To do so, you will have 5 steps to follow:
1 – Export your configurations update set (if changes were made)
2 – Import your configurations update set in the target instance (if changes were made)
3 - Upload provided update set to enable the Campus Export and related WSD objects options (one time activity)
4 – Export your campus and related WSD objects to XML
5 – Upload your campus and related WSD objects XMLs in the target instance
Note: The ‘export related WSD objects’ action allows to copy WSD campuses, buildings, floors, areas and spaces tables from one instance to another while keeping the same sys_ids.
If you had simply created a map in the first instance without pushing any data to WSD or if you do not have any WSD related data, you can skip the ‘related WSD objects’ export step and simply export/import your campus map. In this case, on the target instance you will have to push Indoor Mapping data to WSD by following the steps in this blog:
https://community.servicenow.com/community?id=community_blog&sys_id=5a6e0abc1b278990acdc54e56b4bcb3d
1 – Export your configurations
Capture all your Indoor Mapping map upload and configuration related activities in an update set in the scoped application ‘Indoor Mapping’.
The indoor mapping application contains configurations such as place types to define the category and icon of a point of interest for example. These configurations are used by the map.
In order to avoid any kind of error when importing your campus in a new instance, these configurations need to be imported before the map so that they are recognized by the instance.
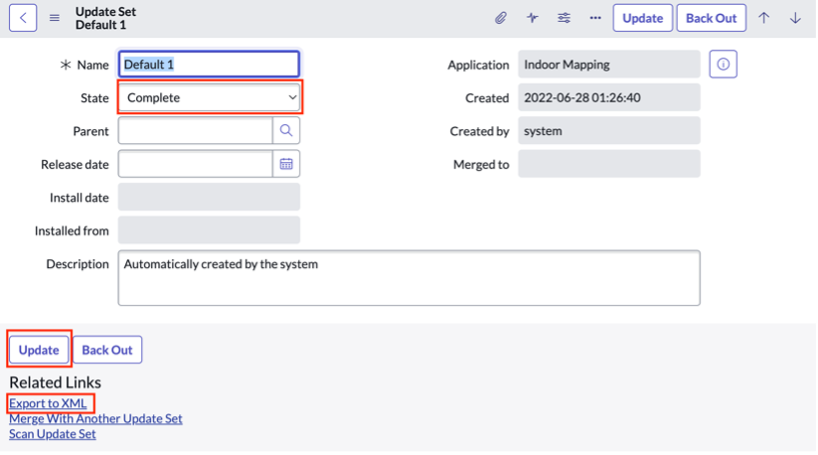
- In the left filter Navigator, search for <Local Update Sets >
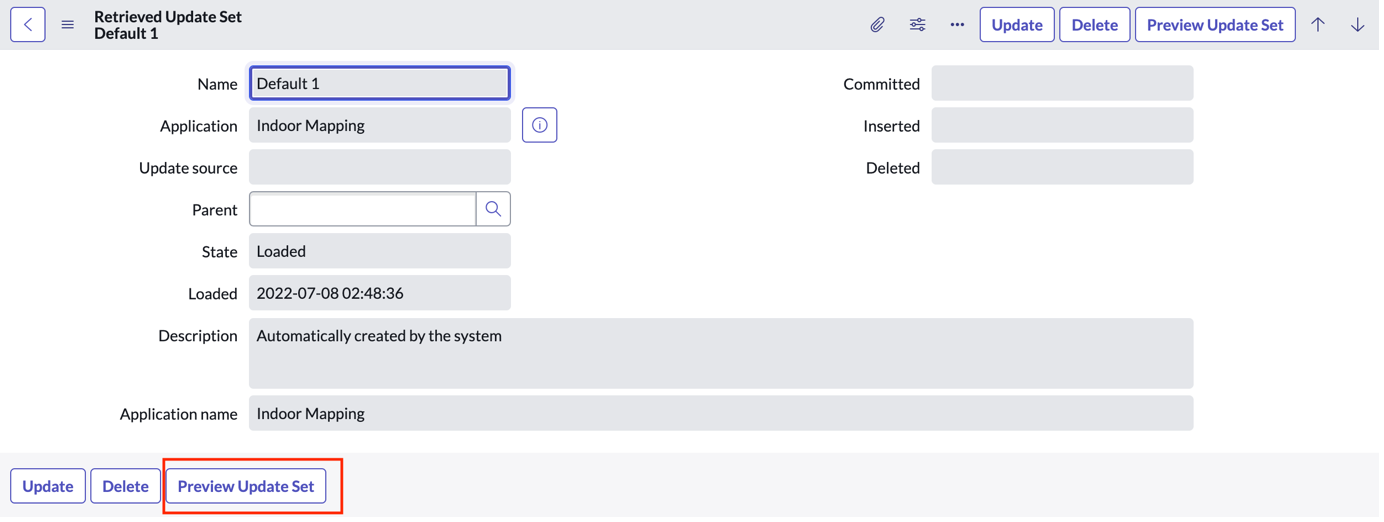
- Then choose the In-progress update set for ‘Indoor Mapping’ scope that was used to capture changes during Indoor mapping upload/configuration and then click on the name (We have used the update set <Default 1> in this case)
This update set contains all the changes that were made to the standard configurations that came with the application.
Note: If you do not find the indoor mapping application in this list and if no changes were made to the standard configurations that came with the application, please skip this step.
If you do not find the indoor mapping application but you know changes were made to the standard configurations, please find on which application the changes were made and select that local update set instead. You can find on which application the changes were made in the application field of the relevant table:
- Once you have clicked on the name, set the state of the Local update set to <Complete> and click on <Update>. Once you click on <Update> the <Export to XML> option will appear under the related links. You can now click on it to download your configurations.
Please note all the elements below are considered as configurations:
2 - Import your configurations update set in the target instance
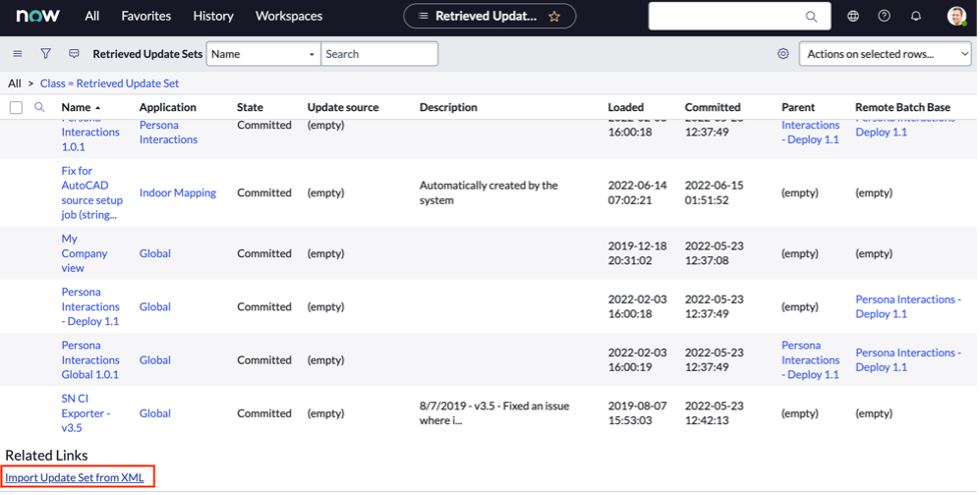
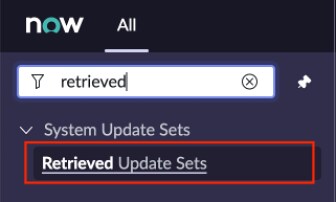
- In the new/target instance, search for <Retrieved Update Set>
- Click on <Import Update Set from XML>
- Upload the configurations update set and click on <Upload>
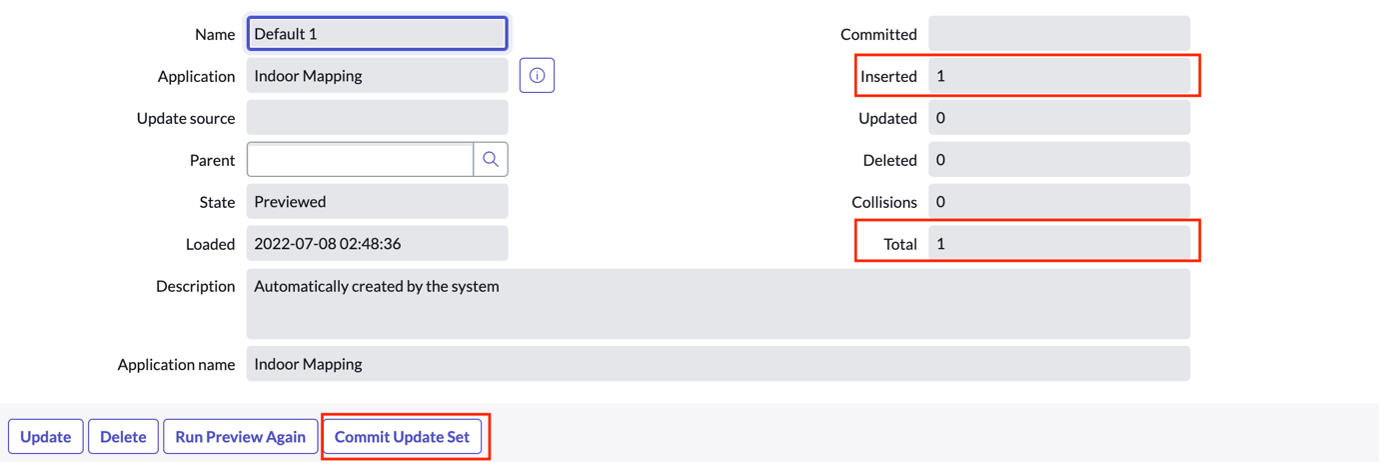
- Once uploaded, click on the update set record then click on <Preview Update Set>
- Confirm the number of changes that will be imported (1 in this case) and then press <Commit Update Set>
Your configurations are now available in the target instance. You can now import your campus data.
3 – Import update set to enable the ‘Export Campus’ and ‘Export related WSD objects’ options
We will now import an update set to enable the UI Actions to export XML for Indoor mapping Campus and related WSD objects.
Please note that this step should only be completed once.
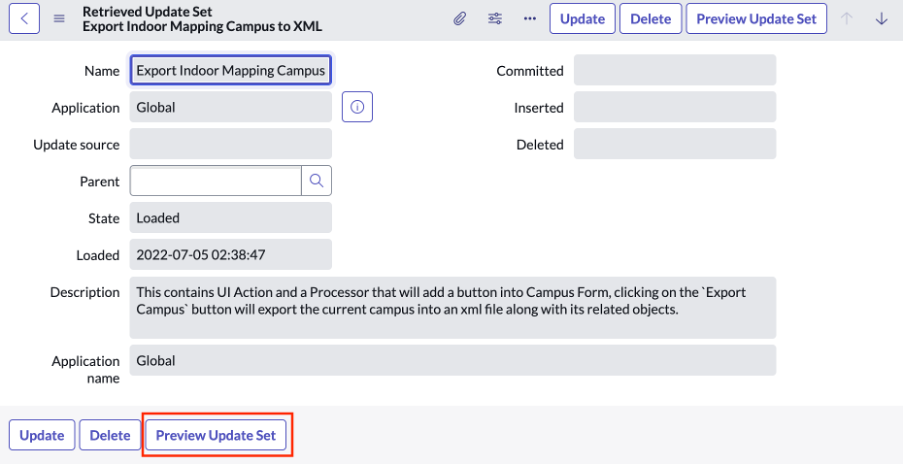
- In the left filter Navigator, search for <Retrieved Update Set>
- Click on <Import Update Set from XML>
- Upload the Update Set attached and click on <Upload>
- Once uploaded, click on the update set record then click on <Preview Update Set>
- Confirm all 4 records will be imported and then press <Commit Update Set>
You now have the ability to export your campus and its related WSD objects!
Note: You will also be able to export several campuses at once.
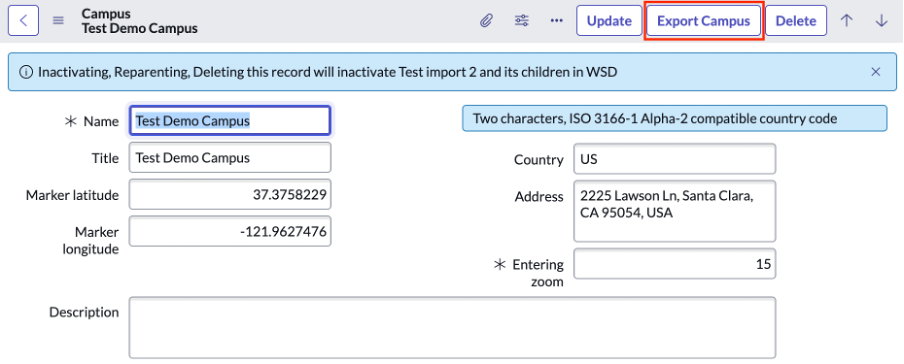
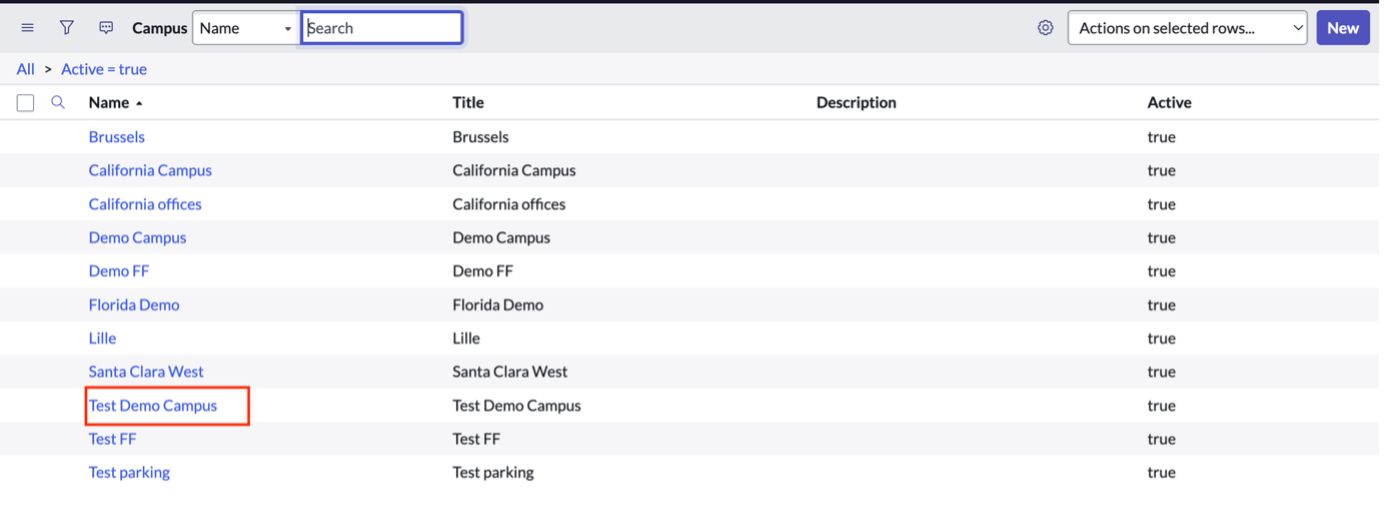
4 – Export your campus
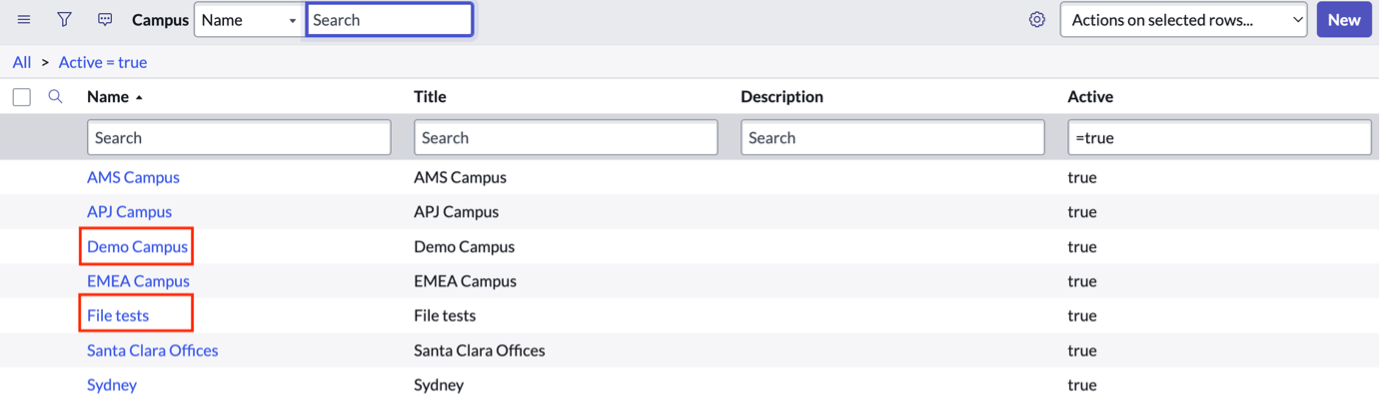
- To do so, search for <Campuses> in the Indoor mapping application
- From the list, select the campuses you want to export, then click on ‘Export Campuses’. You can also click on ‘Export Related WSD Objects’ to download them if you have already imported your Campuses into WSD.
Your campuses and their related WSD objects are now downloaded and are available as XMLs! sn_map_core_campus_2 contains the maps and sn_wsd_core_campus_2 contains all the relevant WSD objects.
Note: All users with the rights to edit a campus are allowed to export it meaning users with the following roles: admin, map_admin, map_editor and campus_editor.
5 – Upload your campus and related WSD objects on the target instance
- On the target instance, search for <Retrieved Update Sets>
- Click on <Import Update Set from XML> then upload the campus maps XML file you have just downloaded from the other instance then press <Upload>. This may take a couple of minutes.
You can repeat this step with the related WSD objects' XML file if you had any.
- Once that import is complete, please go to the <Campuses> section of the indoor mapping application to visualize your imported Campuses
You can also check the result directly in Map Studio
- To visualize related WSD objects, please go to the buildings/floors/areas/spaces section of the workplace safety management application
The spaces of our imported Demo Campus do appear!
All the elements of your campuses are now copied in the target instance including maps, values set in the view editor and WSD related objects!
Notes:
- The export always keeps the same system ID (sys_id) for the campus so it can be exported/imported several times without creating duplicates.
- New uploads will only update or add new elements to the map but will not delete any. Deletes should be managed manually.
- Only users with the Admin role can upload Campuses.
- 79,368 Views
6 Comments
You must be a registered user to add a comment. If you've already registered, sign in. Otherwise, register and sign in.
