Build Your First AI Agent in ServiceNow
- Mark as New
- Bookmark
- Subscribe
- Mute
- Subscribe to RSS Feed
- Permalink
- Report Inappropriate Content
04-06-2026 03:10 AM
If you find this content helpful please upvote, thank you
In this post, we’ll create a simple AI Agent from scratch that can generate an Incident. This is a beginner-friendly walkthrough meant purely for learning purposes.
Step 1: AI Agent plugins are licensed (not free)
Prerequisite Tip: Use a Now Learning instance from the Building AI Agents course. Since this instance expires after some time, make sure to document your steps for future reference.
Step 2: Define the Use Case
We’ll build a basic Incident Creator AI Agent. For now, we’ll focus only on the mandatory fields:
Caller → Logged-in user and Short Description → User input
An AI Agent primarily works with: Instructions → What the agent should do and Tools → How the agent performs actions (Script, Flow, Subflow, etc.)
Step 3: Create the AI Agent
Navigate to: All → AI Agent Studio → Create and Manage
You’ll see two options:
- Use Case
- AI Agent
Select New under AI Agent.
Fill in the details:
- Name: Incident Creator
- Description: An AI Agent that creates incidents based on user input
- Role: To create incidents based on provided details
Instructions:
- Ask the user to describe their issue and store it in the Short Description field.
- Use the
create_incidenttool to create the record. - Inform the user whether the incident was created successfully.
Click Save and Continue.
Step 4: Add Tools
In the Add Tools and Information tab:
- Click Add Tool → Select Script
- This script will take user input and map it to the Incident’s short description
You can define inputs and access them using inputs.<input_name> since the script runs within an inputs function.
Use a simple server-side script to create the incident (refer to the screenshot 1 below).
Click Save and Continue, and in the next Define Availability tab:
- Activate the AI Agent
- Click Save and Test
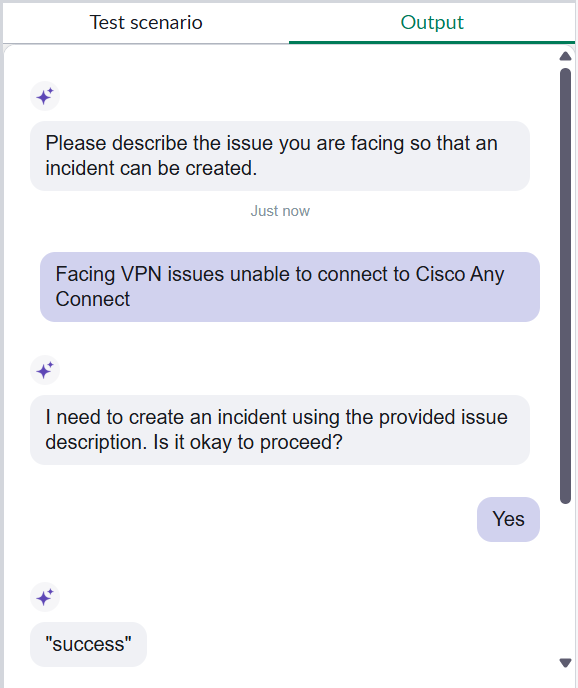
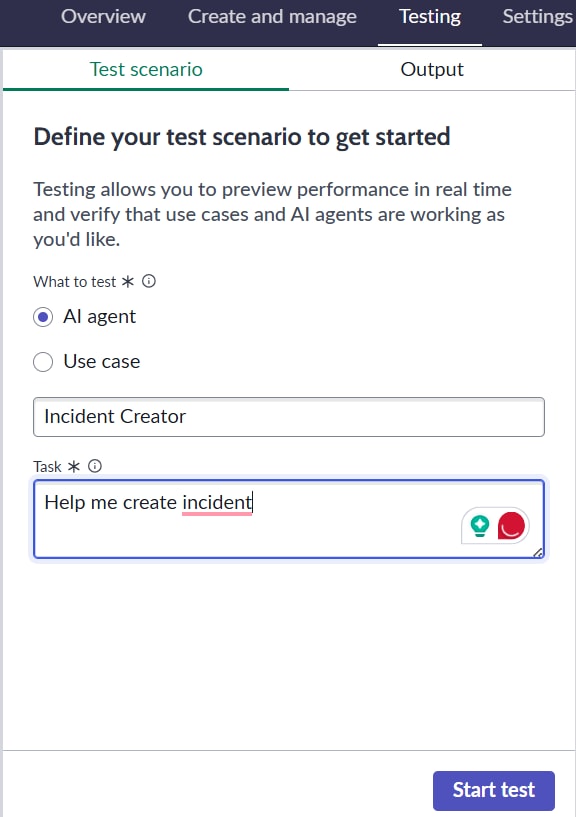
Step 5: Test the Agent
You’ll be redirected to the testing section.
- Select your AI Agent
- In the task panel, start interacting with it
- Provide issue details and confirm inputs(refer to the screenshot 2&3 below)
Check if the incident is created successfully.
Note: You won’t see the Incident Number in the response yet because:
- The script does not return any value
- The agent is not instructed to display it
This is just the beginning. You can enhance the agent by:
- Adding more fields
- Returning the Incident Number
- Creating incidents on behalf of other users
- Using AI to improve validation and responses
Follow for Part 2, where we’ll enhance this AI Agent with more features and improvements.