- Mark as New
- Bookmark
- Subscribe
- Mute
- Subscribe to RSS Feed
- Permalink
- Report Inappropriate Content
03-25-2017 12:48 PM
Hi,
I created my first scoped application and everything works great. Now I am in the phase to make minor improvements and there is one item is on my list to improve is, how to I get the "Post" button assigned to my work notes? Right now I am using the "Save" UI Action and that works and I see the activities but the "Post" would be more elegant.

This is in the incident form:

Solved! Go to Solution.
- Mark as New
- Bookmark
- Subscribe
- Mute
- Subscribe to RSS Feed
- Permalink
- Report Inappropriate Content
03-25-2017 04:36 PM
Hello Armin,
Well that was not so straight forward.. But I found a way for you..
Now this is absolutely working fine..
For scoped applications, you are not allowed to configure the Activity Fomatter like that way.
Here is the way you can achieve this:
1. Create a Activity log UI Formatter for the Application Scope like:

2. Select the same from the Form Layout and Save it:

3. Create a system property from sys_properties.LIST with the Suffix as: glide.ui.x_75830_my_custom_application_table_activity.fields remaining in the Application Scope. Like,
glide.ui.[custom application table name]_activity.fields

In my case, custom application name is 'My Custom Application'.
Provide the name of the fields in the Value for which you want to get in the Activity log.(I have given short_description and my_notes).
On creation of this you will see that, Name field on the property is a Read Only field and is starting as- x_75830_my_custom.and the suffix what you wrote will appear after this.
To do away with this, you have to go to the list view of the created property and have to edit the Name from here and remove the first part upto before glide.

That is, your created property name should appear like: glide.ui.[custom_application_table_name]_activity.fields
Now, go back to the Custom Application form field and open the Activity formatter to configure it(Configure Available Fields). You will see that your provided fields on the created system property are sitting over there.
Like,

THEN,

THEN come back. Means Cancel and come back. You will see that Activity Log will show up. And also you are able to see the POST button as well.

And, the magic has happened.
Hope this will now help you to configure the same for your requirement.
Please hit Like or mark Helpful or Correct based on the impact.
Thanks,
Rajshekhar Paul
- Mark as New
- Bookmark
- Subscribe
- Mute
- Subscribe to RSS Feed
- Permalink
- Report Inappropriate Content
03-25-2017 01:53 PM
Hi Armin,
You have to do a little more steps to get the Post button beside your custom Worknoes field.
Please follow this steps:
In my case, the custom Journal Input field is "My Notes"..

After you have added that on your form, please click on the funnel(yellow highlighted) and make sure you have added that field to show that in the Activity Log also.
Hope this will help.
Please hit Like or mark Helpful or Correct based on the impact.
Thanks,
Rajshekhar Paul
- Mark as New
- Bookmark
- Subscribe
- Mute
- Subscribe to RSS Feed
- Permalink
- Report Inappropriate Content
03-25-2017 02:00 PM

- Mark as New
- Bookmark
- Subscribe
- Mute
- Subscribe to RSS Feed
- Permalink
- Report Inappropriate Content
03-25-2017 02:29 PM
Hi,
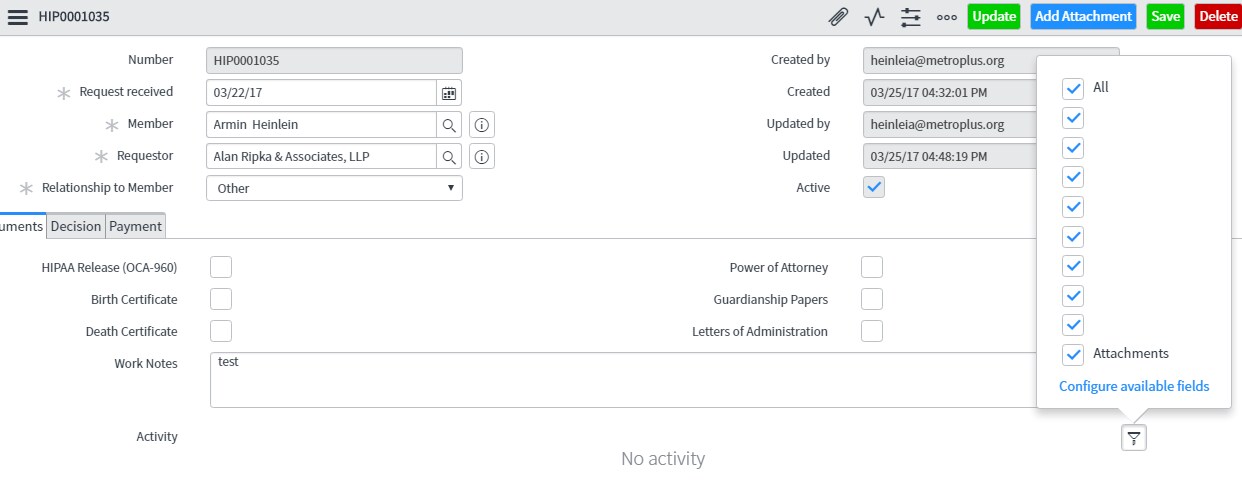
I cannot understand why your Activity configuration list is showing all white fields although everything is checked and at last showing the 'Attachments'..
I would request you to check the flow once again. Is your Activity list a UI Formatter one? Please go through this couple of things once-
Like mine is:

See, this property on the Form Design:

Please note here- You may not need to create a custom Activity field. Because there exists an OOTB one on Global Table. You can make use that only.

I have had created a custom one, but that is not at all needed. You may use the OOTB one only.
Also I have selected the same on the Form Layout:

And, the custom journal input field is My Notes:

And, also please be sure that you are in UI16 mode to see this.
Now, coming on the form, I am able to see as expected. Here is the output also:

Hope this could give you results. If you are performing all this on your personal dev instance, i would kindly ask you to provide the credential to me and the name of the custom app, so that I can help you if possible.
Please hit Like or mark Helpful or Correct based on the impact.
Thanks,
Rajshekhar Paul
- Mark as New
- Bookmark
- Subscribe
- Mute
- Subscribe to RSS Feed
- Permalink
- Report Inappropriate Content
03-25-2017 02:46 PM
I am in U16.
I followed your instructions - same result 😞
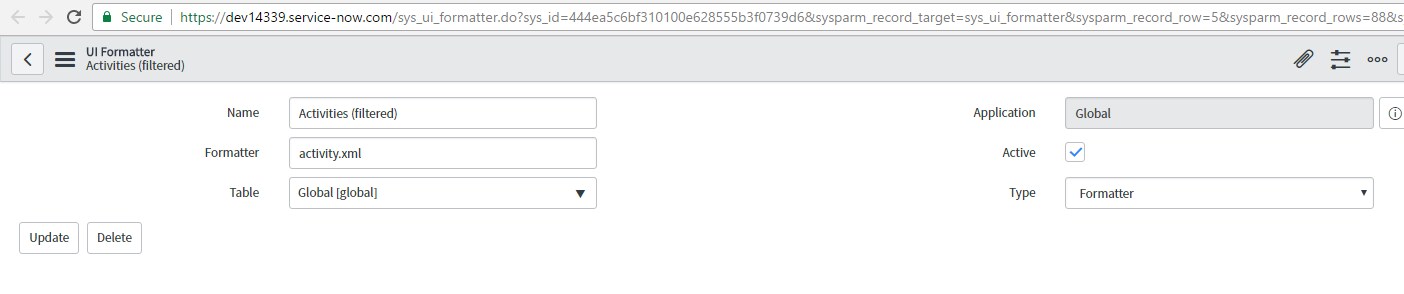
Just one screen. but there is something strange. When I try to configure the available fields in the activity I am getting pointed to Global (see below). Maybe this is the reason for the empties and not displaying the "Post" button.


- Mark as New
- Bookmark
- Subscribe
- Mute
- Subscribe to RSS Feed
- Permalink
- Report Inappropriate Content
03-25-2017 03:12 PM
Hi,
This is happening as you are using scoped application. I will check that for you once in my dev instance for scoped applications to find out if there is any way. I will inform if I can find out something for you.
Thanks,
Rajshekhar Paul