


Dawn Jurek

ServiceNow Employee
Options
- Subscribe to RSS Feed
- Mark as New
- Mark as Read
- Bookmark
- Subscribe
- Printer Friendly Page
- Report Inappropriate Content
12-13-2017
01:42 PM
Following on the heels of our Best practices for implementing the Change Management application, we delve into standard change a bit more, as it's a great mechanism for automating common, low-risk requests. In this installment of our NOWSupport best practices series, we also show you how to create a standard change in the ServiceNow platform.
Streamline your operations with standard changes
In the ServiceNow system, a standard change is a low-risk change that's pre-approved. When a user submits a request for a standard change, it doesn't need approval by a live person—the system creates and assigns the change automatically.
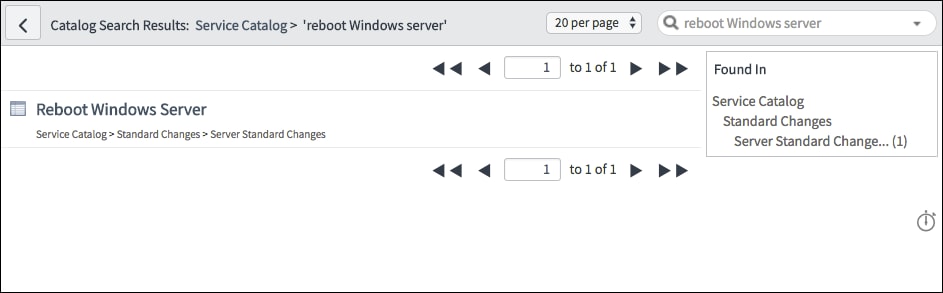
Users request standard changes through a service catalog. The base system comes with a few standard changes, like rebooting a Windows server. As shown in our example below, a user with the itil role searches the service catalog for reboot Windows server...
...clicks on the link in the Catalog Search Results,...
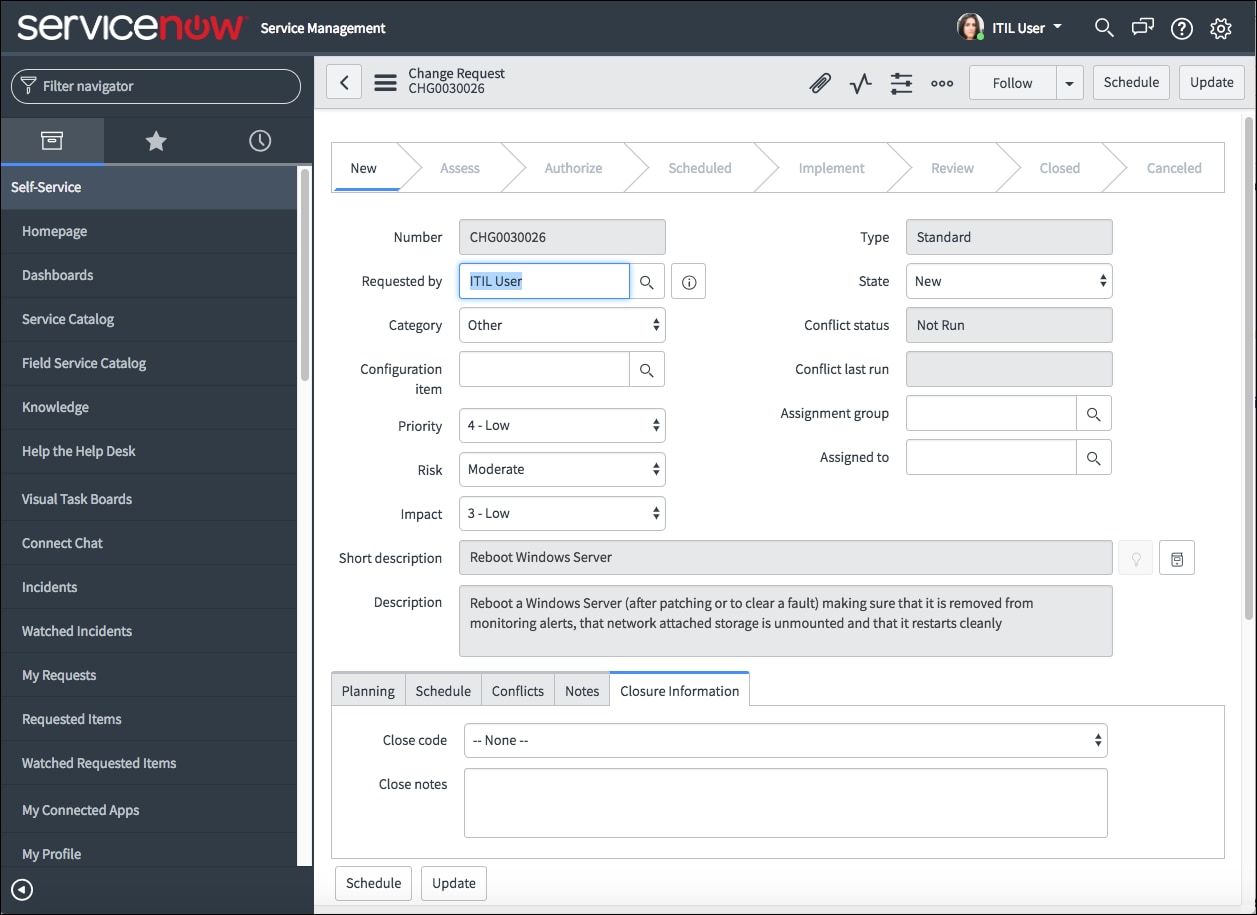
...and schedules the reboot via the Change Request form.
Standard changes can be a great way to streamline your operations. Since they're pre-approved, they save the time and effort required for manual approval—every time. This lets your change management team and change fulfillers focus on changes with higher risk and impact.
To make the most of this feature, take a look at the changes your organization makes often. Any change that's low-risk and is typically approved and completed successfully without issues is a good candidate to be a standard change. The more standard changes you create, the more time and effort you'll save.
Activating Standard Change Catalog on your instance
If the Standard Change Application doesn't appear in the navigator, you'll need to activate the Change Management — Standard Change Catalog plugin (com.snc.change_management.standard_change_catalog) on your instance to get this functionality. This applies mostly to customers who initially implemented prior to the Geneva release. To learn more about plugins, see our postHow do you plug in a plugin? The ins and outs of plugin activation.
Note that only users with the admin role can activate plugins.
To activate the Change Management — Standard Change Catalog plugin:
- Navigate to System Definition > Plugins.
- In the Search field, enter change management — standard change catalog.
- Click the Change Management — Standard Change Catalog link.
- Under Related Links, click Activate/Upgrade.
After you activate the plugin, you should test prior to implementation per your organization's procedures. For more information about activating the standard change catalog, see the product documentation page for your release. Here's the one for Helsinki: Activate standard change catalog. Also, see the product documentation for considerations when migrating to Standard Change as well as a detailed list of what is installed with Standard Change.
Creating a standard change
Your organization can define additional standard changes to suit your operations. To create a new standard change, you'll create a standard change proposal. You need the itil or change manager role to do this. The procedure is different for each role, as described below.
To create a standard change proposal as a user with the change manager role:
- Navigate to Change > Standard Change > My Proposals.
- Click New.
The Standard Change Proposal form lets you specify the details of the change itself and the accompanying change request template for evaluation by the change management team.
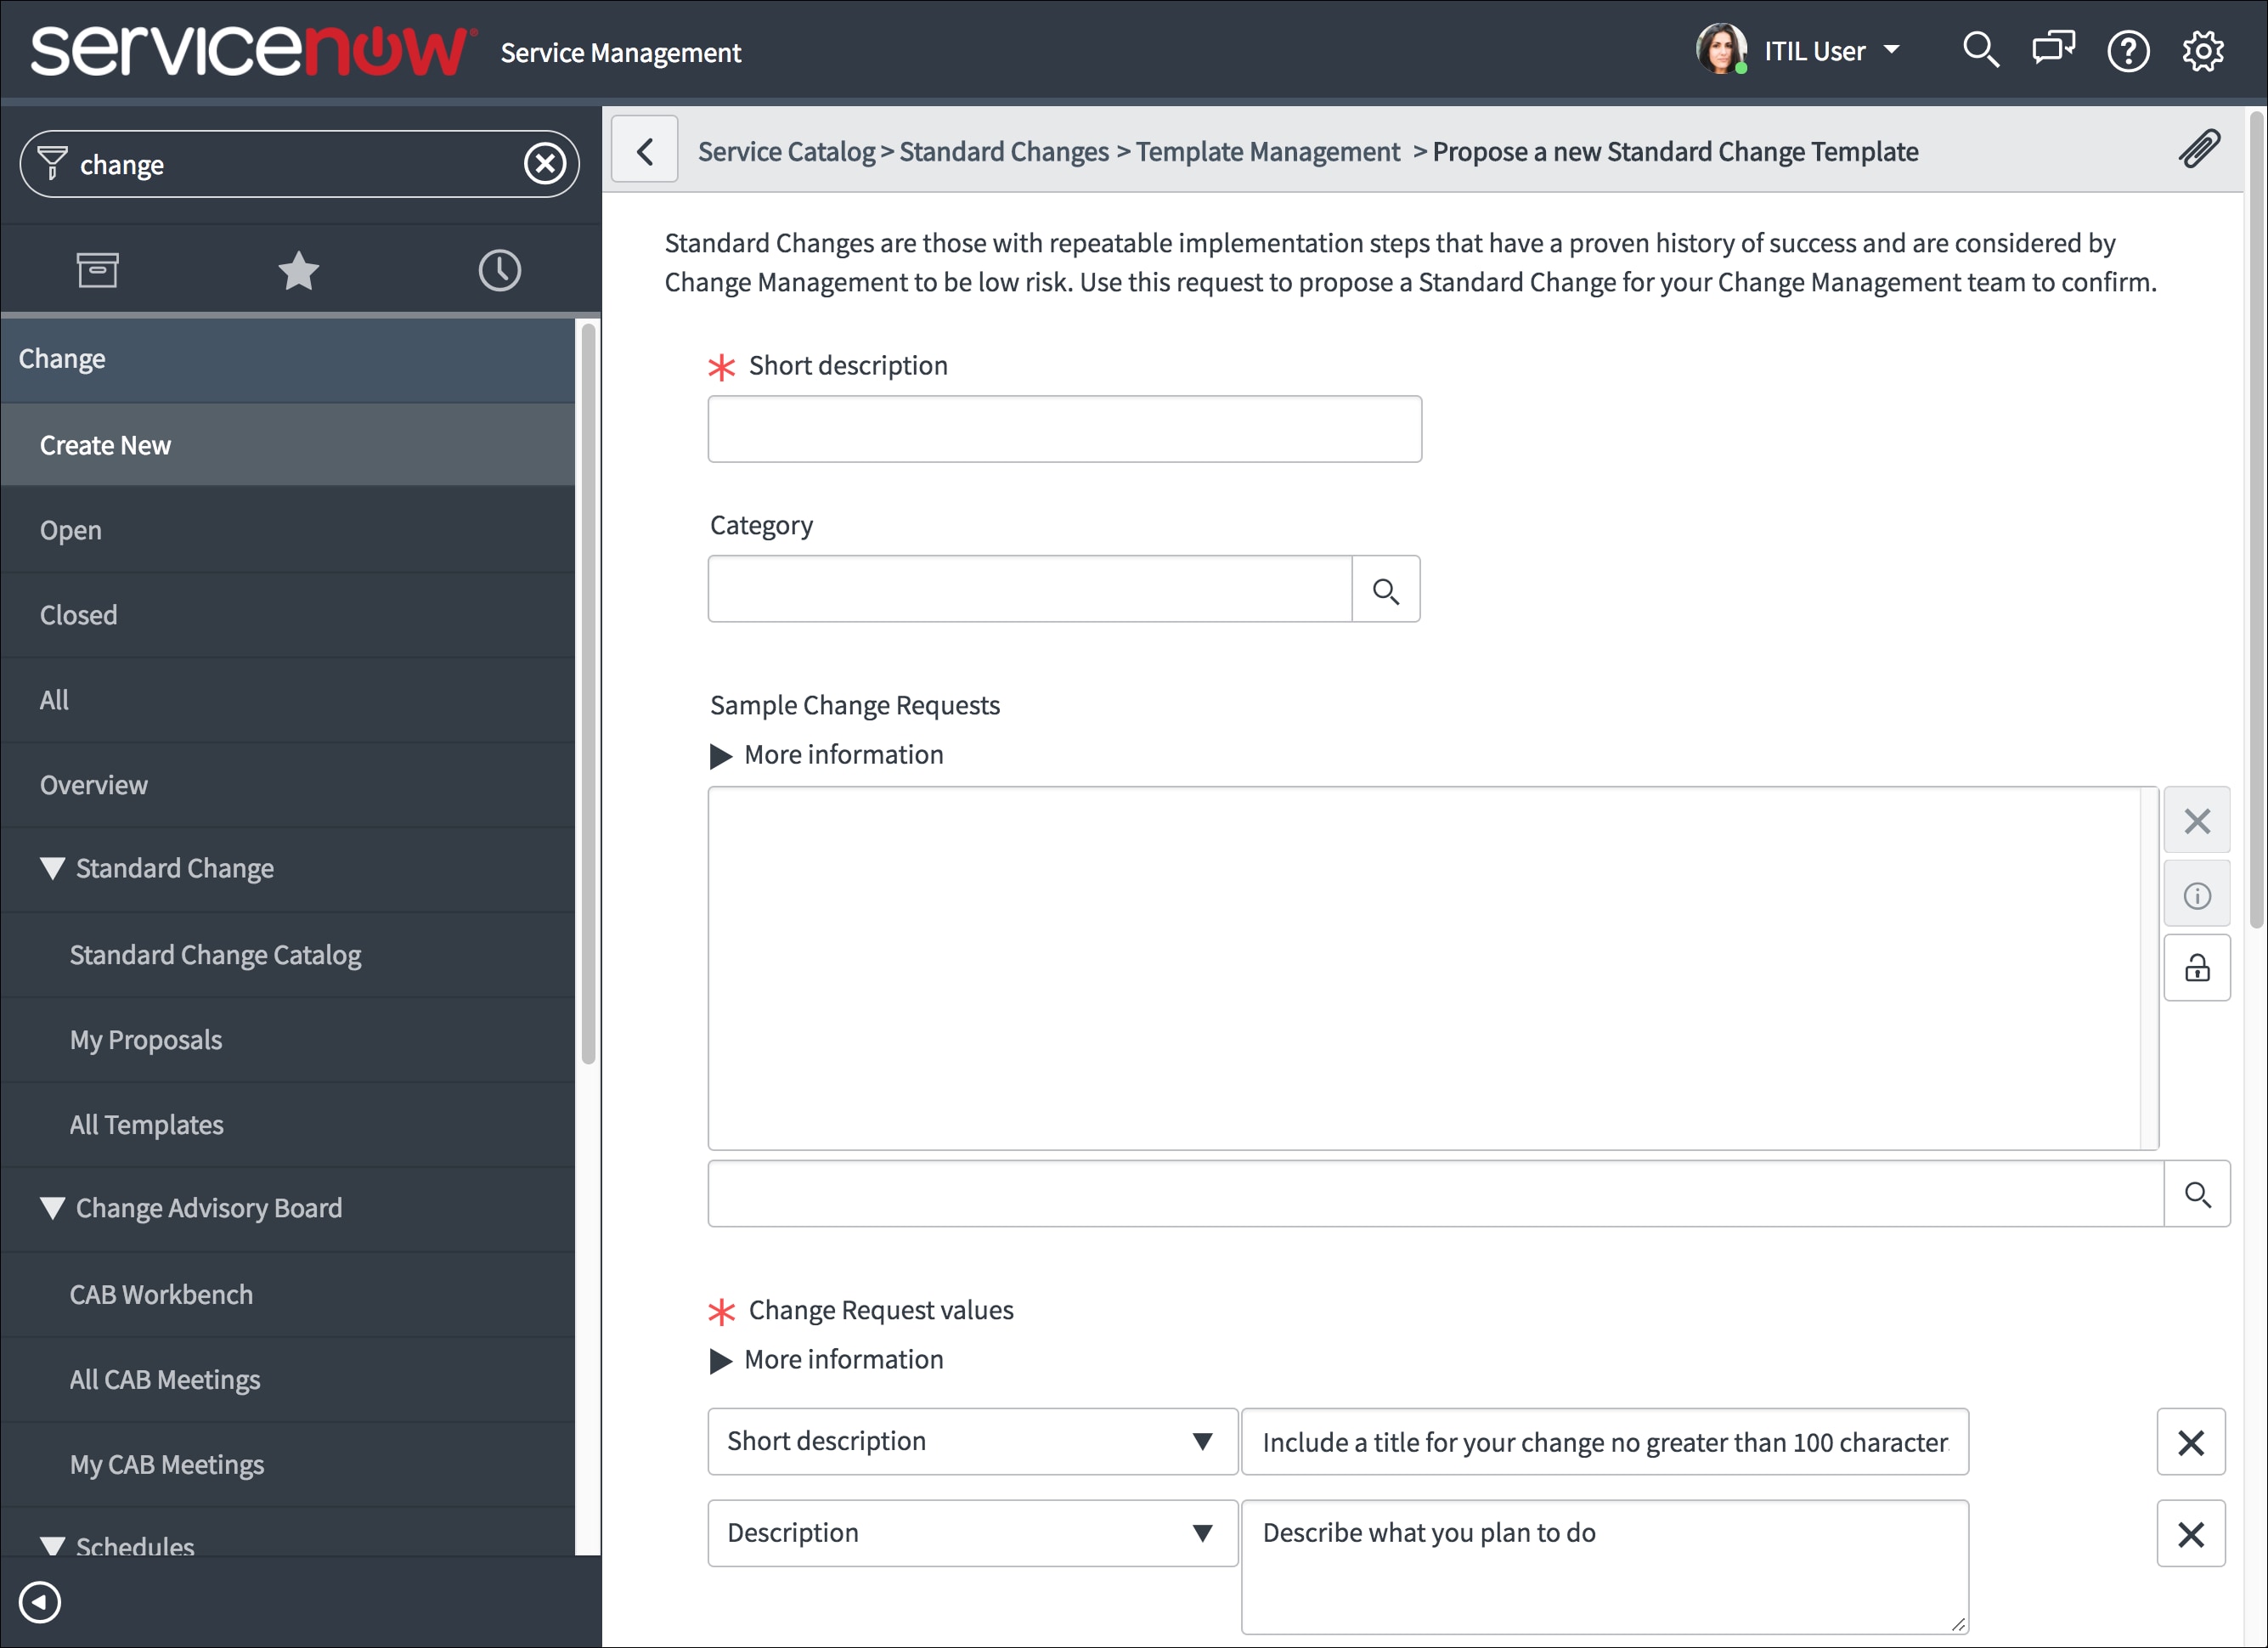
To create a standard change proposal as a user with the itil role:
- Navigate to Change > Standard Change > Standard Change Catalog.
- Click Template Management.
- Click Propose a new Standard Change Template.
Note that the form may differ from that shown below depending on the form view of the logged-in user.
For either procedure, when you complete the form and request approval, the system submits the proposal to the change management team for review. Once the proposal is approved, the system automatically adds the new standard change template to the catalog. That's it—now the change can be created and assigned quickly from the catalog without the need for review and approval by the change management team.
Ready to get stared with standard change? Check out this video on our NOWSupport YouTube channel:
For more information
- Change Management (product documentation)
- Change types (product documentation)
- Standard change catalog (product documentation)
--
Behind the scenes here at ServiceNow, the Knowledge Management and Multimedia teams work closely with subject matter experts to disseminate critical information to our customers. We've found that certain topics come up frequently, in the form of best practices that can help you keep your ServiceNow instances running smoothly. This series targets those topics so that you and your organization can benefit from our collective expertise. If you have a best practices topic you'd like us to cover in this series, please let us know in the comments below. To access all of the blog posts in this series, see our NOWSupport best practices series list.
Labels:
6 Comments
You must be a registered user to add a comment. If you've already registered, sign in. Otherwise, register and sign in.
