


Dawn Jurek

ServiceNow Employee
Options
- Subscribe to RSS Feed
- Mark as New
- Mark as Read
- Bookmark
- Subscribe
- Printer Friendly Page
- Report Inappropriate Content
12-13-2017
10:11 AM
Discovery schedules are the crux of the Discovery application, as they determine what, where, when, and how Discovery scans your network. Creating Discovery schedules allows you to organize your networks and locations into defined jobs that run at a designated interval, whether that be daily, weekly, or on demand.
In this installment of our NOWSupport best practices series, we look at a setting up Discovery schedules. if you haven't gotten that far, don't worry - we have you covered! Check out these videos on our NOWSupport YouTube channel for an overview of planning for and setting up Discovery on your network.
How to plan for and set up Discovery
So how can you use proper scheduling techniques to achieve your goals with Discovery? Let's walk through a hypothetical scenario.
In our example, Linda is an administrator who oversees a network comprised of 100 retail outlets. She needs to verify the configuration items within this network every day within a 12-hour period, for about 8,000 devices in total.
Based on our best practices for MID Server setup and tuning, Linda determines that she needs to deploy four MID Server (virtual) hosts with a single MID Server application on each host. She configures each host to run with 100 threads and 1.5GB of allocated memory.
Now let's see how Linda sets up the Discovery schedules using best practices.
Organize Discovery schedules by location
While you may have unique local requirements, Discovery schedules are best organized by the geographic location of the IP ranges they are going to be discovering.
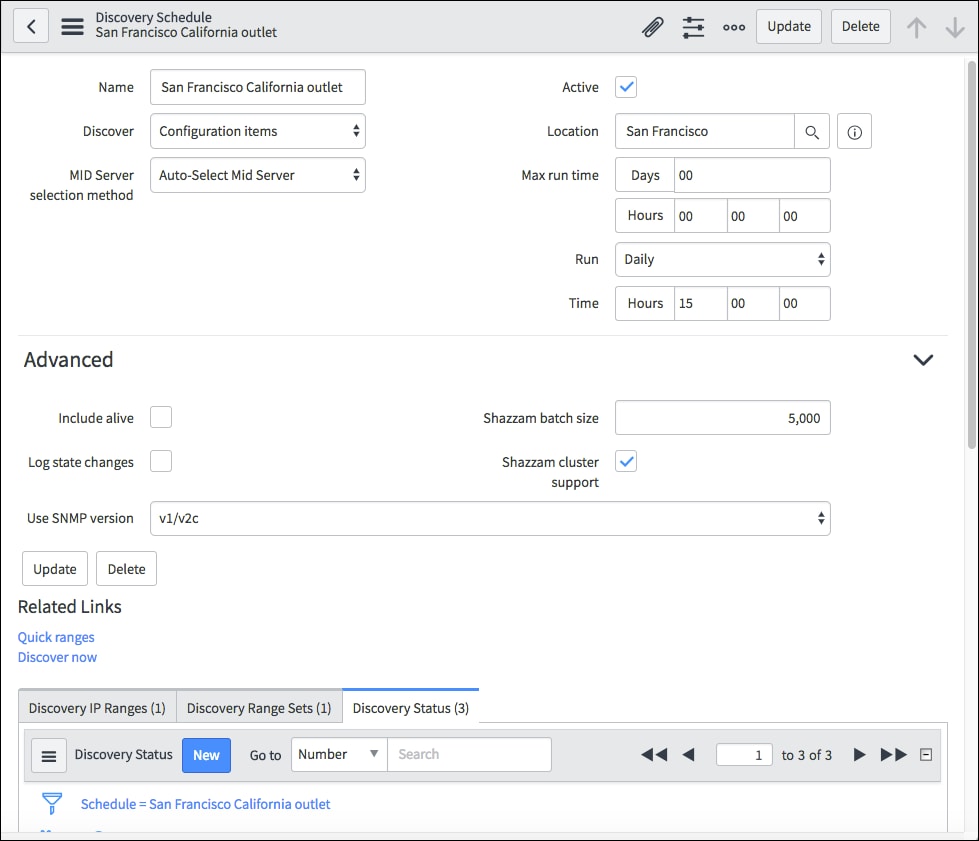
Linda creates schedules to cover each location, totaling 100 in all. She specifies the location of the retail outlet in the Location field of each schedule, so that the respective assets are identified as being related to that outlet. Running preliminary tests, she determines that her schedules average a 3-hour completion time.
Stagger Discovery schedule start times
You don't want 100 schedules to start all at the same time on a single MID Server. Instead, stagger your Discovery schedule so that the load is spread out over a period of time. In our example, Linda can run Discovery between 7:00am to 7:00pm Pacific Standard Time (PST) for all 100 retail outlets. The locations of the retail outlets are spread across four separate time zones, which allows for three groups of schedules to run in the allotted time. So, she sets them up as follows:
- 33 schedules running from 07:00 - 10:00
- 33 schedules running from 11:00 - 14:00
- 34 schedules running from 15:00 - 18:00
Notice that she's allowed an hour between each schedule group and after the last group, which provides a buffer in case one runs longer than 3 hours.
Utilize MID Server clusters and behaviors
Configuring MID Servers into a cluster allows you to pool their resources to provide either failover support or load balancing.
In our example, by configuring a cluster from the four MID Servers she initially set up, Linda pools their resources and forces them to share the work load, as each scheduled Discovery kicks off for each retail location. The initial phase of Discovery sends out shazzam probes for the first 33 schedules, which is a heavy load for one MID Server alone to handle. Thankfully, Linda has Shazzam cluster support at her disposal. So, she sets up the 33 schedules to start within their respective geographic location. With the Shazzam cluster support checkbox selected when configuring her schedules, this directs all MID Servers to be included in the heavy lifting of getting the first phase done. When each port scanning probe is complete, then the rest of the work continues, spread across all MID Servers in the cluster.
Utilize Range Sets
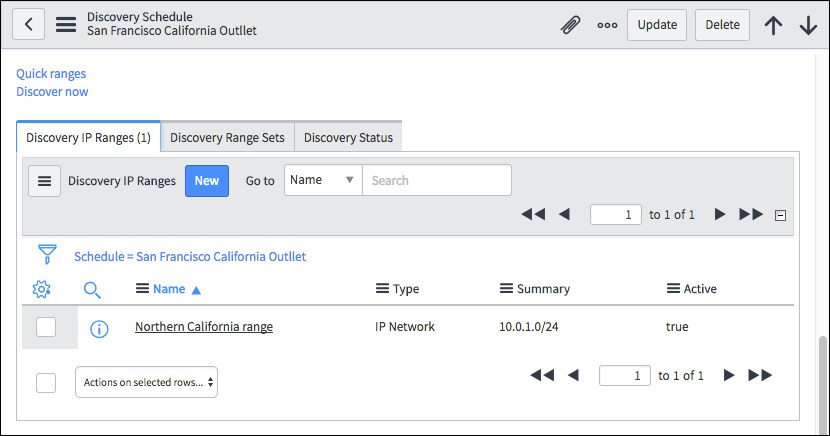
Within each Discovery schedule are two related lists, Discovery IP Ranges and Discovery Range Sets, where you can add Networks, Ranges or Lists of IP addresses to be used in Discovery schedules. Populating the Discovery IP Range tab will direct Discovery to scan all IPs in the specified range. Adding attributes such as Name will allow you to further identify where ranges are located within an organization.
However, it's a best practice to utilize range sets. Discovery range sets are common groups of IPs in a known location that can be called into multiple schedules. Range sets provide for flexibility in both management and identification of known networks for simplicity of administration.
If you don't already know the IP ranges in your network, use Network Discovery to find them. Then convert the IP networks it finds into IP address Range Sets, and add a Discovery range set to a Discovery schedule.
By following these best practices for setting up Discovery schedules, you can streamline the process and ensure that Discovery runs efficiently on your network.
For more information:
- Create a Discovery Schedule (product documentation)
- Network Discovery (product documentation)
- ServiceNow Discovery Training (hands-on classroom training)
- The benefits of good "behavior" while performing Discovery scans (blog by christopher.thompson)
--
Behind the scenes here at ServiceNow, the Knowledge Management and Multimedia teams work closely with subject matter experts to disseminate critical information to our customers. We've found that certain topics come up frequently, in the form of best practices that can help you keep your ServiceNow instances running smoothly. This series targets those topics so that you and your organization can benefit from our collective expertise. If you have a best practices topic you'd like us to cover in this series, please let us know in the comments below.
To access all of the blog posts in this series, see our NOWSupport best practices series list.
Labels:
- 36,802 Views
You must be a registered user to add a comment. If you've already registered, sign in. Otherwise, register and sign in.

