


Deepak Ingale1
Mega Sage
Options
- Subscribe to RSS Feed
- Mark as New
- Mark as Read
- Bookmark
- Subscribe
- Printer Friendly Page
- Report Inappropriate Content
10-11-2015
09:52 PM
Hello Members,
From last few days or so, I was trying to import docx with images to ServiceNow.
I have tried out the solution available on HI support KB (Help required to import KBs in DOCX format to ServiceNow - (ServiceNow KB article KB0533212)), but somehow, that didn't work for me.
ServiceNow KB article on HI promises to convert docx files to htm with docx macros built in VBA, somehow that didn't work for me.
So I thought to implement solution with the help of my friend 'Powershell'.
I have created a powershell script which will convert docx file to htm file, will copy each KB article content to excel cells, segregate the images of docx files to separate files, which can then be imported as zip file at one go in ServiceNow.
Now let me walk you through the detailed procedure of this.
Requirements:-
Windows Powershell V3 installed on your local machine. Powershell is available inbuilt on windows OS starting with windows 7 and later.
If you are on older version of windows, you will require to install powershell separately.
Solution is tested with Powershell v3, Microsoft office 2007 and on windows operating system windows 7.
Some code modification may be required if you are running it on Powershell V2 or Powershell V4.
Steps to create your powershell script.
- Copy below code on clipboard, open notepad, paste the code and save it with '.ps1' extension. This will now work as your Powershell script which will convert 'docx' files to 'htm' files.
You will also require to create a directory structure mentioned in this scripts. - Create folder structure ''D:\HTML Utility\Files to Import' :- This will work as repository for your 'docx' KB files. You have to deploy all 'docx' files in this directory
- Create folder structure 'D:\HTML Utility\Converted Files' :- This will work as repository to images within the 'docx' files, which you will later on import at a one go in servicenow.
- Create 'Template.xls' file under 'Files to Import' folder. This file will work as your 'Data Source' for KB articles importing. It will contain html body tag of your each KB article.
- Click on start menu of windows and type 'Powershell'. You will be provided with below results of screenshot. Click on Powershell ISE (Integrated script environment) to launch your script from this console. You can simply copy-paste the code and execute or you can call the .ps1 file you saved on your machine.
Limitations:-
There is an excel limitation to store 32,767 characters in one cell.
Excel specifications and limits - Excel
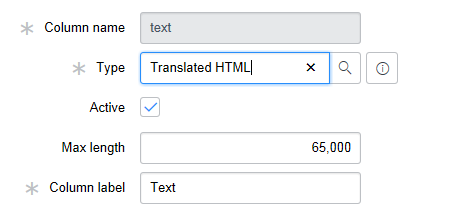
There is a limitation of 65000 characters on 'Text' field of kb_knowledge, which might be incrased but I haven't tried this.
Taking consideration all these limitations, I have created a script to follow limit of ServiceNow of 65,000 characters. My script will store each KB article html body content in single excel cell. If KB article length is more than excel cell limit, script will take care to store next characters beyond limit of excel to next cell. However, script will work for KB articles where characters are less than 64000. Else it will throw a document name on your powershell console indicating your document has been skipped due to charater limits. This is for syncing with ServiceNow text limit field.
cls
$kbFiles = Get-ChildItem 'D:\HTML Utility\Files to Import' -Filter '*.docx' #File Repository for DOCx KB files
$targetDir= "D:\HTML Utility\Converted Files" # Path for converted htm and their associated files
$word = New-Object -ComObject "Word.Application"
$word.Visible = $true
$excel = new-object -ComObject 'excel.application'
$excel.visible = $true
$workBook = $excel.workbooks.open('D:\HTML Utility\Files to Import\Template.xls') # Template.xls file has to be created first at location specified
$worksheet1 = $workBook.Worksheets.item(1)
$worksheet1.name = 'fileForServiceNow'
$worksheet1.columns.item(1).WrapText = $True
$worksheet1.columns.item(1).columnWidth = 40
$worksheet1.columns.item(2).WrapText = $True
$worksheet1.columns.item(2).columnWidth = 25
$worksheet1.cells.item(1,1).value2 = 'KBTextPart1' # set header for CSV file to import
$worksheet1.cells.item(1,2).value2 = 'KBTextPart2' # set header for CSV file to import
$worksheet1.cells.item(1,3).value2 = 'Short Description' # set header for csv file to import
$counter = 1
$i = 0
$KBArticelIndexInExcel = 2
foreach ($document in $kbFiles)
{
Write-Progress -Activity Updating -status progress -PercentComplete ($counter / $kbFiles.count)
write-host $document.Name
$existingDoc = $word.Documents.Open($document.FullName)
$name = $document.Name.Replace(" ","_");
$saveaspath = $targetDir+ '\' + $name.Replace('.docx','.htm')
$wdFormatHTML = [int]10
$existingDoc.WebOptions.AllowPNG = $true
#$existingDoc.SaveAs([ref] $saveaspath,[ref]$wdFormatHTML)
$existingDoc.SaveAs($saveaspath,$wdFormatHTML)
$existingDoc.Close()
[System.Collections.ArrayList]$htmlContent = get-content $saveaspath
$htmlContent > 'D:\HTML Utility\Files to Import\tempStorage.txt'
for($i=0; $i -le $htmlContent.count ; $i++)
{
if($htmlContent[$i] -contains '</head>')
{
$headIndex = $i;
write-host 'line no is: ' $i
}
}
$htmlcontent.RemoveRange(0,$headIndex+1)
$stringlist = [string]$htmlContent
Out-File -InputObject $stringlist -FilePath 'D:\HTML Utility\Files to Import\tempWithoutHeadTag.txt' -Encoding ascii
$KBText = (get-Content 'D:\HTML Utility\Files to Import\tempWithoutHeadTag.txt') -replace '/image','_image'
if($KBText.length -gt 32000) # Excel cell has store only upto 32700 characters, if KB article length is more than 32000, its content will be stored in 2 Cells.
{
$worksheet1.cells.item($KBArticelIndexInExcel,1).value2 = $KBText.substring(0,32000)
$worksheet1.cells.item($KBArticelIndexInExcel,2).value2 = $KBText.substring(32000,$kbtext.length - 32000)
$worksheet1.cells.item($KBArticelIndexInExcel,3).value2 = $document.Name.replace('.docx','')
}
else
{
$worksheet1.cells.item($KBArticelIndexInExcel,1).value2 = $KBText
$worksheet1.cells.item($KBArticelIndexInExcel,2).value2 = ''
$worksheet1.cells.item($KBArticelIndexInExcel,3).value2 = $document.Name.replace('.docx','')
}
$KBArticelIndexInExcel++
$counter++
}
$worksheet1.SaveAs('D:\HTML Utility\Files to Import\UploadKB.xls')
$Word.Quit()
$htmlContent.count
$excel.Quit()
After you run the script, go to 'D:\HTML Utility\Converted Files', you will see folders got generated ending with _files. These folders contains images within your KB docx.
Select all the files ending with _files, right click on any file, select open to compress the file with zip.
Once done, it will create a single zip file. Don't worry about the name of the file. This single file will contains all the images within your all KBs.
This file is ready to be imported into serviceNow
Combined screenshot of Zip file and ServiceNow console to upload zip file images is below.
Click on image zip upload and upload your single zip file.
Once done, now go to 'D:\HTML Utility\Files to Import'.
check for 'UploadKB.xls' file. This file contains all the 'Text' of your all the documents.
It will work as data source for your import set.
I am not able to attach the update set here which is used for transform mapping.
I am writing down onBefore code which is used for mapping 'text' field of kb_knowledge table
Also, the staging table which will be created for this transform mapping, will have kbtextpart1 and kbtextpart2 fields. Make sure to set their size limit to 32000 characters.
/**
* For variables go to: http://wiki.service-now.com/index.php?title=Import_Sets
**/
gs.log('Deepak Import KB length is : ' + source.u_kbtextpart1.toString().length + ' ' + source.u_kbtextpart2.toString().length + '\n ' + source.u_kbtextpart1 + source.u_kbtextpart2);
target.kb_knowledge_base.setDisplayValue('IT');
target.text = source.u_kbtextpart1.toString() + source.u_kbtextpart2.toString();
- 19,131 Views
23 Comments
- « Previous
-
- 1
- 2
- 3
- Next »
You must be a registered user to add a comment. If you've already registered, sign in. Otherwise, register and sign in.

