


Pauline Baguet

ServiceNow Employee
Options
- Subscribe to RSS Feed
- Mark as New
- Mark as Read
- Bookmark
- Subscribe
- Printer Friendly Page
- Report Inappropriate Content
09-06-2022
06:18 AM
Definition of a Place Type: Place Types are used to define a physical location on your map, it can be a polygon or a point depending on if this place corresponds to a room or just a place in your map.
It is used to categorize the different places on your map (example: meeting room, office, printer, toilet...).
You will need to create a place type so that users can guide themselves in your map to get from point A to point B, but also to be able to find information about this place like booking an office or a meeting room, or inform about a technical failure or a danger at a specific place (example: I want to report a slippery floor at the exit of the toilets, so I could take the polygon that defines my toilets to inform the concerned people).
Place types are a feature of Indoor Mapping. In order to access this feature, your instance should be updated to the Rome family release or any other version after, and the following plugins must be installed Indoor Mapping and Workplace Indoor Mapping.
1.Creating an icon
To create a place type, you must first go to your ServiceNow instance. In left filter navigator, you will need to search for the Indoor Mapping module and then select Icon.
From here you will be able to create your icon for your future place type. Note that your instance has a pre-exiting icon library provided.
If you want to edit an existing icon, select icon record and apply your edits.
You can create a new one by clicking on NEW.
For the creation of your Icon, you will have to inform the NAME which you wish to see appearing in Map Studio as well as the TITLE following which you will download your icon in the form of PNG.
You do not have to worry about the size of your PNG, it will be automatically set to the right size and shape by the studio. Click on active (the icon must be active to appear in the studio and on your building and give meaning to your Place Type) and then you validate the creation of your icon by clicking on update.
Once your icon is created go back to the left-hand filter navigator to search for Place types.
Definition of an icon: It is used to design your POIs (points of interest) and define what you see on your map. The icon is also used to style your Place Types and make them known on your entire map.
2.Creating of the Place Type
Once you have created your Icon, we will create the Place Types that will be displayed with your Icon on the studio to differentiate your places in it.
To create your Place Type, you must click on NEW in the upper right corner.
Note: If you want to modify a place type you have to click on the name of it.

You will arrive on this page where you will have to fill in the parameters of your future Place Type.
You will have to fill in the Name of the future Place Type and the Colour you want it to display in the studio. For the Colour you can choose that of the Stroke as well as the interior and their Opacity.
Do not forget to put the # in front of the hexadecimal colour otherwise the studio will not take it into account.
For the opacity you will choose between 0 and 1 knowing that 0 is transparent and 1 completely opaque. You also have the possibility of choosing the thickness of the outline/stroke of your place type.
Automatically when you create a new place type the 4 boxes are checked they correspond to:
- Default polygon display: if you leave the box checked the polygon of your place type will be active, on the contrary if you uncheck it this one will be transformed into point.
Definitions:
Polygon: A polygon will present the surface of a room; we use it for meeting rooms or any other closed room.
Point: The point will be more used to represent a place that is not fixed like a stand for example or to represent a place that is not in a closed room like a resting place or a telephone
-Default title display: if you check the box the title of your place type will be displayed in Map Studio
-Default marker display: if you check the box the icon of your place type that you have previously created will be displayed in Map Studio
-Active: if you uncheck this box your place type will be automatically deactivated on your different maps.
Note: Turning off the place type does not remove it; it will just be inactive on your map and there will be no more points of interest at their original location.
To choose your Default Marker Icon you must click on the magnifying glass on the right of the box, this one will open a list of icon you do not have to look for the one you had previously created in icon.
Once all your settings are done you do not have to click on submit.

Once the settings are saved you will see a new box at the bottom of the page where you can find the list of campuses and buildings where the place type is active.
3.Setting up of the Place Type in the studio
To set up your new Place Type you will go back to the home of your instance and click again on All and by typing Indoor you will click on Map Studio.

You will then select the Campuses in which you want to set up the new Place Type.
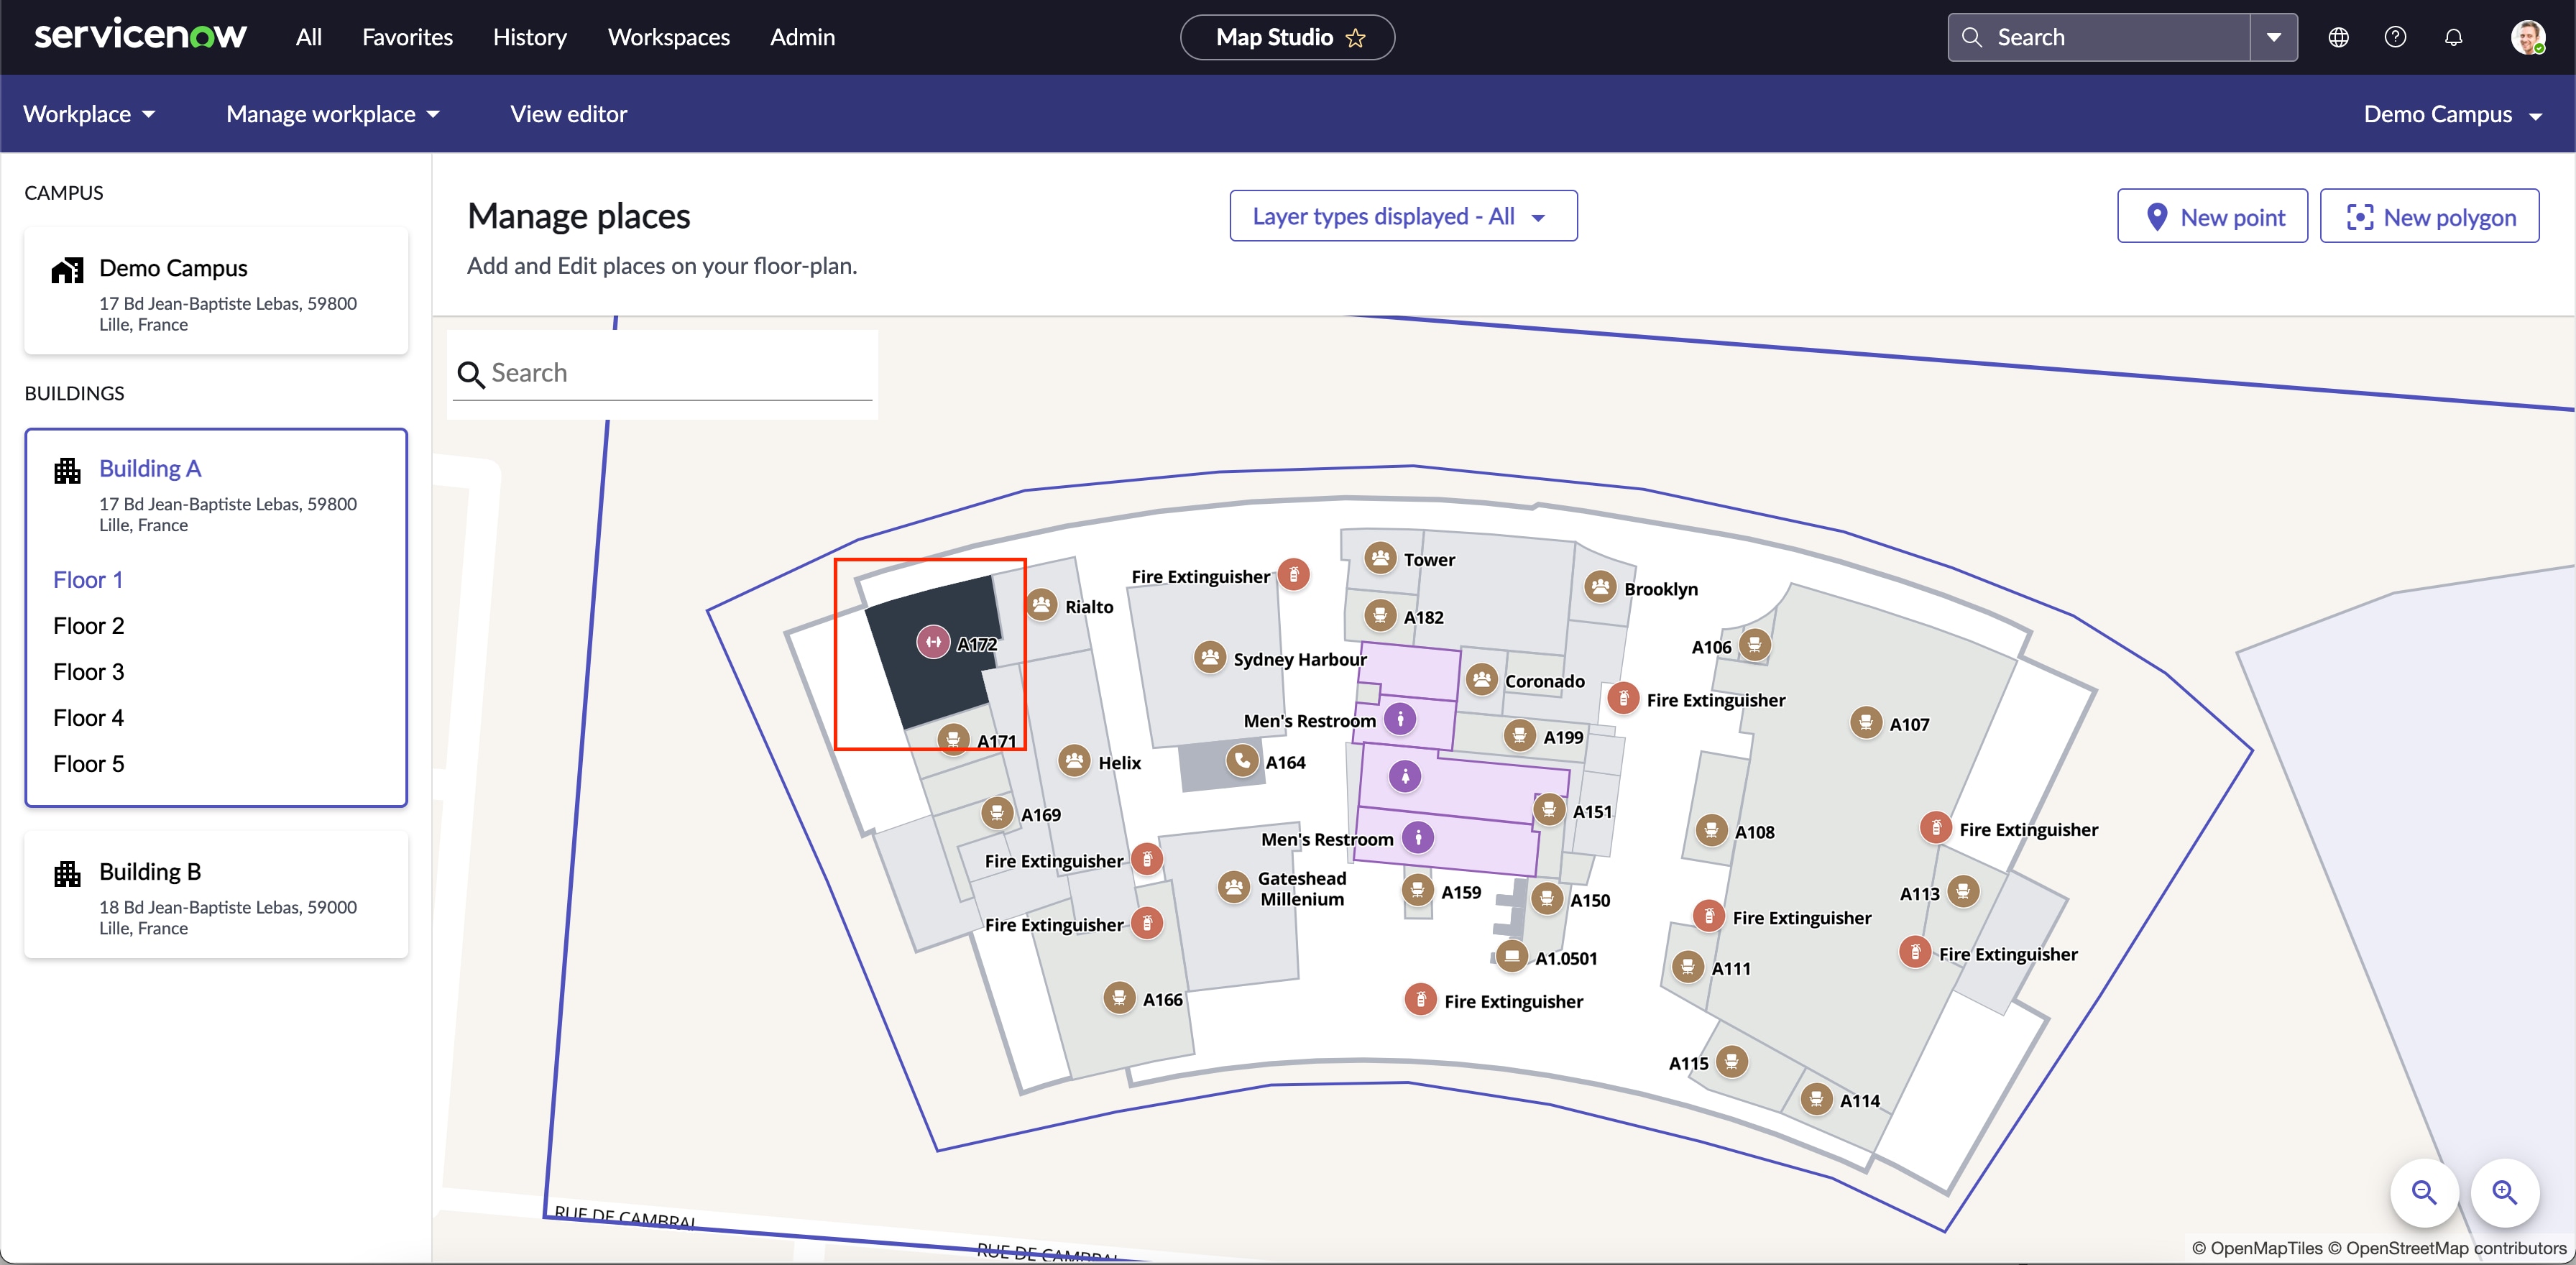
In your instance you will click on Manage Workplace and then on Places, once in Places you choose your Building and the Floor on which you want to set up your new Place type.
You will then select the Places you want to modify. Then click on EDIT in the window that opens on the right of your screen.
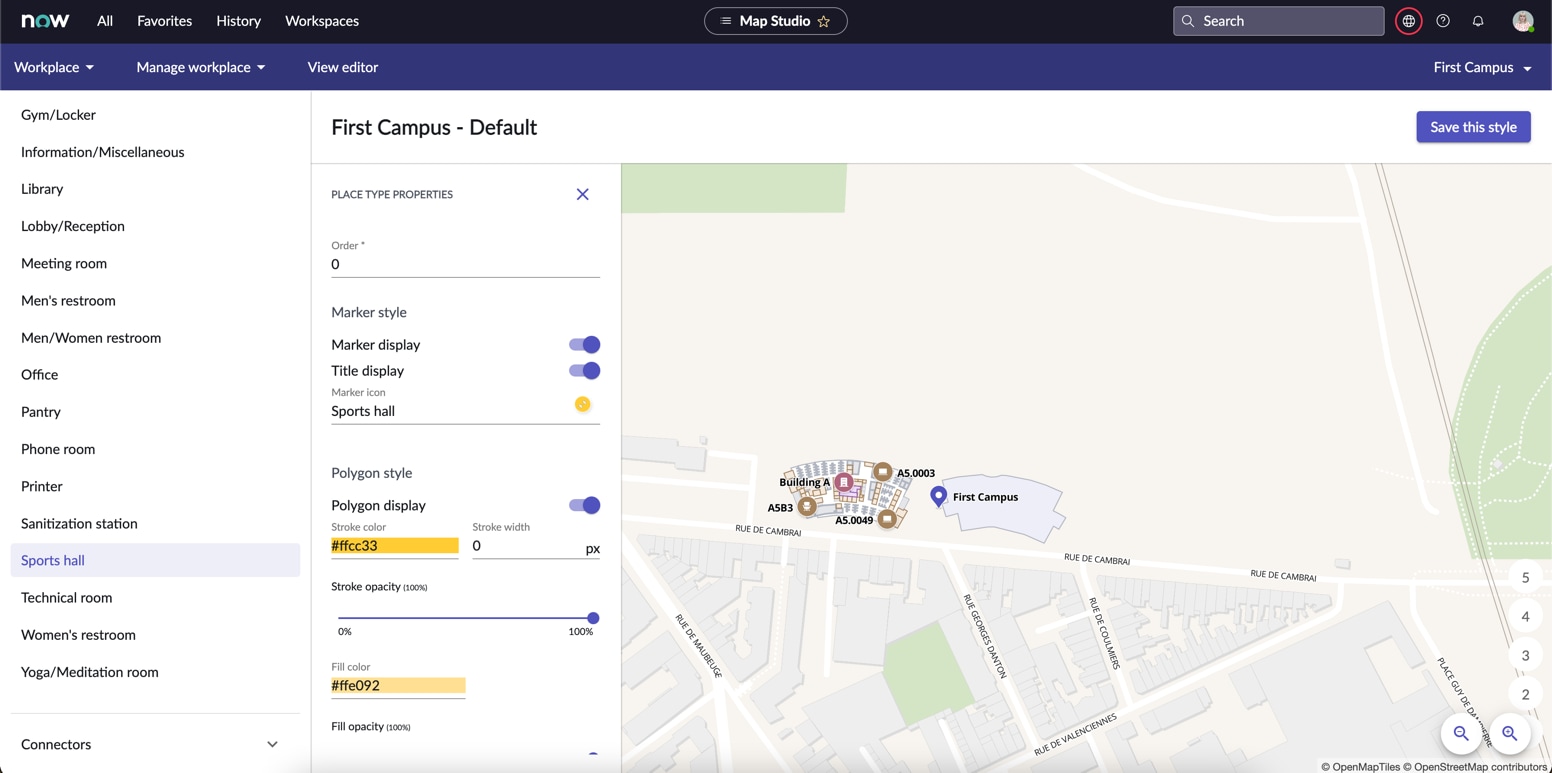
From there you will look for your Place Types created previously in the column place type you can scroll down the list or type directly the name in it once your place type is selected click on SAVE.
You will see your Place Types appear with all the parameters you had previously set up: colour, opacity, marker and zoom.
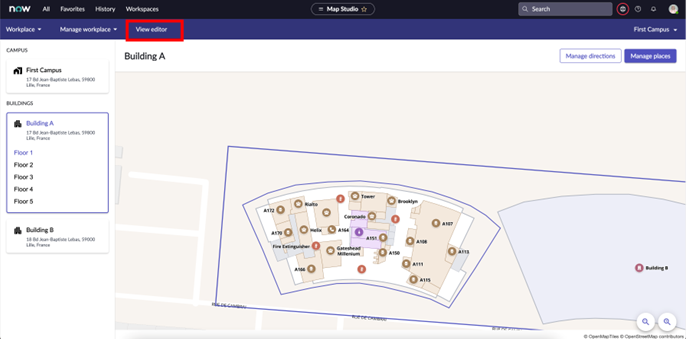
4.Activate the Place Type in the View Editor
Once your Icon and Place Type is created in your instance you need to activate it in your View Editor so that it is available for all your buildings. To do this you need to click on View Editor in the menu bar of your Campus.
You will then choose the View you want to edit; in this case it will be the default view you click on EDIT.

When you have created your Campus, you have already set up your View Editor if you want to add or remove elements later in your Campus you click on Add or remove content.
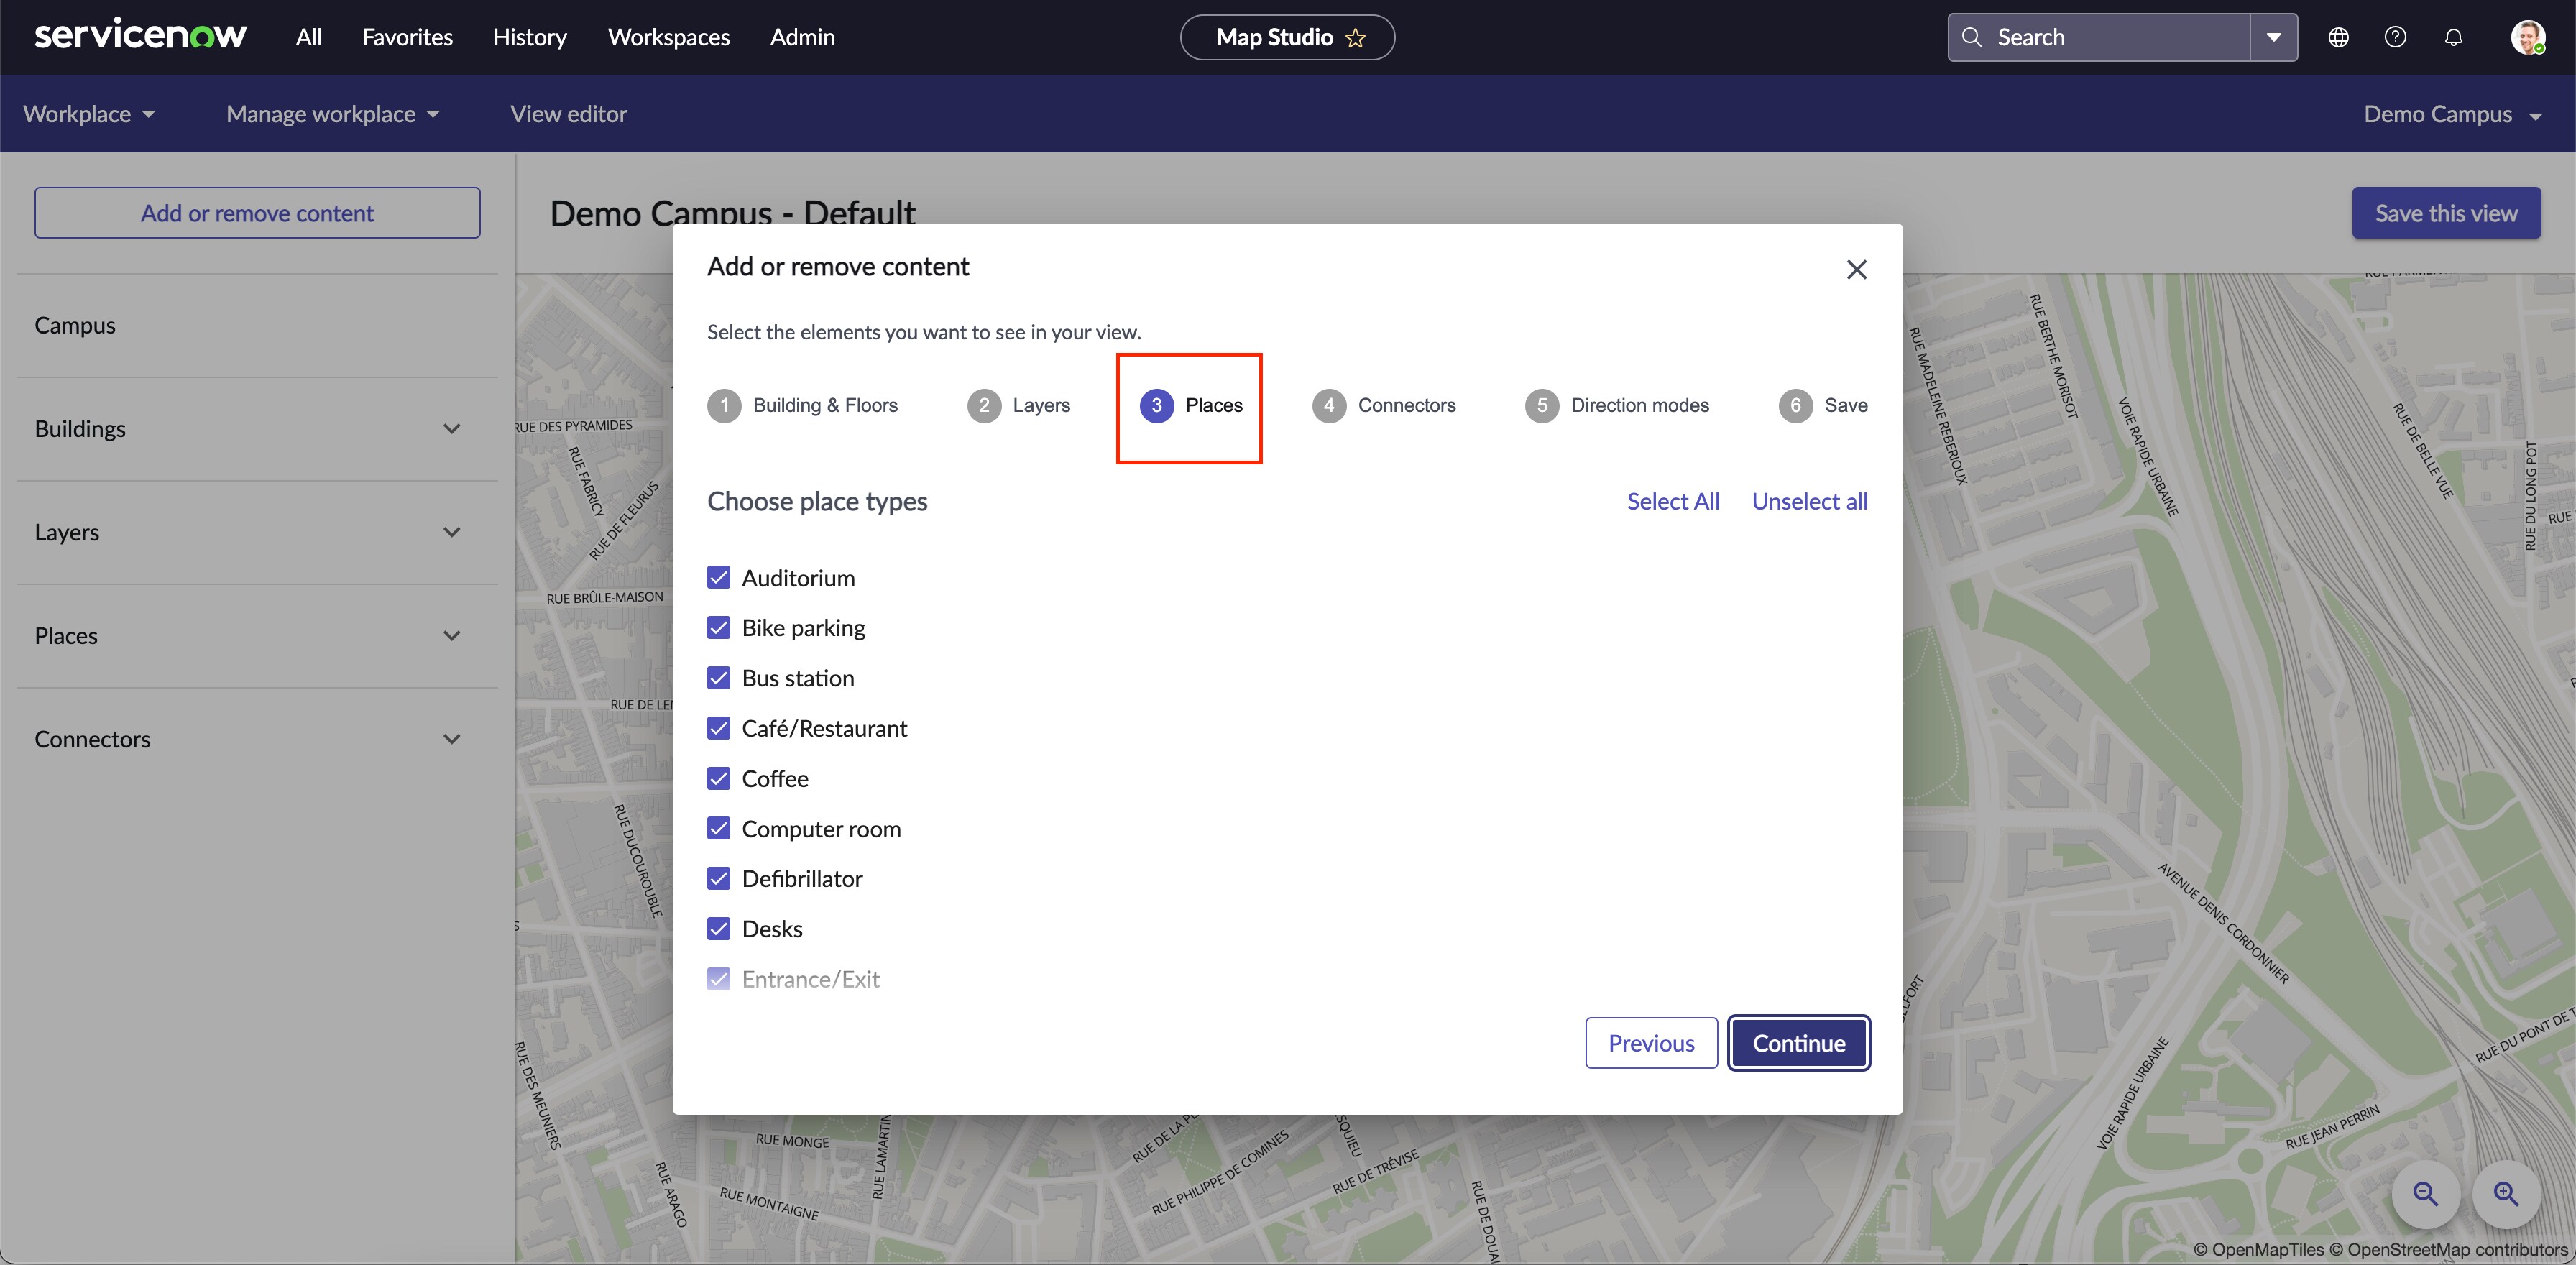
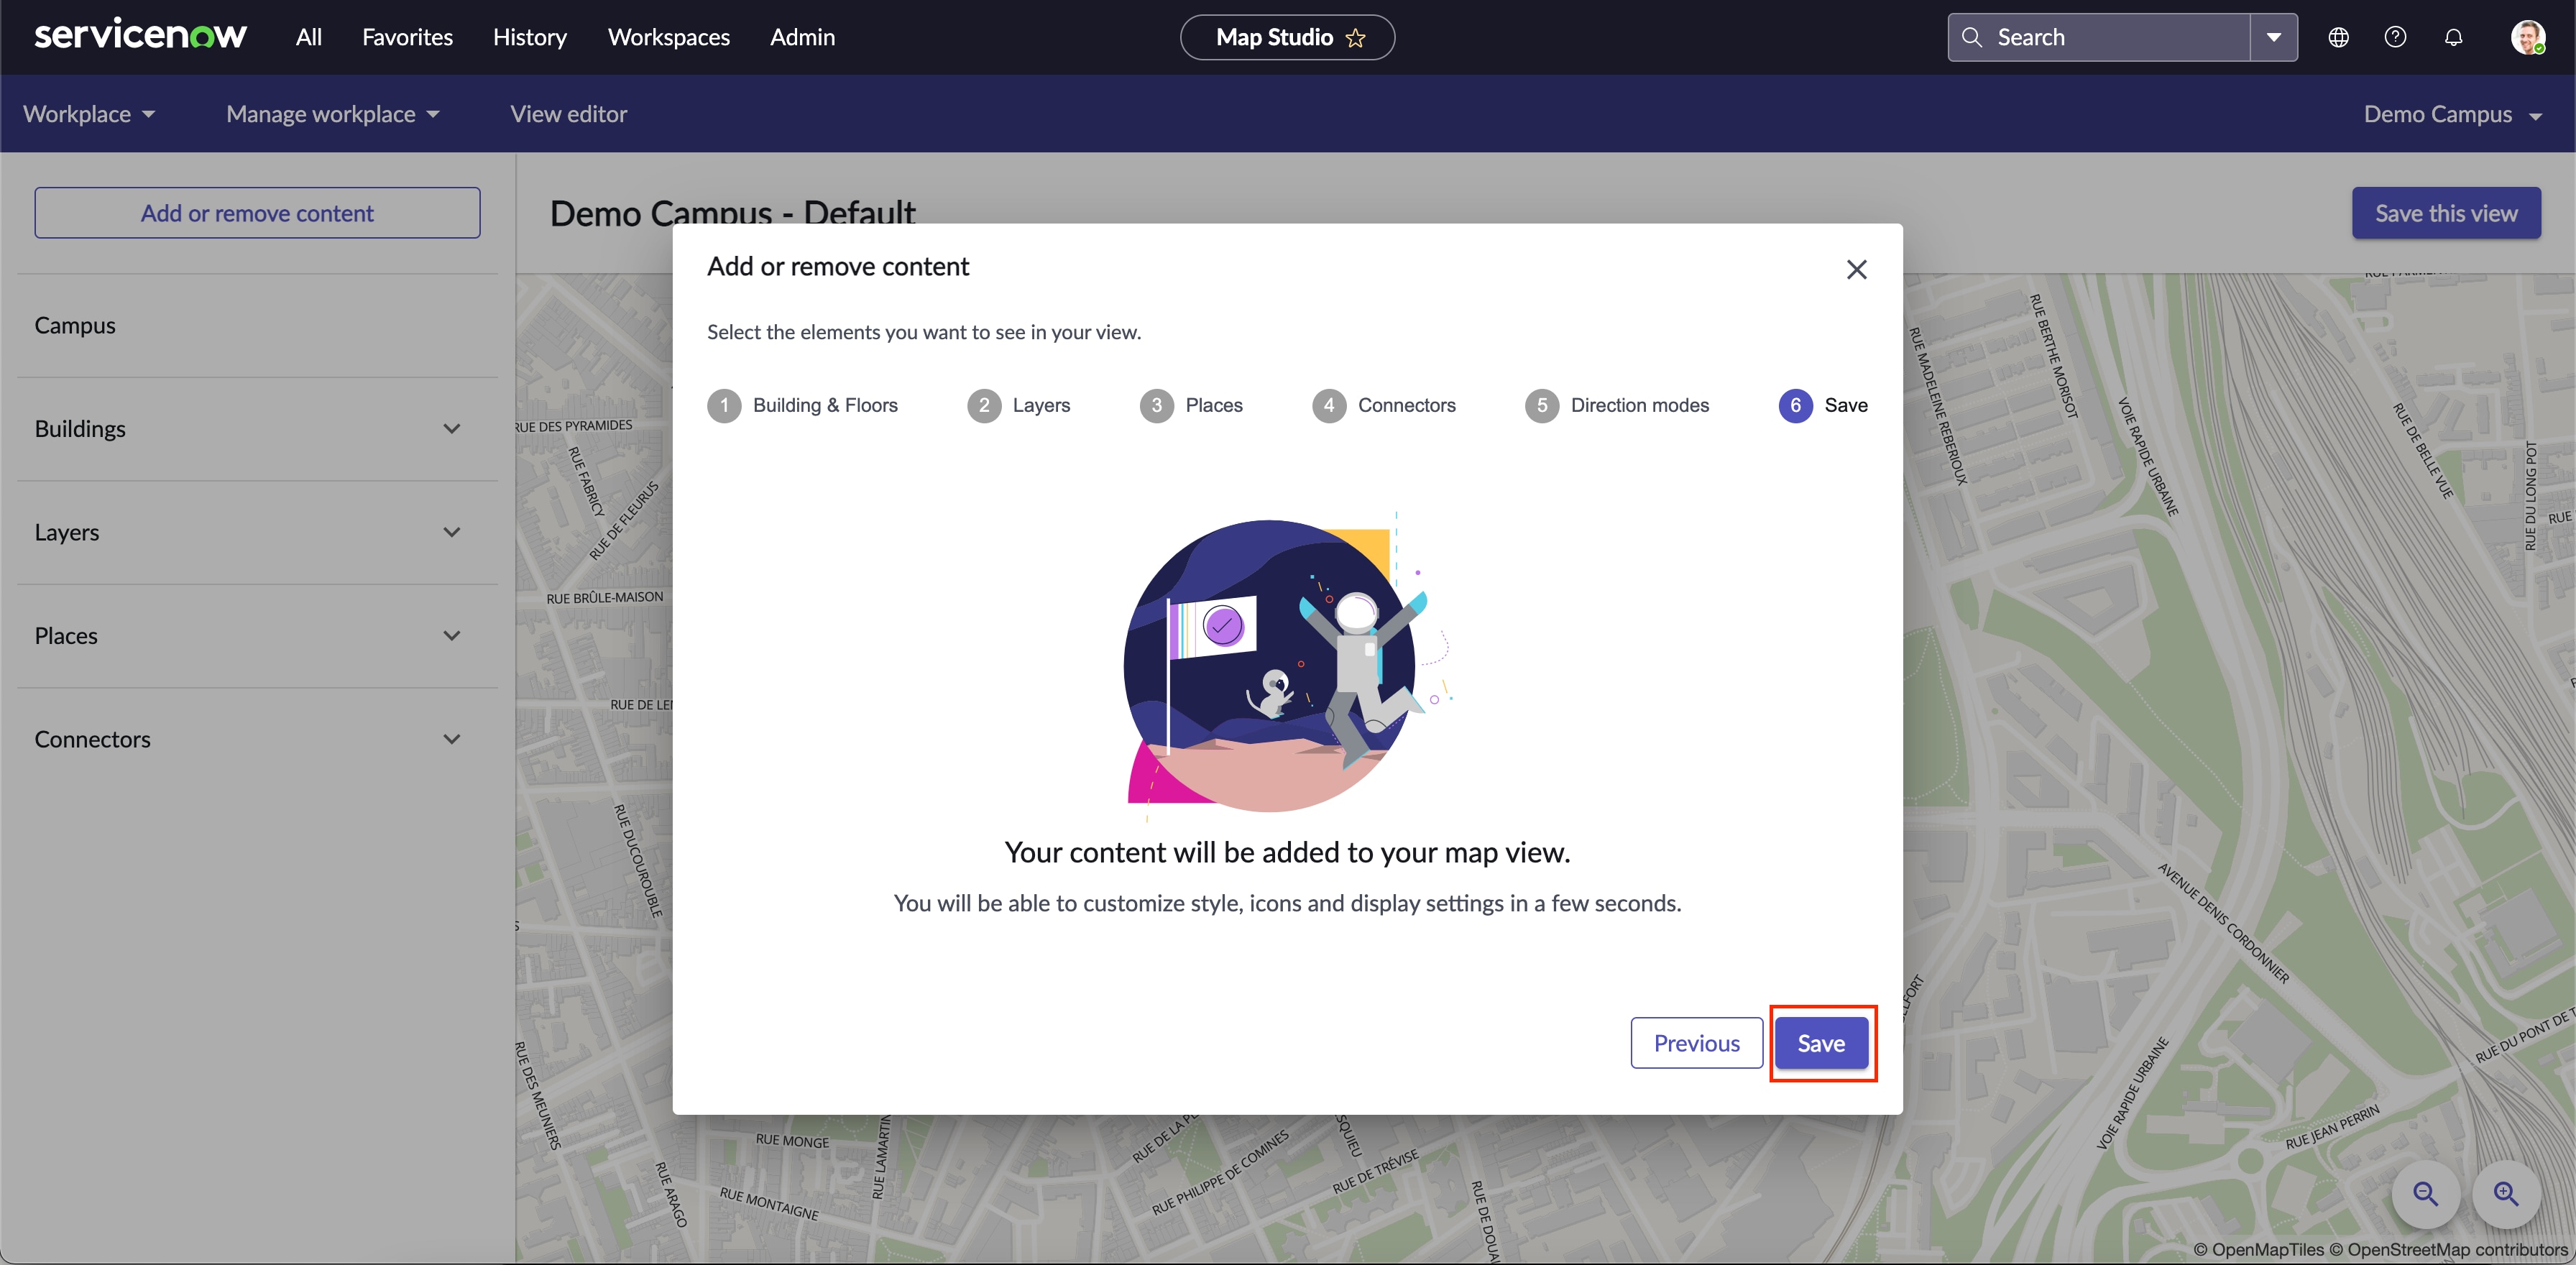
From here you will arrive to this box and click on continue until you arrive to the section that you are interested in, this case the third section Places.
Once in the Places section, look for the Places you have created and want to activate in your View Editor in the list and check them off and click on continue.

You continue to click on Continue until you get to the Save box from where you click on Save and your new Place Types will be active in your View Editor.
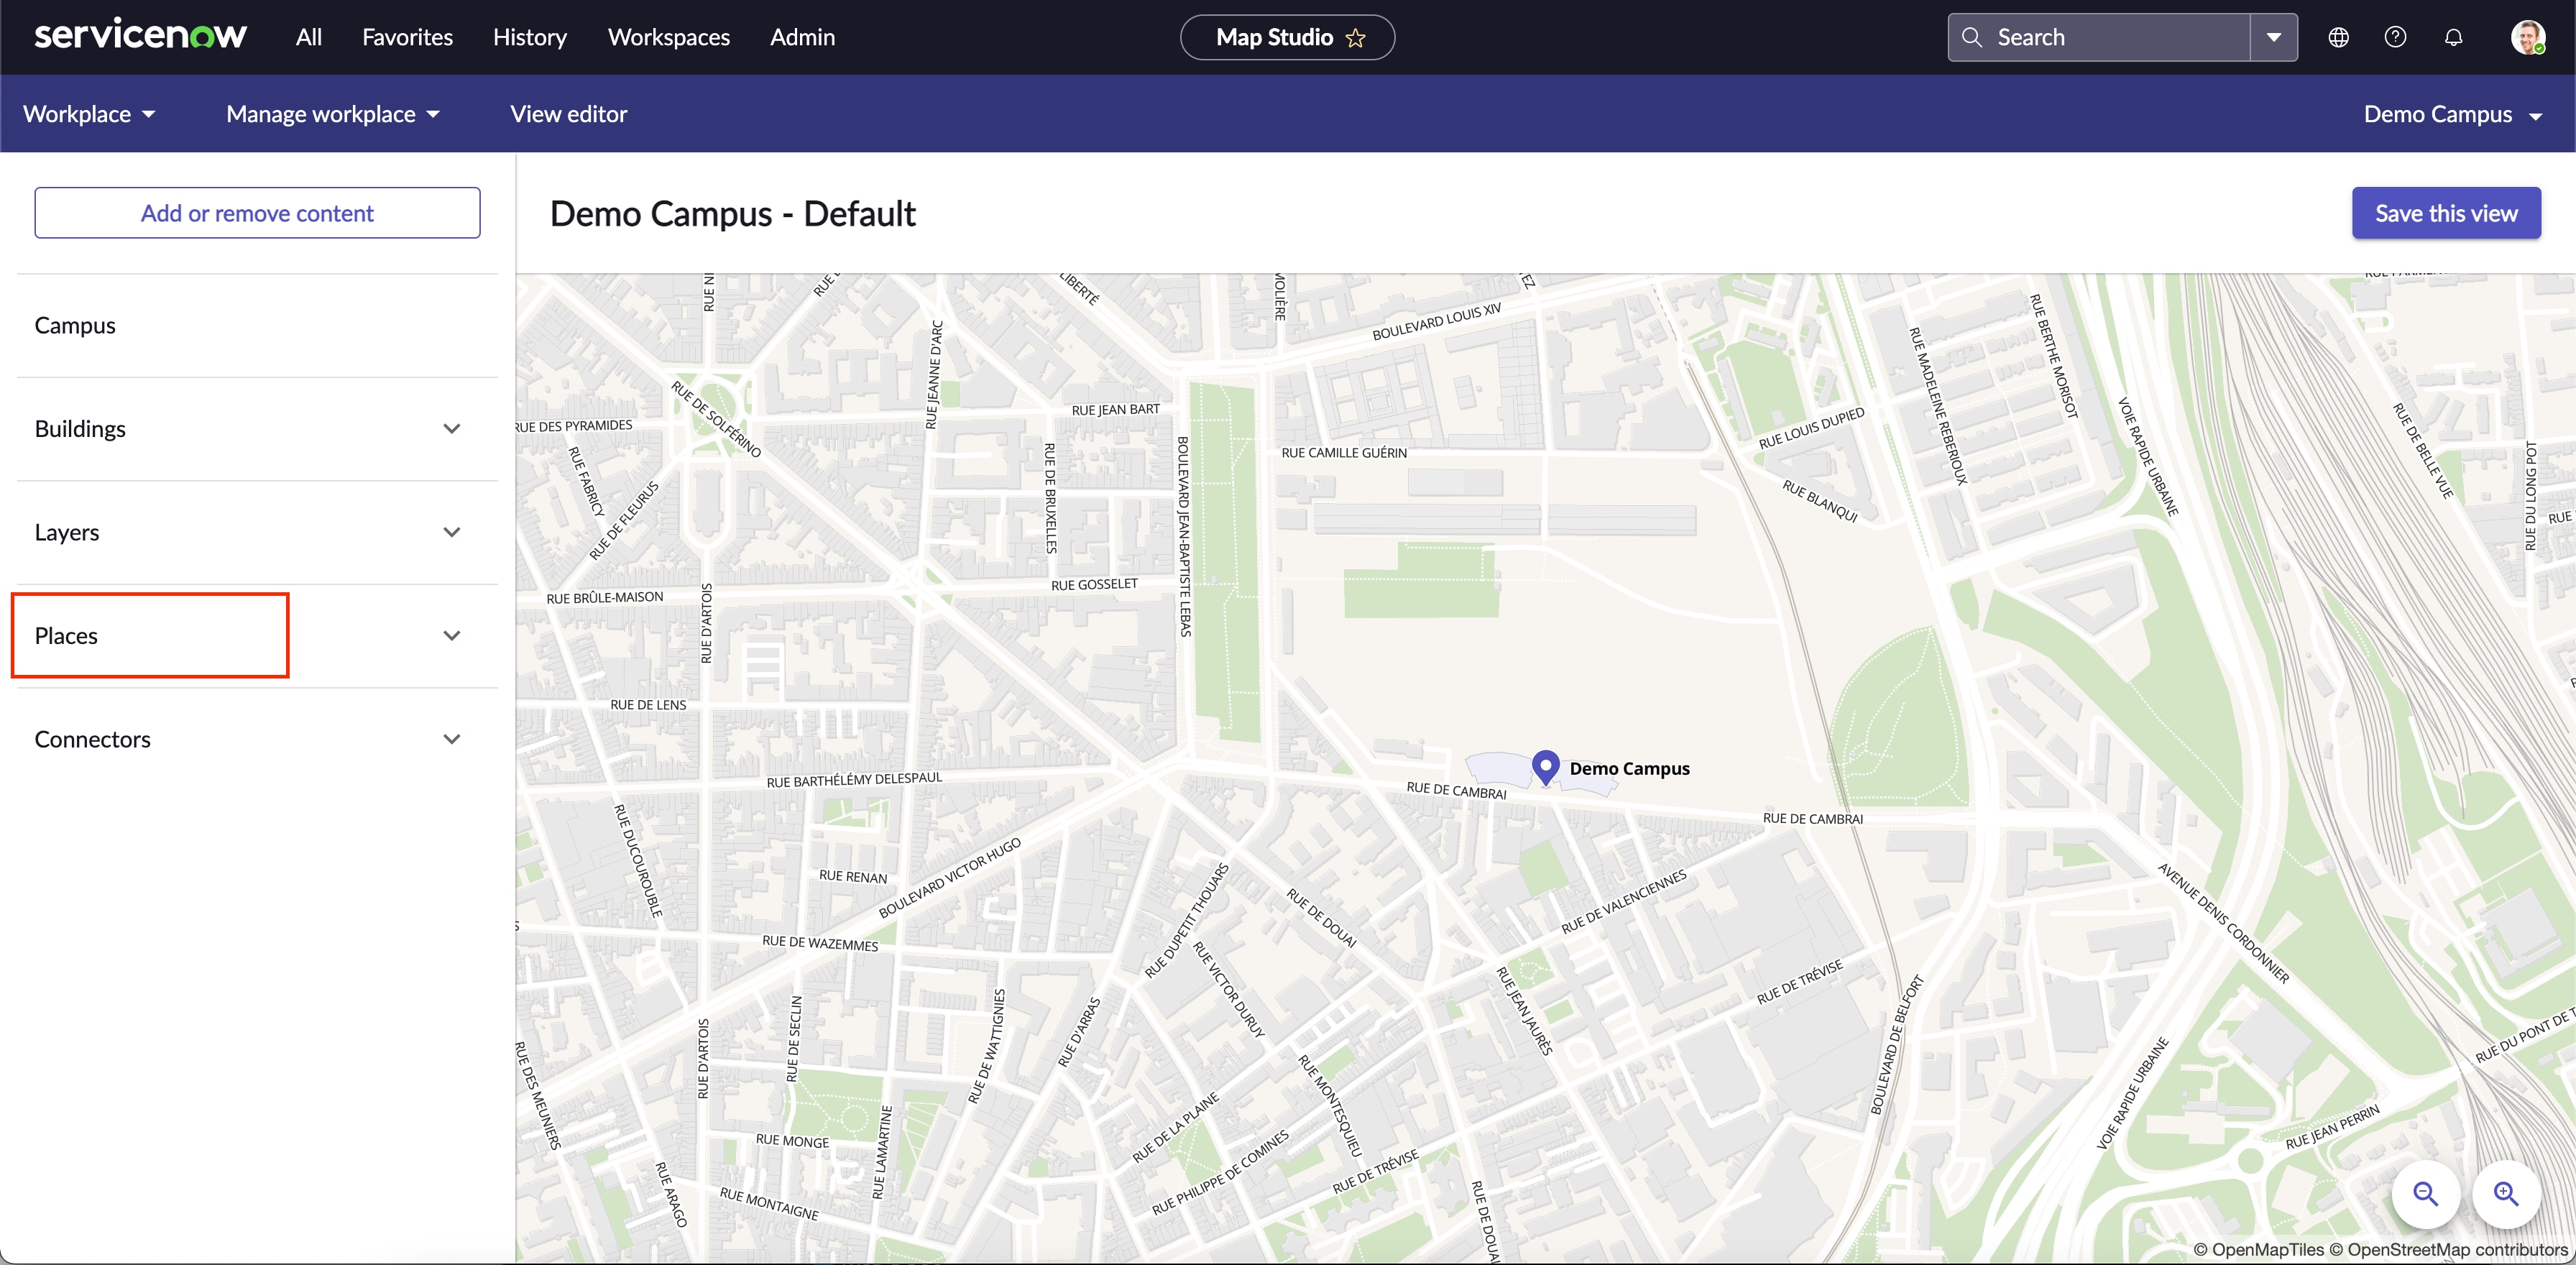
To check if this one is active you can click on Places, look for your Places in the list and click on it.
You will find all the characteristics of your Place Types that you can modify directly from your View Editor, whether it is the colour or other.
When you make a change to your Place in your View Editor, all the Places assigned to it will also change throughout your Campus.

- 8,550 Views
1 Comment
You must be a registered user to add a comment. If you've already registered, sign in. Otherwise, register and sign in.
