


Brandon May

ServiceNow Employee
Options
- Subscribe to RSS Feed
- Mark as New
- Mark as Read
- Bookmark
- Subscribe
- Printer Friendly Page
- Report Inappropriate Content
01-04-2017
03:11 PM
One question I have been asked a lot over the past few months is, "How do I hide the 'New' button on the table lists in Service Portal using 'Data Table' or 'Data Table from Instance Definition Widget'"? This button allows users to create new records directly from the list page on Service Portal, just like the 'New' UI Action works from the list view on the platform. You may not want users to create records through the list and would rather them utilize the Service Catalog instead where they can follow a more step-by-step process. Omitting this button will force users to do this.
"Omit new button" in Service Portal
This button works much like any UI Action on the back-end platform. In order for you to be able to utilize this as a user, you will need to have the appropriate ACL(s) for the specified table of the list view.
One difference you will see between Service Portal and the back-end platform, is the List Control option found on the list view. On the back-end platform, this allows you to easily set the "Omit new button" field to false, removing the ability to create a new record directly through the UI Action from the list view. Unfortunately, this "Omit new button" field does not cross over to the Service Portal. However, getting that button to disappear is pretty easy. Maybe not as easy checking a box, but nevertheless, easy.
How to remove the "New" button on a Service Portal list page
Out of box, the Service Portal list view is defined through the Data Table Widget (widget-data-table), and an out-of-box example can be seen on the 'List' page. In fact, if you ever want to pull a table list in Service Portal, you can go directly to /sp?id=list&table=<table_name>.
To get to the List page, we first need to go the page editor. You can get there by going through /sp_config and selecting the Page Editor, or directly by going to /sp_config?id=page_edit. From the reference drop down, type and select 'List'. From here you will see the list branch. Let's first click the Data Table widget to review the source of the 'New' button.
Here you will see the "New" button defined through the button tag on line 13 in the body of the HTML template for the widget. You will see 'ng-if="options.show_new && data.canCreate"'. This is checking to see if the Boolean value for New button option is set to true or false and if the user has access to create against this table.
Now, I know what you're thinking, 'Sweet! I'll just remove this line of code"! Although this is true, don't get too excited (yet), because if you haven't already noticed, this widget is in read-only state. This is by default and cannot be modified. One way to remove, or comment-out, this line of code is to simply clone the widget.
You can clone the widget by:
- Clicking the the hamburger icon in the top-right corner of the widget's page
- Select 'Clone "Data Table"
From here you will need to give it a widget name and ID.
Once created, you will be able to modify the code and from here you can delete or comment out the line (line 13) and save. You can then go back to the List page, and set the widget to your new cloned Data Table widget without the new button.
I recommend setting the options directly through the page instead.
If you are looking to hide the New button across any page utilizing the Data Table widget, then perhaps the best way (and the way I recommend), is to simply hide the new button through the options schema. On the Data Table widget, you will see options listed in the Client Controller (they are commented out — Line 3 to 16). Take notice of the 'show_new' Boolean value.
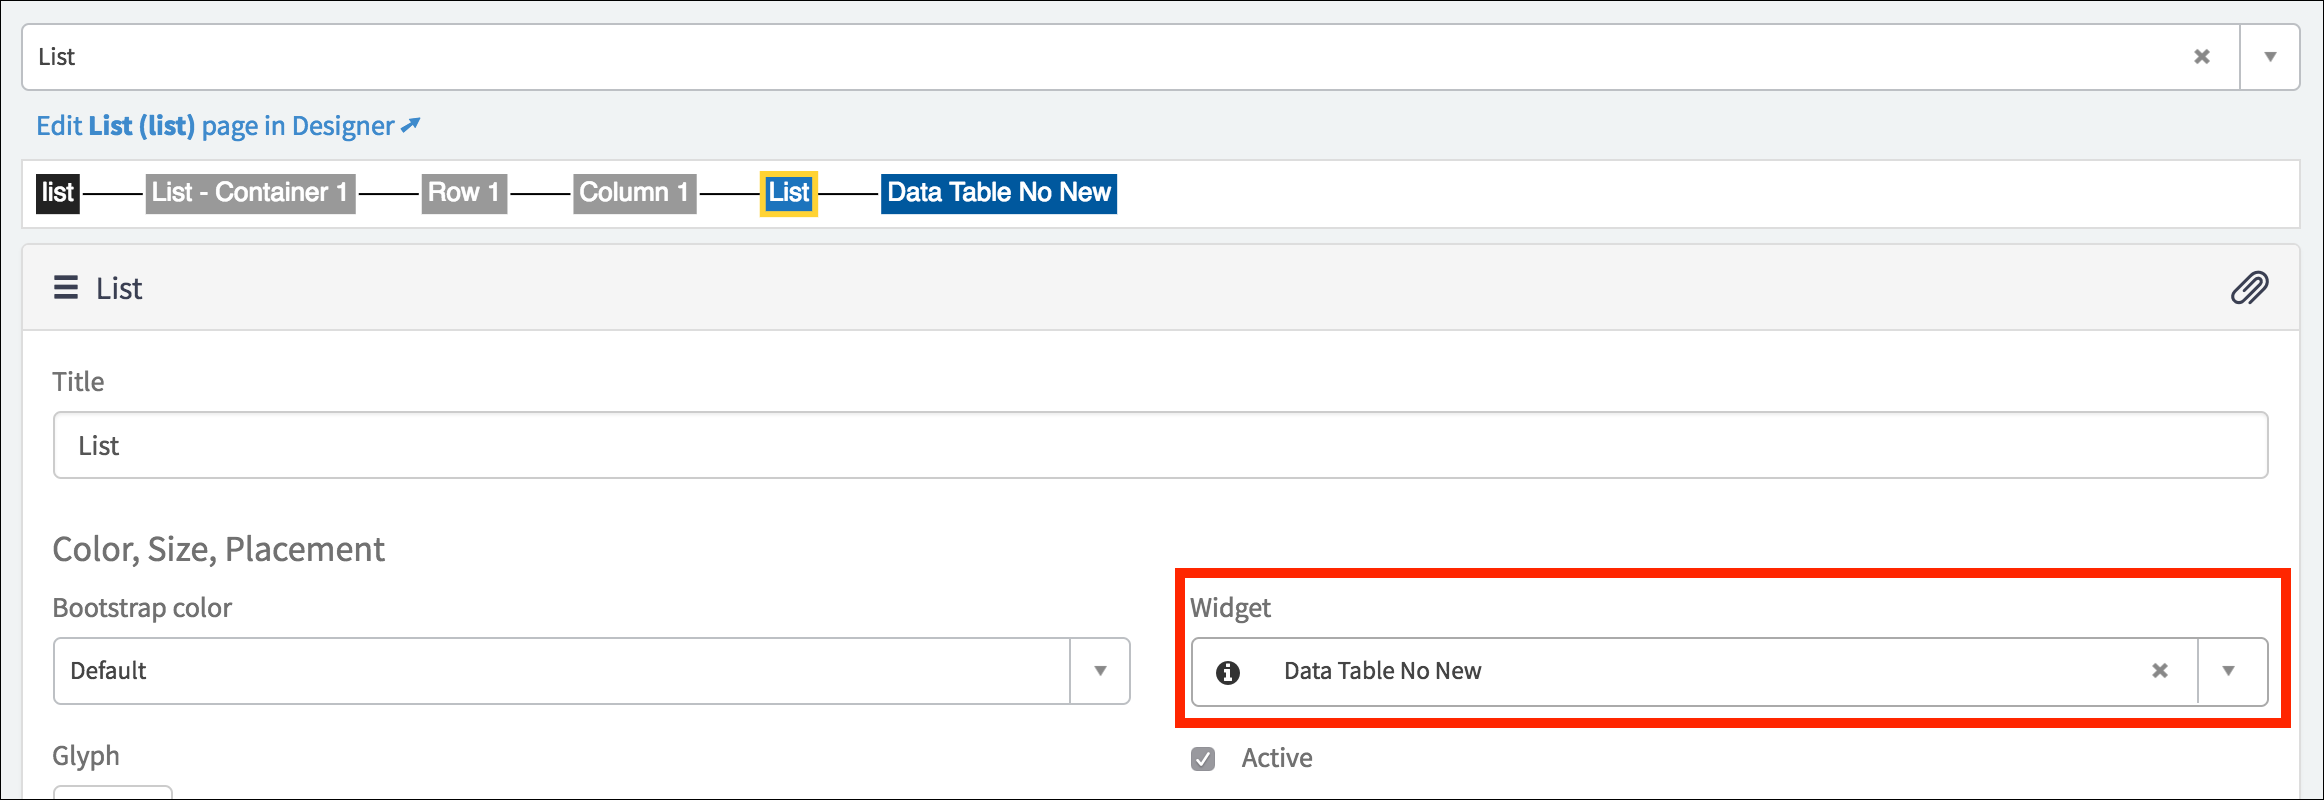
This is the option we are going to set to false on the List page. At the top, on the list branch, select List to open the page record.
At the bottom of the form you will see the 'Additional options, JSON format' field. Here is where you are going to set the option for 'show_new' to false through the following:
{
"show_new" : {
"displayValue" : false,
"value" : false
}
}
From here, you can click the Save button in the bottom right. Now test to see whether or not the button is showing through any table, like the incident table: /sp?id=list&table=incident
Now the new button is gone and users will not be able to create new records through the list. If you ever need to revert back to showing the New button, you can always remove this from the field. For more information on configuring the options-schema, check out the Options Schema Docs page. I also highly recommend fschuster's Service Portal: getting familiar with advanced widget options and b-rad's Adventure in Service Portaling blog.
Labels:
- 25,666 Views
16 Comments
- « Previous
-
- 1
- 2
- Next »
You must be a registered user to add a comment. If you've already registered, sign in. Otherwise, register and sign in.
