- Mark as New
- Bookmark
- Subscribe
- Mute
- Subscribe to RSS Feed
- Permalink
- Report Inappropriate Content
01-31-2022 09:56 AM
Hi everyone!
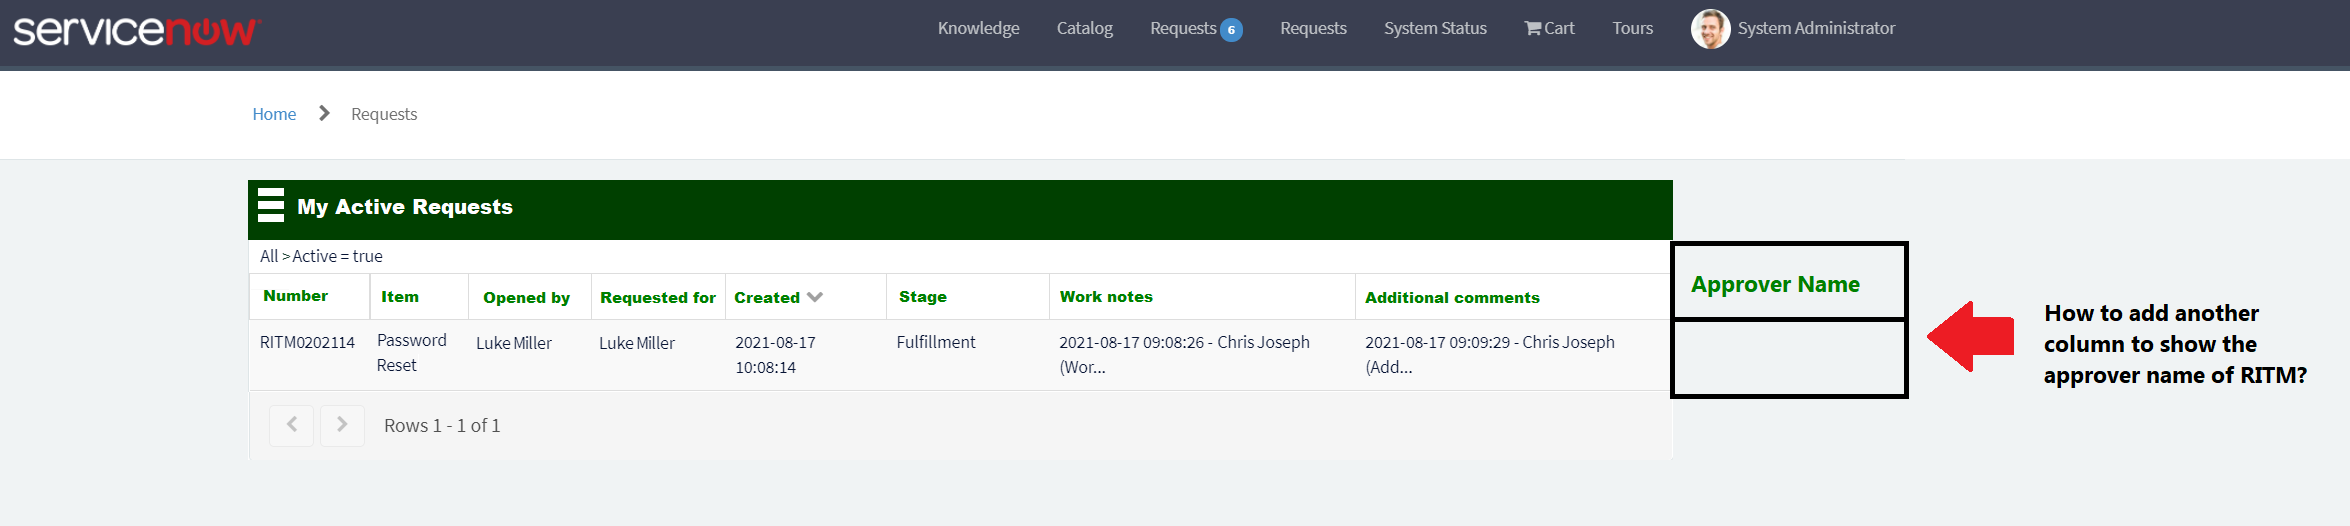
We've been doing a lot of changes in our Service Portal and one of these is to display the approver name of the RITM so that users without ITIL role can see who's the approver of their RITM.
This can be found on sp_instance_table. I tried looking if there's an APPROVER field for this configuration but I don't see one. Is it possible to add the name of Approver for this enhancement?


Solved! Go to Solution.
- Labels:
-
Service Portal
- Mark as New
- Bookmark
- Subscribe
- Mute
- Subscribe to RSS Feed
- Permalink
- Report Inappropriate Content
02-13-2022 11:09 PM
Hi
Sure will try to assist you here.
First thing to understand why you are not able to directly select Approver Name in instance option is because Approvals resides in a Different table named as "sysapproval_approver".
So in order to Include Approver name as well, you need to follow below steps:
1) Create a List Type field on Requested Item record and refer it to User Table as shown below:

Now write a Business Rule on Approval Table that when ever a approval record is generated for an Requested Item then the field which we have created above will be updated with Name of Approver as show below:
BR Details:
Table Name: sysapproval_approver
When: After Insert
Condition of BR: Approval For-->Task-->Task Type is sc_req_item
Script:
(function executeRule(current, previous /*null when async*/) {

	// Add your code here

	var gr = new GlideRecord('sc_req_item');
	gr.addQuery('sys_id',current.sysapproval);
	gr.query();
	if(gr.next()){

		gr.u_approver_name = gr.u_approver_name + ',' + current.approver.toString();
		gr.update();
	}


})(current, previous);
Now the widget which you have shown is a Simple List widget where I believe you have configured your Widget instance Option to display RITM columns.
Now you need to go to the same instance record as you have mention in your screenshot above and add the field named as "Approver Name" which will show you the Approver Name in your portal view as needed.

Hope this helps. Please mark the answer as correct/helpful based on impact.
Regards,
Shloke
Regards,
Shloke
- Mark as New
- Bookmark
- Subscribe
- Mute
- Subscribe to RSS Feed
- Permalink
- Report Inappropriate Content
02-07-2022 06:23 AM
Hello,
Yes give me some time will provide you all the steps, as i am currently a little ooccupied with some tasks.
Thanks
- Mark as New
- Bookmark
- Subscribe
- Mute
- Subscribe to RSS Feed
- Permalink
- Report Inappropriate Content
02-07-2022 10:15 AM
Thank you Saurav!
- Mark as New
- Bookmark
- Subscribe
- Mute
- Subscribe to RSS Feed
- Permalink
- Report Inappropriate Content
02-09-2022 10:13 AM
Sure Saurav, No problem. Thanks in advance!
- Mark as New
- Bookmark
- Subscribe
- Mute
- Subscribe to RSS Feed
- Permalink
- Report Inappropriate Content
02-13-2022 05:44 AM
Hi @shloke04, good day! just wondering if you have an idea about this. Thanks in advance.
- Mark as New
- Bookmark
- Subscribe
- Mute
- Subscribe to RSS Feed
- Permalink
- Report Inappropriate Content
02-13-2022 11:09 PM
Hi
Sure will try to assist you here.
First thing to understand why you are not able to directly select Approver Name in instance option is because Approvals resides in a Different table named as "sysapproval_approver".
So in order to Include Approver name as well, you need to follow below steps:
1) Create a List Type field on Requested Item record and refer it to User Table as shown below:
Now write a Business Rule on Approval Table that when ever a approval record is generated for an Requested Item then the field which we have created above will be updated with Name of Approver as show below:
BR Details:
Table Name: sysapproval_approver
When: After Insert
Condition of BR: Approval For-->Task-->Task Type is sc_req_item
Script:
(function executeRule(current, previous /*null when async*/) {

	// Add your code here

	var gr = new GlideRecord('sc_req_item');
	gr.addQuery('sys_id',current.sysapproval);
	gr.query();
	if(gr.next()){

		gr.u_approver_name = gr.u_approver_name + ',' + current.approver.toString();
		gr.update();
	}


})(current, previous);
Now the widget which you have shown is a Simple List widget where I believe you have configured your Widget instance Option to display RITM columns.
Now you need to go to the same instance record as you have mention in your screenshot above and add the field named as "Approver Name" which will show you the Approver Name in your portal view as needed.
Hope this helps. Please mark the answer as correct/helpful based on impact.
Regards,
Shloke
Regards,
Shloke