- Mark as New
- Bookmark
- Subscribe
- Mute
- Subscribe to RSS Feed
- Permalink
- Report Inappropriate Content
01-31-2022 09:56 AM
Hi everyone!
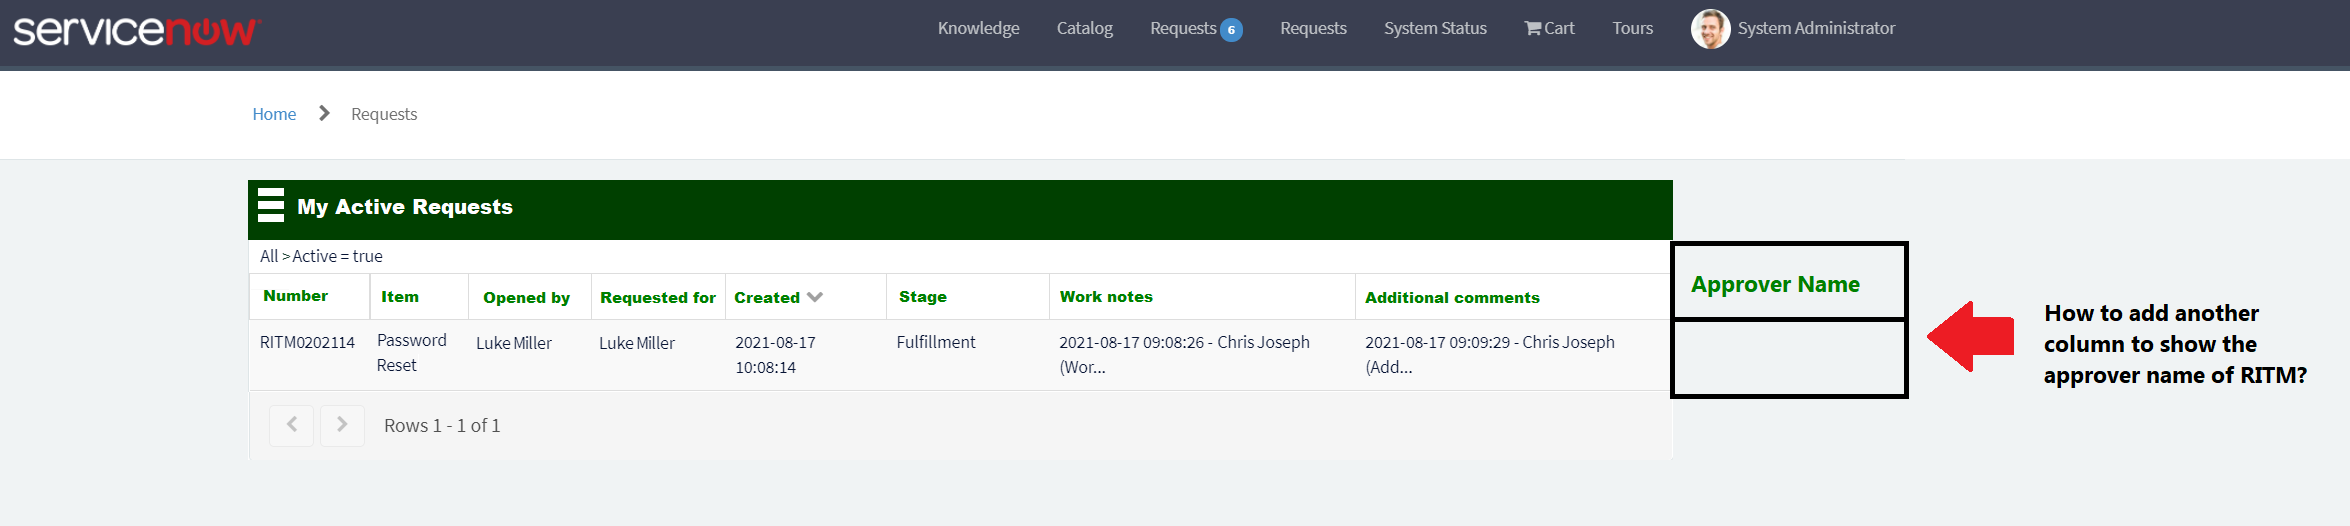
We've been doing a lot of changes in our Service Portal and one of these is to display the approver name of the RITM so that users without ITIL role can see who's the approver of their RITM.
This can be found on sp_instance_table. I tried looking if there's an APPROVER field for this configuration but I don't see one. Is it possible to add the name of Approver for this enhancement?


Solved! Go to Solution.
- Labels:
-
Service Portal
- Mark as New
- Bookmark
- Subscribe
- Mute
- Subscribe to RSS Feed
- Permalink
- Report Inappropriate Content
02-13-2022 11:09 PM
Hi
Sure will try to assist you here.
First thing to understand why you are not able to directly select Approver Name in instance option is because Approvals resides in a Different table named as "sysapproval_approver".
So in order to Include Approver name as well, you need to follow below steps:
1) Create a List Type field on Requested Item record and refer it to User Table as shown below:

Now write a Business Rule on Approval Table that when ever a approval record is generated for an Requested Item then the field which we have created above will be updated with Name of Approver as show below:
BR Details:
Table Name: sysapproval_approver
When: After Insert
Condition of BR: Approval For-->Task-->Task Type is sc_req_item
Script:
(function executeRule(current, previous /*null when async*/) {

	// Add your code here

	var gr = new GlideRecord('sc_req_item');
	gr.addQuery('sys_id',current.sysapproval);
	gr.query();
	if(gr.next()){

		gr.u_approver_name = gr.u_approver_name + ',' + current.approver.toString();
		gr.update();
	}


})(current, previous);
Now the widget which you have shown is a Simple List widget where I believe you have configured your Widget instance Option to display RITM columns.
Now you need to go to the same instance record as you have mention in your screenshot above and add the field named as "Approver Name" which will show you the Approver Name in your portal view as needed.

Hope this helps. Please mark the answer as correct/helpful based on impact.
Regards,
Shloke
Regards,
Shloke
- Mark as New
- Bookmark
- Subscribe
- Mute
- Subscribe to RSS Feed
- Permalink
- Report Inappropriate Content
02-16-2022 08:21 AM

- Mark as New
- Bookmark
- Subscribe
- Mute
- Subscribe to RSS Feed
- Permalink
- Report Inappropriate Content
02-16-2022 12:06 PM
Sure
Will look into it tomorrow and let you know on the steps.
Regards,
Shloke
Regards,
Shloke
- Mark as New
- Bookmark
- Subscribe
- Mute
- Subscribe to RSS Feed
- Permalink
- Report Inappropriate Content
02-17-2022 09:05 AM
Thank you
- Mark as New
- Bookmark
- Subscribe
- Mute
- Subscribe to RSS Feed
- Permalink
- Report Inappropriate Content
02-17-2022 09:21 PM
Hi
In order to show Approver Name in the location you want, you need to follow below steps:
1) Navigate to the Widget named "Ticket Fields" as shown below:

Open this widget and click on Clone Widget button to clone it as shown below:

Now once the widget gets cloned, open the cloned widget and navigate to the Server script of this widget as shown below and add your Approver Name field which you have created as shown below:
Add your field in the same format as other fields are separated by comma in line number 16 as shown in Red below:

Now, you need to link your new Cloned widget to the correct page as well so that the changes work.
So Navigate to the Page record named "ticket"

Open this record and click on Open in Designer Related link and add the new cloned widget as I have done in Red below:

Hope this helps. Please mark the answer as correct/helpful based on impact.
Regards,
Shloke
Regards,
Shloke
- Mark as New
- Bookmark
- Subscribe
- Mute
- Subscribe to RSS Feed
- Permalink
- Report Inappropriate Content
02-21-2022 02:40 AM
Hi Mr.
Also, our system allows approver change. Especially if the current approver is unavailable, we can manually add a different user to act as approver. However, when I tried changing the approver of the RITM, the previous approver was not deleted on the Portal instead it duplicates (see screenshot below)
We need to make sure that the approver name on the back end is sync with the Approver name on the Service Portal. If we change the approver name, whoever is listed in the back end must appear on the portal. If we deleted the approver on the back end, it should be deleted on the portal as well. We don't want any duplicate. Is that possible Sir?
