


sabell2012

Mega Sage
Options
- Subscribe to RSS Feed
- Mark as New
- Mark as Read
- Bookmark
- Subscribe
- Printer Friendly Page
- Report Inappropriate Content
02-06-2016
07:13 AM
In this lab I would like to give an example of the Workflow Control via Variable Input pattern I mentioned in my previous article:
Pragmatic Patterns: Workflows - Using Data to Adjust the Flow
We will be going through the steps to build a very simple Service Catalog driven workflow that will be configured by choices made on the Catalog Item form. We will be looking at how removing one of the choices deactivates part of the workflow.
We will be using this lab as a foundation to build the other two examples in later articles. This lab will be longer than most as I am taking the time to show you how to do these things from scratch (lots of pictures! ).
Prerequisites:
- Some familiarity with the workflow editor. I will be using the Geneva version of ServiceNow for my examples.
- Some familiarity with creating Service Catalog items, variables, and choices, but I will be listing the steps anyway.
- Also, if you have not done so, you might want to run through my other lab on how to do advanced work with the If Activity; as we will be using those techniques in this, and the next two articles:
Mini-Lab: Workflows - Playing With the If Activity
Requirements
- Create a Service Catalog Item / Workflow combination where choices added or removed from the form will affect what occurs in the workflow.
- Place this Service catalog Item under the Can We Help You? Service Catalog Category.
- The name of the Service Catalog Item will be: Workflow Control via Input
- The choices for the form can be in the Choice or custom choice table.
- The Service Catalog item that contains a single variable: State.
- State can have three choices initially: New, Active, Closed (0, 1, 2)
- The workflow will print a message in the log that indicates a particular state was chosen.
- Only the Order Now button will appear on the Service Catalog Item.
- Removal of a choice will deactivate that portion of the workflow.
Design
1. Create a Service Catalog Item (Req #1)
- Name: Workflow Control via Input (Req #3)
- Category: How Can We Help You? (Req #2)
- Deactivate every shopping cart feature except Order Now. (Req #8)
2. Catalog Item Variables: (Req #4,5,6, 9 - implied)
- Name: State
- Choice List
- Choices: New, Active, Closed
- Values: 0, 1, 2
- Choices will be entered into the Choices table
3. Workflow design will be as follows: (Req #1, 7)
Development
So we have our Requirements, and we have our Design, let's get to work!
We will start at the bottom and work up. The workflow will get built first, and then the Service Catalog Item. We won't have all of the pieces yet, but we can prepare for it.
The Workflow (Req #1)
1. Navigate to Workflow -> Workflow Editor. A new tab will open in your browser and the Workflow Editor will be displayed.
2. Click the plus "+" symbol in the upper right of the editor to create a new workflow. The New Workflow form will be displayed.
3. Fill out the form with the following:
- Name: Workflow Control Via Variable Input
- Table: Global
- Description: Workflow control via variable input
- Click the Submit button to save your work.
4. From the Core tab on the editor navigate to Conditions and drag an If Activity onto the form. The Activity Properties form will appear.
5. Fill out the form with the following:
- Name: Check If New
- Advanced: Checked
- Script:
answer = ifScript();
function ifScript() {
if (workflow.variables.state == 0) {
return 'yes';
}
return 'no';
}
d. Click the Submit button to save your work.
NOTE: Here we are making an assumption: The Service Catalog variable being passed in will be named "state". When we build our Service Catalog Item variable we will need to make the name is consistent.
For more information on using Service Catalog variables in a workflow see Section 3 in the following wiki article: Using Variables in a Workflow
6. From the Core tab on the editor navigate to Conditions and drag another If Activity onto the form. The Activity Properties form will appear.
7. Fill out the form with the following:
- Name: Check If Active
- Advanced: Checked
- Script:
answer = ifScript();
function ifScript() {
if (workflow.variables.state == 1) {
return 'yes';
}
return 'no';
}
d. Click the Submit button to save your work.
8. From the Core tab on the editor navigate to Utilities and drag a Run Script Activity onto the form. The Activity Properties form will appear.
9. Fill out the form with the following (Req #7):
a. Name: Log New
b. Script:
var identifier = context.name + '.' + activity.name;
gs.info('---> [{0}] New triggered!', identifier);
c. Click the Submit button to save your work.
NOTE: The context.name will automatically fill in the workflow name, and the activity.name will automatically fill in the, uh, activity name. BTW, this is really useful for labeling your log entries! Remember that a best practice is: NO MYSTERY LOG ENTRIES in the System Log! This has been a real problem at a lot of my clients that use Workflows.
10. From the Core tab on the editor navigate to Utilities and drag a Run Script Activity onto the form. The Activity Properties form will appear.
11. Fill out the form with the following (Req #7):
a. Name: Log Active
b. Script:
var identifier = context.name + '.' + activity.name;
gs.info('---> [{0}] Active triggered!', identifier);
c. Click the Submit button to save your work.
12. From the Core tab on the editor navigate to Utilities and drag a Run Script Activity onto the form. The Activity Properties form will appear.
13. Fill out the form with the following (Req #7):
a. Name: Log Failure
b. Script:
var identifier = context.name + '.' + activity.name;
gs.info('---> [{0}] Nothing triggered!', identifier);
c. Click the Submit button to save your work.
14. Wire up your workflow to look like the following diagram:
At this point you may want to Publish your workflow to save it down. However, that is not really necessary as you will be the only one testing it.
The Service Catalog Item (Req #1)
Now we are ready to create the user interface (UI).
1. Navigate to Service Catalog -> Catalog Definitions -> Maintain Items. The Catalog Items list view will be displayed.
2. Click the New button. The New Catalog Item form will be displayed.
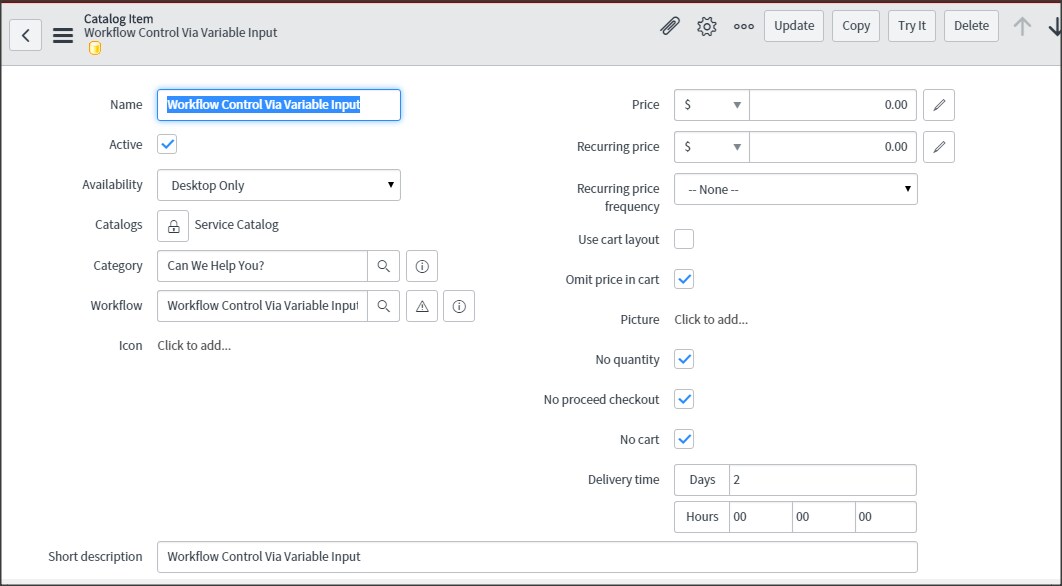
3. Fill out the form with the following:
- Name: Workflow Control Via Variable Input (Req #3)
- Active: checked
- Availability: Desktop Only
- Catalogs: Service Catalog
- Category: Can We Help You? (Req #2)
- Workflow: Workflow Control Via Variable Input
- Short Description: Workflow Control Via Variable Input
- Use Cart Layout: not checked (Req #8)
- Omit price in cart: checked (Req #8)
- No quantity: checked (Req #8)
- No proceed checkout: checked (Req #8)
- No cart: checked (Req #8)
- Right-click on the form header to bring up the context menu.
- Choose Save to save your work and remain on the form.
NOTE: Some of these values may not be visible on the form and you may need to modify the form to include them.
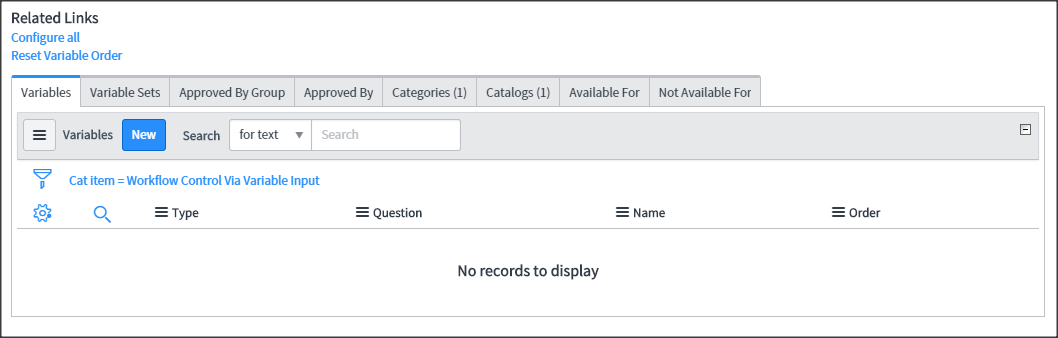
4. Scroll to the bottom of the Item form. You will see the tabs for the related lists.
5. Choose the Variables tab, and click the New button. The New Variable Form will be displayed.
6. Fill out the form with the following (Req #5):
- Type: Select Box
- Click on the Question tab.
- Question: State
- Name: state
- Click on the Type Specifications tab.
- Include None: checked
- Right-click at the top of the Variable form to display the context menu.
- Choose Save to save your work and remain on the form.
NOTE: The Name field is where we make sure our variable name is consistent with what we programmed into our workflow.
7. Scroll to the bottom of the Variable form. You will see the Question Choices related list displayed.
8. Click on the New button. The New Question Choice form will be displayed.
9. Fill in the form with the following:
- Text: New
- Value: 0
10. Right-click on the Question Choice form header to bring up the context menu.
11. Click on Save to save your work and remain on the form.
12. Change the form to the following:
- Name: Active
- Value: 1
13. Right-Click on the Question Choices form header and choose Insert and Stay. This will write down a new record with the new values, and keep you in the form.
14. Change the form to the following:
- Name: Closed
- Value: 2
15. Right-Click on the Question Choices form header and choose Insert. This will write down a third choice record, and will then return you to the Item form.
16. The Question Choices list view should now look something like this (Req #4, 6):
Unit Test
Now we are ready to do our testing. First we will test it with the values we have entered. Then we will remove the Active choice from the State field and note that this effectively deactivates that part of the workflow (no choice — no way to run the code — simple).
1. At the top upper-right of the Item form click on the Try It button. This will display our new Catalog Item form.
2. Click on the State field. You will see our three new choices displayed. Note that the shopping cart has been reduced to just the Order Now button.
3. Choose Active from the State field, and click the Order Now button (Req #5, 6). After a moment the Order Status form will be displayed. Note that the Order Now button is the only thing displayed in the Shopping Cart (Req #8).
4. Click on the RITM number. This will display the Requested Item Form.
5. From the Requested Item Form scroll down to related links.
6. Click on the Show Workflow link. This will display the current workflow.
7. The workflow should show that the Active path was executed.
8. Navigate to System Logs -> System Log -> All. The System Log list view will be displayed.
9. Search for all messages beginning with --->. Observe that there is an entry for Active (Req #7).
NOTE: It is always a good idea to test all available cases.
10. Navigate to Service Catalog -> Catalog Definitions -> Maintain Items. The Catalog Items list view will be displayed.
11. Open the Workflow Control Via Variable Input Catalog Item
12. Scroll to the bottom of the form and click on the Related List Variables tab. You will see your one variable there.
13. Click on the Select Box variable. The Variable form will be displayed.
14. Scroll to the bottom of the form to see the three choices (Req #4).
15. Open the Active choice, and delete it.
16. You should now only have two choices listed (New, Closed).
17. Navigate to Service Catalog -> Catalogs. The catalogs home page will be displayed.
18. Click on Service Catalog. The Service Catalog home page will be displayed.
19. Click on Can We Help You? The "Can We Help You?" page will be displayed. (Req #2)
20. Scroll down through the various items and find Workflow Control Via Variable Input (Req #3). Click on this item. This will open our Item form.
21. Click on the State field and note that the Active value is now missing; effectively deactivating the Active portion of the workflow. (Req #3, 9)
The point of all of this was to show that by removing a value from the State list we can effectively control what is executed in our workflow.
Note that I included requirements traceability in my listing of the Design, Development, and Unit Testing stages. The process and the traceability are both best practices to ensure that I met the original requirements.
That concludes the first pattern example. In my next article I will show how you can use System Properties to control your workflows (pattern 2).
Steven Bell
If you find this article helps you, don't forget to log in and "like" it! I would also like to encourage you to become a member of our blog!
Please Share, Like, Comment this blog if you've found it helpful or insightful.
for Click for More Expert Blogs and also Find Expert Events!
- 2,471 Views
You must be a registered user to add a comment. If you've already registered, sign in. Otherwise, register and sign in.

