


lks

ServiceNow Employee
Options
- Subscribe to RSS Feed
- Mark as New
- Mark as Read
- Bookmark
- Subscribe
- Printer Friendly Page
- Report Inappropriate Content
04-01-2020
06:44 AM
The requirement is to establish ServiceNow and Slack integration in such a way that as soon as a P1 incident is created in ServiceNow instance, instance Post a Message in slack channel.
We build this integration using Flow Designer utility and need to enable IntegrationHub installer (com.glide.hub.integrations) plugin in ServiceNow. IntegrationHub subscription is required to make any outbound API calls triggered by a flow, including calls that a flow indirectly triggers through business rules or other scripts. This plugin/subscription is activated by ServiceNow personnel.
Part 1 - Slack Configuration
Let’s begin with an account creation in slack, this is a free account.
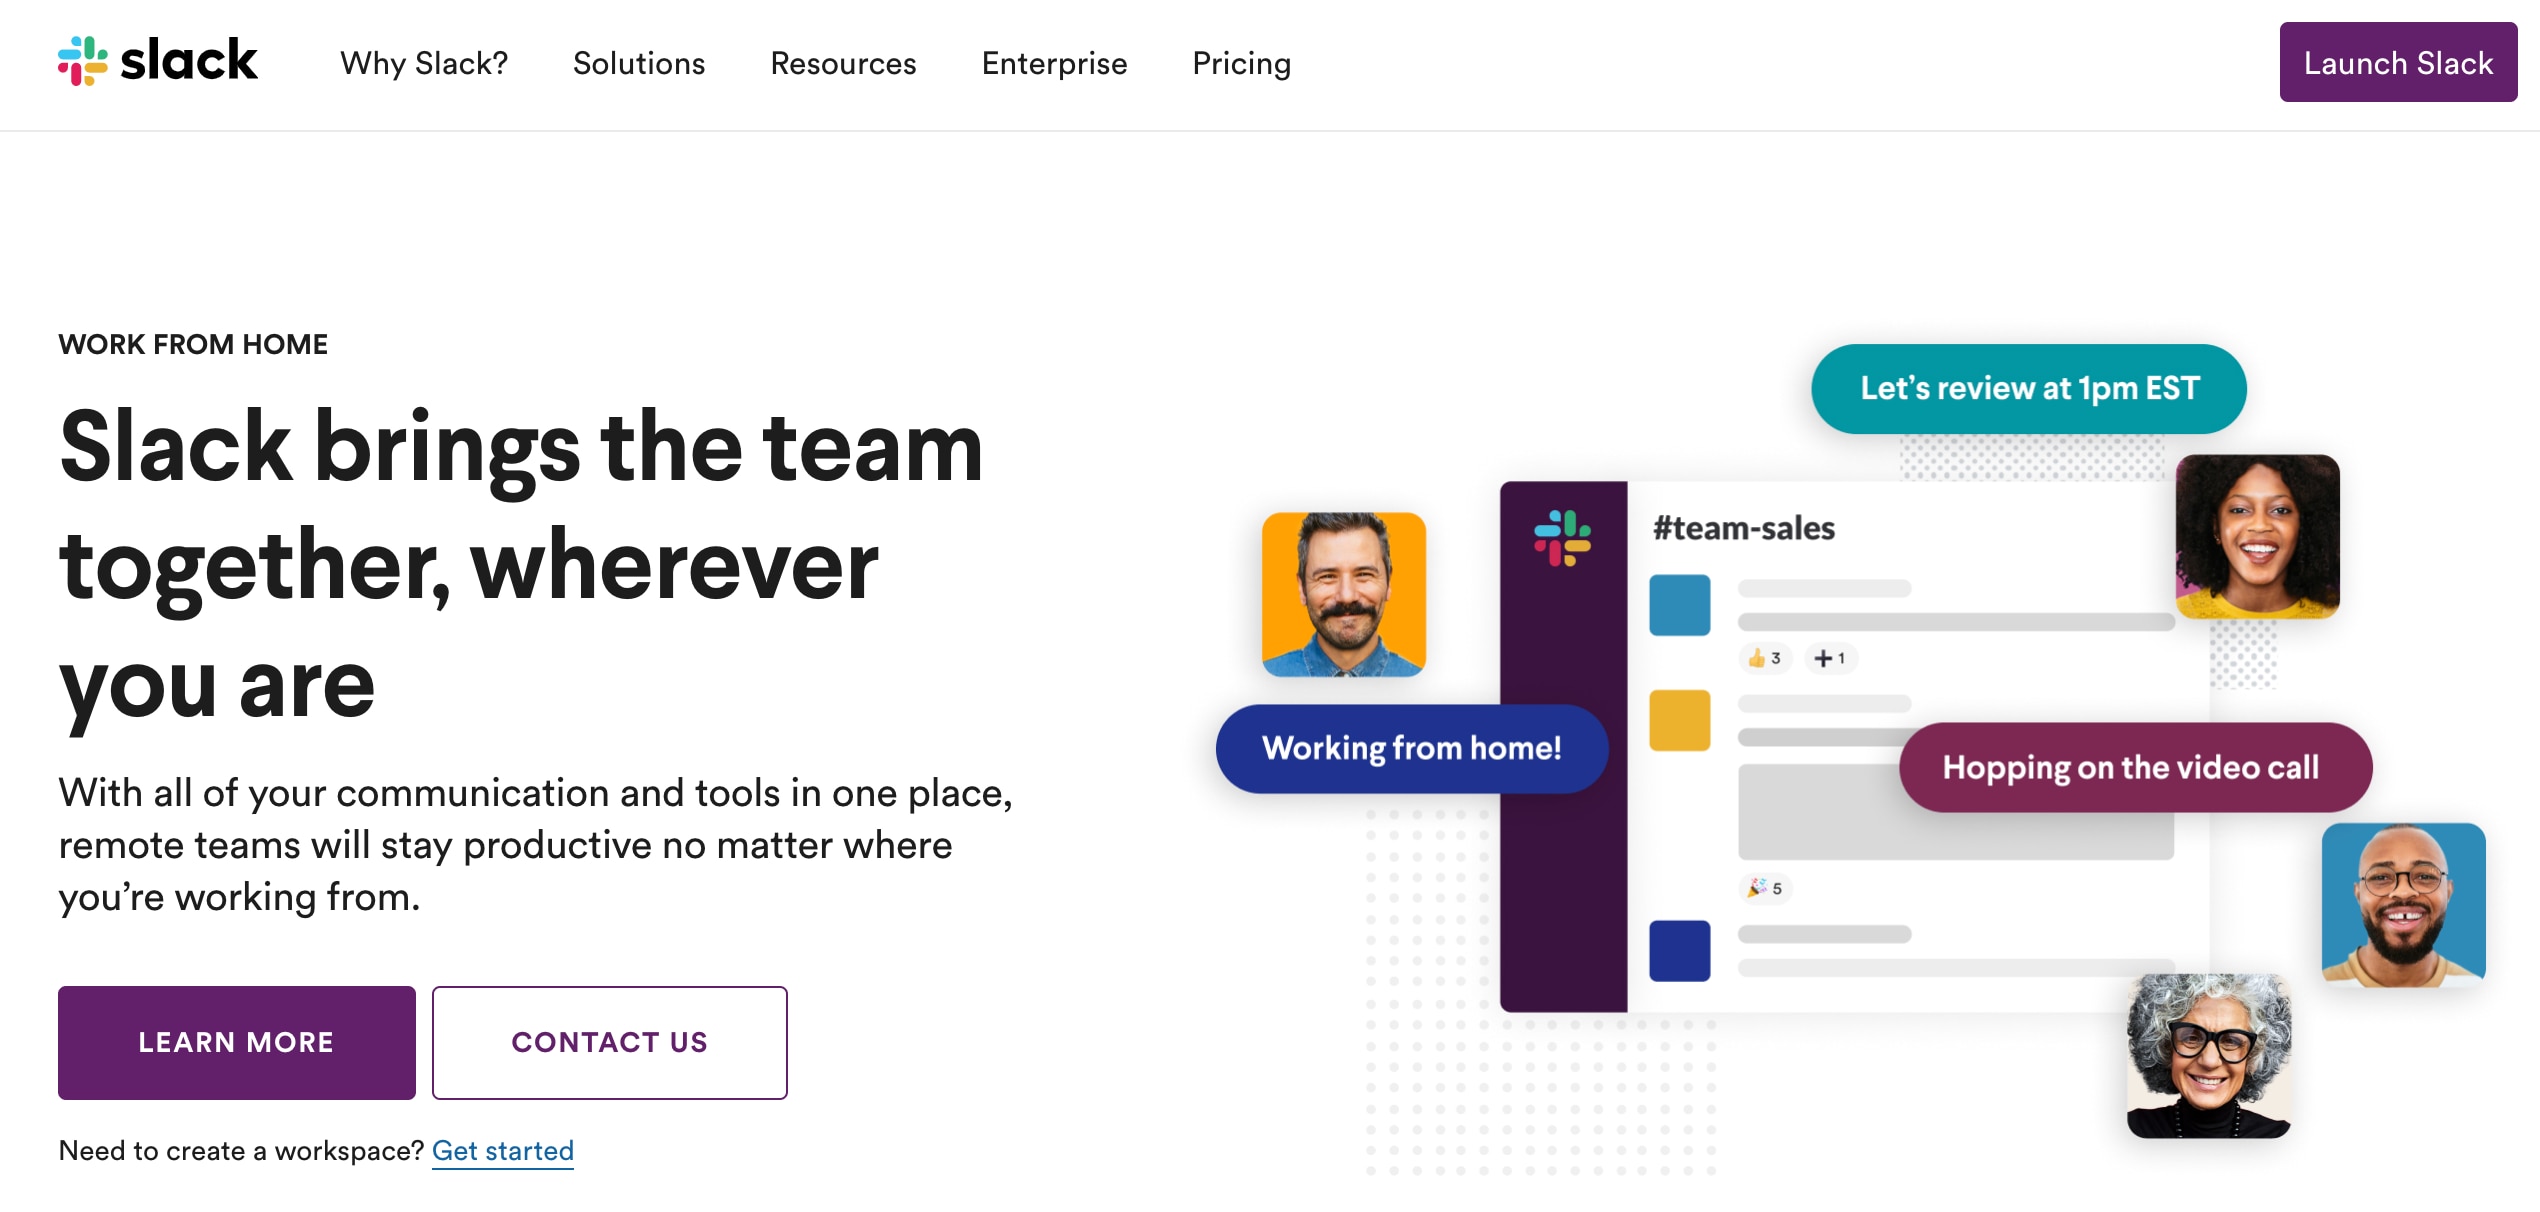
Go to https://slack.com/ in your favourite web browser and you should see below screen.
Click on Get started next to Need to create a workspace? in order to create a free account in slack and it takes you to below screen, please enter your email here.
When you click on Confirm, you’re redirected to below screen. By now, you should have received a 6-digit code from slack in your email inbox. Please enter that 6-digit code in below screen.
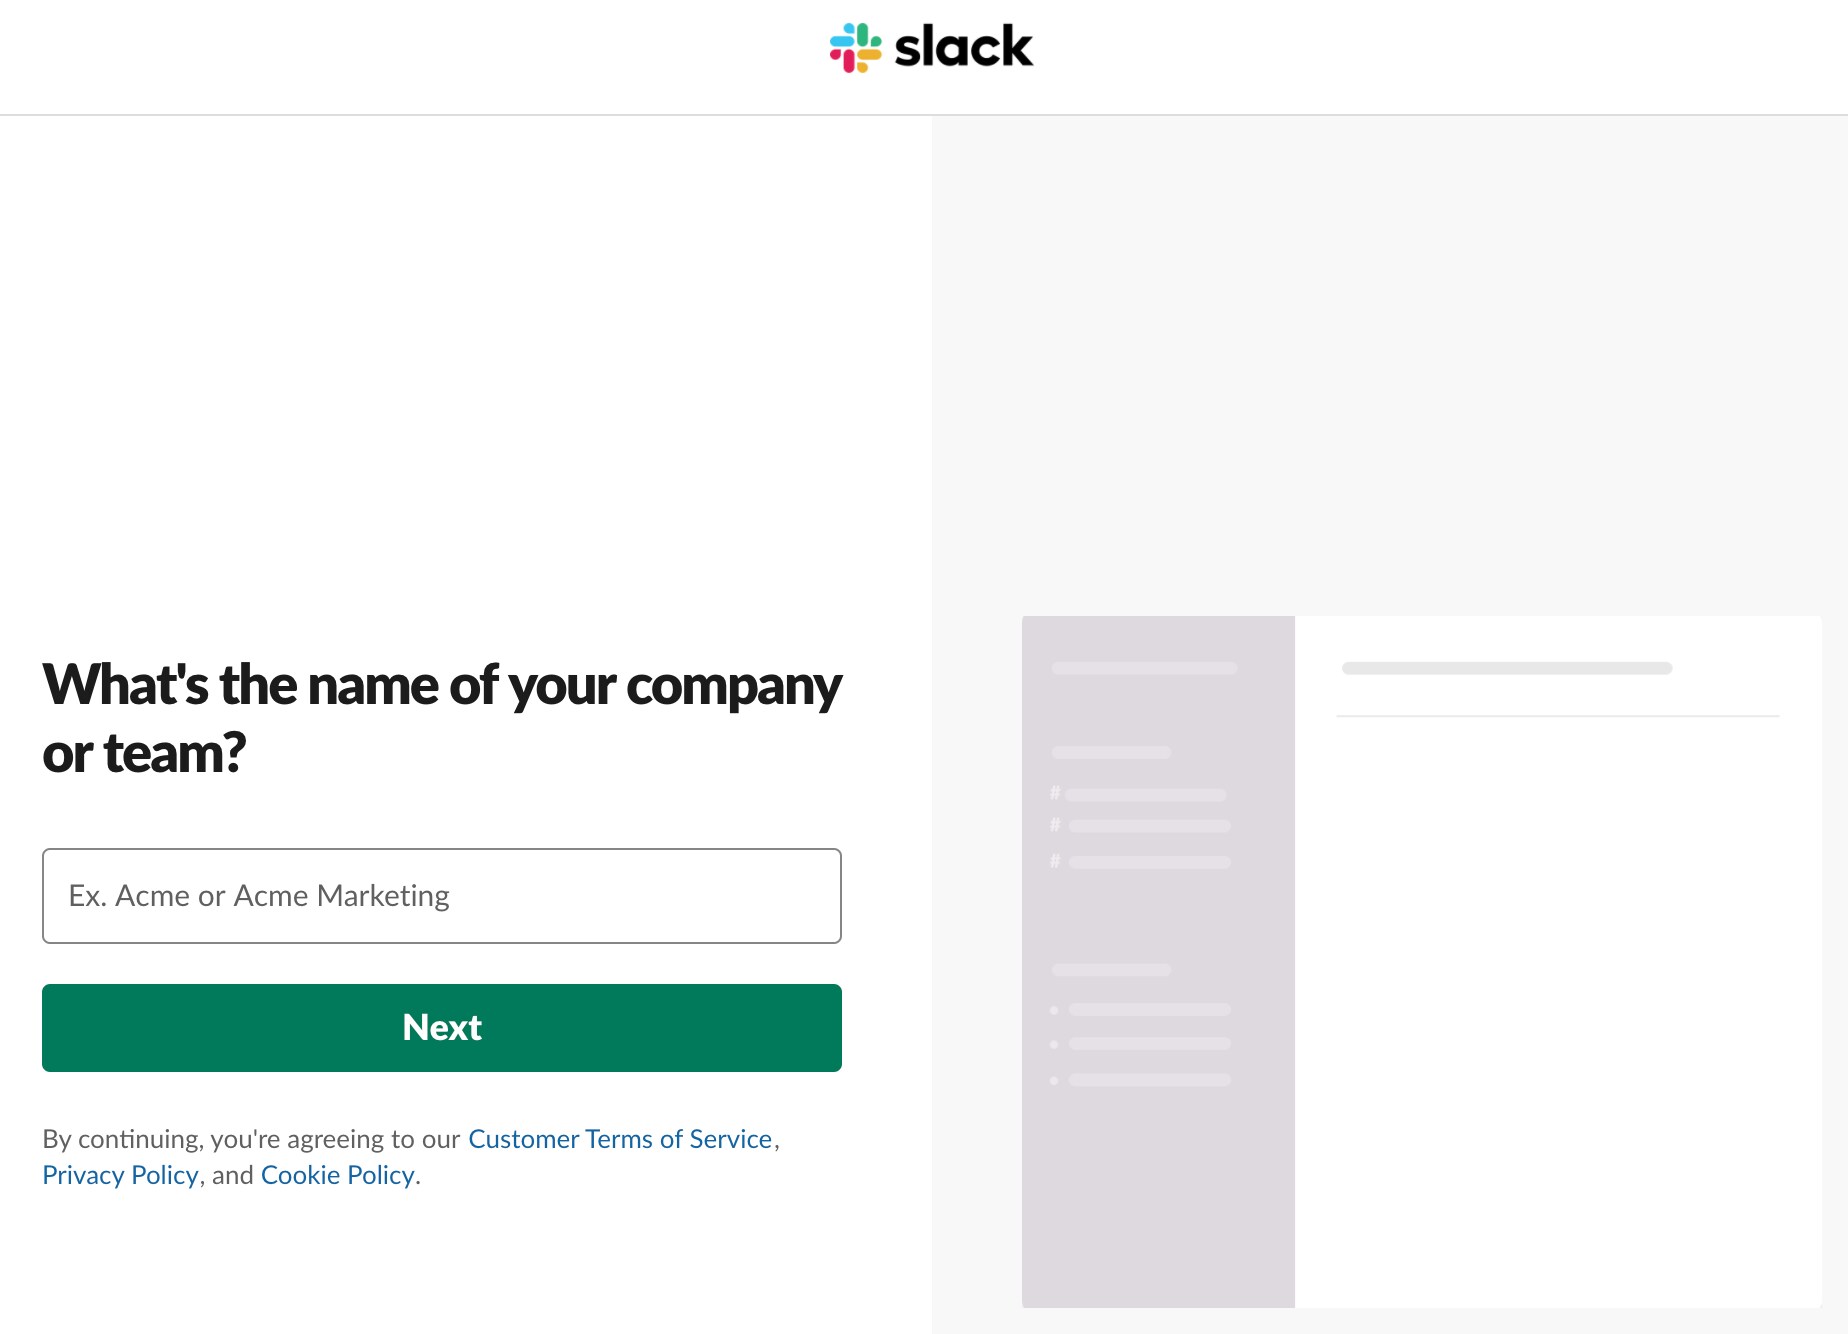
When you enter the 6-digit code, it takes you to below screen provided your 6-digit code is correct.
Give it a name here, this would be the name of your Slack Workspace. Click on Next and it takes you on below screen, asking you to create a channel. I name it as Technical Support and Slack save it as # technical-support where # indicates this is a channel.
Note: We will use this channel name later in ServiceNow when posting messages to this channel.
Click on Next and it takes you to below screen, asking you to add Team Members in the slack channel that you created in previous step. This is optional and you can skip it if you want. I just added two team members here.
Click on Add Teammates or skip for now.
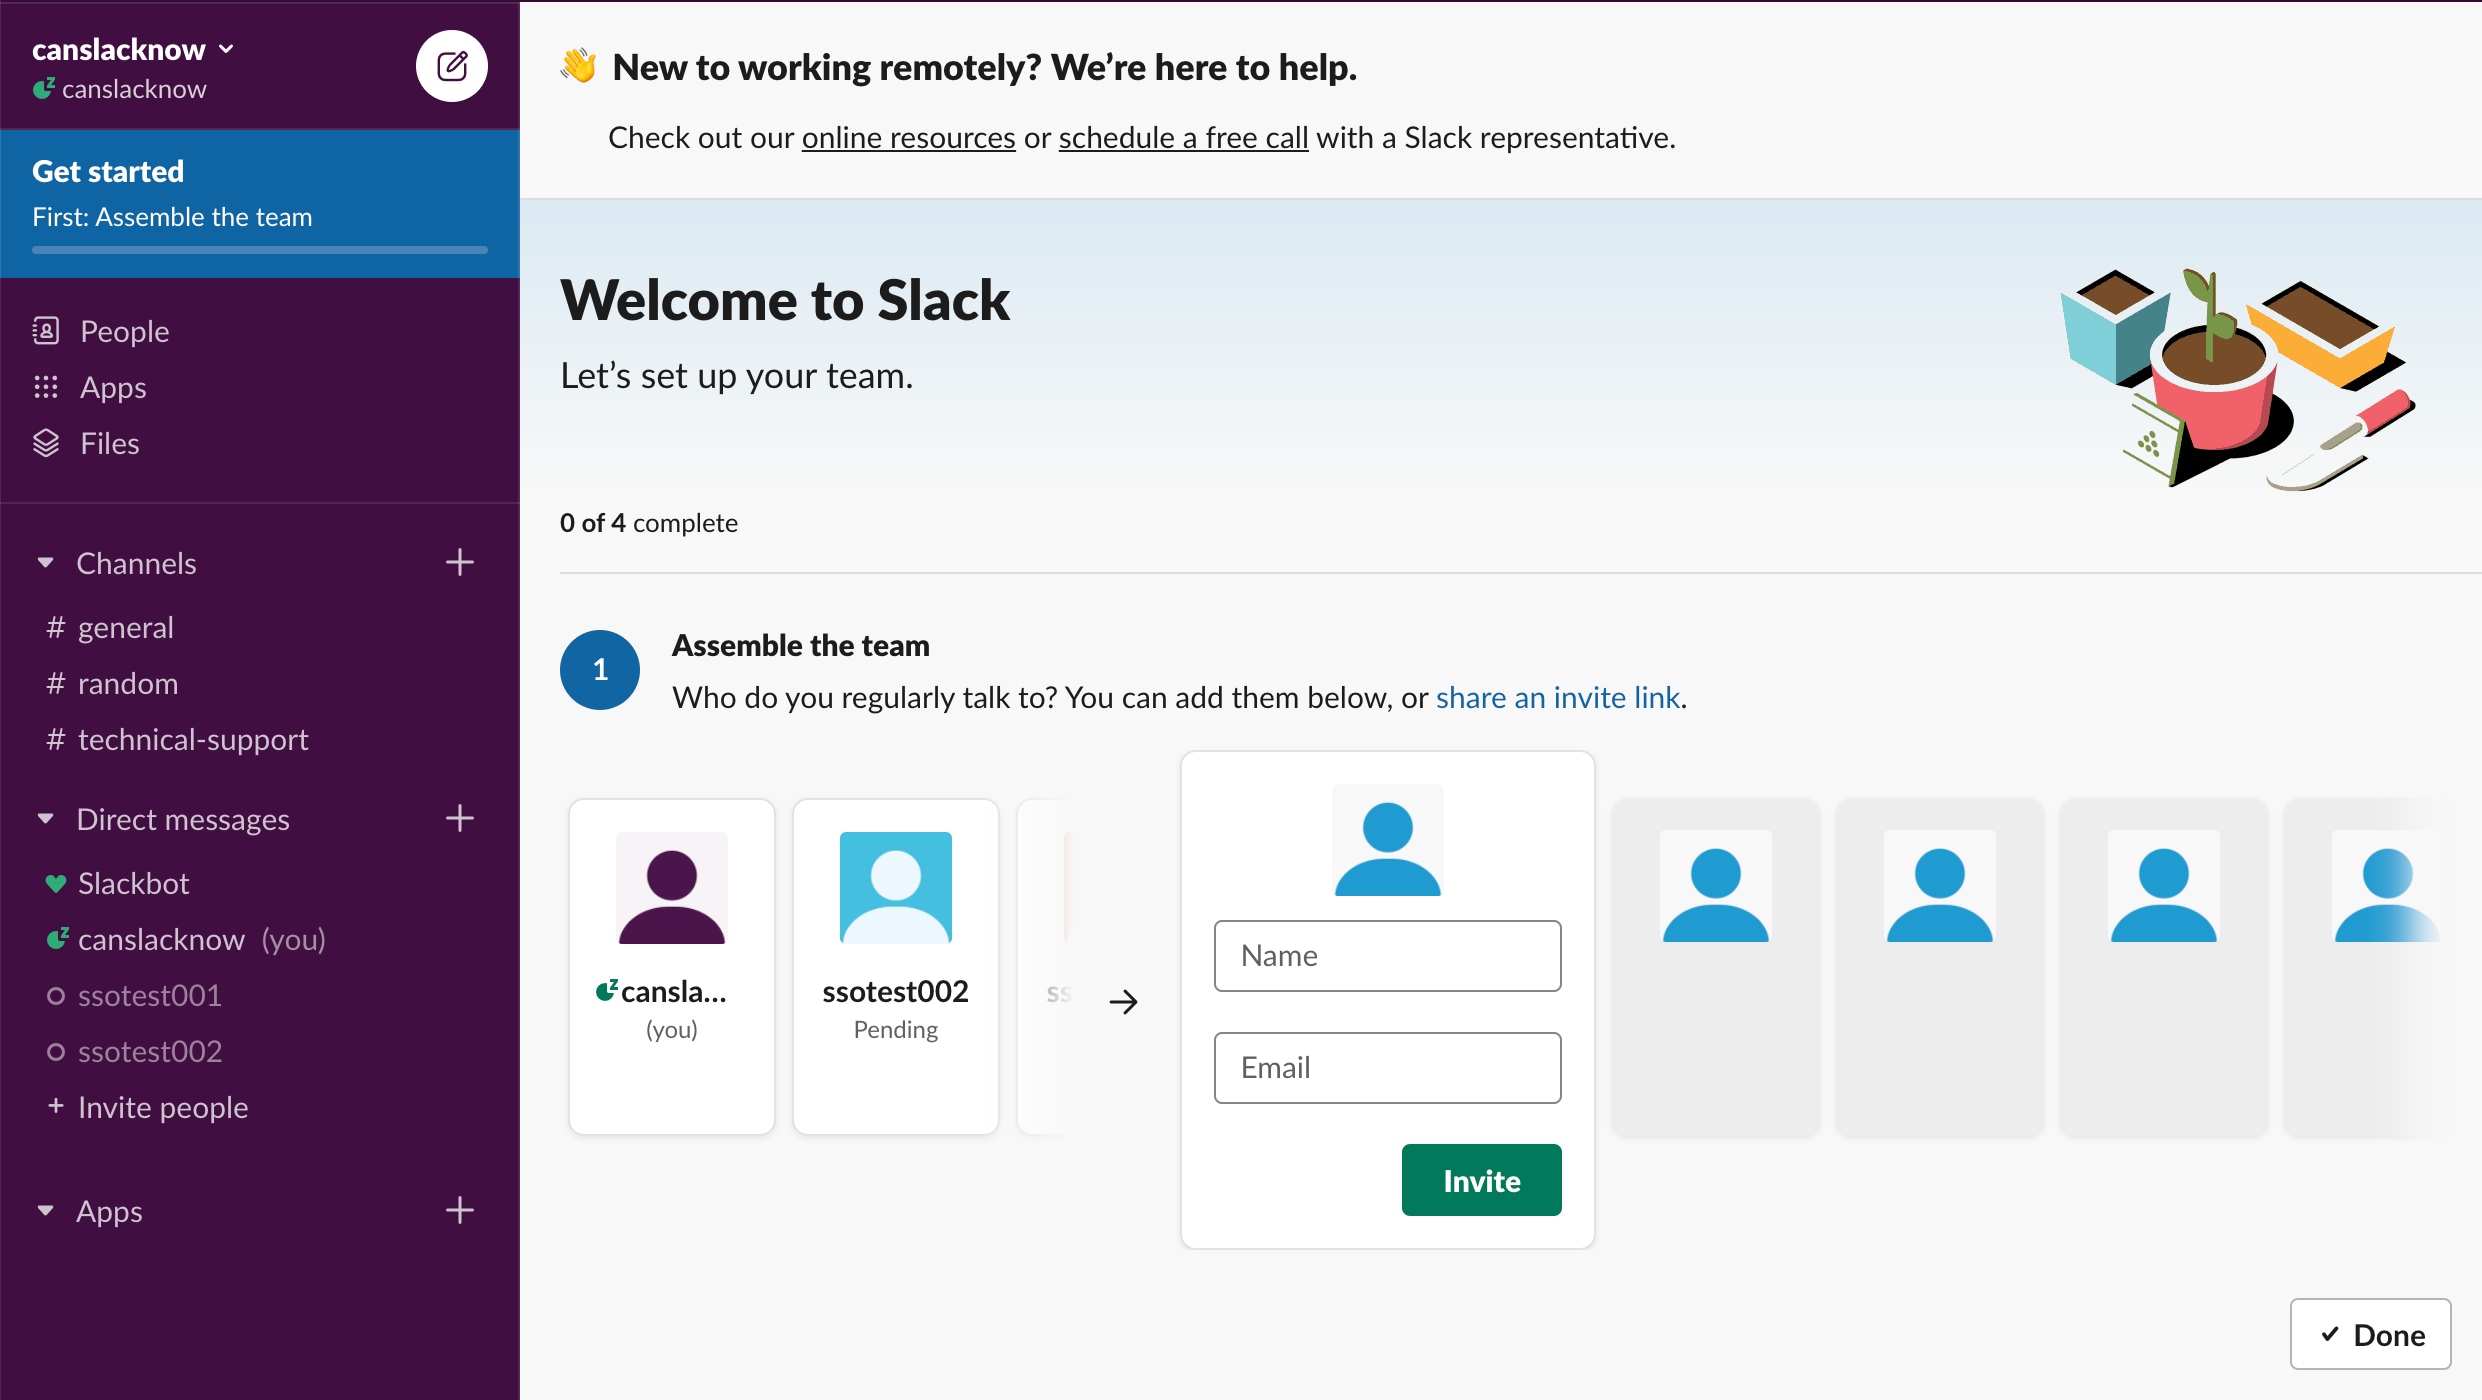
Congratulations!!! your slack workspace is ready with given channel name. Click on See Your Channel in Slack and this is how your Slack Workspace looks like.
This is the welcome page which allows you to add more team members and complete few more optional formalities.
Create Webhook URL
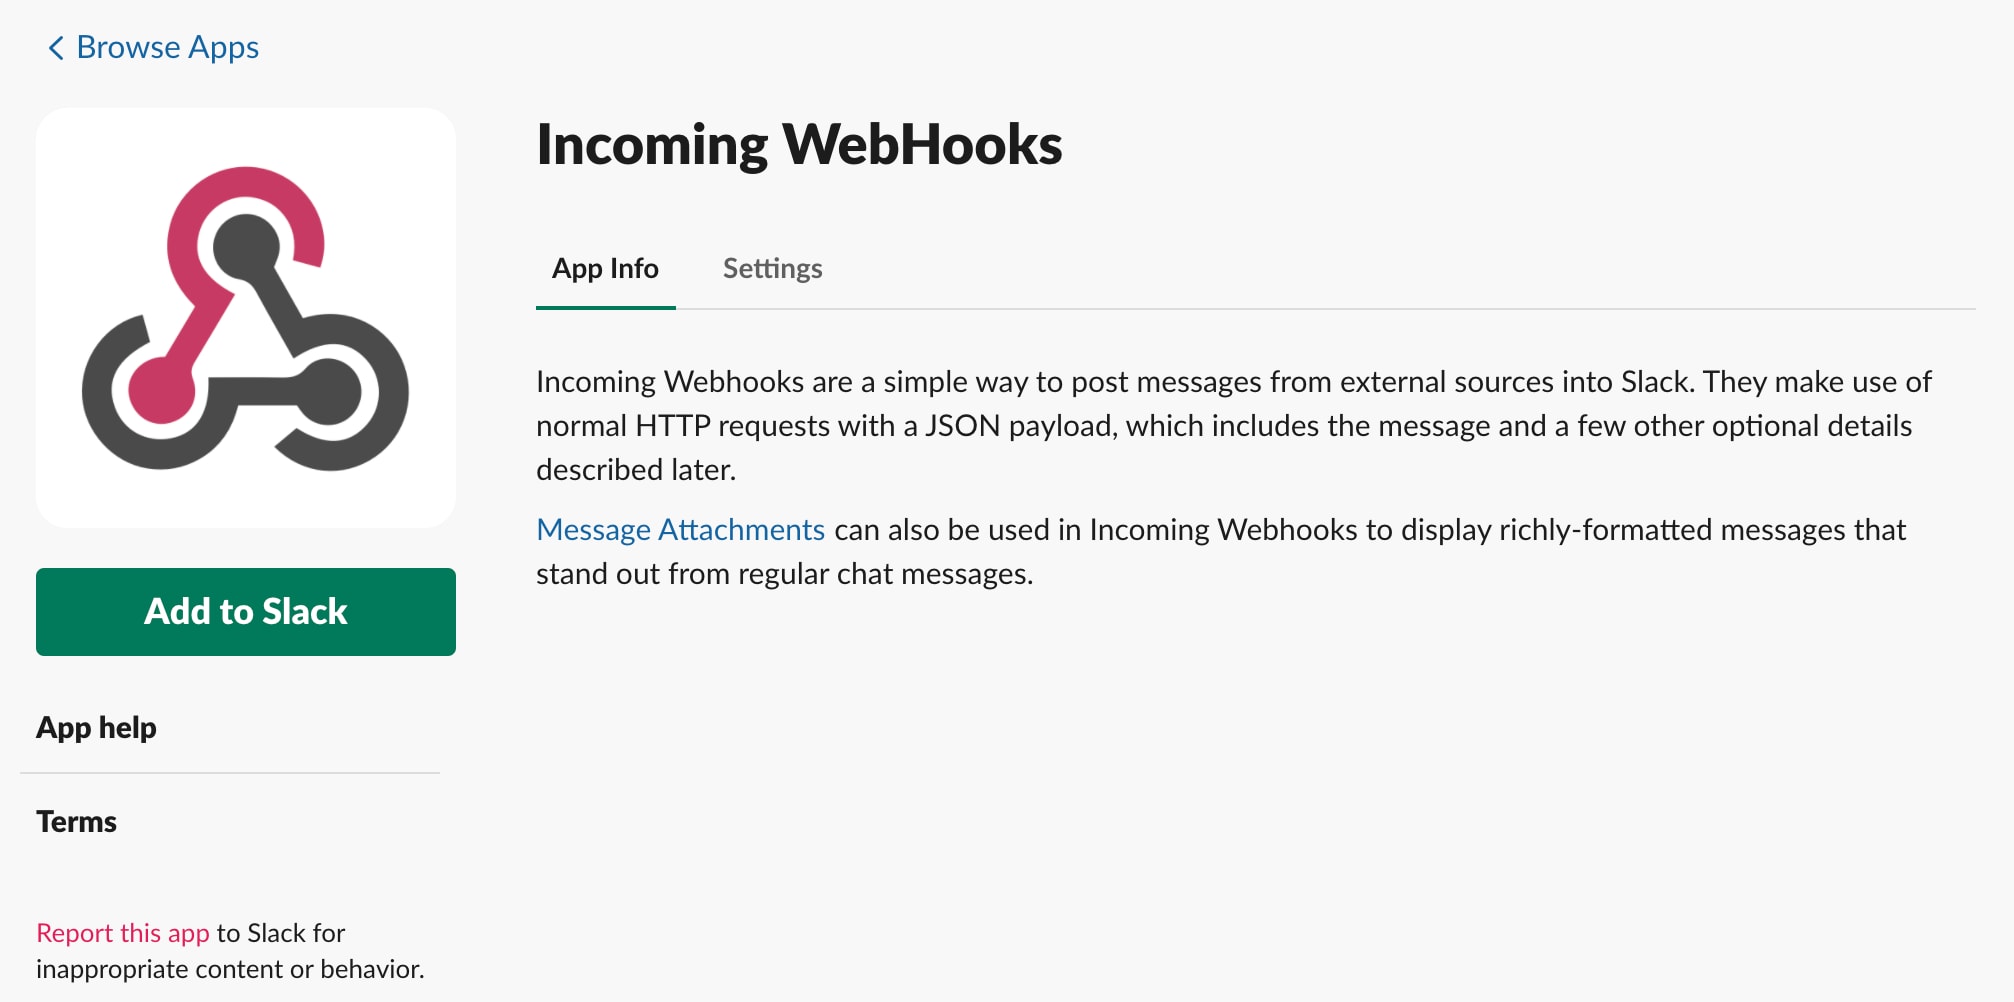
This section explains how to create an Incoming Webhook for your slack workspace. Incoming Webhooks are used to send data into Slack in real-time.
Click on Apps and search for Incoming Webhook as shown in below image:
Click Add for Incoming Webhooks app and it takes you to below screen:
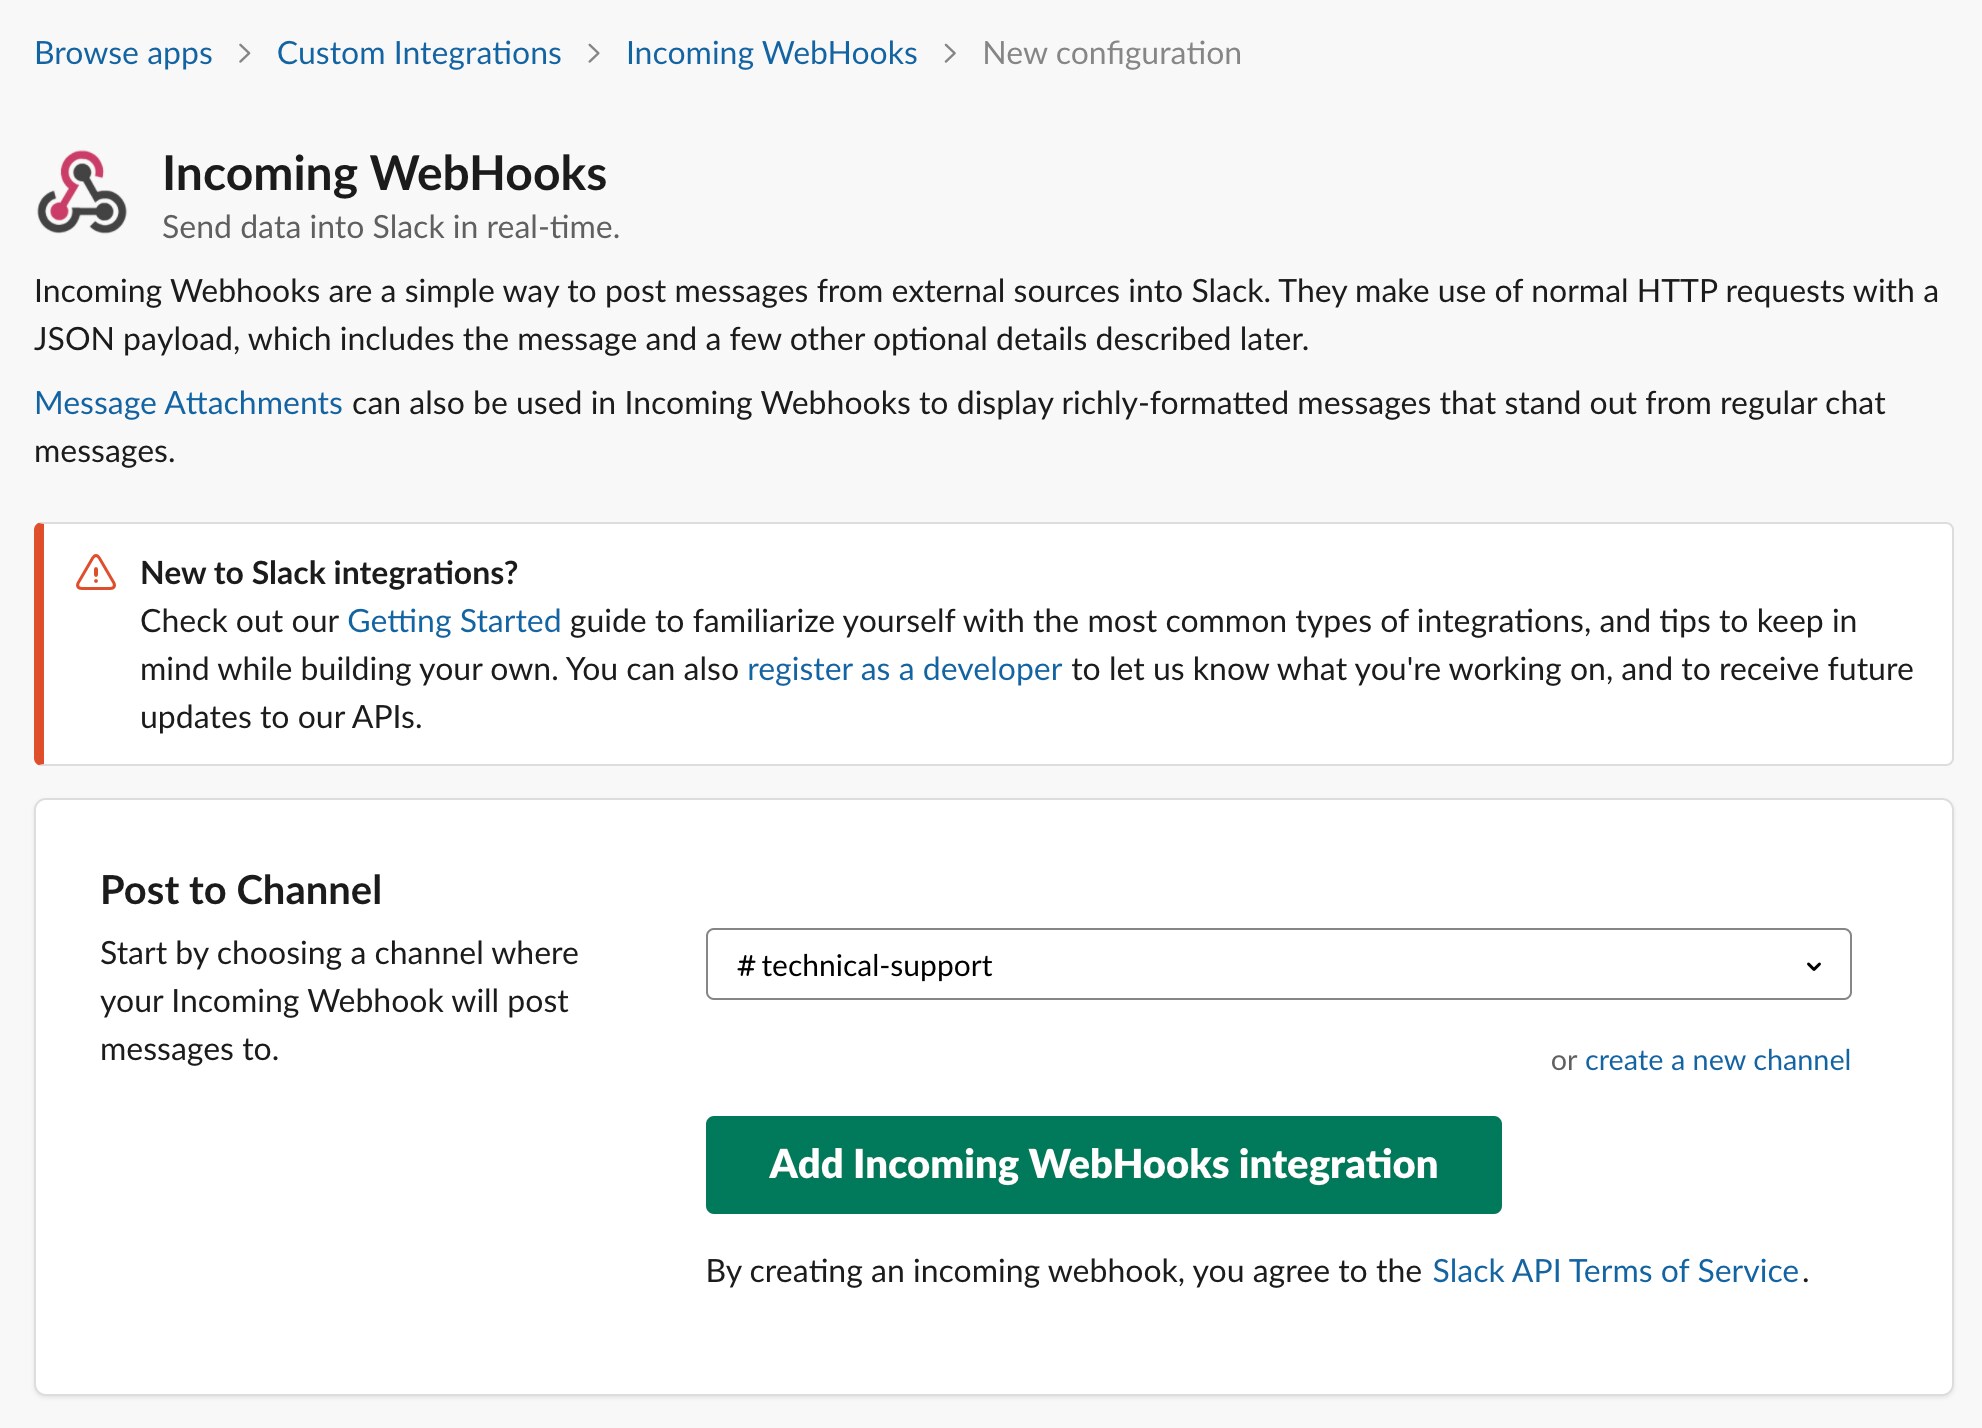
Click on Add to Slack and you’re redirected to below screen:
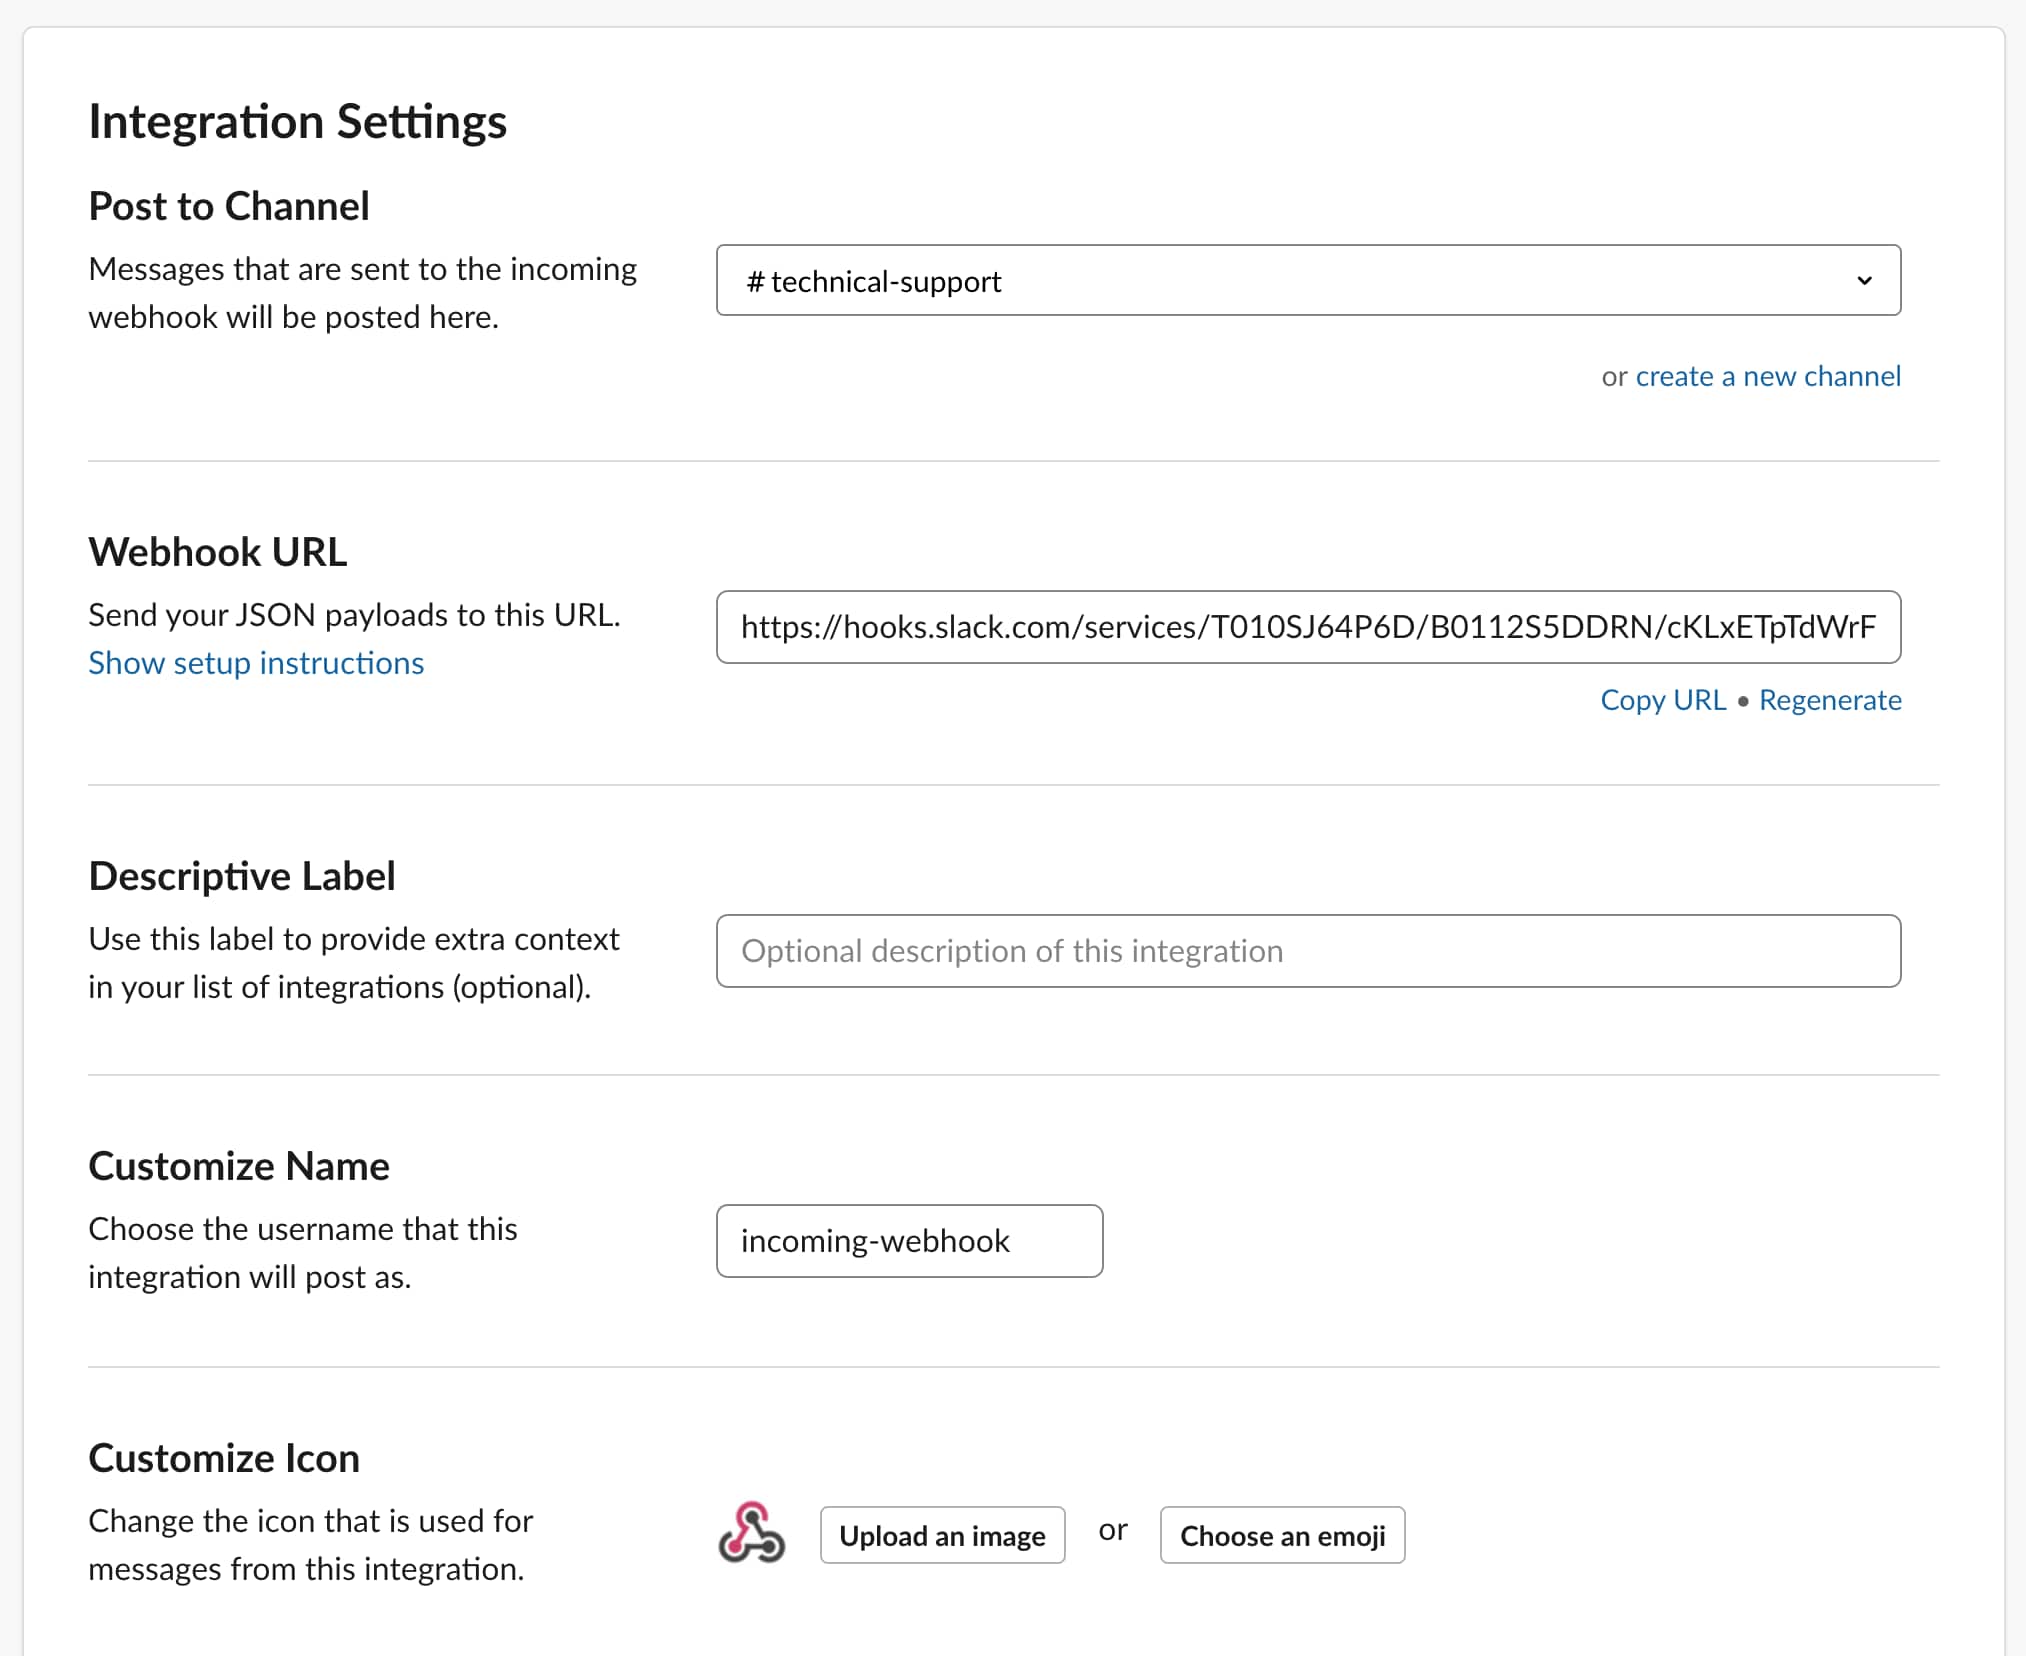
Choose a channel from the available list and click Add Incoming WebHooks integration. Now slack creates an incoming webhook for you and redirect you to below page:
Note the Webhook URL from above screen, we will use it in Flow Designer configuration in Part 2 - ServiceNow Configuration.
Congratulation!!! now you’re all set with your Slack configurations. Let’s go to Part-2 for ServiceNow configurations.
Part 2 - ServiceNow Configuration
This part includes the steps need to be configured in ServiceNow instance to integrate with Slack and post a message in slack channel #technical-support.
Since we are using Flow Designer utility, so we need to make sure Slack WebHooks (sn_slack_ah or com.sn.slack.ah) spokes are installed. This spoke plugin is installed when you enable IntegrationHub installer (com.glide.hub.integrations) plugin.
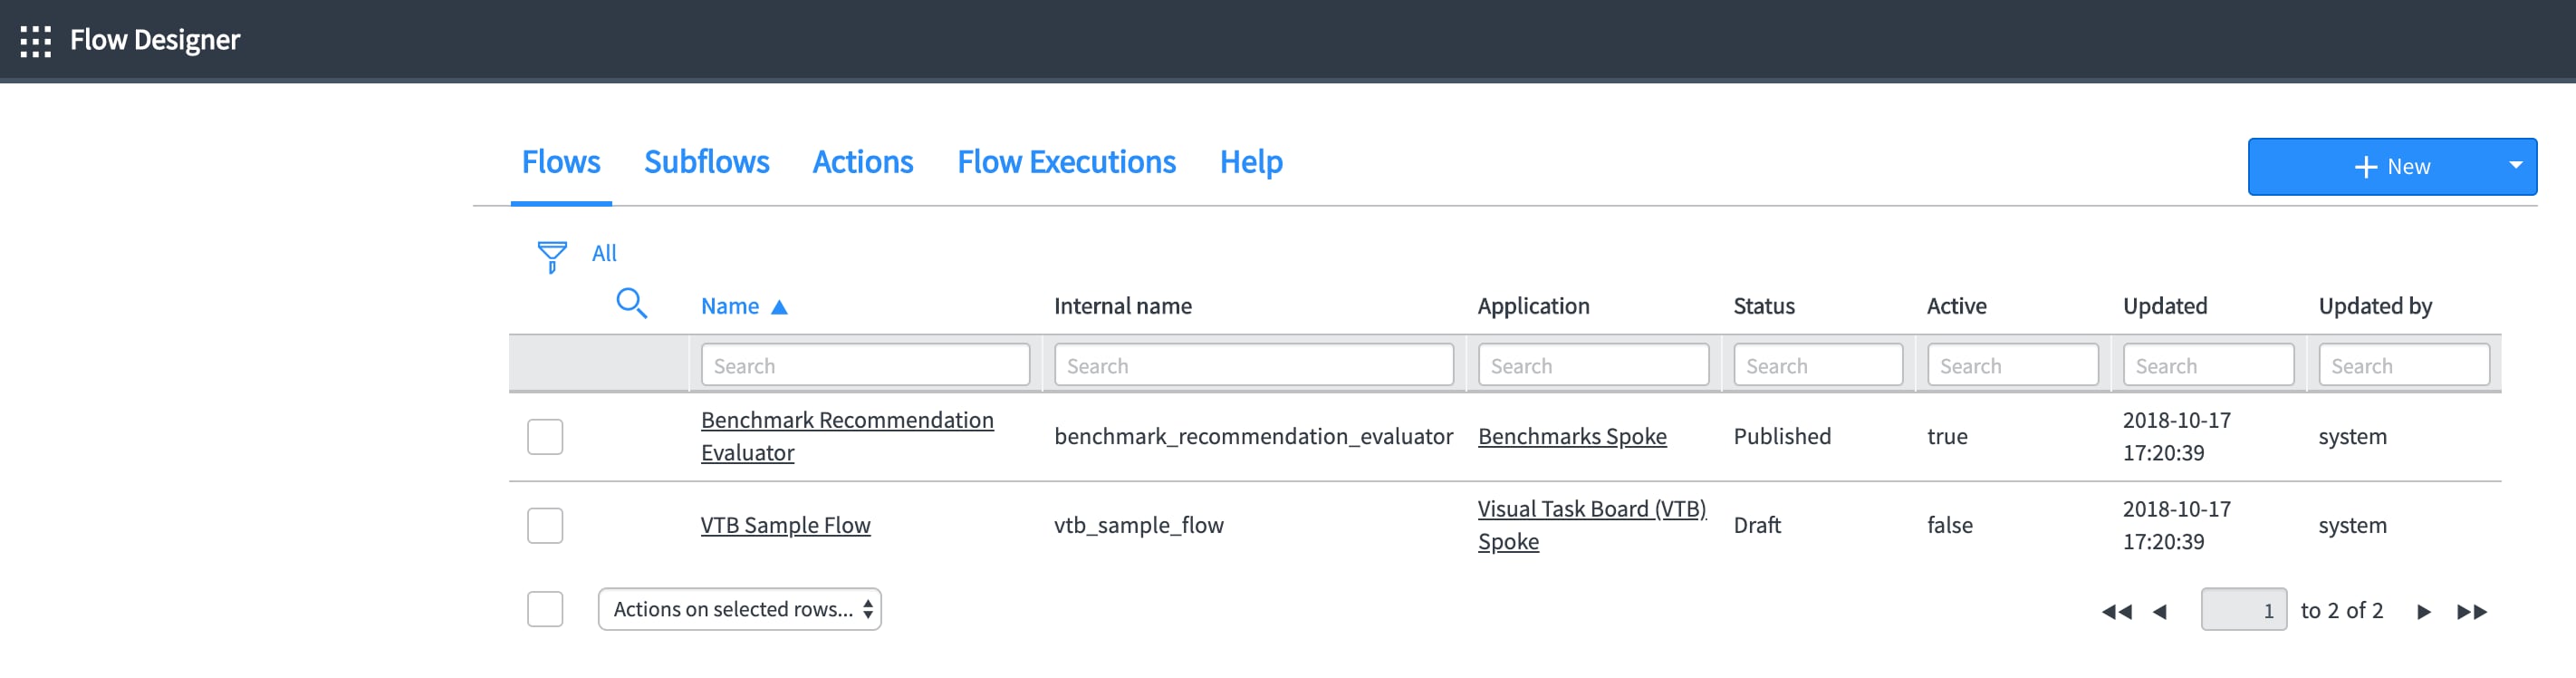
Go to Flow Designer > Designer
It opens the designer in new tab and your screen looks something like below.
Click at New at top right corner and select New Flow from available list.
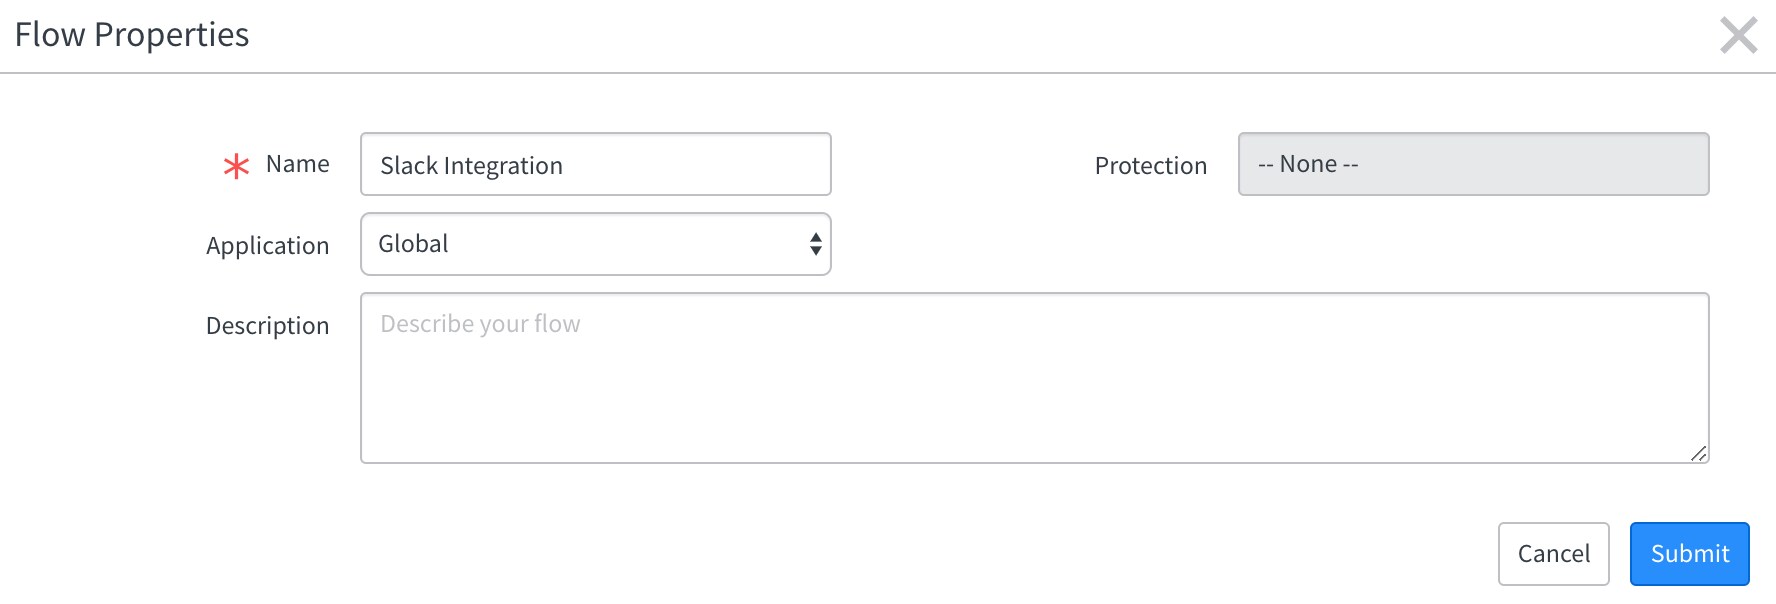
Give a name to your Flow e.g. Slack Integration and click Submit button. Your screen should look something like below:
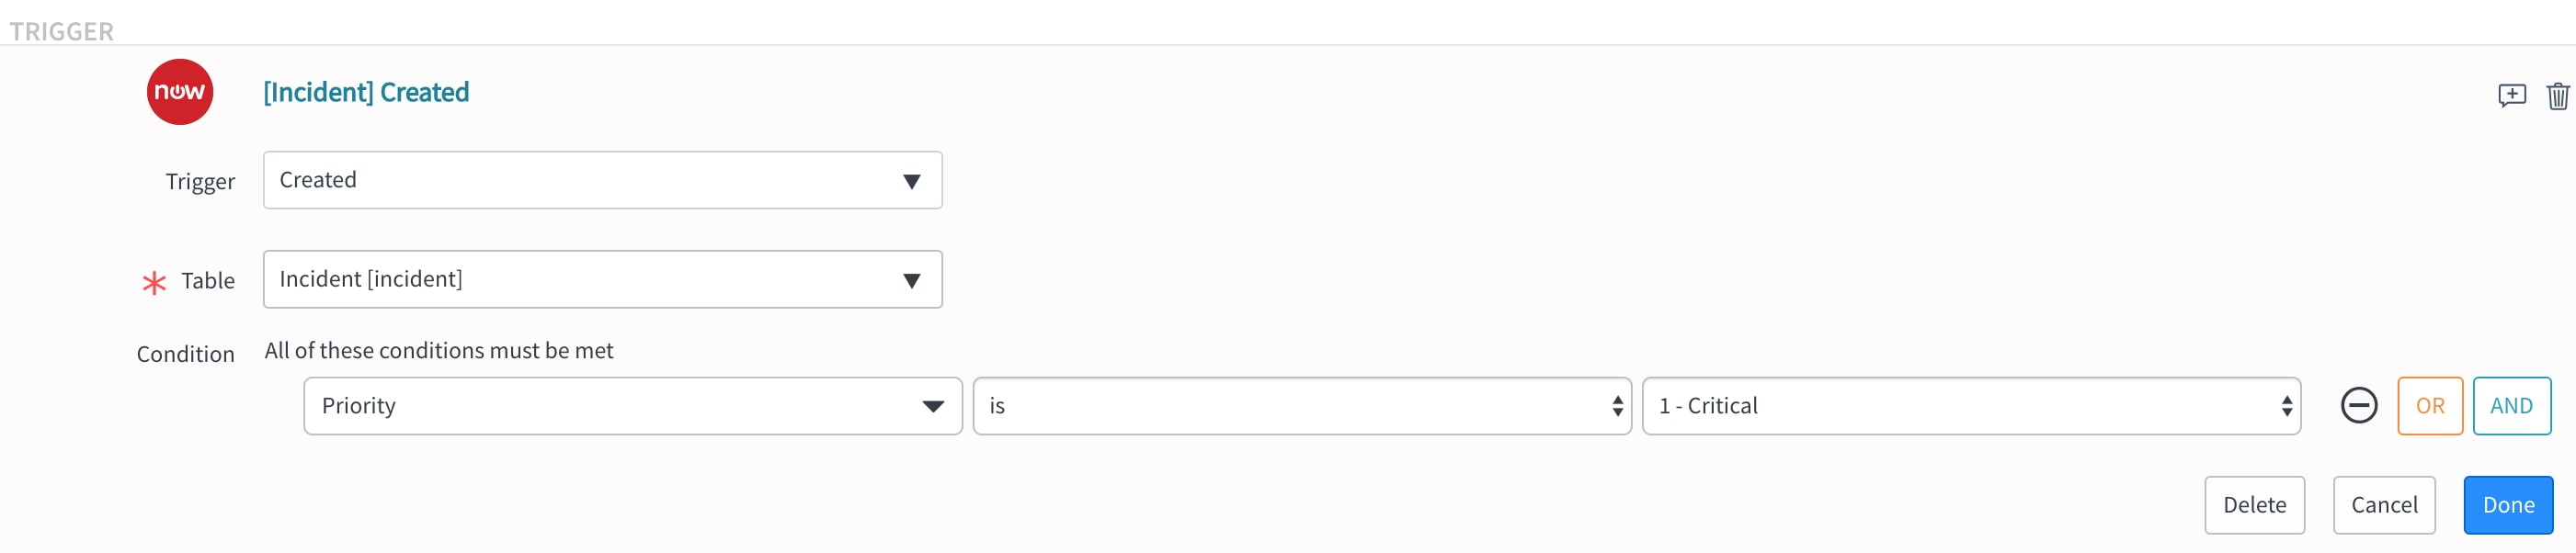
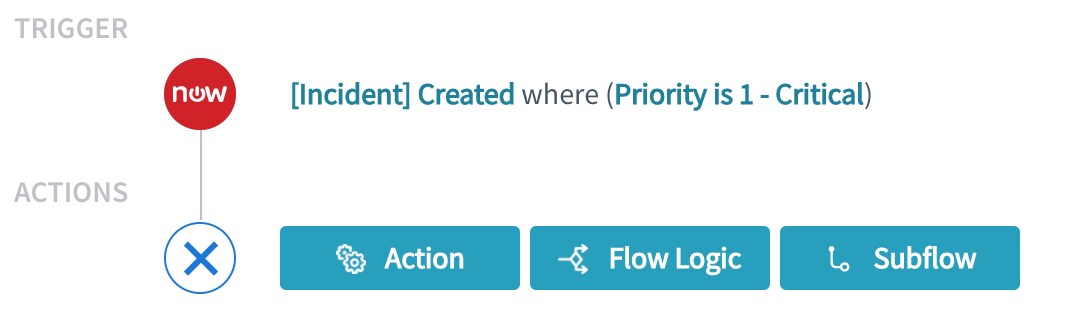
We start the flow by defining a Trigger wherein we add the conditions which determines when to trigger this flow.
Now this Flow – Slack Integration triggers as soon as a Priority 1 incident is created. Click on Done button and your screen looks like below:
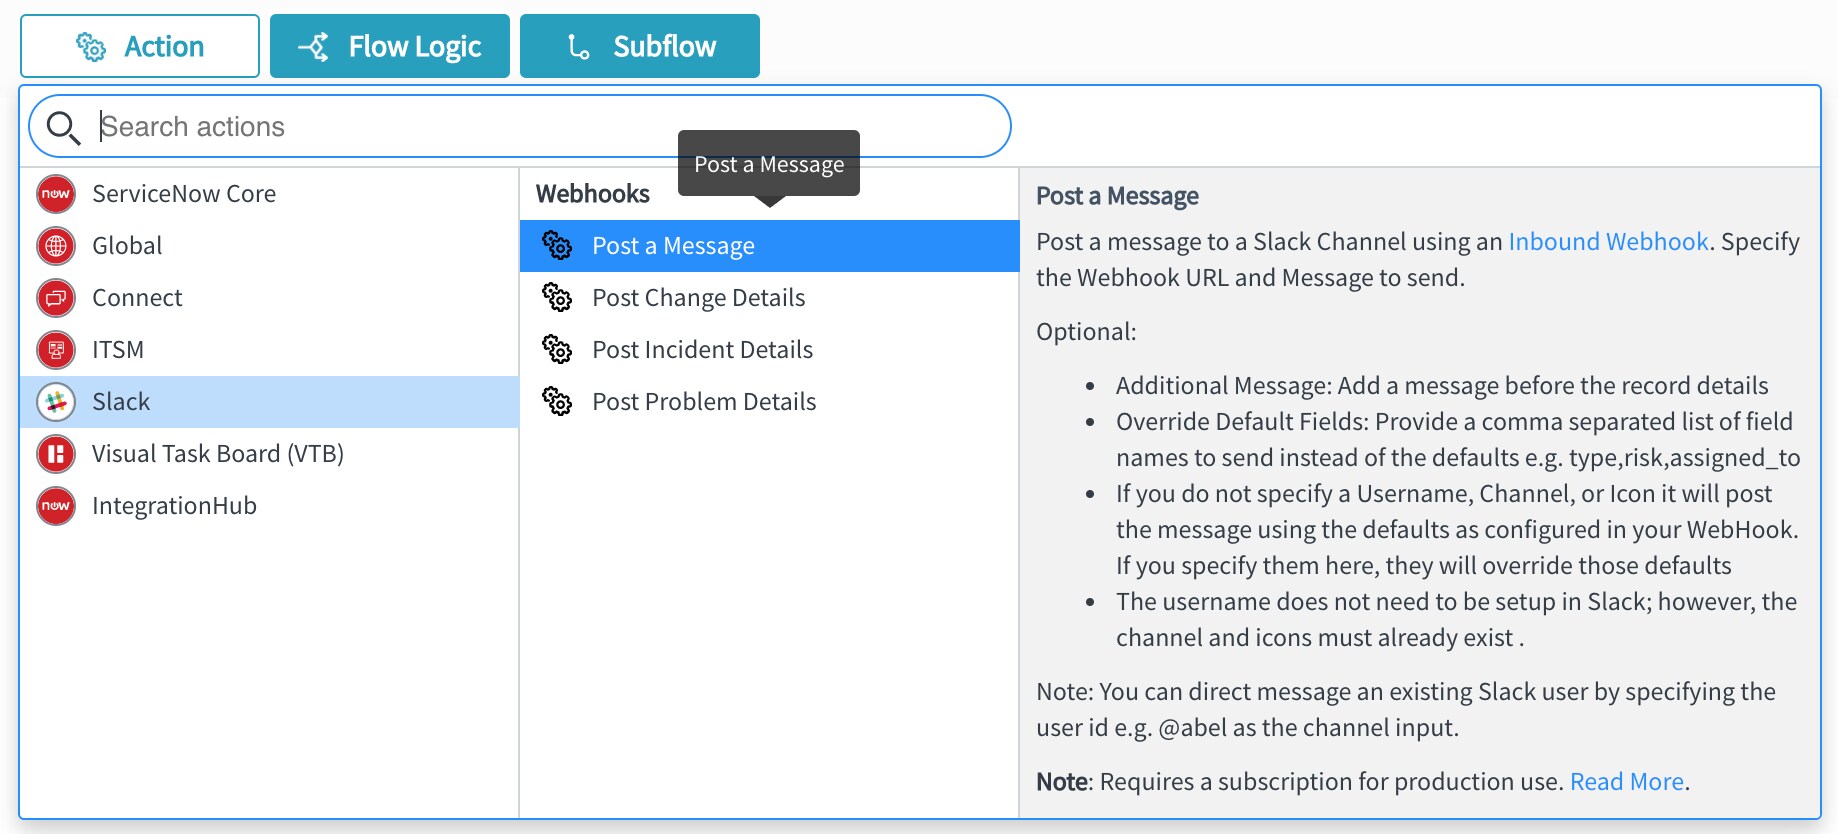
Click on Action button and let’s add some configurations to post a message at Slack channel to inform Technical Support team that a new P1 is ready to pick up.
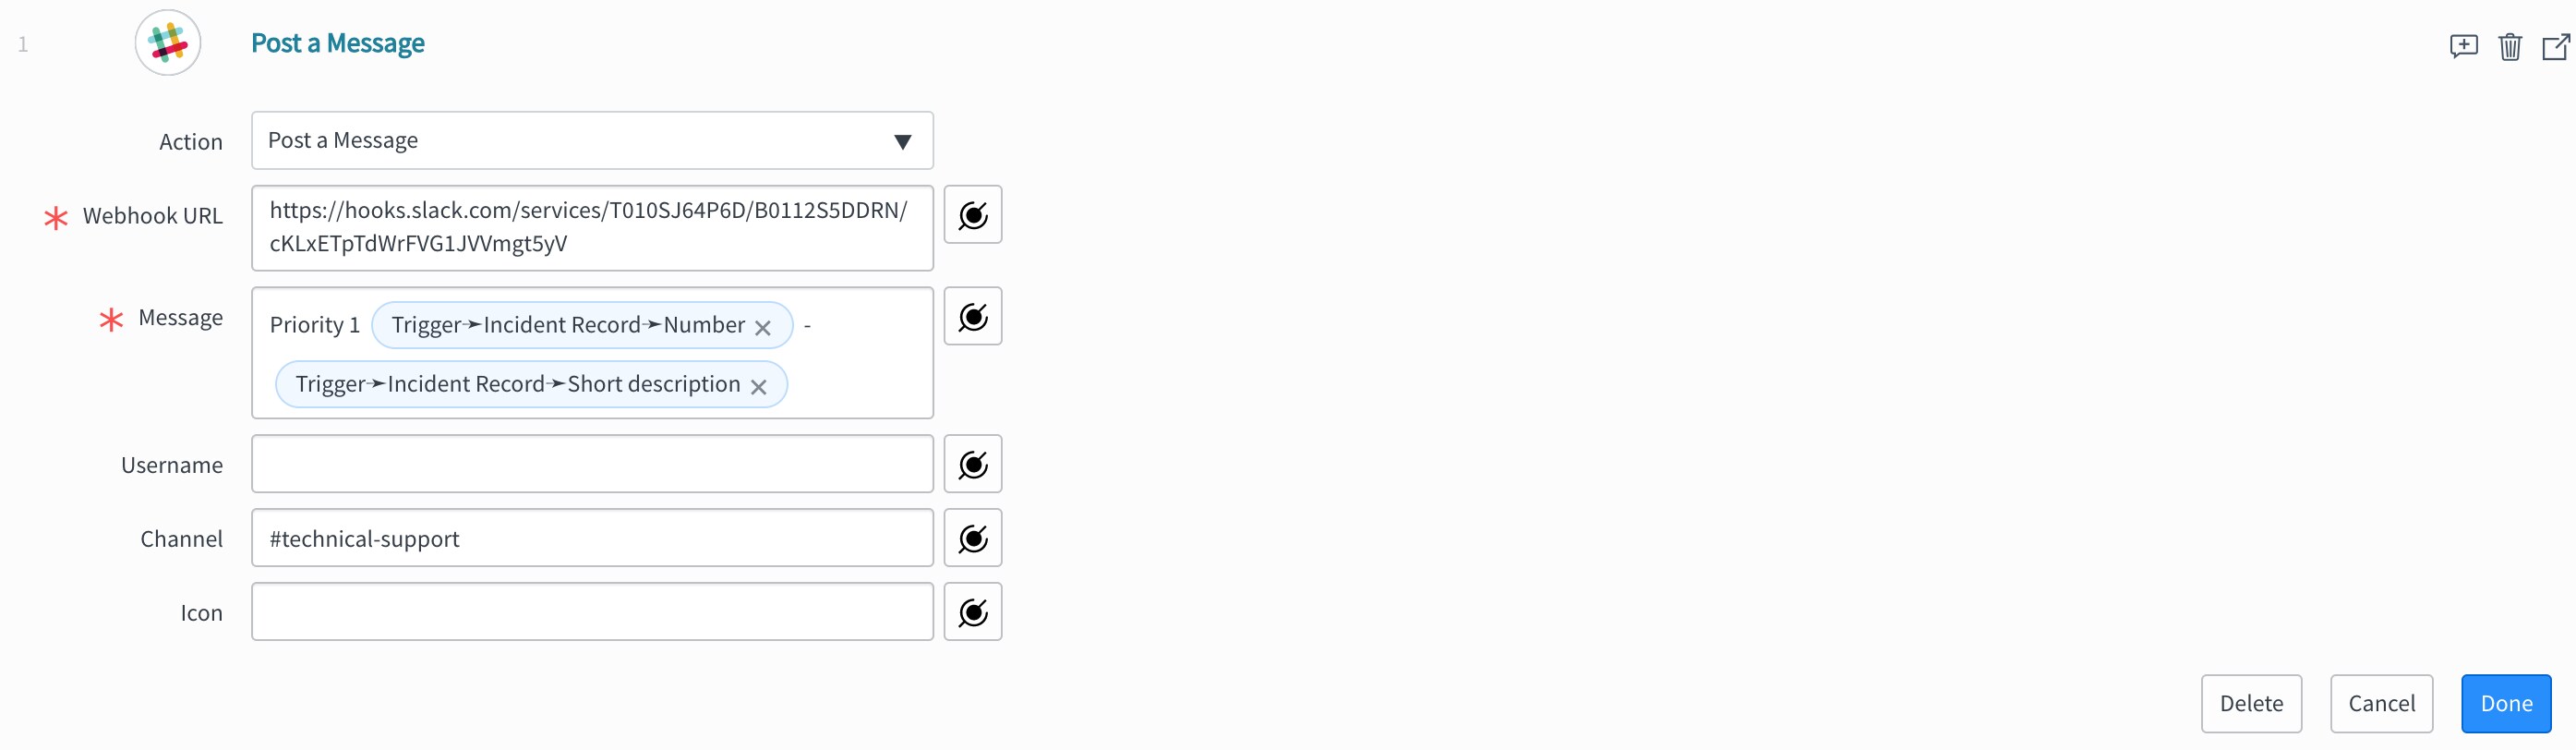
Clicking on Post a Message displays below form asking to fill this information:
Webhook URL: A slack endpoint known as incoming-webhook that your ServiceNow instance will be communicating with in order to post a message to slack channel. We created it in Part 1 above in Slack Configurations.
Username (optional): By default, the message in slack channel comes from incoming-webhook name. Enter a value here when you want to override this default value.
Icon (optional): By adding/defining an icon here, you can override the default slack icon, for example :priority_1:.
Click on Done and Save the flow.
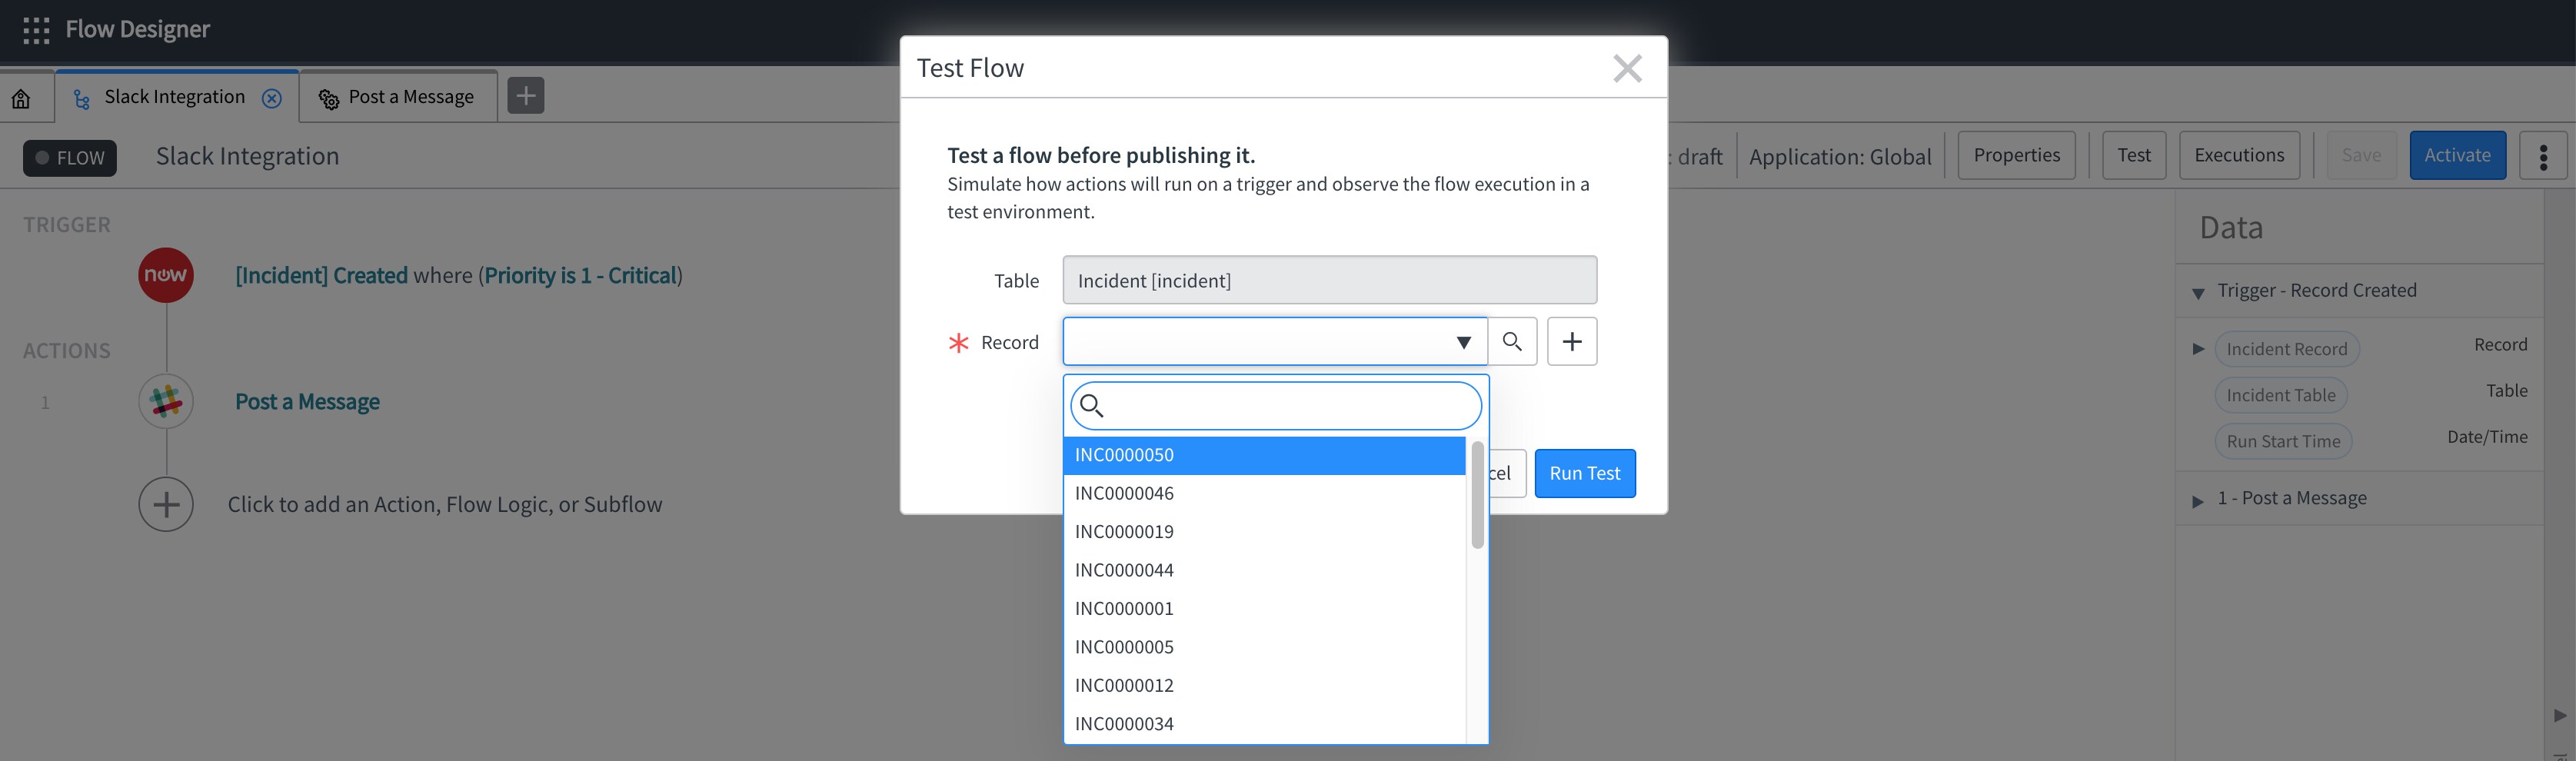
It’s time to test our configurations now. Please click on Test button and test your flow execution by selecting one of existing record from incident table.
Note: We don’t really need to create a new P1 incident for testing this flow, we can do this test by selecting any of existing incident as well. That’s the beauty of Flow Designer 🙂
When your Flow runs successfully, your ServiceNow screen looks like below.
And you receive a message in your slack channel something like this:
By any chance if you receive below error:
There was an error executing the flow:Internal Server Error. com.glide.sys.OutboundRequestValidator$LicensingError: No IntegrationHub plugin is available, external calls from the Flow Designer requires IntegrationHub subscription, <a target="_blank" href="https://docs.servicenow.com/?context=CSHelp:IntegrationHub-licensing-information">Read More</a>.
This means that you’re missing IntegrationHub Installer plugin (com.glide.hub.integrations) on your instance. You must have an IntegrationHub subscription to make any outbound API calls triggered by a flow, including calls that a flow indirectly triggers through business rules or other scripts. For example, suppose a flow updates a record in a table that has a business rule applied. If the business rule includes outbound API calls and is triggered by the flow's record update, you must have an IntegrationHub subscription.
Please install/activate this plugin and you should not face above error anymore.
- 30,937 Views
6 Comments
You must be a registered user to add a comment. If you've already registered, sign in. Otherwise, register and sign in.
