- Post History
- Subscribe to RSS Feed
- Mark as New
- Mark as Read
- Bookmark
- Subscribe
- Printer Friendly Page
- Report Inappropriate Content
07-27-2021 06:26 PM - edited 01-12-2026 02:44 PM
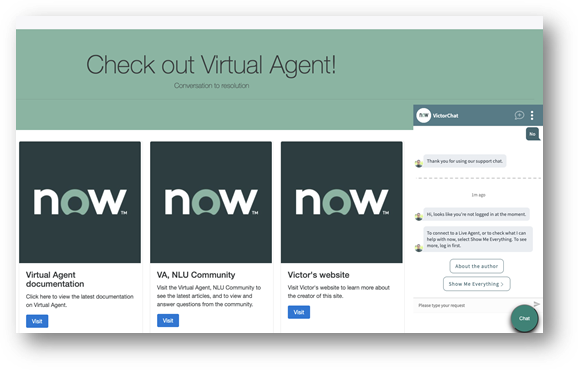
The ServiceNow Virtual Agent web client can be embedded in an external site other than your Portal. Below is a step-by-step guide on how to embed your Virtual Agent in an external site. It also contains steps on creating a custom URL, which is a required step. The official documentation can be found here.
Note: Now Assist in Virtual Agent may run into issues. Instead, consider using CSM Engagement Messenger or Employee Center Browser Extension to embed Now Assist in Virtual Agent in external sites.

Pre-requisites
- Virtual Agent plug-in installed
- A “paid” customer instance (a developer instance will not work in the long-term.)
- Your own hosted domain, e.g. GoDaddy, Azure SharePoint.
New in Tokyo
In the Tokyo release, we have created a Portable VA web client that can be directly embedded to any site via javascript. You can view the documentation here: Add the Portable Virtual Agent web client to a third-party website.
1. You need to set up system properties per Step 2 below in the (Legacy) Process.
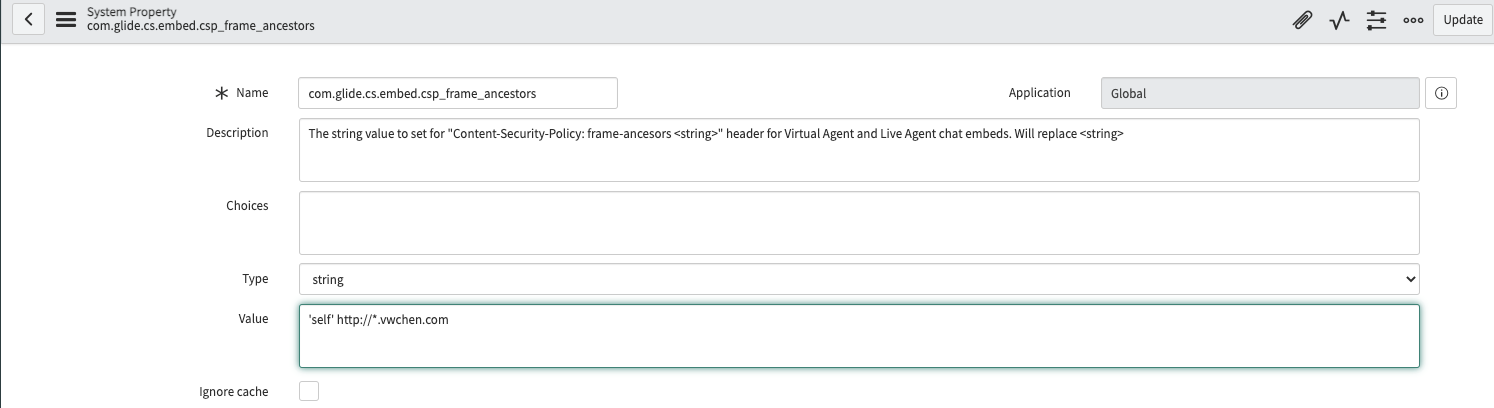
- Set ‘com.glide.cs.embed.csp_frame_ancestors’ to: 'self' http://*.example.com
- Set ‘com.glide.cs.embed.xframe_options’ to: sameorigin
2. Configure CORS Rules for the REST API to give access across domains.
- Navigate to All > System Web Services > REST > CORS Rules.
- Click New.
- On the form, fill in the fields.
Field Description Name Unique name for the rule. Application Scope of the application. Global is the default value. REST API Name of the REST API. Select Conversation Consumer Account [now/cs]. Domain The domain for your website. For example: https://vwchen.com Max age Default value = 0
- On the HTTP Methods tab, select GET.
- Click Submit.
3. Add this script reference to your external page header. Note: "site1.mycompany.com" is your instance URL, e.g. for me it's "victortokyo.service-now.com".
<script src="https://site1.mycompany.com/scripts/now-requestor-chat-popover-app/now-requestor-chat-popover-app.min.js?sysparm_substitute=false"></script>-
const chat = new ServiceNowChat({instance: 'https://site1.mycompany.com'});
You can also configure the size, location, and color of your chat instance, for example:
Example with configuration
const chat = new ServiceNowChat({
	instance: 'https://site1.mycompany.com',
	context: {
		skip_load_history: 1
	},
	branding: {
		bgColor: '#333',
		primaryColor: '#000',
		hoverColor: '#EFEFEF',
		activeColor: '#AAA',
		openIcon: 'custom-open.svg',
		closeIcon: 'custom-close.svg',
		sizeMultiplier: 1.6
	},
	offsetX: 50,
	offsetY: 50,
	position: 'left',
	translations: {
		'Open dialog': 'Open chat',
		'Open Chat. {0} unread message(s)': 'Click to open',
		'Close chat.': 'Click to close',
	},
});
Final note: unless the user is logged in to ServiceNow, they can only use the embedded Virtual Agent as 'guest'. For authentication, view the documentation on how to trigger SSO.
(Legacy) Process
For the steps, we will use http://example.com as the example host domain. In the screenshots, I use my live personal domain, http://vwchen.com.
Note: This does not include steps for SSO authentication to use Virtual Agent as a logged in user. Users will only see topics with Role set to ‘Public’. Article on SSO authentication on external site: Link.
In your instance:
1. Install the “Custom URL” plugin.
2. Set the following system properties:
Set ‘com.glide.cs.embed.csp_frame_ancestors’ to: 'self' http://*.example.com

Set ‘com.glide.cs.embed.xframe_options’ to: sameorigin

In your hosting service:
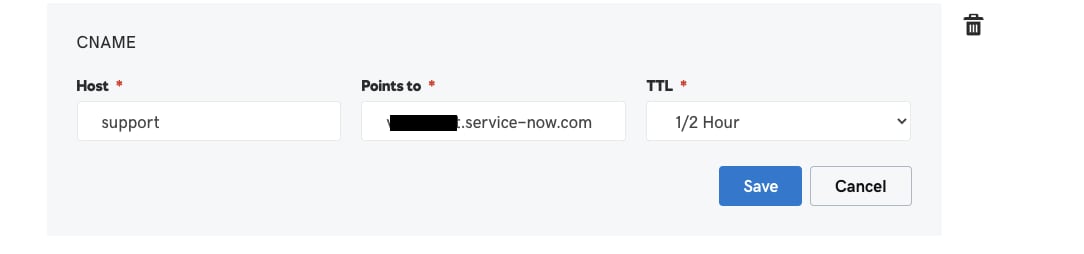
3. Navigate to your hosting control panel (e.g. cPanel) and create a subdomain to eventually link to your ServiceNow instance. E.g. http://support.example.com. This subdomain does not have to be made public, it will redirect to Service Portal. Note: After creating, it may take several minutes for it to become active.


Important: Within the code it will reference an instance URL “YOUR-INSTANCE-NAME-HERE". Update the instance link with your instance name.
Return to your instance.
6. With the “custom URL” plugin installed earlier, navigate in your instance to ‘Custom URL > Custom URLs’. Click “New”. In the “Domain Name” field, enter your created subdomain. In the “Service Portal” field, select Service Portal. Note: This will not work until after the CNAME is propagated.

7. When you visit http://support.example.com, you should now be taken to the Service Portal. Again, this may not be necessary for you, so you can hide this if your only concern is embedding the Virtual Agent.
Embed Virtual Agent FAQs
- Do I have to use a custom domain?
Yes, you must use a custom domain due to the increased scrutiny on 3rd party cookies and cross origin requests (CORS) from the major web browsers. This is a good thing as it increases overall security. For this to work you must put your ServiceNow site on a subdomain off the parent domain you want to embed the chat client on. For example, if you have the chat client embedded on https://mychatclientpage.example.com you must put your ServiceNow instance on a domain off example.com something like https://support.example.com. The page the client is served from should also be served over https.