Use a text decorator icon to selectively highlight list elements that need your users
attention.
Before you begin
Role required: admin
Procedure
-
On your instance, navigate to .
-
In the UI Styles list, click the
New button.
-
In the UI Style form, fill in the fields as
needed.
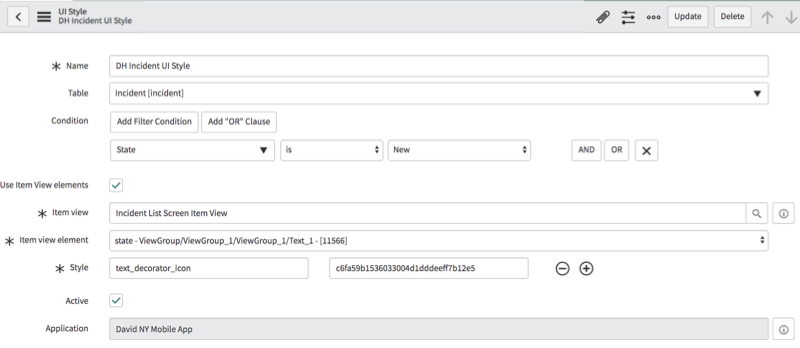
Table 1. UI Style form
| Field |
Value |
| Name |
Name of your UI style |
| Table |
Table to which the UI style applies. Use the same table as the
screen where you apply your style. |
| Condition |
Condition under which the icon is visible. Leave the
condition field blank to apply the icon to all
records. |
| Use Item View elements |
Whether the item view elements are used. Enable this
checkbox to create a text decorator icon. |
| Item view |
The item view where the icon appears. Use the same item view as
the screen where you want to see your icon. |
| Item view element |
The element of the item view where you want to see your
icon. |
| Style |
The style where you define your icon. For a text
decorator icon, use
text_decorator_icon in the first
box, and the Sys_id of the icon in the
second box.Note: You can find your available icons on the
Icon [sys_sg_icon] table. You
can right-click any icon on this list and select
Copy sys_id from the context
menu to copy the sys_id. |
-
Click Submit.
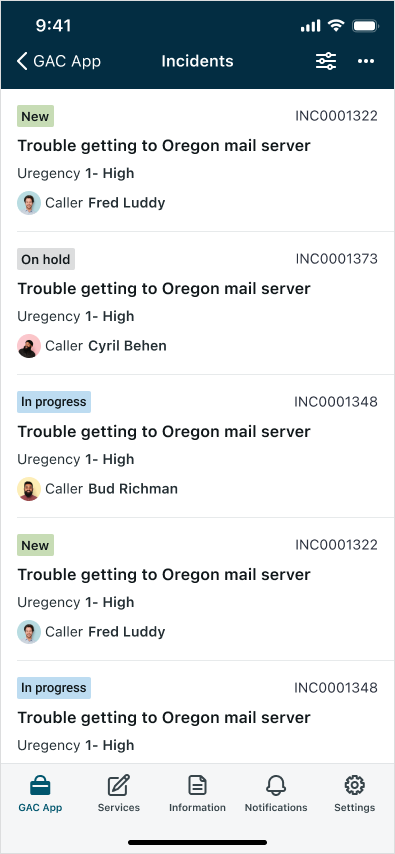
Example
This example demonstrates how to apply a text decorator icon to all records on an
incident list in the New state.
This example applies to the State element of the
Incident List Screen Item View UI style. The condition
field has been set, so the icon only appears for records in the
New state. The icon is located on the
Icon [sys_sg_icon] table.